Adding User-generated Content to Adobe Business Catalyst: The Dress Marketplace
In earlier articles in this series, we used Adobe Business Catalyst to create an ecommerce website with content management capabilities, integrated online store, and dynamic capabilities without having to write any custom code. In this installment, we’re going to extend the site further building a custom web app to power an online marketplace. Test yourself with our short quiz at the end.
In this case, our client, the dance school, wants to create an online marketplace where people can list and sell their dresses. I’ll use this project as an example of user-generated content capabilities, which you can add to your client’s site with a bit of planning, but without back-end database development.
Additional reading includes;
- Introduction to Adobe Business Catalyst – Part 1
- Introduction to Adobe Business Catalyst – Part 2
- Introduction to Adobe Business Catalyst – Part 3
- How to Set Up an Online Store with Adobe Business Catalyst
Planning for Your Web App
Executing the application is going to be easy, but I want to reinforce another topic I’ve touched on in my articles: planning. Taking some time to think about what you and your client want to achieve, as well as how you think it should fit into the existing site, will mean the difference between a fulfilling and a frustrating project.
First of all, let’s clarify what we want to do in simple terms: we want to allow people to upload information about dresses they wish to sell. Such information will be searched or browsed by other people using the dance school website. In essence, we’re talking about some user stories. A user story is a small narrative that describes a discrete piece of functionality you want to add to your application. Remember, even though you won’t need to write any back-end code, you’re still designing an app. For our site, we can discuss a couple of scenarios with our client that will add functionality to their website:
- Create a dress listing
- Browse dress listings
- Search dress listings
The idea is to get a little more detail about how we want this to work on the website. While we won’t write a user story for every scenario in this article, we’ll write one for the first: Create a dress listing.
Jane’s daughter Molly has outgrown her competition dress and will need a new one. The current dress is in excellent condition and Jane would like to sell it to cover part of the price of the new dress. Jane knows that many families from her dance school use the school’s website to keep up with information about classes and to buy shoes, music, and other items they need. Jane would like to list information about Molly’s dress for sale. The information should include the size, condition, price, how to contact Jane, and an image of the dress.
In practice, you could write up a few different user stories to capture slight variations, but this write-up gives us some good detail to get started. Plus, it’s very easy to send to your client so that they can review it and provide feedback, and you can both start thinking about the new functionality in the same way.
A web app in Business Catalyst is a collection of information pieces organized around a common theme. In this example, the theme is a dress, and the information is the set of details that describe the dress.
Those details are data elements that we’ll set up as fields in our web app. Every web app automatically has a name and description, but you should make a list of the other fields you’ll need to create, such as:
- price
- age of the dancer
- age of the dress
- measurements
- seller’s name, phone, email address
Now we have a list of fields to collect and show for each dress, so we’re almost there. We also want to let customers upload an image of their dress, too. In a traditional app, managing file upload capabilities can be tricky, but in Adobe Business Catalyst, it’s a snap.
Before we get started, let’s go to the File Manager and create what we’re going to want to use for the pages related to the app.
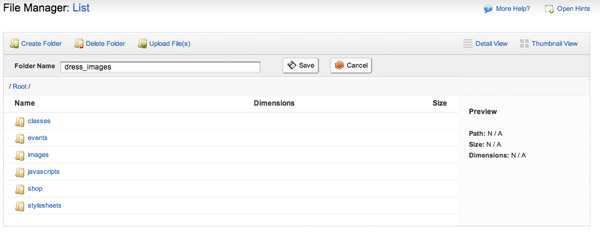
We’ll make a directory for the images that will be uploaded, and we’ll make a directory for the files related to the app itself.
Creating the Web App
A web app is a Module, so go to Modules > Web Apps and click on Build a New Web App. There are three sections of information that you need to provide: Web App Details, Customer Options, and Can Customers Create Web Apps?, and Customer Options. Adobe Business Catalyst provides a lot of features at your disposal to make creating an app easy.
The process is broken up into four steps in the Wizard: Web App Details (the page you are on), Add Custom Fields, Customize Web App Layout, and Set Up Auto Responder.
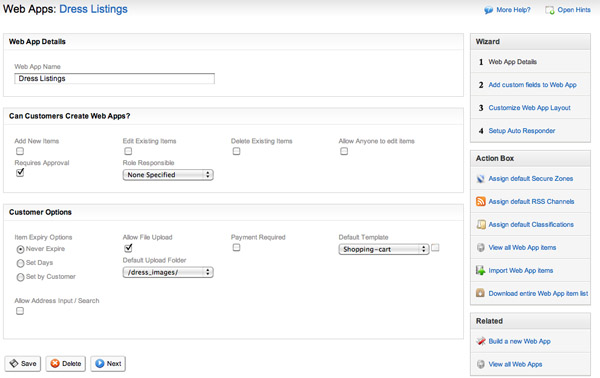
In Web App Details, you’ll name the app. In my case I’m making dress listings, so I name it Dress Listings. Always try to use meaningful names, and avoid being too technical; this is a business application and we want to use names that are relevant to the business.
To fill out the next two sections, let’s think back to our user story. Jane wants to create a listing herself, so the answer to Can Customers Create Web Apps? is Yes. Check the box for Add new items.
We want listings to show up right away, so we’re unchecking Requires Approval — that’s going to get us a simple app that lets customers create a listing that will show up automatically on submission. While we’re going to add authentication for this app later on in the article, we’re not going to use system administration roles, so leave Role Responsible as None Specified.
In the Customer Options section, you manage the expiration of the content, file upload, and ecommerce options. Ask your client if this is a service they want to charge for. In our case, it’s free to list a dress, but think of this data like a classifieds section, and consider the revenue opportunities a web app might present for your client.
Next, click on the Allow File Upload checkbox and then select the directory you made earlier to contain uploaded images. Finally, I’m going to use the existing Shopping Cart template we made back in this first article in the series. After that is set up, let’s move on to adding fields by clicking Next.
Custom Fields
This is the screen where you build the heart of your web app. Add a field for each data element in your list. After you type in the name of the field, select the type of field and determine if it is optional or mandatory. To add the field to your app, click Save Field. Fields in the app can be added or removed over time, but you’ll have to update pages based on the web app after you make a modification.
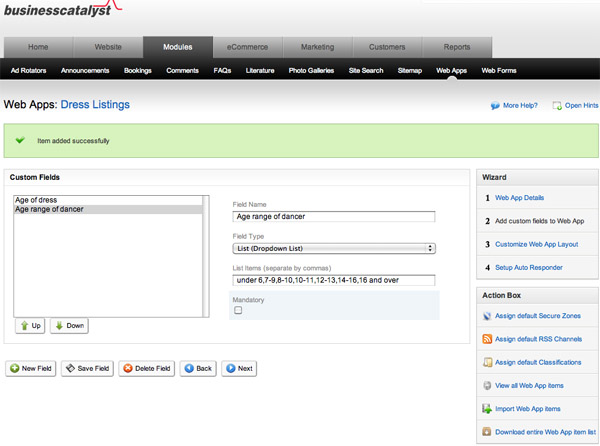
Field types are very versatile for creating your app; you can have text inputs for strings like names, text boxes for longer chunks of text, lists with options to select from, date/time data types, and image data types. You can even have a data source you already created as a data type — that can be very powerful.
After you create your set of fields, click Next, and you can customize the look and feel of the templates generated for the web app. Each web app comes with three templates for each interaction: list, details, and edit. List is the data that will be returned for each item from browsing or searching against the data in your app. Details is the look of an individual item’s page. Edit is the data entry form to edit the data in an item’s listing. For most apps, List and Details are the first templates you’ll want to work with.
Before we start to customize, let’s make some test data so that we can see what we’re working with. Click on View Web App Items on the right-hand navigation column. You’ll see you have no items yet. Click on Create a New Web App Item.
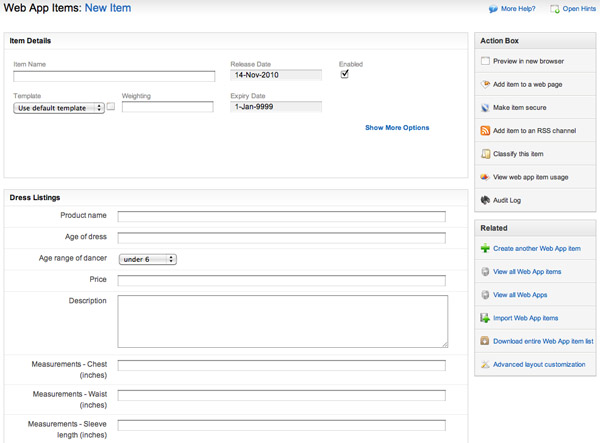
Enter some data into the form and submit it. If you want, add a few items for some test data – you can always delete them before going live.
Customizing Your Template
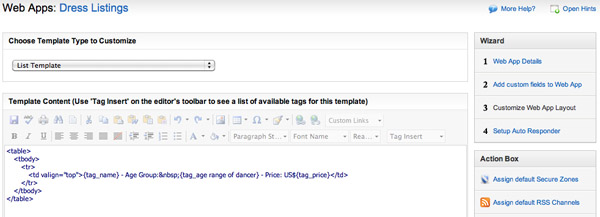
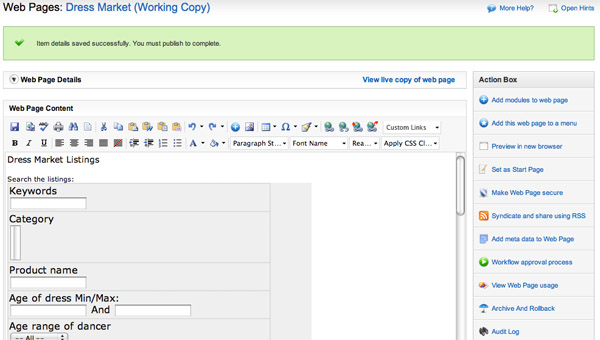
Let’s go back to customize the look and feel of the web app we’ve created. Hover over the web apps link in the menu above and click on Manage Web Apps. Click on the web app name to get back into your app, and click on Customize Web App Layout to return to the List template. Your list will show two data elements from your item by default: the {tag_counter}, which counts the number of items listed, and the {tag_name}, which will generate a link to the detail page using the text in the Name field.
Note: Go back to Part 1 in the series to learn more about Adobe Business Catalyst custom tags.
I want to add a few data elements to the listing to anticipate what customers want to choose from. Using the Tag Insert drop-down, I can find the tags corresponding to all the fields I added earlier. I’m going to use the name of the item, the age of the dancer, and the price, since those are the most basic fields used to filter the items. I’ll add a little text to label the data that’s going to show up in place of the tags.
In addition, you can toggle to the HTML view to get much more fine-grained control over the look and feel of the listing.
Adding a Module to a Page
If you recall our last article, Adobe Business Catalyst makes it very easy to add dynamic functionality to the pages and templates that you create. Let’s create a listings page for the web app and start our Dress Market.
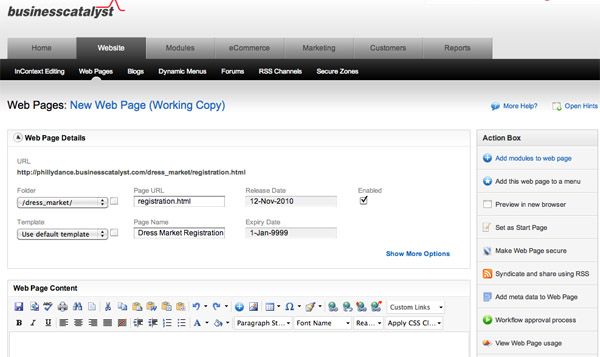
Go to Website > Web Pages and click on Create a new Web Page. Write down the file name and page name, and determine which template to use, and what directory the file should reside in.
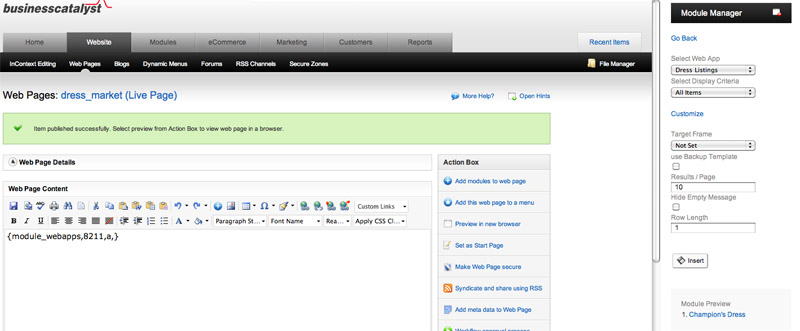
Now go to the Action Box and click on the Add modules to web page button. The Modules pane will load and you can scroll down to web apps. Scroll down to Display List of Web App Items. Click on the link and then select the web app list you want to add.
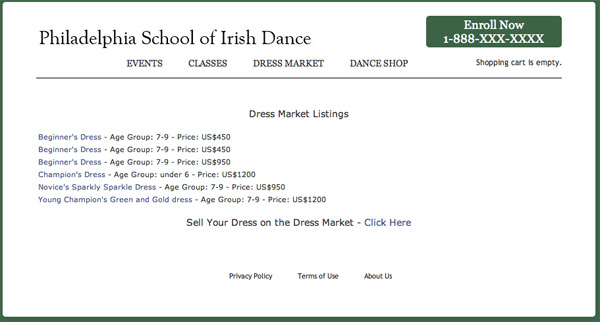
From there, you could select an additional filter or just list all items. We’ll list all items on this page. Preview the page to see the list of items you’ve created so far. Now click on one of the links and you’ll go to the item details page.
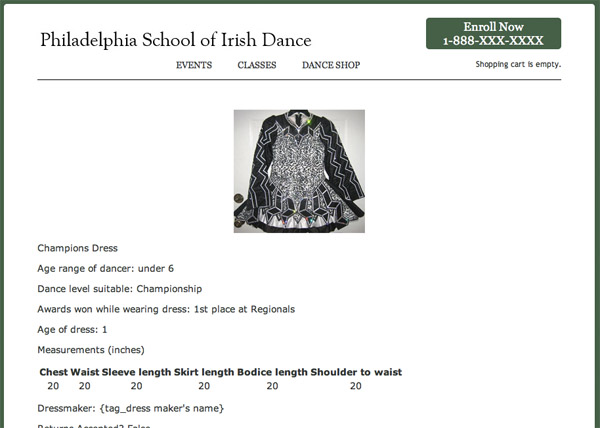
This is the page “out of the box” — before I add some of my own HTML and CSS to clean up the layout.
Let’s take stock of what we’ve done so far:
- Web app is created and has test data
- Listing page has been created and the Web App module was added to the page
- Detail page is working
As you know, there’s a lot of tuning to do now — you’ll have to design how you want each of these pages to look, and then you’ll need to write the CSS to execute the design (or use some of the pre-built styles already available).
In addition, you’ll want to add some links from your main nav, which will mean editing some templates in this particular design. I’m not going to spend much time on that now, since we’ve covered how to get down to the very fine-grained control over look and feel using Adobe Business Catalyst. If you need a refresher for any of the topics covered earlier in the series, follow these links for Part 1 or Part 2.
Going back to our initial user story, we’ve created the underlying ability for Jane to list her daughter’s dress. Yet, the site doesn’t have all the capabilities we’ll need to allow customers to start uploading items.
Create a Submission Page
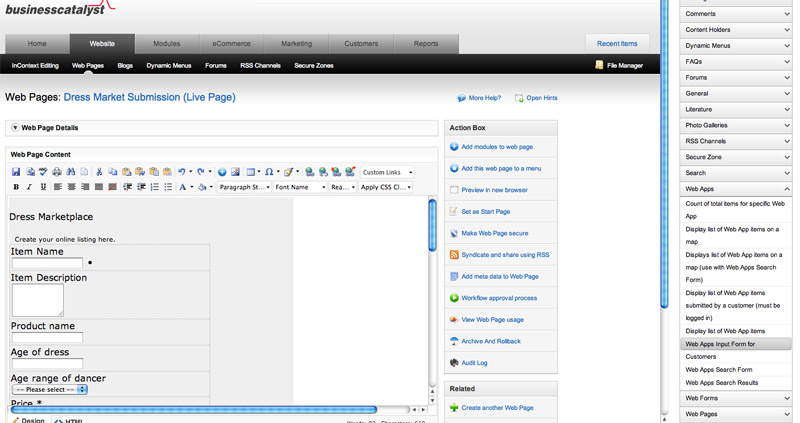
Let’s create a new page and call it Dress Market Submission. We’re also going to ensure that the Enabled button is clicked; that will ensure that the functionality we’re adding to the page works correctly. Let’s add the submission module, so that we have our customer-facing data entry page set up.
Go to the Action Box and click on the Add modules to page link; then scroll down the modules list and click on the Web App link. Click on the Web Apps Input Form for Customers. Select the web app that you want to create a submission page for, and then click insert.
You can preview the page, make some tweaks to it, and generate more test data, if you like.
Securing the Submission Form
A web app like this is a great opportunity for your clients to collect information about their customers. By making the listings open to the public, traffic increases on the site; there’s value for the people listing their dresses in the online market, as well as for the school.
But the ability for customers to generate site content should be gated in some way. Most sites enforce that people should create an account and be logged in to post material to a site — we’re going to add that capability to our site now.
Creating a Secure Zone
In Adobe Business Catalyst, there are many levels of user roles. There are system users like you and your client (we explored how to limit different user role permissions in Part 2). You both log in to the main admin section and use the Business Catalyst interface to manage, modify, enhance, and update the site.
Your customers will be given tools that reside within the look and feel of the customer’s website. From the Adobe Business Catalyst terminology, they will be treated more like “subscribers” to the site, though they’ll have permissions we grant them. In this case, it will be permission to access particular pages like the Submission page.
Requiring a person to be logged in to your site to do certain tasks — called authentication — requires us to do some more planning. We’ll need to determine which pages in the site require a customer to be logged in, and define what information is necessary to create an account. We’ll then have to create a registration page and login section, and then knit the whole user experience together. Take some time to plan out the information you’ll need to collect to create an account:
- username
- password
- first name
- last name
- title
- home phone
- email address
This will be important in a few minutes. But first let’s take stock of everything we’ll do to set up authentication:
- creating the zone
- adding the submission page to the secure zone
- creating the registration web form
- adding the registration form to a page
- adding login to the registration page
- email confirmation message
It may seem like a lot, but the tools in Adobe Business Catalyst make it easy to add security to your site in just a few minutes, with no coding required.
Create the Secure Zone
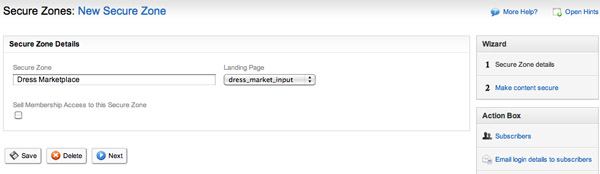
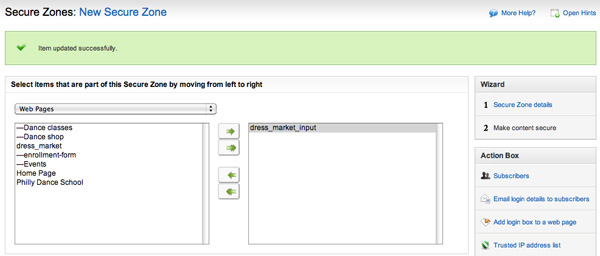
Go to Website > Secure Zones and create a new zone. In the first step, you’ll name the zone and select the page to land on after successfully logging in. I’ll create one for the Dress Marketplace, and select the Submissions page as the landing page.
Next you’ll have to add the Submissions page to the Secure Zone. Select Web Pages in the drop-down; select the Submissions page in the list of assets on the left, and click the single right arrow to move it to the right.
This is similar to the way we created permissions for users back in Part 2. You can secure more than just pages; you can secure other types of content like blogs and forums.
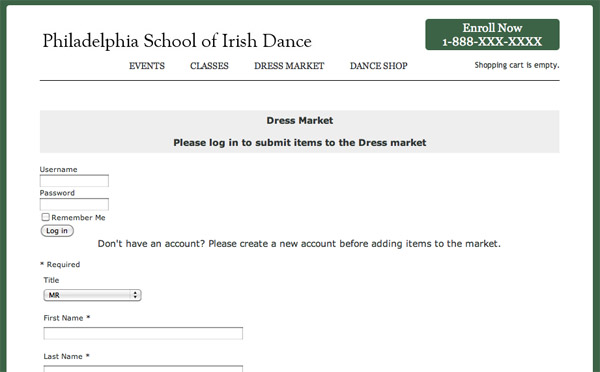
At this point, only logged in customers can get to the Submissions page. If you try to navigate there, you will be blocked and prompted to login.
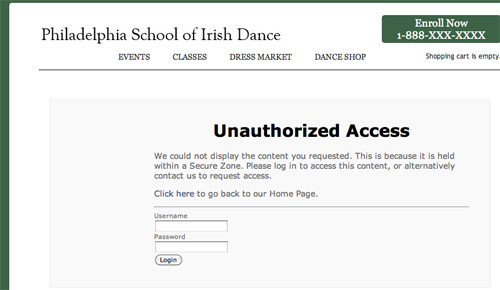
Oops, you don’t have an account for this zone! Okay, let’s make the registration and login page, so that we can get to the Submissions page.
Create the Registration and Login Page
First, let’s create the registration form in Modules > Web Forms. Let’s use the new web form builder to create the form — it has a very intuitive interface to add fields to the form. First name the form and use the Security Zone drop-down to link the form to the zone. We’re not going to add workflow in this example, so leave that set at Don’t use a workflow.
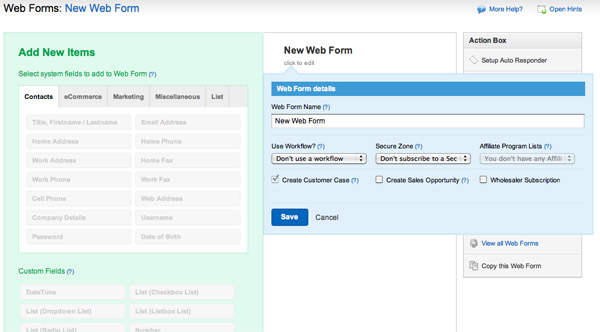
Earlier in the planning process, you determined which fields would be used in the registration form, so let’s find them on the Form Builder. Everything we need is in the Contacts tab, but we can add custom fields and even CAPTCHA image validation to the registration scheme if we wanted to.
As you add fields from the left, they show up in the right column. You can preview the form, and even add it to a web page from here.
We’re going to need to create a page for our registration form. Create the page and add the registration form from the Add Modules tool, or come back to the Web Form section and add it with a one-click insertion.
Save and Publish Your New Registration Page
To access the secure content, the first time through users will need to create a new account, but after that, they’ll just log in and be on their way.
Now we need to add a login form to the page. Open the page from the Web Pages section, click on Add a module, and select the Secure Zone section. Select the Secure Zone login form, choose your zone from the drop-down, and insert it in the page.
As before, you can style the look and feel of the form as needed to make it look clean and well-integrated to your design. Once you are ready, save and publish the page. After cleaning up the HTML and CSS a bit, you’ll have a working registration page.
In order to make it a little more polished, let’s add some more dynamic content for logged in users. Open the Submissions page, access the module manager, and click on the Secure Zone.
There are a number of pre-built tools that anticipate items you would want to add to an authenticated user experience. I’m going to add the line “[name] is logged in. Click here to log out.”
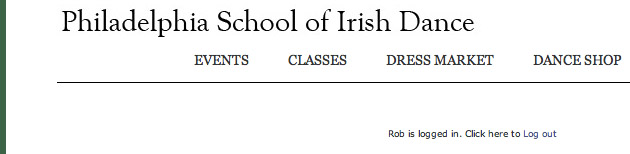
This is actually the combination of two modules: Customer First Name and Link to log out of a secure zone. Play around with these tools to create an even richer experience for your users.
Connecting the Dots
Okay, you have the registration/login page, and your Submissions page is restricted to logged in customers. How do we get there? I added a link from the List page to drive customers to create an account.
Adding Search
That covers the ability to browse the listings, but as the Marketplace fills up with content, people may want to search to filter the results they receive. Adobe Business Catalyst has pre-built modules to let you search the web app data generated on your site.
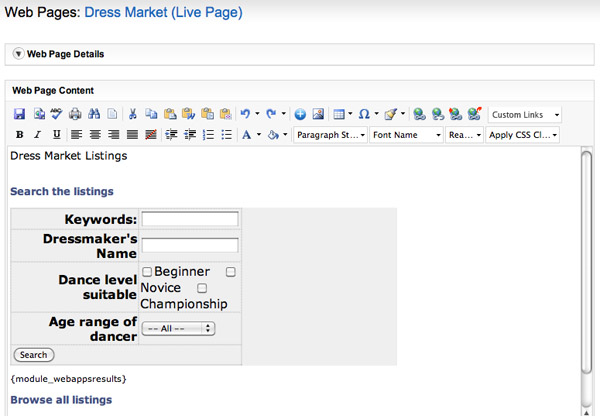
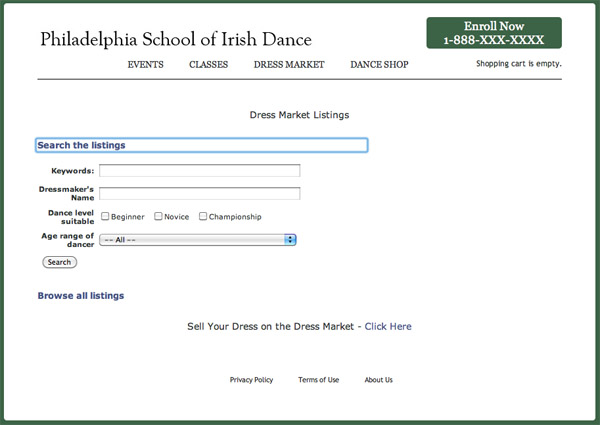
Go to Web Site > Web Pages and open your listings page. Add some HTML to separate the Search section from the Browse section using a <div>; for each one (we’ll add some jQuery to this in a minute). Use the Module Manager to insert a Web App Search Form into the new div you’ve created. Select the Dress Listings from the drop-down and insert the module.
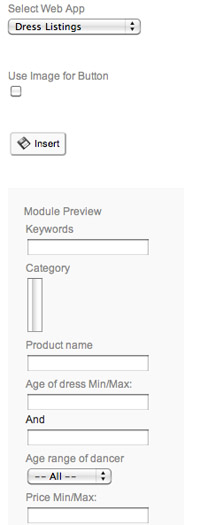
Initially, the search form will give you all the fields to filter against.
You can customize the number of fields, HTML, and CSS to meet your needs.
Now you’ve got a simple search form implemented, but the page is a little clunky, having to scroll up and down to get to browse and search. Let’s add a little jQuery to collapse the divs, and use an effect to open and close the divs that exposes or hides the search or browse capabilities.
Add Some jQuery
Creating a fulfilling and intuitive user experience will encourage your customers to drive through the site and use the capabilities you spend time implementing. jQuery is a strong JavaScript framework that is easy to implement, and gives you powerful tools to create an interactive experience on your site.
While we like to show how easy it is to use Adobe Business Catalyst to add functionality without coding, this takes us in the other direction: showing how a platform this powerful gives you the ability to dig in and add the libraries you want.
We’ll do a little light coding in JavaScript and HTML to implement the library and use the Accordion effect in jQuery UI; I think you’ll find this is a simple introduction to adding jQuery to your Adobe Business Catalyst site. If you are a jQuery Ninja, the platform exposes JavaScript handlers in many modules and forms. so that you can easily use Ajax and other techniques to create a rich interactive user experience.
First of all, add the jQuery libraries to your application by linking to the scripts from within your templates so the libraries are accessible all over your site. Most browsers will cache the file after it’s first requested, so you won’t be adding download time, but you will need to make the call so that the scripts are used for each page.
You can upload the scripts to your site or link to them externally. I’ll upload the latest jQuery and jQuery UI libraries:
<script src="/JavaScripts/jquery-1.4.2.min.js"></script>

<script src="/JavaScripts/jquery-ui-1.8.6.custom.min.js"></script>
I’m going to use the accordion effect to close and open the divs when a customer clicks on the heading Search or Browse. First, I need to set up my HTML to create headers and divs to contain my modules. In the sample code below, I’ve cut out the search form for space:
<div class="dress_market">

<div>

<h3><a href="#">Search the listings</a></h3>

<div id="search">

<!-- search form content removed for space -->

</div>

<a href="#">Browse all listings</a></h3>

<div id="browse">

{module_webapps,8211,a,}</div>

</div>

<!-- close accordion div -->

</div>

<!-- close dress_market div -->

</div>
I have a wrapping div with a class called “dress_market” which l use throughout the dress_market to apply common CSS styles. Within that I have a div with an id=”accordion” — that will wrap both the search and browse divs. The headers contain hrefs with an anchor tag that will give me a click event to bind the accordion action.
My script will contain the JavaScript to execute the accordion:
<script>

$(function() {

$( "#accordion" ).accordion({

autoheight: false,

collapsible: true,

alwaysOpen: false

});

});

</script>
Place this script at the bottom of the page so that the JavaScript is evaluated and executed after the page has loaded. You can also use the document).ready(function(); method to ensure jQuery is executed after the page has fully loaded.
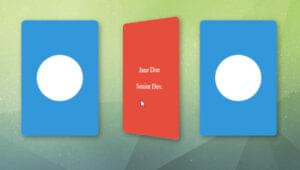
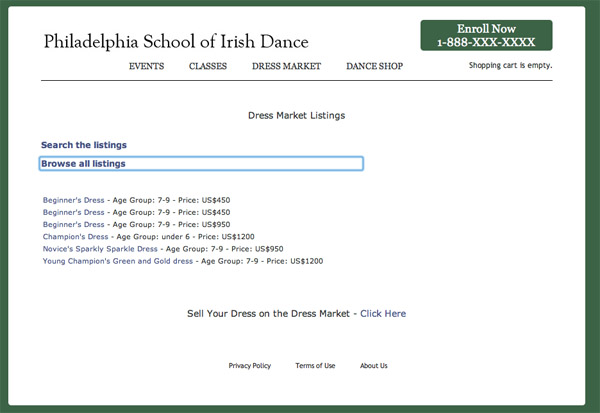
When you click on the Browse all listings link, the accordion closes the top div and opens the browse div in the same page.
There you go. If you are feeling adventurous, the search form comes preloaded with a tag loading the search results {module_webapresults}. Use jQuery to highlight the search results returned.
Full documentation on this library can be on the jQuery UI.
Email Confirmation
In addition to connecting the site pages, you’ll want to customize the email messages that new registered users receive, as well as the messages they receive after creating a new item in the marketplace. Registration email can be configured from the Admin menu by selecting Customize System email and then selecting the Secure Zone Login Details.
You can customize the email sent after submitting a new item by clicking on Manage Web App, selecting your new app, and then clicking on Set up Auto Responders. We don’t need to spend too much detail on this — you can customize the text and have access to dynamic tags to add more data to the email.
Now let’s recap: We’ve created an app, the listings page, the details page, and a submissions page. We’ve restricted access to only logged in customers, created a registration/login page, customized the email messaging, and knitted it all together with appropriate links. Not bad for one day, hmm? All without having to create custom code. Now that you’ve got a new app, how about checking out some of the activity it’s generating?
User Activity Reports
Remember that one of the main ways to build business is to increase the interactions and transactions performed by your existing customers. It’s critical to build marketing to attract new customers, but once you’ve got them, keep them interested with newsletters, special offers, and other relevant communications.
Adobe Business Catalyst provides robust and intuitive tools to mine the data that you collect from your web apps, so you and your clients can grow their online business. In addition to the activity data you’ll see in the admin section’s dashboard, you can build custom reports about the activity in the online Dress Market.
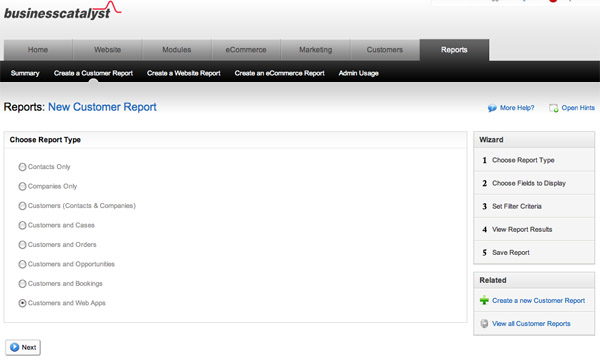
Go to the Reports section and click on Create a Customer Report. Select the bottom item to build a report for Customers and Web Apps; then click Next.
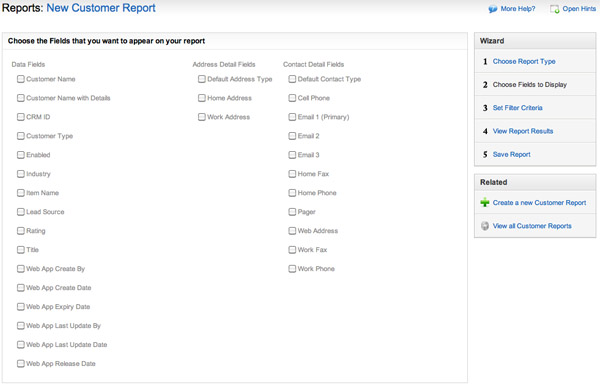
Select the fields you want in the report. I’ve selected a few based on the type of app we made.
Next, tell it what data to filter against.
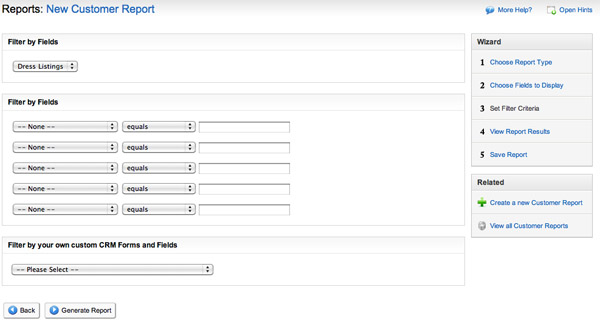
In the bottom section called Filter by your own customer CRM Forms and Fields, select your web app in the drop-down. If we leave Display all fields selected, you’ll see a report that filters all fields by the criteria in the first screen. Due to your test data, that may end up as an intersection of one row of data. Instead, leave it unchecked and then click Generate Report.
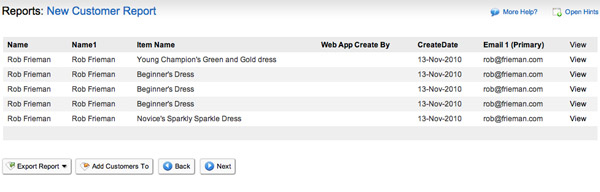
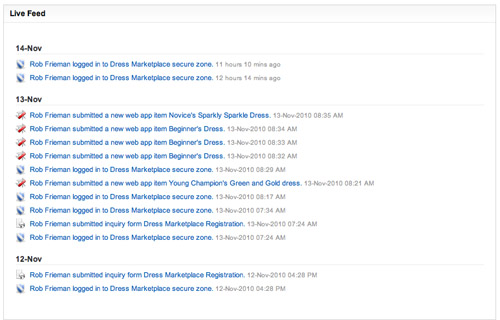
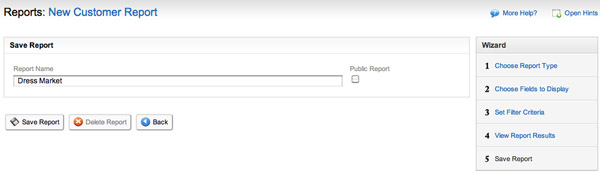
You should see a list of all the items submitted, by whom and on what date. Now click next to name and save the report.
This simple activity report is the first step to generating marketing lists. Think of the opportunities for cross selling!
Now you have a community of highly motivated users, creating accounts on your site and arriving without additional marketing. You could add dress-making and related products to your online store, segment the reporting, and send targeted ads to these customers.
You could create newsletters especially for this segment of your customer base and increase traffic to other sections of your site to grow your business.
Limitations of What We’ve Achieved
It’s important to note that there are some limitations to what we’ve just built and what you can build with Business Catalyst web apps. For example, we won’t be able to enable the purchasing of web app items. While Business Catalyst web apps are very powerful, it’s important that you do a little research to find out what’s possible and what’s not.
Summary
In this article, we’ve explored how Adobe Business Catalyst can help you to unleash the most powerful asset your client has: customers.
User-generated content can take a website from being a place where customers expect only to receive information, into a tool that they use to exchange information. Adobe Business Catalyst’s finely controlled web app management capabilities make this potential transformation a reality.
The best part about this kind of tool is that as more customers use it and find out about it, the more it grows. User-generated content is a powerful way to extend the reach of your online business, and Adobe Business Catalyst is a great way to harness that power.
Now you can tackle the short quiz we’ve compiled to see how much you’ve absorbed from this article.
This tutorial has been made possible by the support of Adobe. In cooperation with Adobe and independently written by SitePoint, we strive to work together to develop the content that’s most useful and relevant to you—the readers.
 Rob Frieman
Rob Frieman has been building web sites and applications for over 15 years. He currently leads web application development for a large financial services company.