Advertisements come in various shapes and sizes, but one thing is for certain—they are made to grab your attention and hold it. Just like poster designing, learning how to create a clean and captivating ad is not only fun, but it can also be very beneficial if you’re launching a business and want to control your advertising expenses. When it comes to getting your business noticed, few things can provide a better start than a stunning visual advertisement.
In today’s tutorial, I’m going to show you how to design a fun and colorful advertisement for the LG Shine cellphone. You will learn how to combine stock images to create a seamless background, and you’ll learn how to use Photoshop’s blending options to add glowing features to the elements. By the end of the tutorial, not only will you be able to create a similar design, but you will be able to use the same techniques to create advertisements for other products such as watches, jewelry, and similar products. Let’s fire up Photoshop and get started on our illuminating cellphone advertisement!
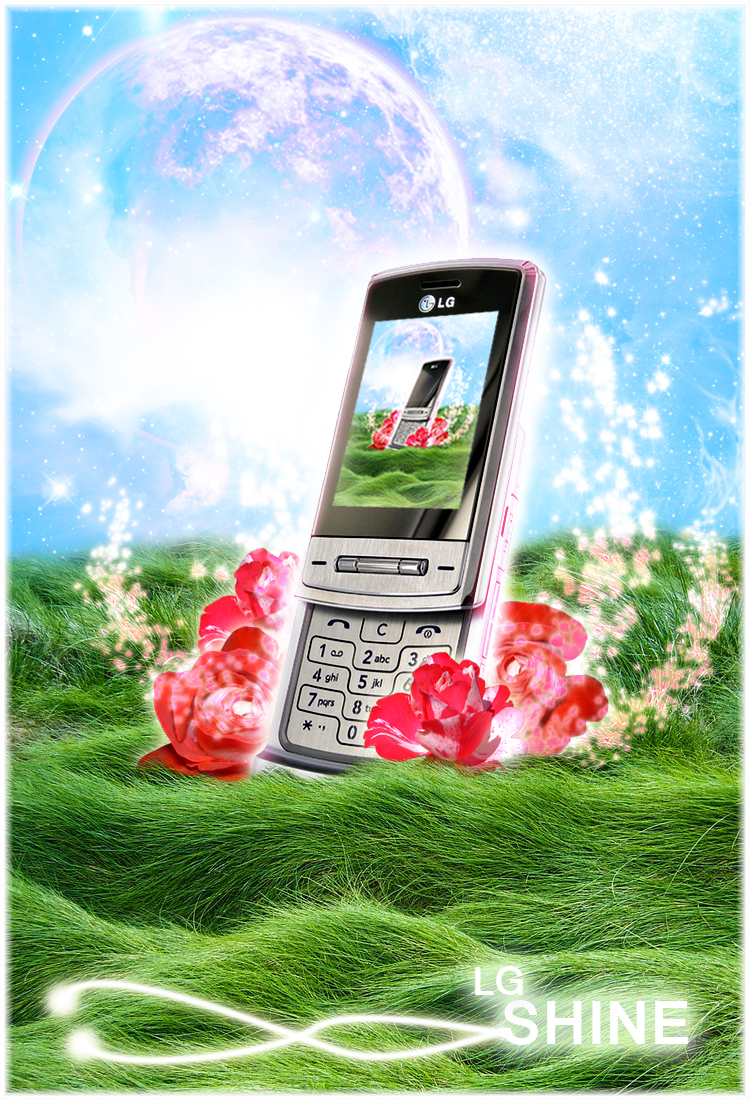
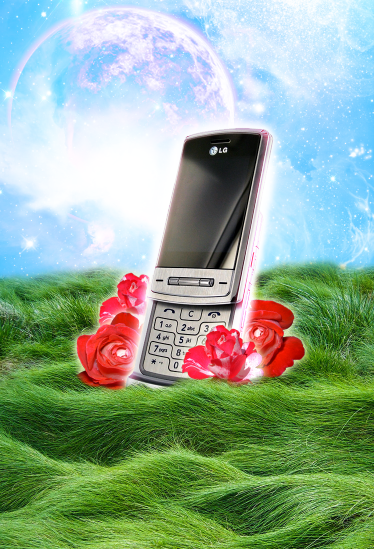
What You’ll Be Making
Resources Needed
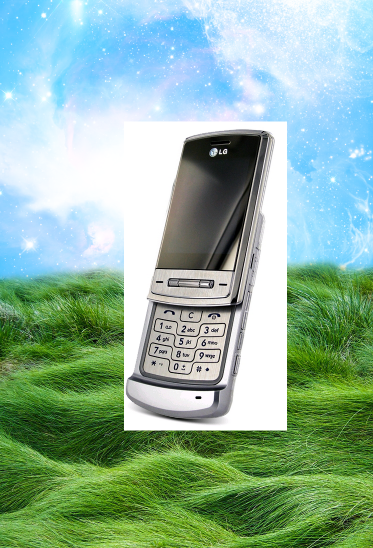
Phone
Galaxy
Galaxy Background
Grass
Moon
Flowers
Star Brush
Step 1: Create a New Document
Start by opening Photoshop and going to “File” > “New” to create a new document. When the dialogue box appears, change the increments so that your canvas will be 750 pixels wide and 1100 pixels tall. Make sure that the resolution is 300, and press “OK.”

Step 2: Define a Background
To aid in the blending of stock images that we’ll layer on our background, select #8ed9ff as the foreground color and fill in a new layer.

Step 3: Grow Some Grass
Open up the stock image of the grass and paste it on the bottom half of the canvas.

Once you have your grass in place, take a medium-sized soft round brush and begin erasing the top edge so that your final result is similar to the image shown below.

Step 4: Add Galaxy Background #1
Copy and paste the “galaxy background” stock image underneath the grass layer. You may need to resize to get the image to fit on the canvas. When you have gotten your image in place, change the layer mode to “Overlay.”

Step 5: Add Galaxy Background #2
Open the “galaxy” stock image and, just like the first galaxy background, you will want to makes sure that this layer is under the grass layer but above the first galaxy layer. Resizing may be necessary. Change the layer mode to “Screen.”

Step 6: Position the Phone
Place the image of the LG Shine in the middle of the canvas so that the bottom half overlaps the grass and the top half overlaps the sky.
Step 7: Polish Your Phone
To give our LG Shine a boost of color, we need to go to the Levels panel (Ctrl + “L”) and input the following level settings:

Remove the rest of the white that surrounds the phone until it is a standalone image.

Step 8: Grass Duplication
Because the phone looks like it is floating over the grass, we need to make some adjustments so that it looks more realistic. To do this, simply duplicate your grass layer and place it above the phone. Erase the sections that cover the phone until only the bottom edge of the phone is covered with grass.

Step 9: Add the Moon
Copy and paste the “moon” stock image into a layer beneath the grass layer and above the galaxy layers. Extract the moon from the black background and resize it, making sure to place the moon somewhere in the top-left corner. Change the layer mode to “Lighten.”

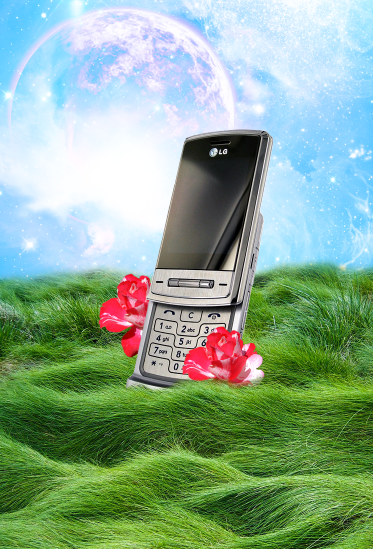
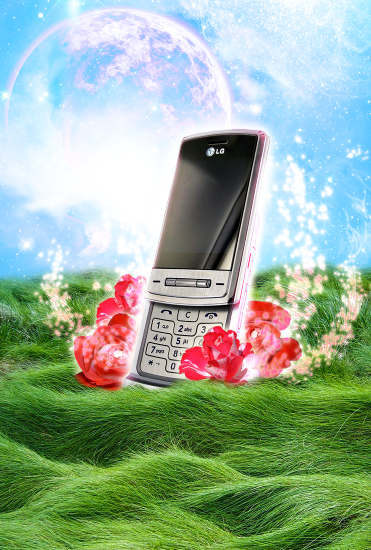
Step 10: Add Some Flowers
If you haven’t unzipped the flower folder, go ahead and do that now. Grab the “flower4” file and paste it onto your canvas; you will need to scale it down. When you have scaled the image down to your desired size, place the flower at the bottom-right corner of your phone, make sure this new flower layer is just above the phone layer. Copy the flower image, rotate it and then drag the layer underneath the phone image before placing it on the left side of the phone so you have something like this.
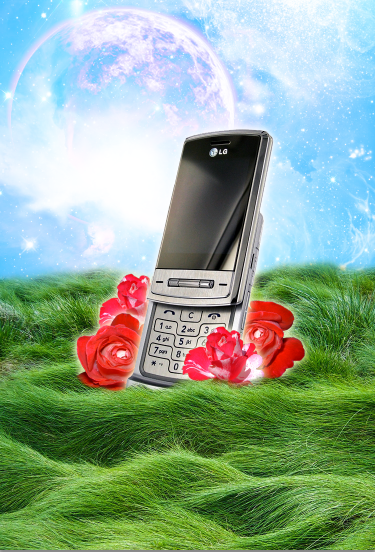
Step 11: More Flowers
Following the same steps that you did for the first flower, copy and paste “flower6” on to your canvas and resize it. Place the layer underneath the phone, move the flower to the left side of your phone, and add a similar flower on the right hand side.

Step 12: Add Some Glow
To add a glow around each flower, access the blending options panel by double-clicking on the specific layer and check the “Outer Glow” box. Change the settings to the following:

Apply these same glow effects for each flower as well as the phone.
Step 13: Highlight the Phone
Create a new layer and place it just above the phone layer. With a soft round brush, paint around the perimeter of the cell phone with #ef5190, and then change the layer mode to “Linear Dodge” (Add).
Step 14: Add Sparkles
With the same color that you used to create the glow around the cell phone, add a couple of sparkly swirls with the star brush (brush sizes 90 and 40). Make sure that this is done in a layer underneath the cellphone. When you are happy with your swirls and sparkles, check the “Outer Glow” box in the blending options menu and press “OK.” Change the layer mode to “Linear Dodge” (Add).
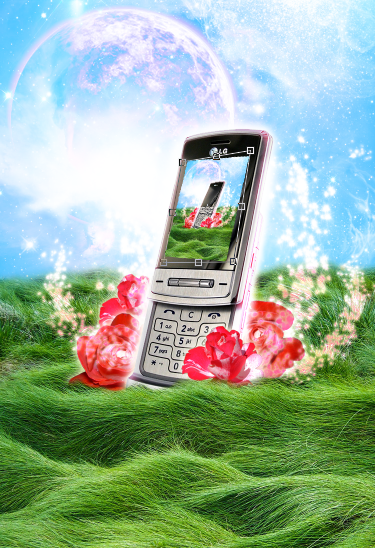
Step 15: Build the Phone Screen
Select your canvas (Ctrl + “A”) and go to “Edit” > “Copy Merged.” Paste the copied image (this should be your entire image) and scale it down until it is the size of the cellphone screen. Use the Distort tool (found under the “Transform” menu) to resize and change the perspective of the pasted image until it looks like it is the phone screen’s image.
Step 16: Add Screen Glow
To make our phone screen look like less of an image and more like a backlit LED screen, double-click the layer to access the blending options and check the “Inner Glow” box. Use the following settings:

Step 17: Finish
Finish the image by adding a 10 pixel white border around the entire image. Also, add in any text that you want—in this case the phone name and a pair of glowing headphones created with the pen tool.

Conclusion
As you can see, designing an advertisement is fairly simple. You can add and remove elements with a simple click of your mouse or graphic pen. Be wary when adding too many objects onto your canvas; you do not want the image to appear too crowded and the viewer of the advertisement to be distracted or confused. Try out different stock images and brushes when you design your ads, and of course, have fun!
 Gabrielle Gosha
Gabrielle is a creative type who specializes in graphic design, animation and photography.


