Create a Photorealistic Letter Envelope in Photoshop

Photoshop is program of choice for web designers around the globe. Its popularity is well-deserved; it has amazing potential for creating lifelike imagery in minutes. Nowadays, designers are focusing on creating highly-detailed realistic items. Photoshop has a lot to offer in this realm — all you need to do is keep practicing and exploring it to attain outstanding results.
In this tutorial, I’ll show you how to create a photorealistic letter envelope in Photoshop from scratch. You’ll learn to create both the front and backsides of the envelope. We are going to use different shape tools, filters, and various blending options to achieve the final result. So, let’s get started!
Resources:
Postage Photoshop Brushes by Redheadstock
Stripes
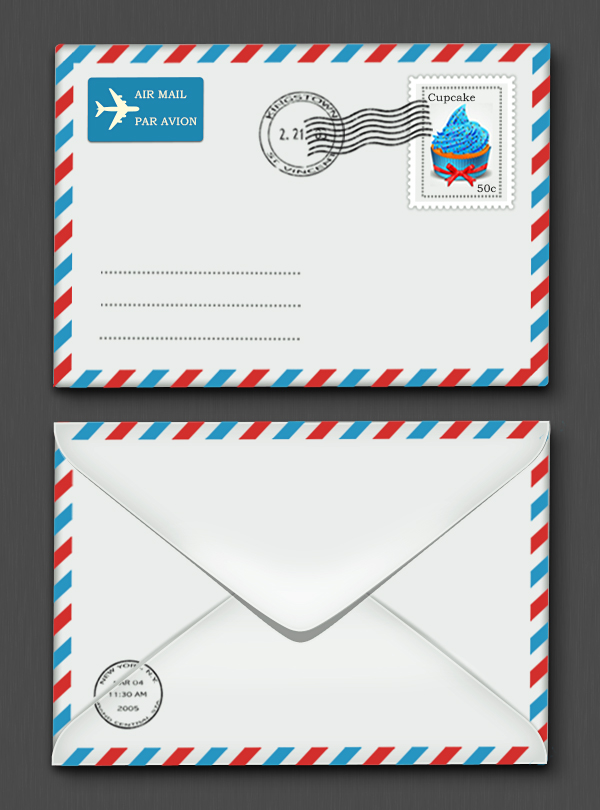
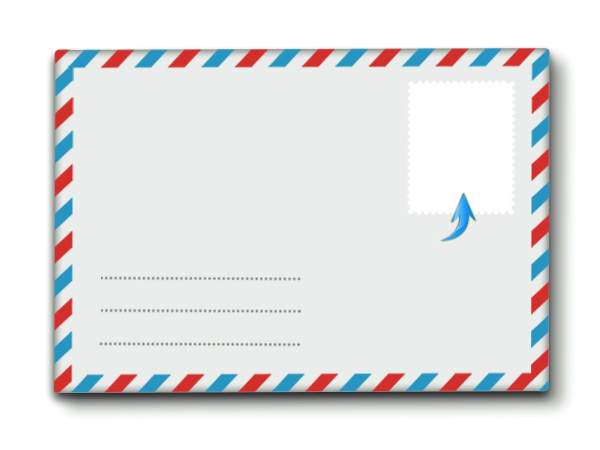
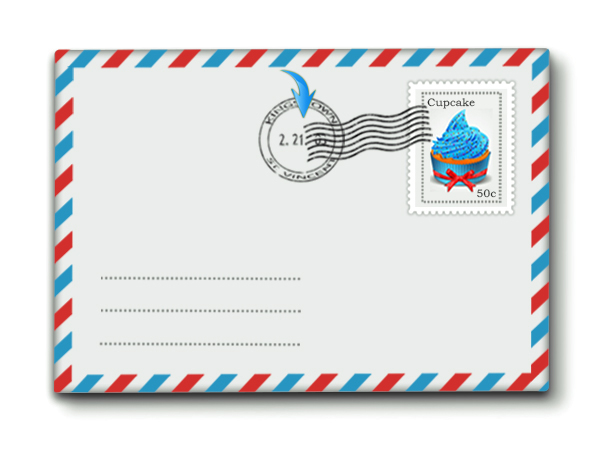
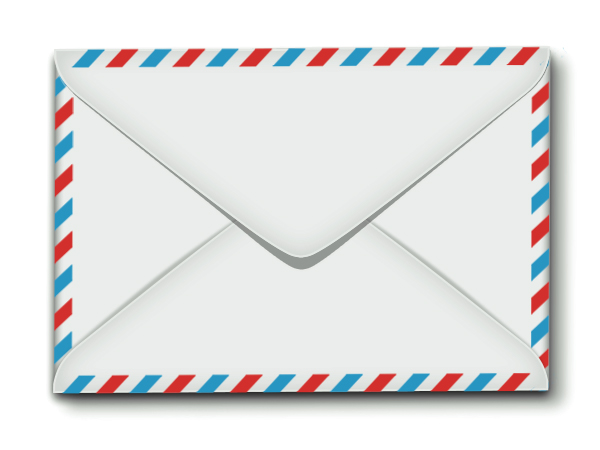
Final result:
Step 1: Build Your Canvas
Create a new document in Photoshop with an 800px width and a 1000px height.

Step 2: Design the Outline
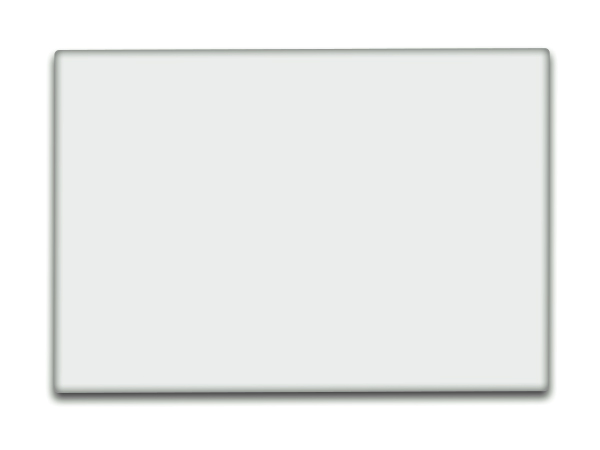
First, we’ll make the front side of the envelope. Set #eaedeb as your foreground color and select the rounded rectangle tool with a 10px radius to draw a rectangle of the size that you want your envelope to be.

Step 3: Apply Layer Styles
Double-click on this layer to open the layer style window and apply the following settings.


Step 4: Duplicate Your Layer
To enhance the shadow effect, duplicate the rectangle; remove its effects by simply dragging them to the “Delete Layer” icon present at the bottom of the layers panel. Change its color to pure black and place it below the original rectangle layer. Now, drag this rectangle to the right and downward a bit.

Go to “Filter” > “Blur” > “Gaussian Blur.” Use a value of 4px here.
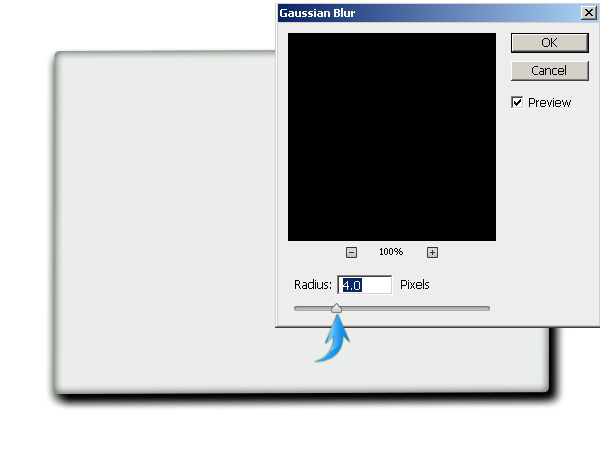
Now reduce the opacity of this layer to 40%.

Step 5: Build Envelope Borders
Next, we’ll form the envelope borders. I’ve made the desired pattern to save your time; you can download it from the resources. Open the file in Photoshop, select a thin stripe using rectangular marquee tool, and press Ctrl+ “C” to copy the selection.
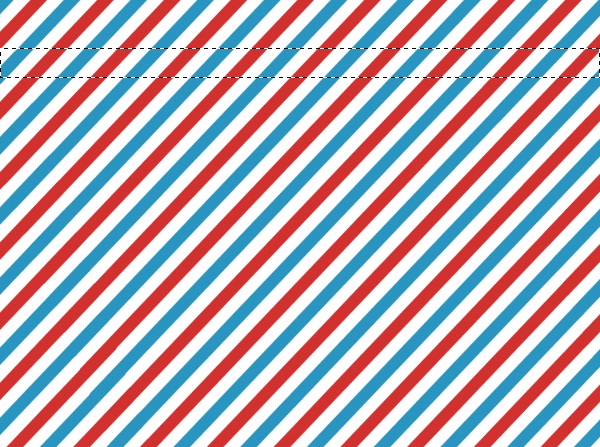
Now press Ctrl + “V” to paste it onto a new layer at the top of the rest of the layers in your document.
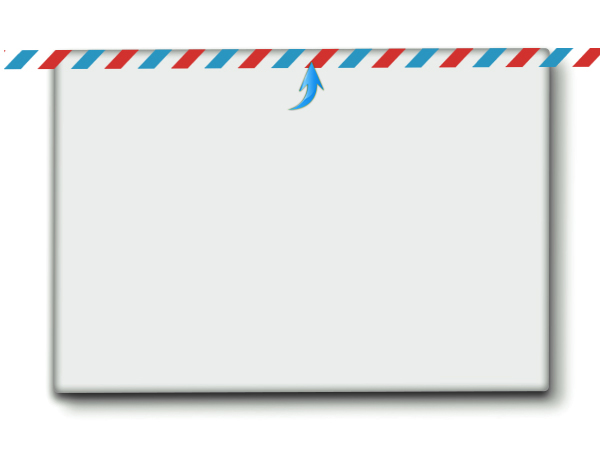
To confine this stripe to the envelope, click on the stripe layer, and then press Ctrl + <click on the thumbnail of the rectangle layer> to make a selection around it. Now press the “Add layer mask” icon, which is present at the bottom of the layers panel.
Step 6: Stripes All Around
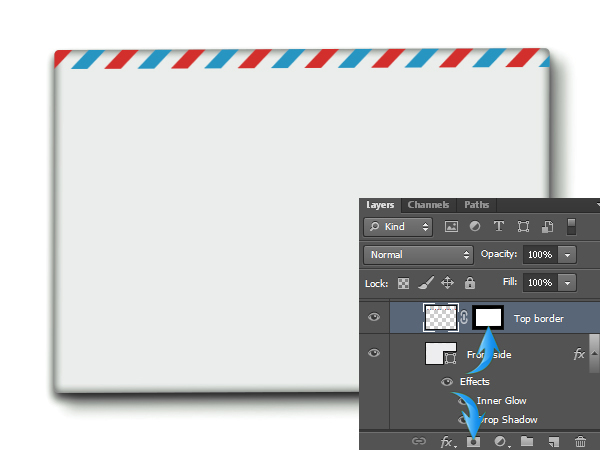
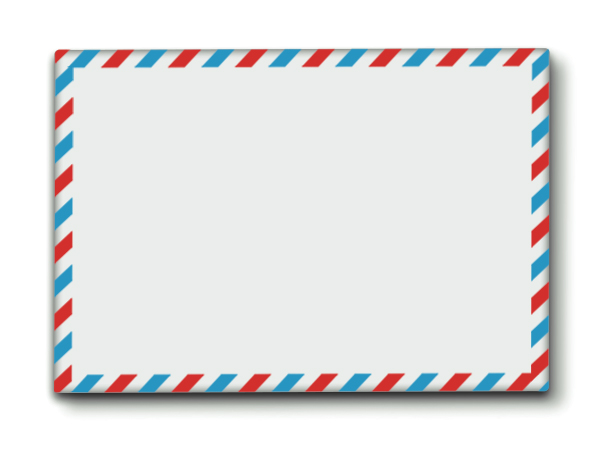
Duplicate the top border thrice, arrange it around the rest of the borders, and add layer masks to them. Use the free transform tool (Ctrl + “T”) to rotate the border 90 degrees.
Step 7: Make Address Lines
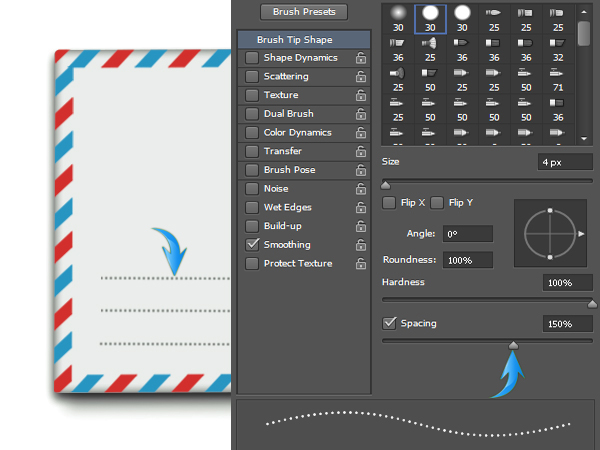
Next, we’ll make dotted lines at the bottom-left corner of the envelope. Set #a0a4a1 as your foreground color and select the hard round brush. Use the following settings in the brush panel and simply draw a line using the brush tool while holding the “Shift” key. Draw this line on a new layer and duplicate it twice to get three lines in total. Arrange them as shown below.
Step 8: The Stamp
To form a stamp base, draw a rectangle in pure white color and select the hard round brush with the same settings used in step 7. Apply this brush on a new layer around the borders in a way that inner halves of the circles are inside the rectangle. Once you are satisfied with the shape, merge these layers.
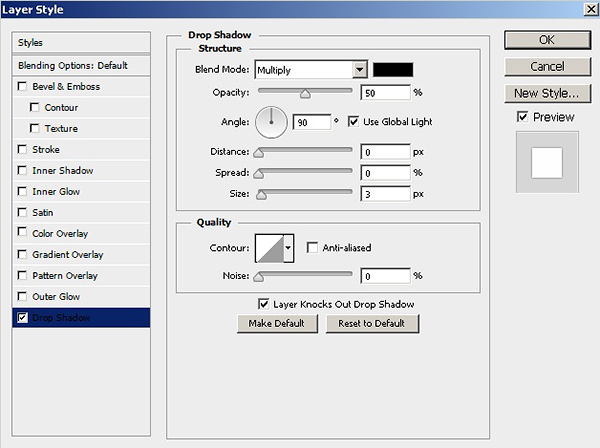
Use the following settings to add shadow to the stamp.
Step 9: Stamp Details
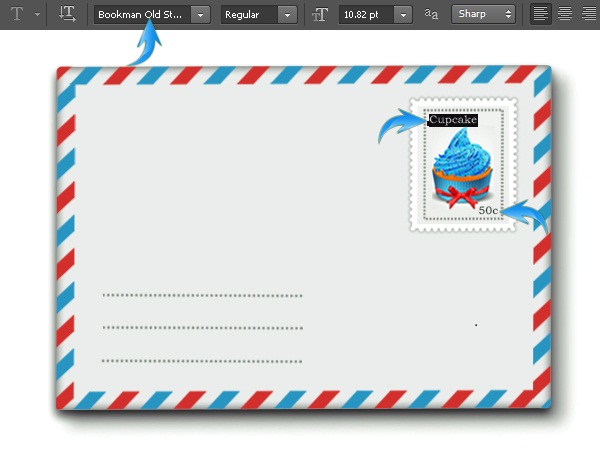
I’ve used the image from my cupcake tutorial. You can make a dotted frame using the same technique if you want. Add some text to finish the stamp. I’ve used “Bookman Old Style” as the font here.
Step 10: Add Ink Stamps
Load the stamp brushes in Photoshop and apply few of them on separate new layers in pure black. Arrange them as you like.
Step 11: Air Mail Stamp
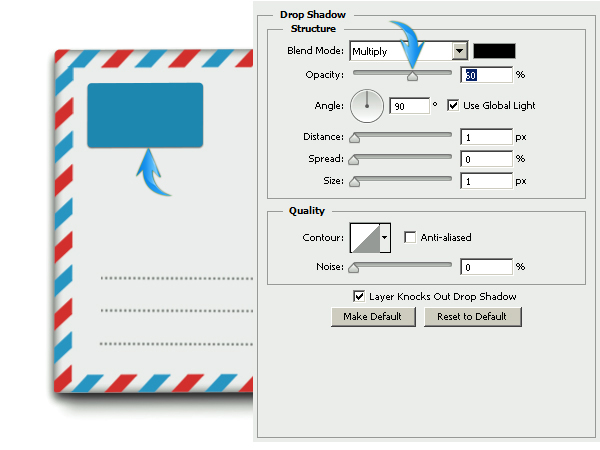
Draw a small rectangle using the rounded rectangle tool with a 10px radius. Use color #2087b0 here.

Use the following values to add a slight shadow.
Step 12
Add some text inside the rectangle. I used the same font in white shade. You can add a simple plane vector to enhance the overall look. I’ve made the plane using the pen tool (Tool mode: Shape).
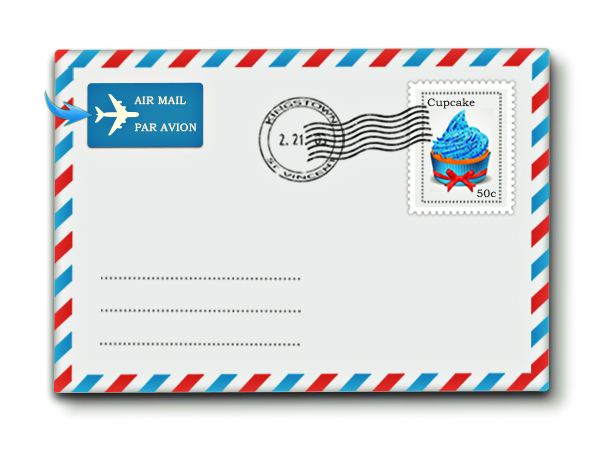
The front of the envelop is done, all with simple, easy techniques used to achieve a great result. Now, we’ll move ahead to create the backside.
Step 13: Start the Back
Collect all the layers forming the envelope’s front in a group. Duplicate this group, and delete all the layers in this group except the main rectangle, its shadow, and the striped borders.

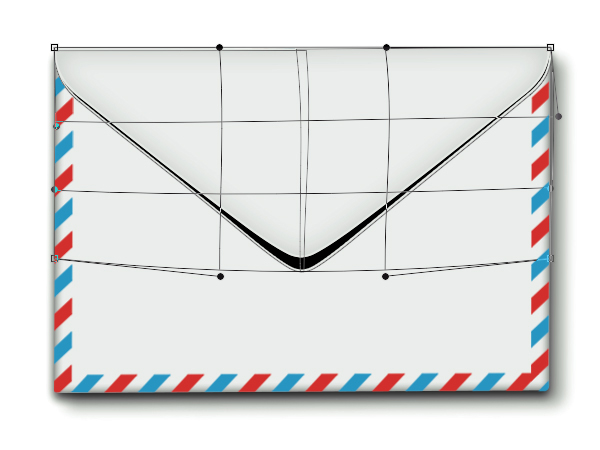
Now, draw the shape as below using the pen tool (Tool mode: Shape) in color #eaedeb. I’ve drawn half of it, duplicated it, and flipped it horizontally to get the identical sides. To flip horizontally, go to “Edit” > “Transform” > “Flip Horizontal.”

Step 14: Add Layer Styles
Apply the following layer style settings on this new envelope flap.


Step 15: Form a Flap Shadow
Next, to form its shadow, duplicate this new shape layer, turn it black, and place it below the original layer. Now, go to “Edit” > “Transform” > “Warp.” Use this tool to create the shadow shape shown below.
Reduce the opacity of the shadow layer to 35%.

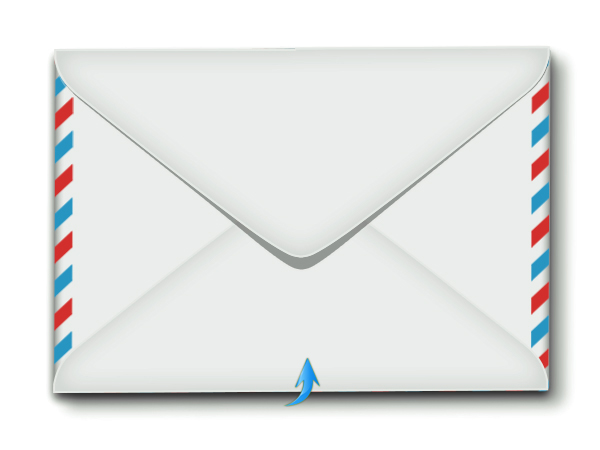
Step 16: Finish Your Envelope
Duplicate the shape layer, which we’ve created in step 13. Flip it vertically and arrange it as shown below.
Step 17: Add Shadow
Make its shadow in the same way as explained in step 15. Use the warp tool as shown below.
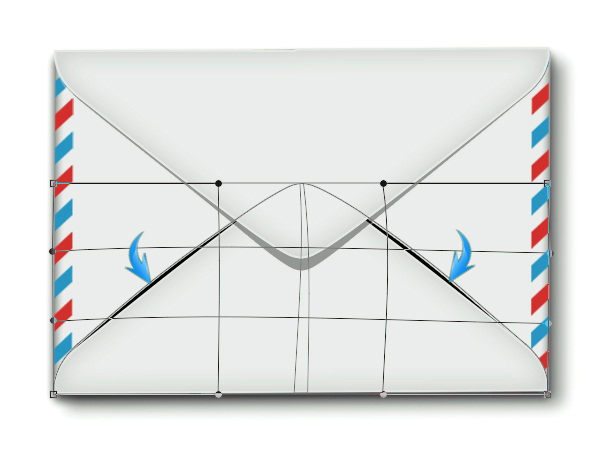
Once you are done, reduce the opacity of this layer to 20%.

Step 18: Bring Back the Stripes
Now drag the top and bottom border layers at top of rest of the layers.
Step 19: Add a Stamp
Apply an appropriate stamp brush on a new layer.

I want to break the stamp in two parts, as you can see paper is lifted a bit at that area. To achieve this, duplicate the stamp layer. Select a portion of the stamp using the lasso tool and go to “Edit” > “Clear.”

Now, click on the duplicated stamp layer and add a layer mask to confine it to the lower triangular shape.

Step 20: Remove Unwanted Shadow
Create a new layer at the top and apply a soft round brush tool with 20% opacity in pure white color as shown below.


That’s it guys. I hope you enjoyed the tutorial and learned something useful. I’ll be waiting for your feedback.
Frequently Asked Questions (FAQs) about Creating a Photorealistic Letter Envelope in Photoshop
What are the basic tools needed in Photoshop to create a photorealistic letter envelope?
To create a photorealistic letter envelope in Photoshop, you will need to familiarize yourself with several tools. These include the Rectangle Tool for creating the basic shape of the envelope, the Gradient Tool for adding depth and dimension, and the Brush Tool for adding details and textures. You will also need to use the Layer Styles function to add effects such as shadows and highlights. Lastly, the Pen Tool is essential for creating precise paths and shapes.
How can I add realistic textures to my envelope design in Photoshop?
Adding realistic textures to your envelope design can be achieved by using the Brush Tool and Layer Styles. You can use a variety of brushes to create different textures, such as a paper texture for the envelope. Layer Styles can be used to add effects such as Bevel and Emboss, which can give the envelope a more three-dimensional look. You can also use images of real textures and blend them into your design using blending modes.
Can I use custom fonts and colors for the address on the envelope?
Yes, you can use any font and color for the address on the envelope. Photoshop allows you to add text using the Text Tool, and you can choose from a wide range of fonts. You can also adjust the color of the text using the Color Picker. To make the text look more realistic, you can add effects such as a drop shadow or a slight gradient.
How can I create a realistic stamp for my envelope in Photoshop?
Creating a realistic stamp involves using a combination of the Ellipse Tool, the Brush Tool, and Layer Styles. You can use the Ellipse Tool to create the basic shape of the stamp, and then use the Brush Tool to add details such as the stamp design and the perforated edge. Layer Styles can be used to add effects such as a drop shadow and a bevel to make the stamp look three-dimensional.
How can I save and export my envelope design in Photoshop?
Once you’re satisfied with your envelope design, you can save it by going to File > Save. You can choose to save it as a Photoshop file (.PSD) if you want to be able to edit it later, or you can save it as a JPEG or PNG file for sharing or printing. To export your design, go to File > Export > Export As, and choose the format you want.
Can I create different sizes of envelopes in Photoshop?
Yes, you can create envelopes of any size in Photoshop. When you create a new document, you can specify the width and height of the canvas, which will determine the size of the envelope. You can also adjust the size of the envelope later by using the Transform function.
How can I add a realistic shadow to my envelope in Photoshop?
Adding a realistic shadow can be achieved by using the Layer Styles function. You can add a Drop Shadow effect to the envelope layer, and adjust the settings such as the angle, distance, spread, and size of the shadow to make it look more realistic.
Can I use my own images or designs on the envelope?
Yes, you can use your own images or designs on the envelope. You can import images into Photoshop and use the Transform function to adjust their size and position. You can also use the Brush Tool to paint your own designs directly onto the envelope.
How can I make the envelope look more three-dimensional in Photoshop?
Making the envelope look more three-dimensional can be achieved by using the Gradient Tool and Layer Styles. You can use the Gradient Tool to add a gradient to the envelope, which can give it a sense of depth. Layer Styles can be used to add effects such as a bevel and a drop shadow, which can make the envelope look more three-dimensional.
Can I print my envelope design directly from Photoshop?
Yes, you can print your envelope design directly from Photoshop. Go to File > Print, and adjust the print settings as needed. Make sure to choose the correct paper size and print quality for the best results.
Anum is Web and Graphic designer. Addicted to Photoshop and crazy for pixel perfection. She is also an active blogger, sharing her passions, skills and creative details on her blog Websoulz. She loves to connect with the community, sharing the latest design gossips and rolling her eyes on boring trends.