Quick Tip: How to Build Customizable HTML Widgets in Jekyll


Key Takeaways
- Jekyll, a static site generator, can be used to build customizable HTML widgets using Liquid, an open source template language. This can be done without needing Ruby plugins, making it accessible to non-technical users and clients.
- Two methods for setting customizable variables are shown: the inline method, useful for widgets that will be included multiple times, and the Front Matter method, ideal for longer text strings and widgets included once per post. These methods allow for dynamic elements such as button labels and text fields to be easily customized.
- The benefits of using Jekyll to build HTML widgets include the ability to write in Markdown, built-in support for code highlighting, and the flexibility of the Liquid templating language for data manipulation and display. These features allow for the creation of highly customizable and interactive widgets.

The static site generator Jekyll is known in web design circles for being light-weight and “hacky”. But that is only part of the truth. Jekyll is surprisingly powerful in terms of what you can do with it, and how user-friendly you can make it to non-technical users and clients.
In this quick tip, I will show how you can build HTML widgets that your clients or team members can easily customize and include anywhere in a Jekyll project—no Ruby plugins needed, just Liquid, the open source template language created by Shopify, and good old HTML.
Setting Variables
There are several ways of setting variables for customization. In this article, I’ll introduce two of them: the inline and Front matter methods.
Inline Variables
Setting variables inline is the best option if there’s a good chance the widget will be included more than once, say, in a blog post. In this example I’ll use a PayPal button.
First, create a new file called paypal-widget.html in your _includes folder. Then, fill it with this code:
<form action="https://www.paypal.com/cgi-bin/webscr" method="post" target="_top">
  <input name="cmd" type="hidden" value="_s-xclick">
  <input name="hosted_button_id" type="hidden" value="VALUE">
  <button class="buy-button" name="submit">Buy Now</button>
  <img src="https://www.paypalobjects.com/en_US/i/scr/pixel.gif" alt="" width="1" height="1" border="0" style="display: none !important;">
</form>
The above example will generate a simple “Buy Now” button, allowing people to pay via PayPal. There’s just one problem: the code is static and can’t be customized.
The widget has two elements you will want to keep dynamic: the value of the hosted_button_id and the button label. Achieving this with inline variables is quickly done:
<form action="https://www.paypal.com/cgi-bin/webscr" method="post" target="_top">
  <input name="cmd" type="hidden" value="_s-xclick">
  <input name="hosted_button_id" type="hidden" value="{{ include.id }}">
  <button class="buy-button" name="submit">{{ include.button }}</button>
  <img src="https://www.paypalobjects.com/en_US/i/scr/pixel.gif" alt="" width="1" height="1" border="0" style="display: none !important;">
</form>
The variables you added are include.id and include.button. When you are ready to include the HTML widget inside, say, a Markdown post, you can simply do this:
{% include paypal-widget.html id="EXAMPLE-ID" button="Buy Now | $30" %}This will create a button labeled “Buy Now | $30”. You can include the same file several times in the same page, each with different include.id and include.button values, as they are set individually inline.
Front Matter Variables
For longer text strings and widgets that will only be included once in a blog post, you can set the values of the variables in the Front matter of your posts and pages. In this example you’ll create a newsletter signup box.
As before, start by creating a new file in the _includes folder of your Jekyll project, name it something meaningful like signup-widget.html. Then, fill it with this code:
<div class="signup-cta">
  <h2>Sign up to the newsletter</h2>
  <p>Receive daily updates straight to your inbox—just fill out your name and email address and hit Submit!</p>
  <form method="POST">
    <input id="name" placeholder="First name">
    <input type="email" placeholder="Email address">
    <button type="submit">Submit</button>
  </form>
</div>
In this example, there are three elements you want to keep dynamic: the h2 text, the p element’s text below it, and the button text:
<div class="signup-cta">
  <h2>{{ page.cta.title }}</h2>
  <p>{{ page.cta.body }}</p>
  <form method="POST">
    <input id="name" placeholder="First name">
    <input type="email" placeholder="Email address">
    <button type="submit">{{ page.cta.button }}</button>
  </form>
</div>
Now when you include it in a Markdown post or page, define the following variables in the Front matter using Yaml:
---
cta:
    title: "Get the newsletter"
    body: "Like this blog post? Sign up to receive more content like this, delivered straight to your inbox every day."
    button: "Sign me up!"
---
And then you can include the widget anywhere in the text, much like you did with the other example:
{% include signup-widget.html %}The result, after adding some CSS, looks like this:
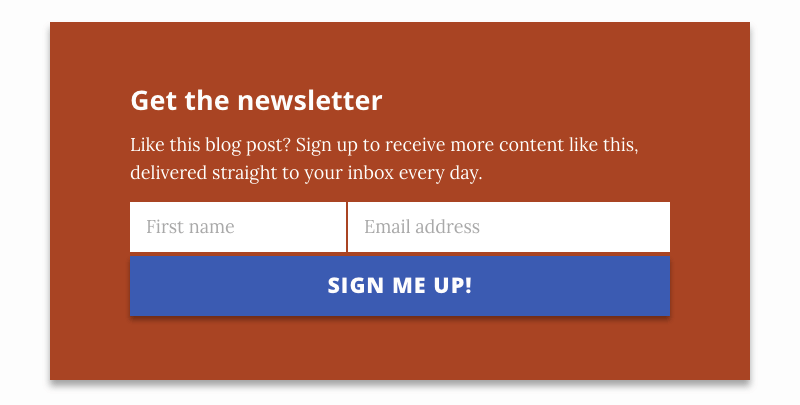
You can, of course, include this more than once in a blog post—but both instances would retrieve the values for their variables from the same source, so they’d look exactly the same. If you want to make it possible to include a widget more than once in one page or blog post and customize each one individually, inline variables are the way to go.
Conclusion
Well, there you have it. Two quick and easy ways to create powerful modules for your Jekyll project. The possibilities with this technique are endless, and I’d love to hear how you end up using it in the comments below. I’m happy to answer any questions you might have.
Frequently Asked Questions about Building Customizable HTML Widgets in Jekyll
What are the benefits of using Jekyll to build HTML widgets?
Jekyll is a simple, blog-aware, static site generator that’s ideal for personal, project, or organization sites. It’s flexible and easy to use, allowing you to focus on what matters most – your content. When it comes to building HTML widgets, Jekyll offers several advantages. Firstly, it allows you to write in Markdown, a lightweight markup language that you can use to add formatting elements to plaintext text documents. Secondly, Jekyll has built-in support for code highlighting, making it easier to display code snippets in your widgets. Lastly, Jekyll’s Liquid templating language allows you to manipulate and display data, making it possible to create highly customizable widgets.
How can I customize my HTML widgets in Jekyll?
Customizing HTML widgets in Jekyll is straightforward. You can use Jekyll’s Liquid templating language to manipulate and display data in your widgets. This allows you to create widgets that are tailored to your specific needs. For example, you can create a widget that displays the latest posts from your blog, or a widget that displays a list of your most popular posts. You can also use CSS to style your widgets, giving them a unique look and feel.
Can I use Jekyll to build interactive HTML widgets?
Yes, you can use Jekyll to build interactive HTML widgets. By combining Jekyll with JavaScript, you can create widgets that respond to user input. For example, you could create a widget that displays a different message depending on the time of day, or a widget that changes color when the user hovers over it. The possibilities are endless.
How do I add an HTML widget to my Jekyll site?
Adding an HTML widget to your Jekyll site is a simple process. First, you need to create the widget using Jekyll’s Liquid templating language. Once you’ve created the widget, you can add it to your site by including it in your site’s layout file. This will ensure that the widget appears on every page of your site. Alternatively, you can add the widget to individual pages by including it in the page’s Markdown file.
Can I use Jekyll to build HTML widgets for other platforms?
Yes, you can use Jekyll to build HTML widgets for other platforms. The widgets you create with Jekyll are just HTML, CSS, and JavaScript, so they can be used on any platform that supports these technologies. This includes platforms like WordPress, Drupal, and Squarespace.
How do I debug my HTML widgets in Jekyll?
Debugging HTML widgets in Jekyll is similar to debugging any other HTML, CSS, or JavaScript code. You can use your browser’s developer tools to inspect the widget and see how it’s being rendered. If you’re having trouble with the Liquid templating language, Jekyll’s documentation provides a comprehensive guide to its syntax and usage.
Can I use third-party libraries when building HTML widgets in Jekyll?
Yes, you can use third-party libraries when building HTML widgets in Jekyll. This includes libraries like jQuery, Bootstrap, and Font Awesome. To use a third-party library, you simply need to include it in your site’s layout file. This will ensure that the library is available to all of your widgets.
How do I optimize my HTML widgets for performance?
Optimizing your HTML widgets for performance involves a few different strategies. First, you should minimize the amount of HTML, CSS, and JavaScript in your widgets. This will reduce the amount of data that needs to be downloaded when a user visits your site. Second, you should use efficient CSS selectors and avoid unnecessary JavaScript. This will ensure that your widgets render as quickly as possible. Lastly, you should consider using a CDN to serve your widgets. This will ensure that your widgets are delivered to users as quickly as possible, regardless of their location.
Can I use Jekyll to build responsive HTML widgets?
Yes, you can use Jekyll to build responsive HTML widgets. By using CSS media queries, you can create widgets that adapt to different screen sizes. This ensures that your widgets look great on all devices, from smartphones to desktop computers.
How do I update my HTML widgets in Jekyll?
Updating your HTML widgets in Jekyll is a straightforward process. Simply make the necessary changes to your widget’s code, then rebuild your site. Jekyll will automatically incorporate the changes into the generated HTML. If you’re using a version control system like Git, you can also track changes to your widgets over time, making it easy to roll back to a previous version if necessary.
Front-end web developer and online entrepreneur based in Sweden. Big fan of static site generators like Jekyll. I do freelance web design at http://jonp.io