Making precise selections in Photoshop is an essential skill that every designer needs. As a print designer, you will find yourself using selections to remove objects from their background to place within ads. As a web designer, you might extract an image and place it on a website with no background. If you are a photographer, you might make a selection to remove blemishes or other unwanted features from an image. You can’t get around it; everyone uses selections, and if you make excellent selections, you’ll end up with excellent work.
So, what do you do when you have something that is extremely difficult to select with normal selection tools? As basic selection tools, you have the marquee tool, the lasso tools, the magic wand tool, and the quick selection tool at your disposal. These don’t always do the trick; you don’t have a truly precise tool to make intricate selections.
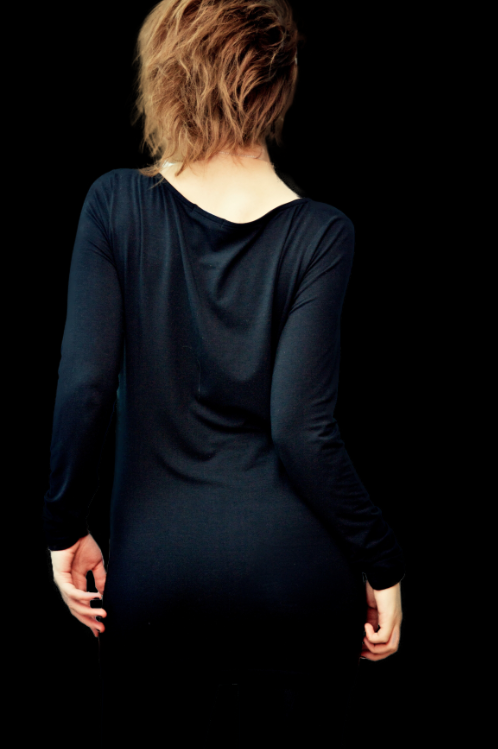
Even with the masking and channels, you can’t make a precise selection consistently. Sure, you can refine your selection, feather it, and spend a lot of time on it, but that method is neither easy nor consistent. Notice in the image below (which you can download from here), there is a woman on a subtle background. This might not be considered a terribly complex selection, but the hair is fairly difficult to extract onto its own layer.
 You can try the quick selection tool, which does a great job of making a selection of the bulk of the image, but making a more refined selection is difficult with this method. The problem is the hair. The wisps of hair are too fine and tedious to select with standard selection tools.
 In comes Refine Mask to the rescue. In the example, I made the selection using the Quick Selection Tool. This does a good job of selecting most of the image, but now we are going to refine our selection. In Photoshop, when you make a selection, the options menu for your selection tool should offer a button that says “Refine Mask.” Click that button to bring up the Refine Mask Dialog Box.
 The Refine Mask menu is one of the best tools for refining your selection. You have many options for viewing your mask:
- Marching Ants, which is your basic selection view.
- Overlay, which is the same view as quick mask mode.
- On Black, which gives you a lot of contrast in your view and looks just like a normal layer mask.
- On White, which offers the same kind of contrast with the opposite background.
- Black & White, which helps you distinguish your selection from the background when you are trying to see dark and light areas of an image that you want to add and subtract from your selection.
- On Layers, which shows your underlying layers.
- Reveal layer, which shows the normal background.
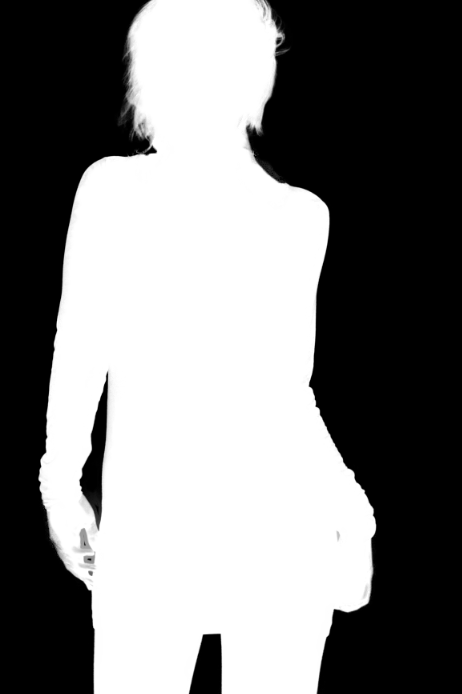
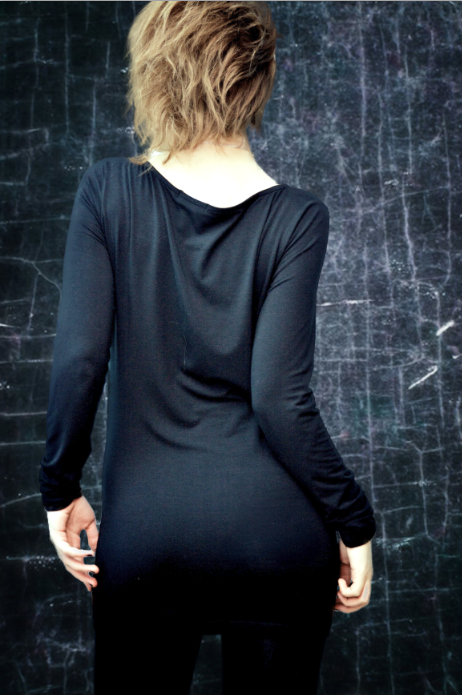
 Each view has its own purpose, but the best views for contrast would have to be On Black, On White, and Black & White. This dialog box is handy, because you can easily toggle between each view by hitting the “F” key. You can see in the example below that our selection is good, but the wisps of hair are not included in the selection.
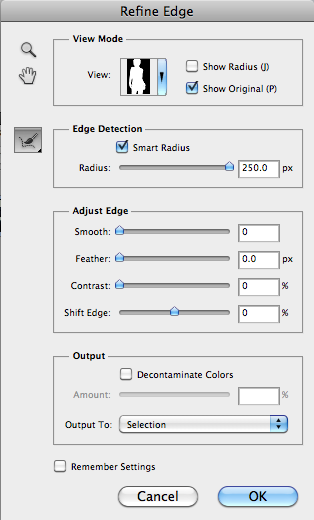
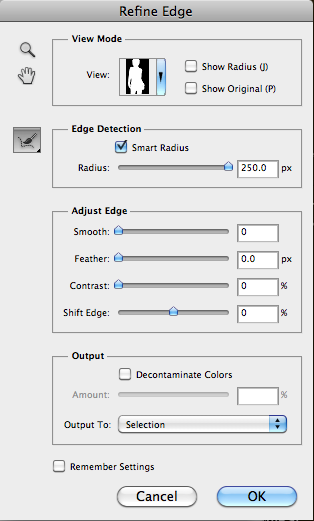
 We can fix this by using the Smart Radius Slider. Just by using this slider, we can a more refined and precise selection. I bumped it all the way up to 250px and in doing so, have the result shown below:
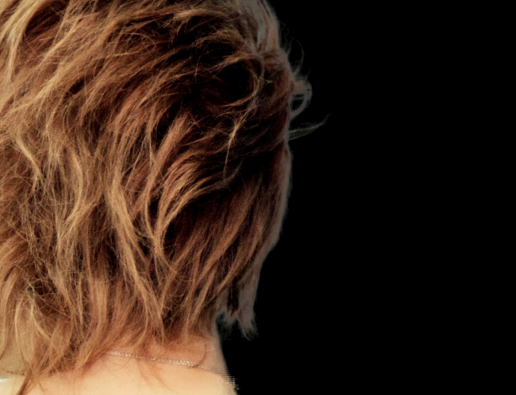
 This slider does a great job, but there are still a couple of hair wisps that aren’t included in the selection, making our image incomplete. We want our images to look as natural as possible, so we’ll need to include those. The Refine Mask dialog has a brush on the left that you can use to add to and subtract from the selection. Hold shift to add to the selection, and hold alt/option to subtract from the selection. If you need a different view, use the “F” key to toggle through the different views.
 Our selection looks great and is much more detailed than before. As we cycle through the different views, we can see the hair that we wanted to include in our selection. Many would say that this is a very good selection, but now, if you go to the view called On Black, you can see a light outline around the woman’s body and in her hair. You can also see below that there is some ghosting around the hand. Use the brush to add these details back in.

 This is called fringe. You could go through and erase it all or try to contract your selection, but it could cut into your image, which makes your selection worse instead of better. The best option in the Refine Edge menu is the bottom one called Output. If you select Decontaminate colors, you can move the slider to the right and remove the fringe.
 You can also select how this is output. You can choose New layer with layer mask, new layer, new document, or new document with layer mask. If you still need to keep this in the current document, then choose to create a new layer with a layer mask. This gives you the ability to refine the layer mask even more. When you are done with your refinements, right-click on the layer mask icon and select Apply Mask.
 With the image extracted, now you can place it over any background that you want. With your complex and professional level selections, you can convert them to masks and mask out and extract any object from its background. I added this background texture below the extracted image, and the result is shown below.
 You might think that you need a lot of contrast for this to work, but in reality, you don’t. Here is a sample image of a dandelion, which you can find here. The image doesn’t have a lot of contrast, and the tones of the background and subject are very similar.
 Make a rough selection of the dandelion. This doesn’t have to be exact, but try to select as much of the main image as you can. I used the quick selection tool, which took about 3 seconds to make this selection.
 Then, I simply turned on smart radius and bumped the value all the way up.
 To get rid of the extra content in the background, such as the green from the rest of the field, I used Decontaminate Colors and bumped the value all the way up. I exported the selection as a mask on its own layer and voila!
 The Refine Edge and Refine Mask Settings can handle easy or tough selections, and it makes the process of making complex selections much easier. These techniques can make your Photoshop selections quicker, easier, and better.
Frequently Asked Questions (FAQs) about Making Complex Selections in Photoshop
What are the different selection tools available in Photoshop?
Photoshop offers a variety of selection tools, each with its unique capabilities. The Marquee tools allow you to make rectangular, elliptical, single row, and single column selections. The Lasso tools, including the Lasso, Polygonal Lasso, and Magnetic Lasso tools, are ideal for freeform selections. The Quick Selection tool is perfect for making fast selections, while the Magic Wand tool selects similarly colored areas. The Pen tool allows for precise path-based selections. Lastly, the Select and Mask workspace provides advanced selection options.
How can I refine the edges of my selection in Photoshop?
Photoshop provides several options to refine the edges of your selection. You can use the Refine Edge tool, available in the Select and Mask workspace, to adjust the edge detection, smoothness, feathering, contrast, and shift edge of your selection. You can also use the Feather command under the Select menu to soften the edges of your selection.
How can I save and load selections in Photoshop?
To save a selection, go to the Select menu, choose Save Selection, and provide a name. The selection will be saved as an alpha channel. To load a saved selection, go to the Select menu, choose Load Selection, and select the desired alpha channel.
Can I make a selection based on color in Photoshop?
Yes, you can use the Magic Wand tool or the Color Range command under the Select menu to make a selection based on color. The Magic Wand tool selects contiguous areas of similar color, while the Color Range command selects all areas of similar color in the image.
How can I invert my selection in Photoshop?
To invert your selection, go to the Select menu and choose Inverse. This will select everything in the image that was not previously selected.
Can I modify my selection after making it in Photoshop?
Yes, you can modify your selection using the Add to selection, Subtract from selection, and Intersect with selection options available with each selection tool. You can also use the Transform Selection command under the Select menu to scale, rotate, or skew your selection.
How can I select a complex object with intricate details in Photoshop?
For complex objects with intricate details, you can use a combination of selection tools. Start with a basic selection tool like the Lasso or Quick Selection tool, then refine the selection using the Select and Mask workspace. The Refine Edge brush within this workspace is particularly useful for selecting intricate details like hair or fur.
What is the difference between the Quick Selection tool and the Magic Wand tool?
The Quick Selection tool selects an area based on color and texture similarity when you click or drag in the area. The Magic Wand tool, on the other hand, selects all pixels of a similar color within a specified range, wherever they are in the image.
How can I select and isolate a subject from its background in Photoshop?
You can use the Select Subject command under the Select menu to automatically select the main subject in your image. Then, you can refine the selection using the Select and Mask workspace and separate the subject from its background.
Can I use Photoshop to select and replace a specific color in my image?
Yes, you can use the Color Range command under the Select menu to select a specific color in your image. Then, you can use the Hue/Saturation adjustment to change the selected color.
 James George
James George is a professional web developer and graphic designer. James is an expert in design, and a professional web developer, with a special interest in WordPress. Founder of Design Crawl, James has been a professional designer since 2005.