Grouping Radio Buttons and Checkboxes
There are two types of form elements that are likely to be part of their own subgroup. These are checkboxes and radio buttons, both of which can be used to offer users multiple choices when responding to a given question on a form.
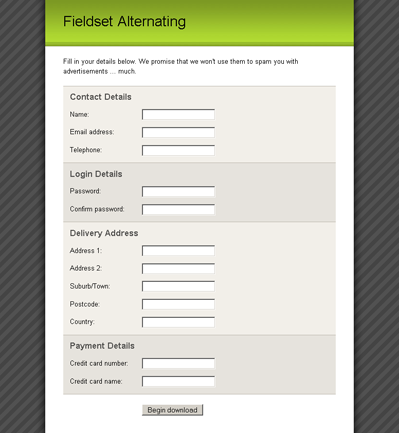
Figure 22: Alternating-color fieldset elements
The way in which these form elements are laid out is slightly different to text fields, select boxes or textareas. As they are part of their own subgroup, they should be included in a nested fieldset inside the main fieldset. Using our fieldset:
element-subgroups.html (excerpt)
<fieldset>
<legend>Contact Details</legend>

<ol>
<li>
<fieldset>

<legend>Occupation:</legend>
<ol>
<li>

<input id="occupation1" name="occupation1"
class="checkbox" type="checkbox" value="1" />

<label for="occupation1">Doctor</label>
</li>
<li>

<input id="occupation2" name="occupation2"
class="checkbox" type="checkbox" value="1" />

<label for="occupation2">Lawyer</label>
</li>
<li>

<input id="occupation3" name="occupation3"element
class="checkbox" type="checkbox" value="1" />

<label for="occupation3">Teacher</label>
</li>
<li>

<input id="occupation4" name="occupation4"
class="checkbox" type="checkbox" value="1" />

<label for="occupation4">Web designer</label>
</li>
</ol>

</fieldset>
</li>
</ol>

</fieldset>
The label for the subgroup actually becomes the legend for the nested fieldset, then each of the checkboxes or radio buttons inside the fieldset receives its own label. The ordered list structure that was put in place at the top level is replicated on this sub-level as well, more for consistency than necessity although it can be very handy if you want to style some of the sub-items.
The nested elements will inherit the styles that we put in place for top-level items, so we’ll have to set some rules specifically for nested elements before they’ll display correctly:
element-subgroups.css (excerpt)
fieldset fieldset {
margin-bottom: -2.5em;

border-style: none;
background-color: transparent;
background-image: none;
}

fieldset fieldset legend {
margin-left: 0;
font-weight: normal;
}

fieldset fieldset ol {
position: relative;
top: -1.5em;
margin: 0 0 0 11em;

padding: 0;
}
fieldset fieldset label {
float: none;

width: auto;
margin-right: auto;
}
Firstly, all the decoration on the nested fieldset is removed: background-color, background-image, and border properties. Instead, it’s given a negative margin-bottom for the purposes of some trickery we’ll see in a moment.
We want to make the legend look exactly like a normal label, so we remove the left margin and also take off its bold font-weight. It’s important to be careful with the length of text inside the legend, as most browsers won’t wrap the text in a legend. As a result, any width you’ve set for the legend/text will be ignored, as the text will just continue on in one line, possibly running over the rest of the form. We can overcome this limitation by exercising a maximum character width for the legend text and sizing the form columns in em units, so that with text-resizing the layout will scale accordingly.
Limitations of legend Along with the inability of legend elements to wrap text, they are also resistant to width settings and text alignment. This use of legend elements for grouping within fieldset elements is only possible for left-aligned label elements, not right-aligned label elements.
We use the ordered list to position the nested form elements and label elements. Its left margin pushes the entire container away from the left edge, equivalent to the amount of margin given to form elements at the top level. Then, to bring the top of the form elements in line with the top of their respective legend, we need to position the ordered list relatively and move it up by -1.5em. This will leave a large space at the bottom of the list (where the list would have been if it wasn’t moved relatively), and this is where the fieldset‘s negative margin comes into play. The negative margin pulls up the content after the fieldset by the same amount we moved the ordered list, making it look like there is no empty gap. The padding that’s put on ordered lists at the top level isn’t needed here, so we just set this property to 0.
The last thing we need to do is to revert our label elements to their native state. This means we stop them from floating and set their width to auto. Because they’re inline elements, they’ll now sit nicely next to the actual form elements — checkboxes or radio buttons.
There’s an additional change to make to the Internet Explorer-specific style sheet: to turn off the negative relative position on nested legends. We don’t have to deal with background colors on the nested fieldset elements, so the negative relative position isn’t needed here:
element-subgroups-ie.css (excerpt)
fieldset fieldset legend {
top: 0;
}
Once those new styles have been created, we end up with the form that appears in Figure 23 — a nested fieldset that lines up perfectly with all the other form elements and gives the user a nice straightforward choice of options.
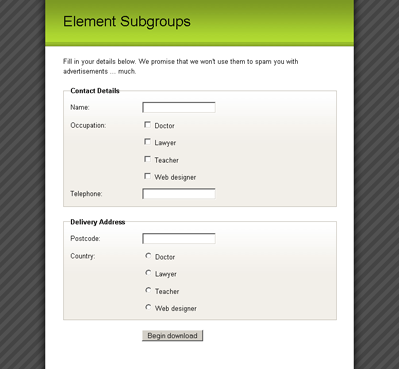
Figure 23: Nested subgroups of checkboxes and radio buttons
 Cameron Adams
Cameron has been adding to the Internet for over seven years and now runs his own design and development business: www.themaninblue.com. He likes to combine the aesthetic with the technological on his Weblog, which contains equal parts of JavaScript, design and CSS.