- Wireframing
- Step 1: Set Up the Artboard
- Step 2: Gather Functional Requirements
- Step 3: Create Text and Shapes
- Step 4: Style, but Don’t Style
- Step 6: Create Transitions
- Step 7: Set Animation (Optional)
- Step 8: Test, Test, Test
- Bonus Step 9: Conduct Usability Tests
- Conclusion: Figma Has It All
- Frequently Asked Questions (FAQs) about Wireframing in Figma
In this article, we’ll explore what wireframing is, and why it’s worth doing it with Figma — the most-used UI design tool on the market today.
We’ll take a deep dive into Figma, and learn how to design user interfaces with it — digging into wireframing as we go.
BTW: if you take a look at the 2020 Design Tools Survey, Figma won in most categories: User Flows, UI Design, Prototyping, Handoff, Design Systems, Versioning, and even “most excited to try in 2021”.
Wireframing
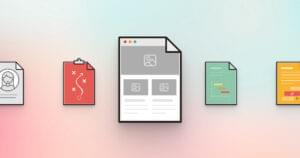
Wireframes are diagrams that depict the structure of a design, and they can be either low-fidelity (for user research) or mid-fidelity (for UX research). We’ll be focusing on the latter (UX research), and visuals will be of no concern to us here, because all we want to do at this stage is figure out the content and layout (otherwise known as the “information architecture”).
What are we wireframing?
First, a little background on the UI we’ll be building. It will be a table-like structure showing various UX design tools and which step of the UX design workflow each tool is used in. The data will be user-submitted, so the aim is to see which UX design workflow is best, rather the overdone “which UI design tool is best?”
Wireframing will help me to figure out how best to structure this interface without wasting time on figuring out the little visual details. It won’t look amazing, but that’s fine; it just needs to look nice enough that users can offer me some feedback.
Yes, it’s a real UI. At the moment I’m calling it “Toolflows”.
Let’s begin!
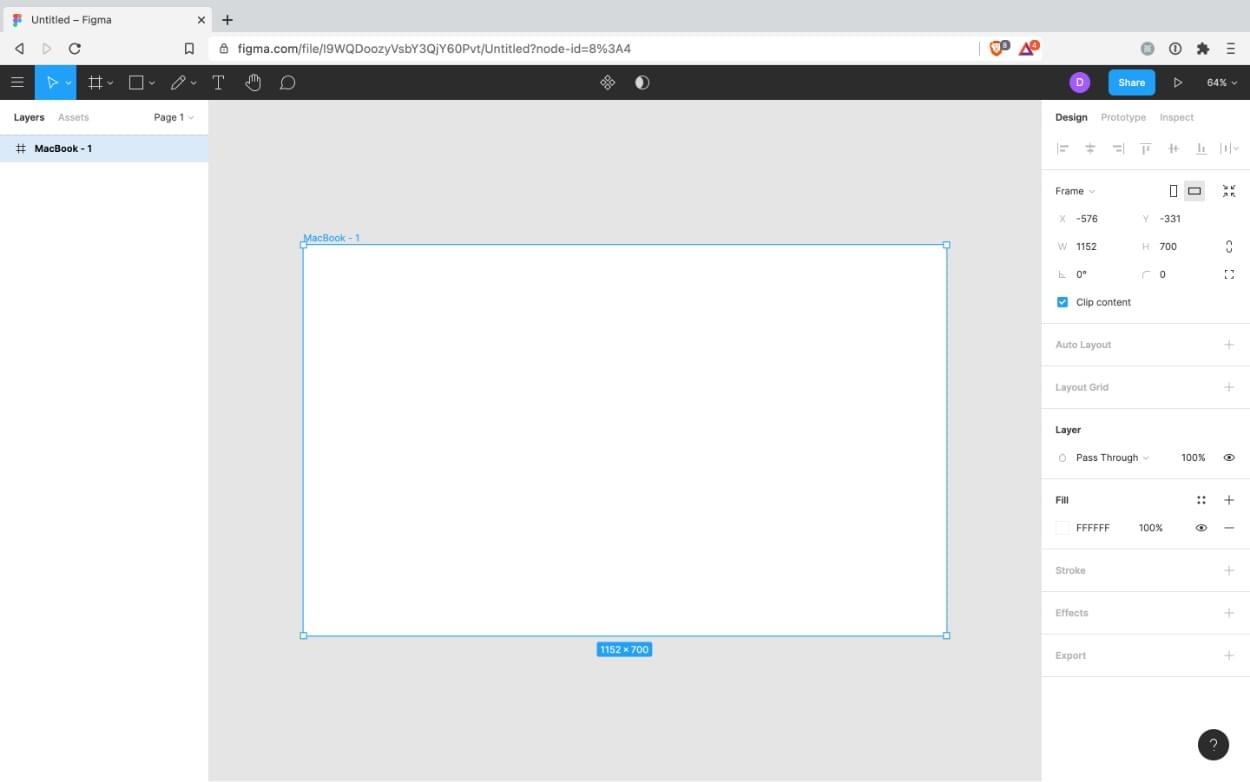
Step 1: Set Up the Artboard
The majority of my website’s users are desktop users, so it makes sense to wireframe my design on a desktop artboard. Press A on your keyboard, then click Design > Desktop > MacBook from the right sidebar of Figma.
Step 2: Gather Functional Requirements
Assuming that you or somebody else did some user research at some stage, we’ll need to refer to that to create our wireframe. While conducting user research (specifically, user interviews, focus groups, and user testing with low-fidelity wireframes), we would have been made aware of any functional requirements.
Ours are:
- filter by tool
- number of workflow users
Let’s start wireframing!
Step 3: Create Text and Shapes
First of all, there are Figma wireframe kits available, but I’m not a fan of them exactly. They make me feel constrained to work only with what’s available in the kit, so it hinders creativity.
Instead, we’ll wireframe using text and shapes.
As we learned before with the artboard, the easiest way to create anything in Figma is to abuse the keyboard shortcuts:
- T: Text
- O: Ellipse
- R: Rectangle
- ⇧⌘K: Image
- ⇧L: Arrow
- L: Line
After that, it’s simply a case of clicking on the artboard roughly where you’d like the object to appear, and then you can use your mouse and arrow keys to adjust the size and alignment.
Useful shortcuts:
- ⌘-/+ to Zoom.
- ⌘D to Duplicate selected objects.
- ⌘G to Group selected objects (⌘rc to select within).
- Hold ⌘ when mouse-resizing to rotate objects.
- Hold ⇧ when mouse-resizing to maintain aspect ratio.
- Use arrow keys to move objects by 1px (Hold ⇧ for 10px).
- Arrow keys + ⌘ to resize by 1px (Hold ⌘⇧ for 10px).

Next, we’ll move on to styling.
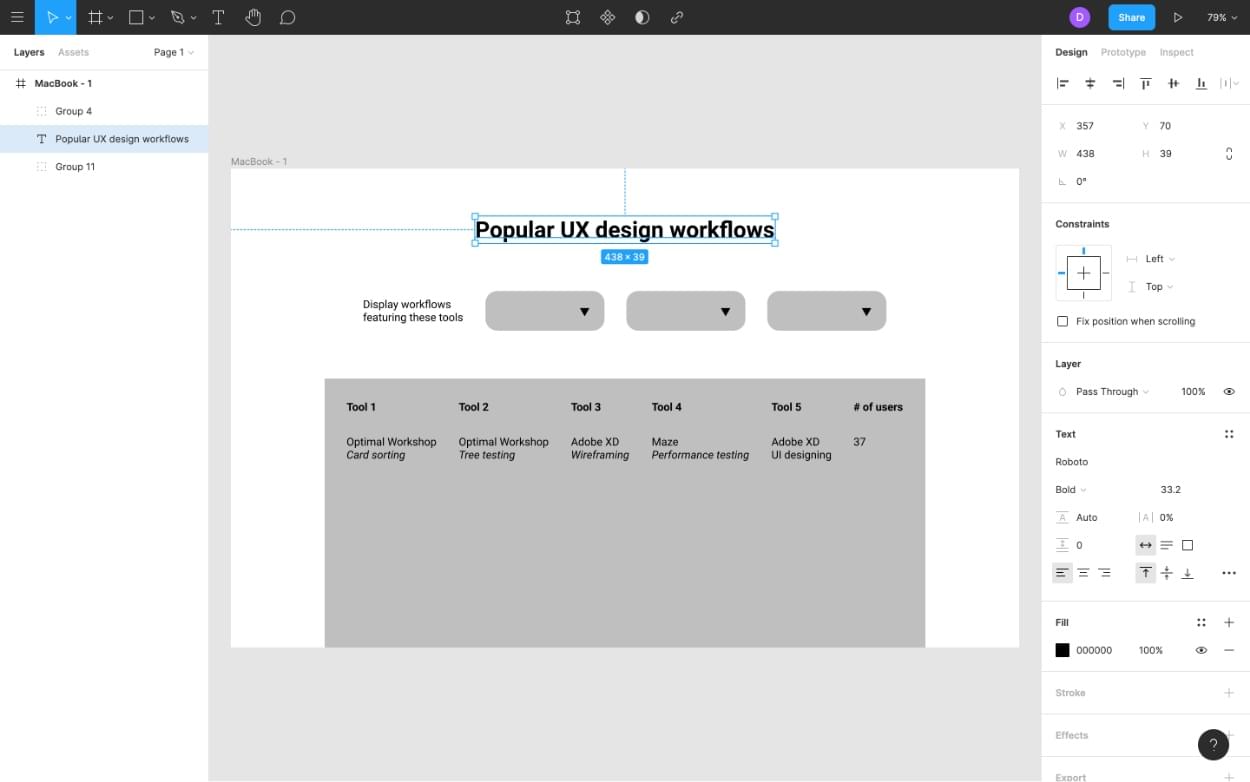
Step 4: Style, but Don’t Style
Using the (hopefully still visible) Design sidebar, we can alter the styles of objects on our artboard, both aesthetically and to specify the sizing and alignment of them more accurately.
Whether you’re using the Design sidebar or the arrow keys to size/align, hold ⌥ (option) to measure the distance between objects.
Remember, don’t design much beyond sizing and aligning. Give rounded corners to buttons (so that we can very clearly see that they’re buttons), bolden headings, etc. Clarity, not aesthetics.
And that’s it; now we have a wireframe. That being said, for designs that require interaction, we’ll want to demonstrate how exactly our design would function, so without further ado let’s move onto prototyping. Prototyping is the step where we make the design interactive (that is, feel as if it were the real thing).
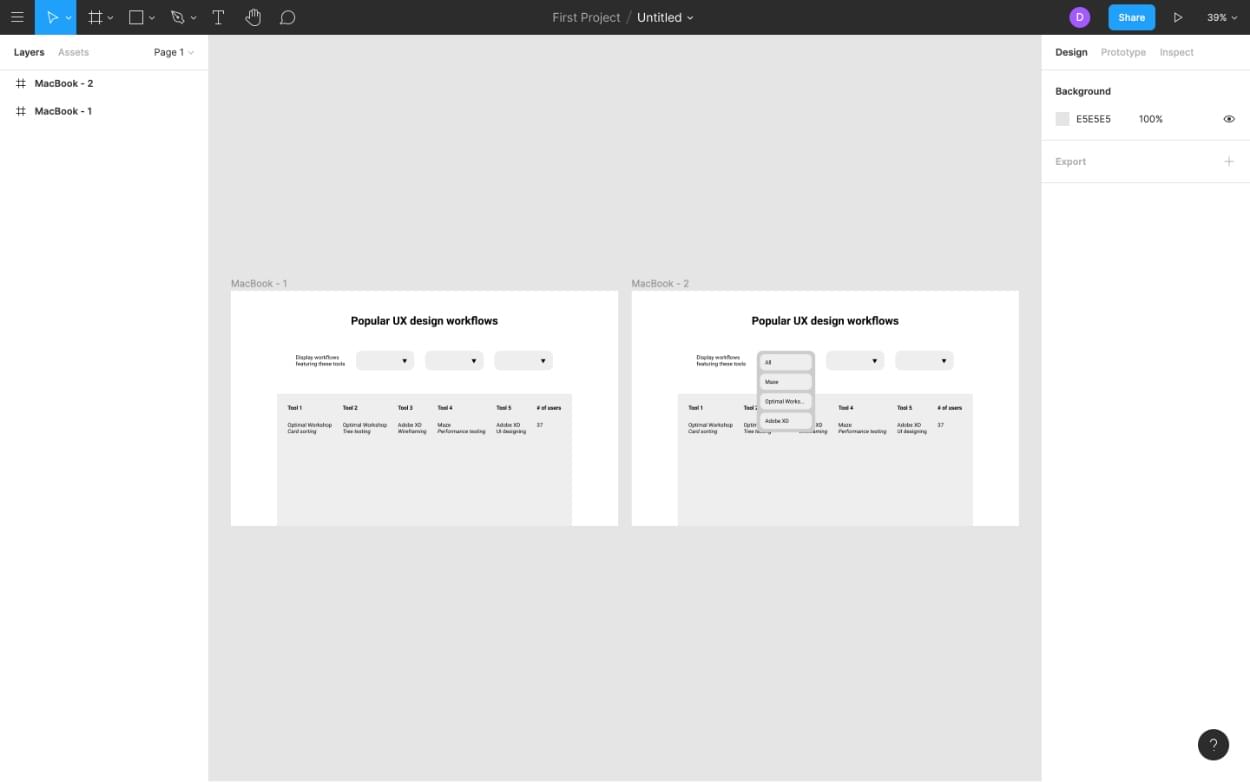
Step 6: Create Transitions
The concept behind this step is to duplicate our artboard, demonstrate how we want our design to look at the end of the interaction, and then define the trigger (animation optional) that will initiate the transition between the two “states”.
Start by duplicating the artboard (⌘D), and then change whatever needs to be changed in this new artboard. In my case, I want to show the dropdown menu, which filters workflows by tool.
Next, switch to the Prototype sidebar before selecting the object that will be the trigger for your interaction. For me, this is the closed dropdown menu from the original artboard.
Once selected, there should be a draggable circular + icon. Drag this circle onto the second artboard to create a “connection”.
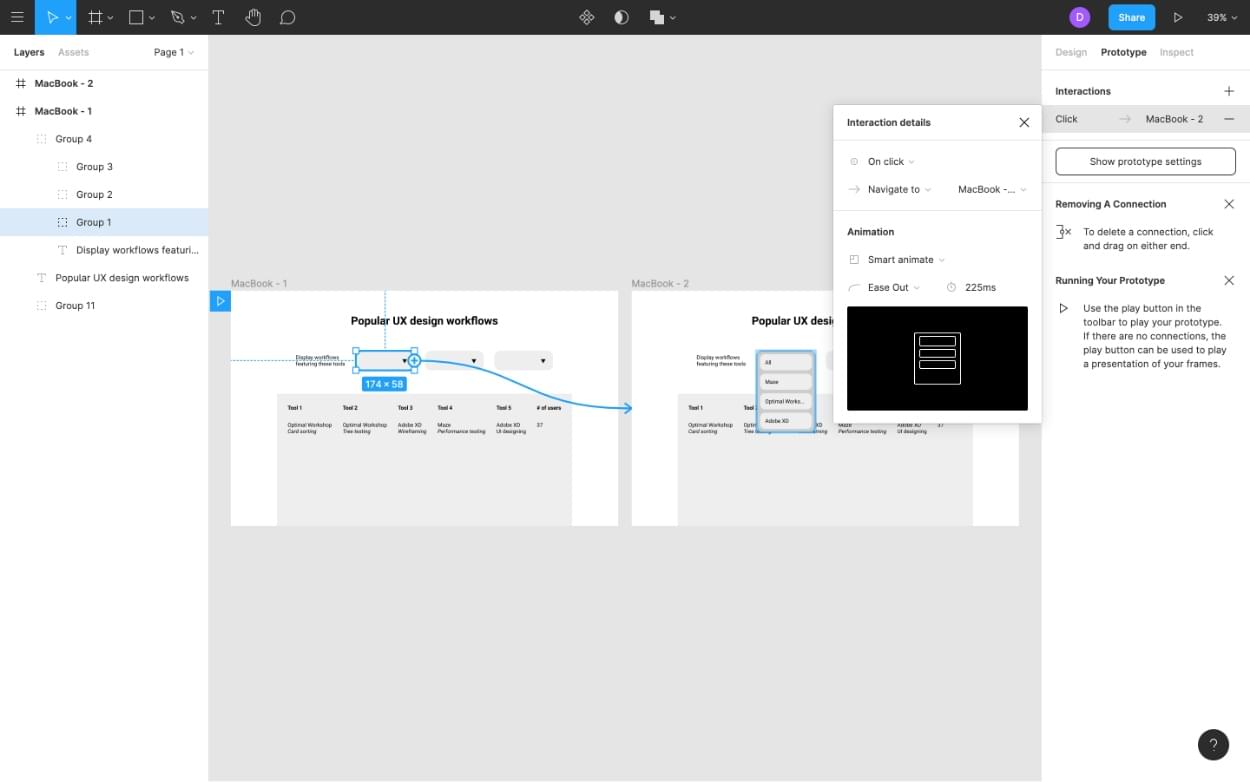
Step 7: Set Animation (Optional)
Next, we should set some animation for the interaction so that users can more easily see what’s changed between the two states.
Animations don’t need to be fancy, since we’re only designing with mid-fidelity right now, so from the Interaction details dialog that revealed itself after creating the connection, set the Animation to Smart animate. Smart animate animates layers that didn’t exist in the “trigger artboard”. Smart, ay?
If you’re prototyping with mid-fidelity wireframes, you won’t really need to tinker with any of the other options, but it’s cool that you know how to create animated connections now.
Step 8: Test, Test, Test
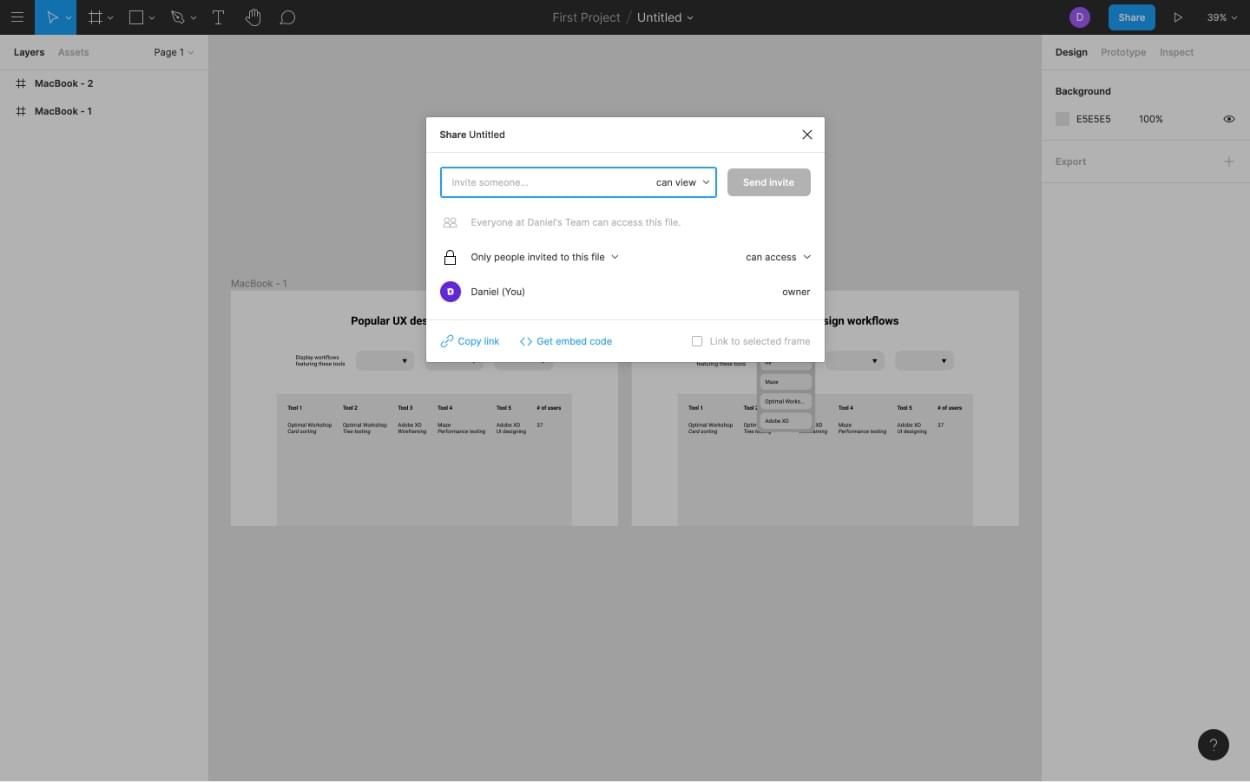
Next, we’ll want to test it, first to ensure that all of the connections work, then to acquire what I’d consider “low-level feedback” from stakeholders. Obviously the real value comes from testing with users, but that doesn’t mean that our stakeholders don’t have anything to contribute. Maybe we missed something?
To share with stakeholders, hit the Share button in the top-right corner. Stakeholders will be able to leave some comments.
For your own testing (which I’d recommend doing before sending sharing with anybody else) you’ll want to download Figma Mirror for iOS or Android. When designing for desktop, though, simply hit the play icon in the top-right to enter “Present” mode.
Bonus Step 9: Conduct Usability Tests
If you’d like to acquire more qualitative feedback on your design (task completion rate, time to completion, etc.), then apps like Maze and Useberry (which both work with Figma) will help you to accomplish exactly that. After all, this is why we’re wireframing, right? To make our design more usable.
Conclusion: Figma Has It All
Figma has it all, including a thriving and dedicated community made up of both macOS and Windows designers, and even those that simply want to design in their web browser (so, Linux too!).
So, what now? Well, you could explore the Figma community, see what they’re making, and maybe even download some Figma plugins to extend and automate your UI design workflow.
Frequently Asked Questions (FAQs) about Wireframing in Figma
What are the key features of Figma for wireframing?
Figma offers a range of features that make it an excellent tool for wireframing. It provides a collaborative platform where multiple users can work on the same project simultaneously. It also offers a variety of design components, including shapes, text, and images, which can be easily manipulated to create wireframes. Additionally, Figma supports vector networks, allowing designers to create complex shapes and designs with ease. It also offers prototyping capabilities, enabling designers to create interactive wireframes.
How can I share my Figma wireframes with others?
Figma allows you to share your wireframes with others in a few simple steps. You can invite collaborators to your project by entering their email addresses. You can also generate a shareable link to your project, which can be accessed by anyone with the link. Additionally, you can export your wireframes as PNG, JPG, or PDF files, which can be shared via email or other communication platforms.
Can I use Figma for wireframing on mobile devices?
Yes, Figma offers a mobile app that allows you to view and interact with your wireframes on mobile devices. However, the mobile app does not currently support full design capabilities. For comprehensive wireframing, it is recommended to use the desktop version of Figma.
How can I create interactive wireframes in Figma?
Figma’s prototyping feature allows you to create interactive wireframes. You can link different frames together to simulate the flow of your design. You can also add interactions, such as click or hover effects, to your design elements. This allows you to create a realistic prototype of your design, which can be tested and refined before moving on to the development stage.
What are some best practices for wireframing in Figma?
Some best practices for wireframing in Figma include starting with low-fidelity wireframes to outline the basic structure of your design, using consistent design elements to maintain visual coherence, and utilizing Figma’s collaboration features to gather feedback from your team. It’s also important to make use of Figma’s prototyping capabilities to test and refine your design.
Can I import designs from other tools into Figma for wireframing?
Yes, Figma supports importing designs from other tools such as Sketch and Adobe XD. This allows you to leverage existing designs and assets, saving you time and effort in the wireframing process.
How can I organize my wireframes in Figma?
Figma offers several features to help you organize your wireframes, including layers, frames, and groups. You can also use color coding and naming conventions to keep your designs organized. Additionally, Figma’s components feature allows you to create reusable design elements, which can be easily managed and updated across your project.
Can I use Figma for wireframing if I’m a beginner?
Absolutely! Figma is a user-friendly tool that is suitable for both beginners and experienced designers. It offers a range of tutorials and resources to help you get started with wireframing. Plus, its intuitive interface and powerful features make it a great tool for learning and mastering wireframing.
How can I improve my wireframing skills in Figma?
Practice is key to improving your wireframing skills in Figma. Start by creating simple wireframes and gradually move on to more complex designs. Make use of Figma’s resources and tutorials to learn new techniques and features. Also, don’t hesitate to seek feedback from your peers or the Figma community to improve your designs.
Is Figma a good tool for wireframing for large projects?
Yes, Figma is well-suited for large projects. Its collaboration features make it easy for large teams to work together on a project. Plus, its robust design and prototyping capabilities can handle complex designs with ease. Additionally, Figma’s cloud-based platform ensures that your projects are always up-to-date and accessible from anywhere.
 Daniel Schwarz
Previously, design blog editor at Toptal and SitePoint. Now Daniel advocates for better UX design alongside industry leaders such as Adobe, InVision, Marvel, Wix, Net Magazine, LogRocket, CSS-Tricks, and more.