Real-Time Laravel Notifications and Follows? Sure, with Stream!


Key Takeaways
- Laravel makes it easy to create dynamic applications like newsfeed sites, blogs, or forums. Adding real-time notifications for user actions can make the application more interactive, and this can be achieved with the help of a service called Stream.
- Stream is an API that can be used with many languages and frameworks. It has an official package for Laravel, making it easy to integrate into any Laravel application. It can be used to create feeds, activity streams, and notification systems.
- Stream-Laravel provides automatic integration with Eloquent models. By including the GetStream\StreamLaravel\Eloquent\ActivityTrait, automatic tracking of a model to user feeds is enabled. For instance, every time a Post is created, it will be stored in the feed of the user who created it, and when a Post instance is deleted, it will be removed as well.
- Stream-Laravel needs to be set up with API credentials from the Stream Dashboard. Once this is done, various methods offered by the package can be used to build feeds and notifications.
- Laravel allows customization of notification channels according to the application’s requirements. It also supports on-demand notifications, database notifications, SMS notifications via Nexmo and Twilio services, and handling of notification events.
This article was peer reviewed by Wern Ancheta and Younes Rafie. Thanks to all of SitePoint’s peer reviewers for making SitePoint content the best it can be!
With Laravel, it’s pretty easy to create newsfeed sites, blogs, or even forums where people post content, comment, or even mark some of these posts as favorite. To spice things up, we can make the app more lively by adding notifications for actions performed by other users. In this tutorial, we’ll be relying on a service called Stream to add this functionality to our app.
Stream is an API for Building Feeds, Activity Streams, and Notification Systems

The API can be used with many languages and frameworks. Visit the website and click on Try the API. Select PHP as the language of choice since we’ll be working with PHP. The tutorial should give you a good overview of the type of notifications we can get with Stream. There’s an official package for Laravel, which makes it even easier to integrate this service into any Laravel app.
For this tutorial, we are going to use an existing project to try out the Stream API. Just clone this repo. It’s a simple Laravel 5.4 blog where users get to perform CRUD operations on blog posts. We’ll add the ability to follow other users shortly. We will then create feed sections with different types of notifications telling us who did what and when. Our main focus in this tutorial will be on people creating new blog posts and following each other. The complete code for this tutorial can be found here.
Project Setup
It’s recommended you use Homestead Improved for quickly getting up and running with a professional development environment that contains everything you might need.
git clone https://github.com/vickris/simple-blog
With the repo set up locally, we should then prepare a database before running any migrations. We will use MySQL for this tutorial. After setting up the database, run:
cp .env.example .env
I have the database connection section in my .env file looking like this:
DB_HOST=localhost
DB_DATABASE=homestead
DB_USERNAME=homestead
DB_PASSWORD=secret
Since this is not a fresh Laravel install, we will have to run composer install to install various packages and dependencies for this project:
composer install
Then run:
php artisan migrate
php artisan db:seed
The app has some seed data to generate 10 posts. If we serve our app and visit /posts, we should be greeted with ten posts.
All set! We can now sign up new users and even create blog posts. The link to create a new post is in the navbar. Let’s add the ability to follow other users. By following another user, we’ll be updated on their activities i.e. creating new posts or following other users.
Following Users
For this, we’ll start by generating a Follow model alongside a migration. Note. however, that for large scale projects, it’s recommended to create followers and following tables to make querying relations easier:
php artisan make:model Follow -m
Let’s update the up method of the newly generated migration to this:
public function up()
{
    Schema::create('follows', function (Blueprint $table) {
        $table->increments('id');
        $table->integer('user_id')->index();
        $table->integer('target_id')->index(); // ID of person being followed
        $table->timestamps();
    });
}
Here, we are adding a user_id column because a follow belongs to a user. Let’s now run the migrate command to create the follows table:
php artisan migrate
We are yet to define the relationship between follows and users. Open the User model file and add the relationship:
app/User.php
[...]
class User extends Authenticatable
{
    [...]
    public function follows() {
        return $this->hasMany(Follow::class);
    }
}
Inside app/Follow.php, let’s add the target_id to the list of mass assignable attributes. We are also going to define the relationship specifying that a follow belongs to a user:
app/Follow.php
[...]
class Follow extends Model
{
    protected $fillable = ['target_id'];

    public function user()
    {
        return $this->belongsTo(User::class);
    }
}
[...]
With the relationships defined, we can now add the ability to follow other users. Let’s define the routes for the follow and unfollow actions.
[...]
Route::group(['middleware' => ['auth']], function () {
    [...]
    Route::get('/users', 'FollowController@index');
    Route::post('/follow/{user}', 'FollowController@follow');
    Route::delete('/unfollow/{user}', 'FollowController@unfollow');
});
[...]
We want to limit the follow and unfollow actions to authenticated users, that’s why we placed these routes inside the route group with the auth middleware.
The first route will take us to a page listing all the users. Next, we should create the FollowController:
php artisan make:controller FollowController
Then we define an index action inside this controller. It is inside the index action where we’ll retrieve all users except the currently logged in user. We don’t want a scenario where users can follow themselves:
app/Http/Controllers/FollowController.php
[...]
use App\User;
use App\Follow;
use Illuminate\Support\Facades\Auth;
[...]

class FollowController extends Controller
{
    public function index()
    {
        return view('users.index', [
            'users' => User::where('id', '!=', Auth::id())->get()
        ]);
    }
}
We still don’t have the users.index view. Let’s create it:
resources/views/users/index.blade.php
@extends('layouts.app')

@section('content')
    <div class="container">
        <div class="col-sm-offset-2 col-sm-8">

            <!-- Following -->
            <div class="panel panel-default">
                <div class="panel-heading">
                    All Users
                </div>

                <div class="panel-body">
                    <table class="table table-striped task-table">
                        <thead>
                            <th>User</th>
                            <th> </th>
                        </thead>
                        <tbody>
                            @foreach ($users as $user)
                                <tr>
                                    <td clphpass="table-text"><div>{{ $user->name }}</div></td>
                                </tr>
                            @endforeach
                        </tbody>
                    </table>
                </div>
            </div>
        </div>
    </div>
@endsection
By visiting the URL /users, we should see names belonging to the signed up users. We want to add a button next to the user’s name allowing users to follow and unfollow each other.
Let’s update the controller we just created by adding the follow and unfollow methods. But before that, we need to make sure someone is not already following another person before performing the follow operation and vice-versa. To achieve this, we’ll have to create a small helper function in our User model:
app/User.php
class User extends Authenticatable
{
    [...]
    public function isFollowing($target_id)
    {
        return (bool)$this->follows()->where('target_id', $target_id)->first(['id']);
    }
}
We can now proceed and code the logic for the follow and unfollow actions:
app/Http/Controllers/FollowController.php
class FollowController extends Controller
{
    [...]
    public function follow(User $user)
    {
        if (!Auth::user()->isFollowing($user->id)) {
            // Create a new follow instance for the authenticated user
            Auth::user()->follows()->create([
                'target_id' => $user->id,
            ]);

            return back()->with('success', 'You are now friends with '. $user->name);
        } else {
            return back()->with('error', 'You are already following this person');
        }

    }

    public function unfollow(User $user)
    {
        if (Auth::user()->isFollowing($user->id)) {
            $follow = Auth::user()->follows()->where('target_id', $user->id)->first();
            $follow->delete();

            return back()->with('success', 'You are no longer friends with '. $user->name);
        } else {
            return back()->with('error', 'You are not following this person');
        }
    }
}
Let’s then update the view listing for all the users to have follow and unfollow buttons next to the usernames. Since we want different variations of the button based on the follow status, we’ll make use of the helper function we created. Insert the code block right after the <td> tag displaying the name in our users.index view:
resources/views/users/index.blade.php
[...]
@if (Auth::User()->isFollowing($user->id))
    <td>
        <form action="{{url('unfollow/' . $user->id)}}" method="POST">
            {{ csrf_field() }}
            {{ method_field('DELETE') }}

            <button type="submit" id="delete-follow-{{ $user->target_id }}" class="btn btn-danger">
            <i class="fa fa-btn fa-trash"></i>Unfollow
            </button>
        </form>
    </td>
@else
    <td>
        <form action="{{url('follow/' . $user->id)}}" method="POST">
            {{ csrf_field() }}

            <button type="submit" id="follow-user-{{ $user->id }}" class="btn btn-success">
            <i class="fa fa-btn fa-user"></i>Follow
            </button>
        </form>
    </td>
@endif
[...]
If we now reload the users index page, we should see a view that looks like this:
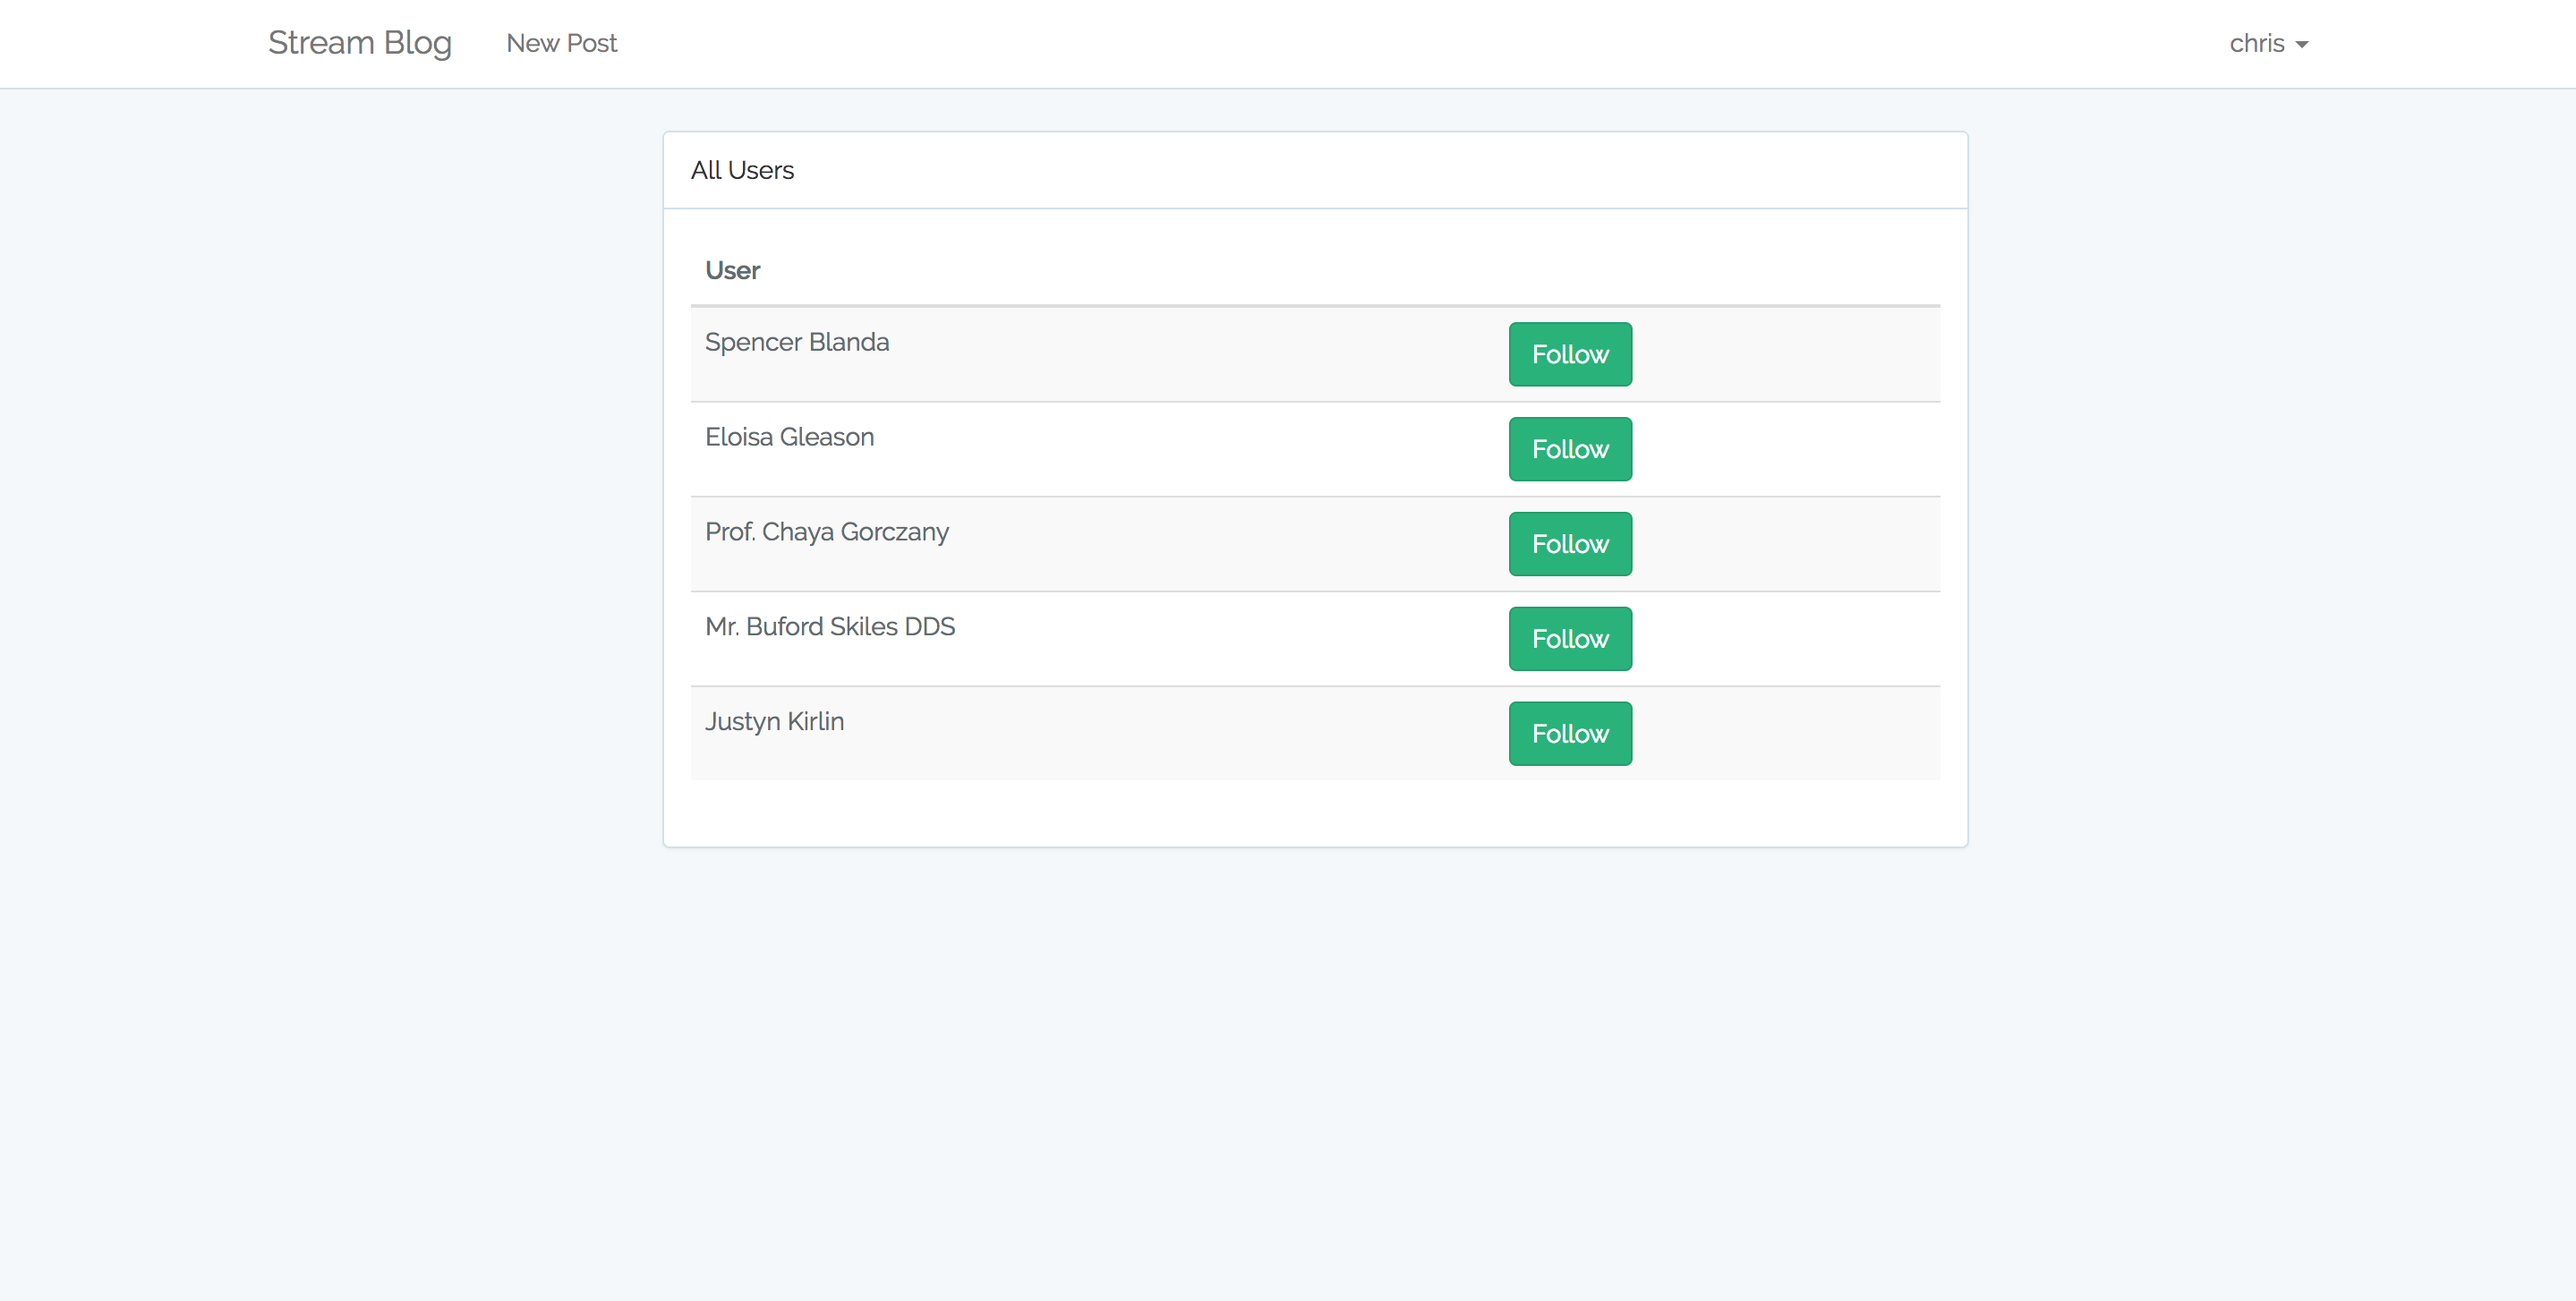
Try following the first person in the list. Notice the color change in the button.
Introducing Stream
Stream will help us get notifications whenever someone we follow performs an action. For this tutorial, we want to be notified whenever they create a new post or follow another user. We also want to get a notification when someone follows us.
Setup
Let’s install it via Composer:
composer require get-stream/stream-laravel
Then, we add GetStream\StreamLaravel\StreamLaravelServiceProvider to the list of providers in config/app.php to register the service:
'providers' => [
  // Other providers
  [...]
        GetStream\StreamLaravel\StreamLaravelServiceProvider::class,
    ],
And also create an alias for it still within config/app.php:
'aliases' => [
  // other aliases
   [...]
        'FeedManager' => 'GetStream\StreamLaravel\Facades\FeedManager',
   ],
We then publish the configuration file by running this command:
php artisan vendor:publish --provider="GetStream\StreamLaravel\StreamLaravelServiceProvider"
This will create the config/stream-laravel.php file. We are supposed to set our credentials in this file once they are created in the Stream Dashboard.
Stream Dashboard
Let’s head over to GetStream.io and create a new application. You can give the app whichever name you want. For the select server location, I chose US East but you can choose the location that is closest to you:
We get the API key, API secret, and API app id once the app has been created. The keys are accessible from the dashboard.
While still on the dashboard, let’s create the feed groups we want for this application. By default, we should create the following:
userfeed which is of typeflat(flat feeds render activities without any grouping and this is the default type of feed in Stream). This feed displays all actions for a certain user.timelinefeed which is also of typeflat. This feed shows what has happened recently.timeline_aggregratedwhich is of typeaggregated(aggregated feeds render activities in a grouped format based on the activity type). This type of feed allows the user to specify an aggregation format.notificationfeed which is of typenotification. Similar to aggregated feeds, however, notifications can be marked as read and you can get a count of the number of unseen and unread notifications.
Stream-Laravel Config File
We should set the received API key, API secret, and API app id in config/stream-laravel.php file in order to communicate with Streams API. We should also set the location for good measure.
Let’s place these keys and their corresponding values in our .env file then load them into our config/stream-laravel.php with the env helper that Laravel provides.
.env
STREAM_KEY=xxxxxxxxxx
STREAM_SECRET=xxxxxxxxxxxxxxxxxxxxxxxx
STREAM_APP_ID=xxxxxx
config/stream-laravel.php
'api_key' => env('STREAM_KEY'),
'api_secret' => env('STREAM_SECRET'),
'api_app_id' => env('STREAM_APP_ID'),
'location' => 'us-east',
This should get us up and running with Stream. Let’s now explore some of the features that come with Stream.
Adding Posts as Activities – Eloquent ORM Integration
Stream-Laravel provides instant integration with Eloquent models – by including the GetStream\StreamLaravel\Eloquent\ActivityTrait, we get automatic tracking of the Post model to user feeds:
app\Post.php
class Post extends Model
{
    use \GetStream\StreamLaravel\Eloquent\ActivityTrait;
    [...]
Every time a Post is created it will be stored in the feed of the user who created it, and when a Post instance is deleted then it will be removed as well.
Automatically!
Let’s test things out by creating a new post. If we now head over to the Stream Dashboard and click on the Explorer tab, we should see a new activity:

I suggest we delete this activity as we’ll be updating our Post model soon, changing the verb to created. As it stands, the verb is app/Post. To delete the activity just check the box next to the activity and a menu with the option to delete the activity will pop up. If we don’t do this, we’ll run into issues later on when rendering feeds.
Conclusion
I must admit that setting up Stream took a while but once done with this, we are in a position to start using the various methods offered by the stream-laravel package to build feeds and notifications. In the next part of this series, we’ll be looking at how to configure our models so that they can be stored in feeds as activities. We will also look at how to get different types of feeds and render them on a view. Stay tuned!
Frequently Asked Questions (FAQs) on Real-Time Laravel Notifications
How can I customize the notification channels in Laravel?
Laravel allows you to customize notification channels according to your application’s requirements. You can specify the channels in the via() method of your notification class. The via() method should return an array of channels the notification should be sent through. For instance, you can use the mail and database channels for a user notification. Here’s an example:public function via($notifiable){
return ['mail', 'database'];}
You can also conditionally add channels based on the notifiable entity’s preferences.
How can I use Laravel’s on-demand notifications?
Laravel’s on-demand notifications allow you to send notifications to entities that are not stored as users of your application, such as a simple email address. You can use the Notification::route() method to specify the delivery channels and the recipient information. Here’s an example:Notification::route('mail', 'taylor@example.com')
->notify(new InvoicePaid($invoice));
In this example, the InvoicePaid notification will be sent to taylor@example.com via the mail channel.
How can I store notifications in the database?
To store notifications in the database, you need to use the database notification channel. First, you need to create a migration for the notifications table. Laravel provides a schema for this table that you can generate using the notifications:table command. After running this command, you can migrate your database. Then, in your notification class, you need to define a toDatabase() or toArray() method that returns an array representing the notification’s data. This array will be JSON encoded and stored in the data column of your notifications table.
How can I send notifications via SMS?
Laravel supports SMS notifications via the Nexmo and Twilio services. To send an SMS notification, you need to configure the nexmo or twilio services in your config/services.php file. Then, in your notification class, you need to define a toNexmo() or toTwilio() method that returns a NexmoMessage or TwilioMessage instance.
How can I schedule notifications in Laravel?
Laravel does not natively support scheduled notifications. However, you can achieve this by scheduling a task that dispatches the notification. You can use Laravel’s task scheduling system to schedule a closure that dispatches the notification. Here’s an example:$schedule->call(function () {
$user = User::find(1);
$user->notify(new InvoicePaid($invoice));})->daily();
In this example, the InvoicePaid notification will be sent to the user with ID 1 every day.
How can I handle notification events?
Laravel dispatches several events during the notification process that you can listen to. These events include NotificationSending, NotificationSent, and NotificationFailed. You can listen to these events in your event service provider and perform actions based on these events.
How can I resend failed notifications?
Laravel provides a retry command that you can use to retry failed notifications. You can use the php artisan queue:retry command followed by the ID of the failed job to retry the notification.
How can I customize the notification’s message?
You can customize the notification’s message by defining a toMail(), toDatabase(), toNexmo(), or toTwilio() method in your notification class. These methods should return a message instance or an array representing the notification’s data.
How can I add an action button to a mail notification?
You can add an action button to a mail notification by using the action() method on a MailMessage instance. The action() method accepts two arguments: the text of the button and the URL the user should be redirected to when the button is clicked.
How can I customize the notification’s subject?
You can customize the notification’s subject by defining a subject() method in your notification class. The subject() method should return the text of the subject.
Chris is a software developer at Andela. He has worked with both Rails and Laravel and blogs to share a few tips. Chris also loves traveling.

Published in
·APIs·CMS & Frameworks·E-Commerce·Frameworks·Laravel·Libraries·PHP·Web Services·January 17, 2017

Published in
·APIs·CMS & Frameworks·Frameworks·Laravel·Libraries·Miscellaneous·PHP·Web Services·June 19, 2017

Published in
·APIs·Authentication·Frameworks·Laravel·Libraries·Patterns & Practices·PHP·Security·Standards·February 17, 2016