Learning new software always seems like a daunting task, especially when it is packed with so many features, as Adobe products always are. Well-designed software is flexible enough to accommodate a vast variety of users and their preferences. Luckily, Adobe products are built similarly to one another, so if you gain a firm grasp on one, then you can navigate your way through others. Illustrator and Photoshop are two Adobe products whose layout and setup are similar, but each program has their own distinct differences. If you are thinking about adding Illustrator to your design arsenal, there are several things that you should know when turning your Photoshop chops into Illustrator skills.
Similarities Between Illustrator and Photoshop
The best way to transition from Photoshop to Illustrator is to find functions that they both have in common, even if they’re named differently. The basic layout of Photoshop and Illustrator are the same. You have the canvas in Photoshop, where you do most of your work. In Illustrator, it is called an artboard, and you can have multiple artboards in one document. In Illustrator, this is handy if you are creating basic storyboards. It also makes it convenient when creating PDFs, because it will save each artboard to its own page. In Photoshop, to change the document size, you change the canvas size, but in Illustrator, you select the Artboard Tool and resize the handles like you would any other resizable box throughout various Adobe programs.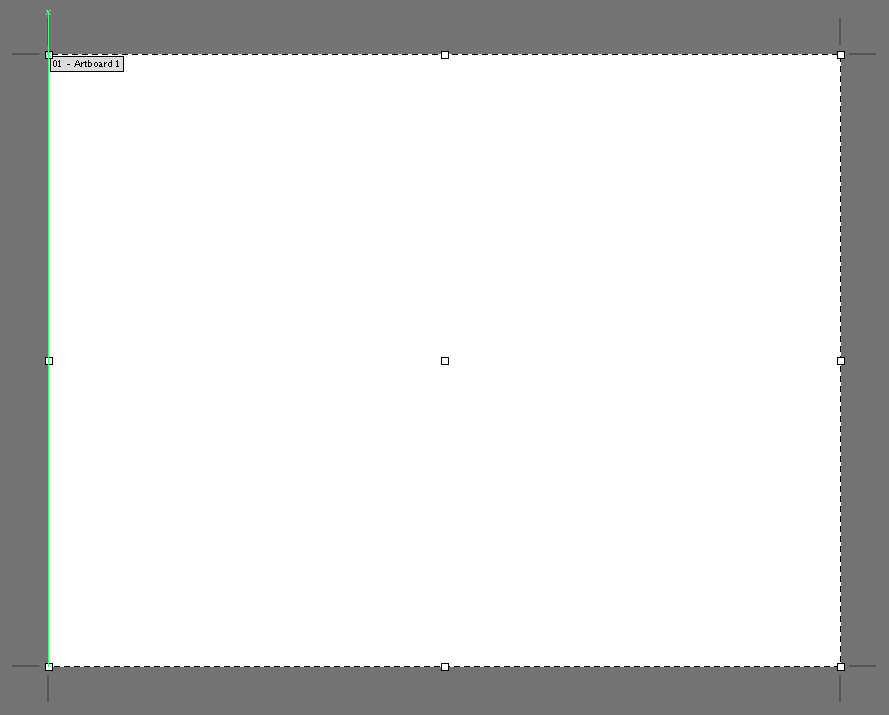 Panels are set up the same in Illustrator as they are in Photoshop. You have the tools available on the left side, and the main sets of panels on the right side. Like Photoshop, they are fully customizable, and you can save and load presets that you have specified.
 Illustrator and Photoshop both use layers in order to stack objects and other parts of your work, so you can organize your work easily. The difference with Illustrator is that it has the additional Appearance Panel as well. This Panel works like the Layers Panel, but it is for each individual shape. It gives you control over how Fills, Strokes, and Effects are stacked. This has a definite affect on the look of your various objects.
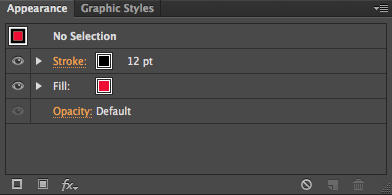
 The Square shown above has a default appearance. Illustrator by default creates a stroke that is centers on the bounding box of an object that you have drawn. The Appearance Panel gives you the ability to rearrange the stacking order, so that the stroke doesn’t eat away from your object, as in the example shown below.

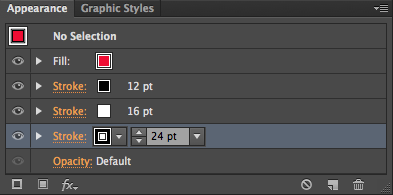
 You can continue to add as many stokes as you’d like, and it is fairly easy to create multiple strokes on one object, with control over each one. Notice the stacking order of the strokes on the box in the example below. You can control the color of the fill or stroke, and the size of the stroke, all from inside of the Appearance Panel.

Filters
Most of the filters from Photoshop are present in Illustrator, from the Artistic set, all the way down to the Stylize and Texture sets. Illustrator does come with its own set of effects, though. These are the same effects that I mentioned before that appear in the Appearance Panel. These effects all do different things, and here is a quick rundown of what they do:3D
Illustrator has its own set of 3D effects, where you can extrude, revolve, and rotate objects in 3D space. Here, you can apply 3D effects to type and other objects that you have created in Illustrator.Convert to Shape
This effect converts your current selection to the specified shape. This will convert a rectangle into a rounded rectangle, etc.Crop Marks
This adds crop marks to graphics that you have created in Illustrator. This is generally used for printing purposes.Distort & Transform
This allows you to distort and manipulate your shapes using various effects and settings, such as pucker & bloat, which pull the edges of your object inward or inflate them outward. Free distort allows you to bend and alter the shape without conventional handles and settings. Roughen adds rough edges to your shapes, making them look rough or distressed, which can be difficult to do by hand.Path
This allows you to offset the path, outline the object, or outline the stroke of an object created in Illustrator.Pathfinder
This has the same settings as the Pathfinder Panel, which allows you to combine, subtract from, and divide shapes you have created in Illustrator.Rasterize
This takes the vector object that you have selected in Illustrator and converts it to raster graphics, based on pixels..Stylize
These effects allow you to add glows, drop shadows, and feather effects to your objects in Illustrator.SVG Filters
This adds Scalable Vector Graphics (SVG) effects to your vector graphics. These don’t always turn out so well on Illustrator’s normal graphics. These are meant more for when you are creating scalable vector graphics for the web using Illustrator.Warp
This set of effects bends vector objects created in Illustrator. The defaults bend objects in Illustrator according to presets, but they all have sliders with values that you can adjust. This is for creating difficult rounded shapes with precision.Building Shapes
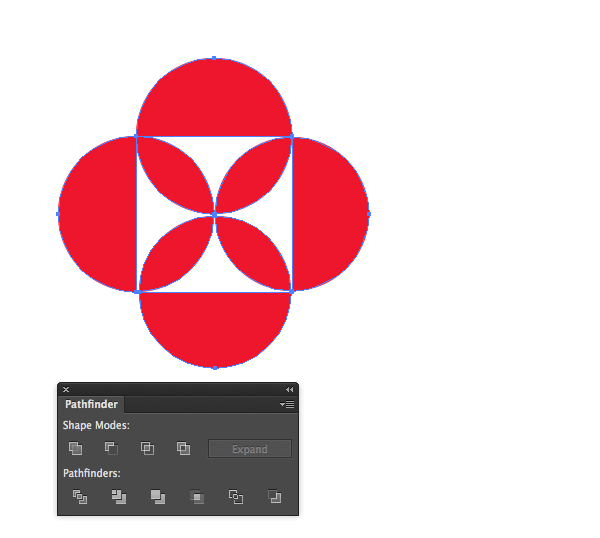
Building shapes in Illustrator is typically easier than when you are working in Photoshop. Photoshop uses paths, and you can add to, subtract from, and manipulate paths using Photoshop’s pen tool. In Illustrator, you can still do all of that, but you can combine shapes using the Pathfinder Panel, and Illustrator’s shape builder tool.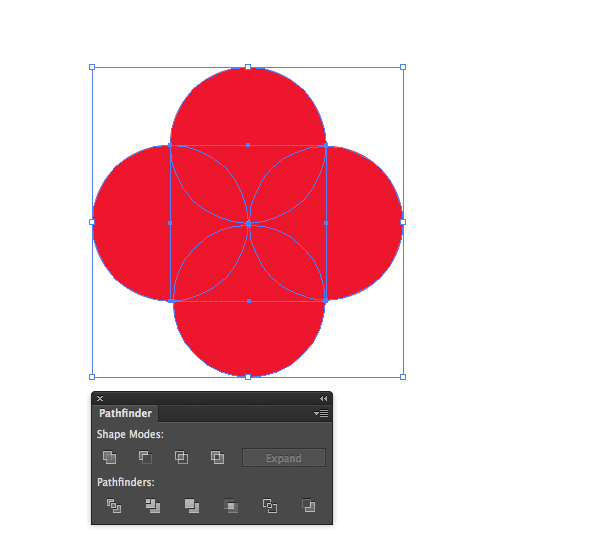 The shapes above are all separate shapes that are overlapping each other. using the Pathfinder Panel, you can click any of these icons to perform different actions. For example, the top-right icon combines all of the selected shapes. The next one over subtracts the top shape from the rest of the shapes. The third icon will get rid of anything that doesn’t overlap. The fourth icon will remove all of the overlapping areas. This is a quick way to position all of your shapes and remove what you don’t need. In Illustrator, it’s quick and easy.
 I clicked the fourth option on the top row to get rid of the overlapping parts of the shapes. When we do this, all of our parts are associated with each other, so now they are grouped together. You can double-click the object to go into an editing mode, where you can manipulate each piece by itself. Then, double-click the canvas to go back to normal mode, where they are all grouped together again.
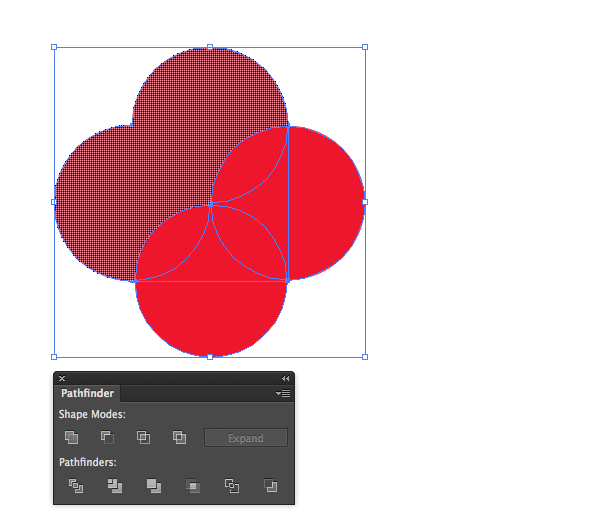 The shape builder tool does essentially the same thing. Click and drag across multiple shapes to combine them into one shape. Once they are combined, their individual paths go away. There is no way to go back to the original shapes unless you undo the last step.You can hold Option/Alt and click on a shape to remove it. I removed the two shapes from the group in the example below, and combined all of the others.
 Another big difference between Illustrator and Photoshop is Illustrator’s gradient mesh tool. That is how Illustrator handles gradients across complex vector shapes. The way that the mesh works depends on the shape of your object and how many anchor points it has. Deselect the object and choose a different color (depending on if it is a highlight or shadow). Then, select the gradient mesh tool and click on the area where you want the highlight to be. Illustrator will determine the mesh depending on the shape at the intersection of its anchor points, as in the example below.
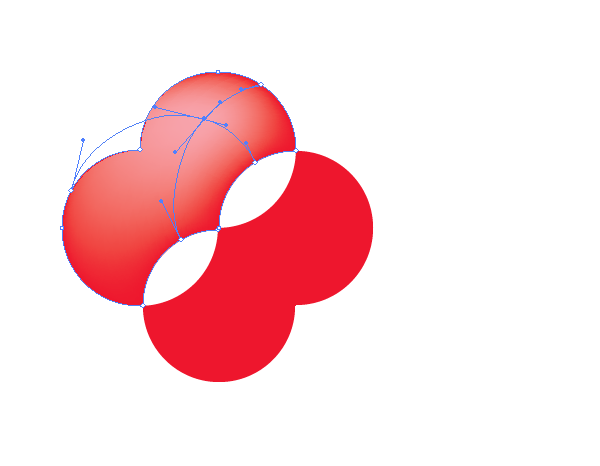 You can manipulate the mesh by moving or altering the anchor points within the mesh itself. This can take some getting used to.
Brushes
Brushes behave differently in Illustrator as well. In Photoshop, brushes are raster paint that aren’t easy to alter once they have been placed on the canvas. However, in Illustrator, each brush stroke is a path. You can select this path, alter it, change the color of the brush stroke, change its thickness, and even its style. Below, I used a watercolor brush and made three separate strokes. After being laid down on the artboard, I could select a path and change the color. I did this for all three brush strokes. Let’s see Photoshop do that!
Conclusion
Making the leap from Photoshop to Illustrator might seem like a daunting task, but if you take a look at the major differences and learn how Illustrator creates its objects and shapes, you can be up and running in no time. After a while, you may find that you can design faster in Illustrator, and then bring those designs into Photoshop to add the finishing touches. You may find that you can flip back and forth between the two programs and create outstanding artwork that may not be easy to do in either program by itself. Have you made the leap from Photoshop to Illustrator? Did you find it difficult? If not, what helped you to make the transition easier? Share your tips in the comments section below.Frequently Asked Questions on Photoshop to Illustrator Transition
What are the key differences between Photoshop and Illustrator?
Photoshop and Illustrator are both Adobe products but they serve different purposes. Photoshop is a raster-based software primarily used for photo editing and manipulation. It works with pixels and is ideal for creating and editing digital and scanned images. Illustrator, on the other hand, is a vector-based software used for creating logos, illustrations, and graphics. It works with mathematical equations to create shapes, so the images can be scaled up or down without losing quality.
Can I use Photoshop skills in Illustrator?
Yes, some skills are transferable between Photoshop and Illustrator. Both programs use similar tools, such as the Pen tool, the Text tool, and the Shape tool. However, the way these tools function can differ between the two programs. For example, the Pen tool in Illustrator is more versatile and can create more precise shapes compared to Photoshop.
How can I import my Photoshop files into Illustrator?
You can easily import your Photoshop files into Illustrator by going to File > Place. Then, select the Photoshop file you want to import. You can choose to link or embed the file. If you choose to link the file, any changes made to the original Photoshop file will be reflected in Illustrator.
Is Illustrator better than Photoshop for logo design?
Illustrator is generally preferred for logo design because it is a vector-based program. This means that the logos created in Illustrator can be scaled to any size without losing quality, which is crucial for logos as they need to be resized for different uses.
Can I create vector graphics in Photoshop?
While Photoshop does have some vector capabilities, it is primarily a raster-based program. This means that it is not ideal for creating vector graphics. Illustrator, on the other hand, is specifically designed for creating vector graphics and provides more precise and flexible tools for this purpose.
How can I improve my Illustrator skills?
The best way to improve your Illustrator skills is through practice. Start by familiarizing yourself with the basic tools and functions of the program. Then, try to recreate simple designs or logos. As you become more comfortable, you can start working on more complex projects. Online tutorials and courses can also be very helpful.
Can I use Illustrator without knowing how to draw?
Yes, you can use Illustrator even if you don’t know how to draw. Illustrator provides a variety of tools that can help you create shapes and designs without the need for freehand drawing. However, having some basic drawing skills can be beneficial in understanding shapes and structures.
What file formats can I export from Illustrator?
Illustrator supports a wide range of file formats for export. These include .ai (Adobe Illustrator), .eps (Encapsulated PostScript), .pdf (Portable Document Format), .svg (Scalable Vector Graphics), .jpg (JPEG), .png (Portable Network Graphics), and .tif (TIFF).
Can I edit text in Illustrator like I do in Photoshop?
Yes, Illustrator has a powerful text editing tool that allows you to manipulate text in various ways. You can change the font, size, color, and spacing of the text. You can also create text paths and shapes, which is something that Photoshop does not offer.
Is Illustrator harder to learn than Photoshop?
The difficulty of learning Illustrator or Photoshop can depend on your previous experience and what you want to achieve with the software. If you are already familiar with Photoshop, you may find some aspects of Illustrator to be similar. However, Illustrator does have a steeper learning curve due to its focus on vector graphics and more complex tools.
 James George
James George is a professional web developer and graphic designer. James is an expert in design, and a professional web developer, with a special interest in WordPress. Founder of Design Crawl, James has been a professional designer since 2005.