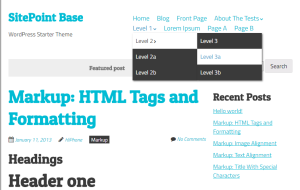
SitePoint recently released a new WordPress base theme. It’s very easy to customize and you can quickly and easily build advanced WordPress themes to suit your needs.
The SitePoint Base Theme gives you full permission to edit and modify the base theme. After downloading this theme, I customized it to build a theme for my WordPress blog. If you’d like to learn more about custom theme development, check out SitePoint’s course Build a Custom WordPress Theme!
There are two different ways to customize this theme:
- Create a child theme.
- Use SitePoint Base Theme to kick off your own awesome theme.
In this tutorial, I am going to explain, how to create a child theme and modify the SitePoint Base theme.
Getting Started
I prefer to use a local WordPress installation to create and test new WordPress themes. A local development environment can make your development workflow much faster and simpler.
I’m using WAMP Server for Windows. You can use any tool of your choice to set up local WordPress development environment. MAMP for MAC, WAMP for Windows, XAMPP and Bitnami are cross platform tools to install WordPress locally.
- Install WordPress locally with WAMP Server
- Download Sitepoint Base Theme
- Download a code editor. I prefer SublimeText.
After setting up a local WordPress installation, run your local WordPress site, install and activate SitePoint base theme.
Open your themes folder and create a new folder name it sitepoint-base-child or anything you like. Create two files in this new child folder.
- style.css
- functions.php
If you do decide to use a child theme with the SitePoint Base Theme, there’s no need to use CSS @import or even enqueue the parent stylesheet. SitePoint Base Theme will automatically enqueue the parent stylesheet for you.
Open style.css file and include the following information:
/*
 Theme Name:   SitePoint Base Child
 Theme URI:    http://www.yoursite.com/
 Description:  A sitepoint-base child theme by Tahir Taous
 Author:       Your Name
 Author URI:   http://www.yoursite.com
 Template:     sitepoint-base
 Text Domain:  sitepoint-base-child
 Version:      1.0.0
*/
Save your changes.
Login to your local WordPress site, go to Appearance > Themes. You should see SitePoint Base Theme there without any screenshot. Activate SitePoint Base Child theme.
Your child theme is ready. Now we can add our own custom styles to suit our own preferences.
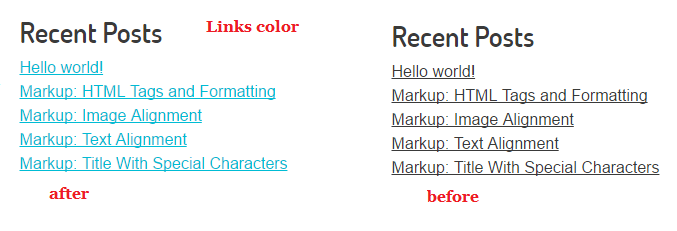
For me, I’d like to change the default color for the links. The default color for the links is #3a3a3a.
Open style.css file and add the following styles to change the default color for links. I also want underline all visited links.
a {color: #00BCD4;}
a:visited {text-decoration: underline;}
You can see the base color for the link in the screenshot below.
Site Title and Description
By default, SitePoint Base Theme does not display your tagline and site title size is quite large. Let’s change the styles for the site title and add support for site description. Copy header.php file from SitePoint Base Theme folder and paste it in your child theme.
Around line 45, you can find following code, which displays our site title and logo. If you upload your custom logo, the site title text will be hidden.
<div class="grid-40 tablet-grid-40 site-title">
  <?php sitepointbase_the_custom_logo() ?>
</div> <!-- /.grid-40.site-title -->
We are now going to replace above code the following new code.
<div class="grid-40 tablet-grid-40">
  <div class="site-title">
    <?php sitepointbase_the_custom_logo() ?>
  </div>
  <p class="site-description">
    <?php bloginfo('description') ?>
  </p>
</div> <!-- /.grid-40.site-title -->
Go to Appearance > Customize > Site Identity and add your site tagline.
Now, if you upload your custom logo, only site title will be hidden not the tagline text.
I’d also like to change the font-size of site-title (64px = 4rem). You can use Chrome Developer Tools to inspect and find all related styles for any element. In your SitePoint Base Theme’s style.css, you can find following styles.
.site-title a {
    color: #3a3a3a;
    font-size: 64px;
    font-size: 4rem;
    text-decoration: none;
}
The size for the site title link is also a little big, so you can reduce the size. Just declare your new styles in child theme’s style.css file. You can also change the color for site title.
.site-title a {
    color: #00BCD4;
    font-size: 32px;
    font-size: 2rem;
}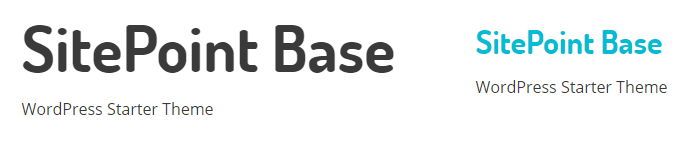
In the screenshot above, you can see new color and the smaller font size for site title.
New Google Font
I am using a heavily customized SitePoint base theme at my personal and WordPress blog. SitePoint Base is a great starting point but there are a few customisations I want to make such as fonts, color for links and the margin between list items.
I’d like to use new Google Fonts for my child theme. You can select and use any Google Font. I am going to use Patua One and Titillium Web. For the titles, SitePoint Base uses ‘Dosis’ font, I have selected ‘Patua One’ for the titles.
For body and other content, SitePoint Base theme is using ‘Open Sans’ Google font but I am going to use ‘Titillium Web’.
Open functions.php file in your child theme and add the following code to register our new Google web fonts (Titillium Web and Patua One).
function sitepoint_base_child_fonts_url() {
$fonts_url = '';

/* Translators: If there are characters in your language that are not
* supported by titillium_web, translate this to 'off'. Do not translate
* into your own language.
*/
$titillium_web = _x( 'on', 'titillium_web font: on or off', 'sitepoint-base-child' );

/* Translators: If there are characters in your language that are not
* supported by Patua One, translate this to 'off'. Do not translate
* into your own language.
*/
$patua_one = _x( 'on', 'Patua One font: on or off', 'sitepoint-base-child' );

if ( 'off' !== $titillium_web || 'off' !== $patua_one ) {
$font_families = array();

if ( 'off' !== $titillium_web ) {
$font_families[] = 'Titillium Web:400,400i,600,900';
}

if ( 'off' !== $patua_one ) {
$font_families[] = 'Patua One:400';
}

$query_args = array(
'family' => urlencode( implode( '|', $font_families ) ),
'subset' => urlencode( 'latin,latin-ext' ),
);

$fonts_url = add_query_arg( $query_args, 'https://fonts.googleapis.com/css' );
}

return esc_url_raw( $fonts_url );
}


// Enqueuing on the front end
function sitepoint_base_child_scripts_styles() {
wp_enqueue_style( 'sitepoint-base-child-fonts', sitepoint_base_child_fonts_url(), array(), null );
}
add_action( 'wp_enqueue_scripts', 'sitepoint_base_child_scripts_styles' );
Next, we need to add the new Google Fonts in the child theme style.css file. Open style.css fine in your child theme and paste the following code.
body, dt, b, strong, strong em, b em, em,
.wp-caption .wp-caption-text,
.gallery-caption,
.entry-caption,
blockquote p, blockquote cite,
.menu-toggle, button, input,
.archive-title,
.page-title,
.entry-content th,
.comment-content th,
.comments-link,
.entry-header address,
.comment-content address,
.entry-header time,
.entry-header address,
.entry-content dt,
.comment-content dt,
.archive-meta,
.comments-area article header time,
form label.error,
#wp-calendar caption,
.nav-menu
{
  font-family: 'Titillium Web', sans-serif;
}

h1, h2, h3, h4, h5, h6,
article.sticky .featured-post,
h1.page-title{
font-family: 'Patua One', cursive;
}
Now save your changes and load the front page of your website. You should see your new Google Fonts in action.
Although, our new Google Fonts are working, we need to modify some styles. The default font-weight is 700 for .nav-menu. See around line 1748 in parent theme’s style.css file. We need to change the default font-weight.
Open child theme’s style.css file and add the following code.
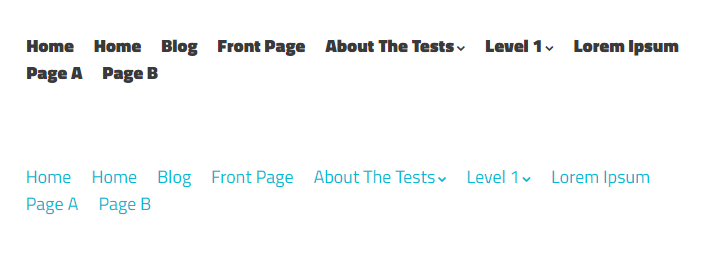
.nav-menu { font-weight: normal;}
.main-small-navigation a, .main-navigation a{color: #00bcd4;}
The default link color main navigation is #3a3a3a but I have changed it to #00bcd4. You can see the changes in the screenshot below.
Some Other Changes
So far, we have changed the default color for links and the main navigation menu link and added two new Google Fonts. Add following styles in your child theme’s style.css file to add padding between drop-down menu items, increase the margin between list items in widget areas and align site tagline center on small screen devices.
.main-navigation ul ul a {padding: .5rem;}

.widget li {margin: .5rem 0;}

@media only screen and (max-width: 519px) {
.site-description{text-align: center;}
}
You can see these changes in the above screenshot.
What’s Next?
In this tutorial, I have explained how you can use a child theme to modify default styles of SitePoint Base Theme, this is just a basic tutorial.
You can even add new navigation menus, custom landing pages, new widget areas, display post excerpt on home-page instead of full post content and more to your child theme. You can even customize default theme to build your own powerful theme.
Additionally, you can also learn to create a new simple template File for a WordPress theme in SitePoint’s Build Your First WordPress Theme mini course, which you can preview below:
If you enjoyed this tutorial, add your comments below and let us know what you’d like to learn more about so you can learn to customize the SitePoint Base theme like a pro.
 Tahir Taous
Tahir Taous is founder of Just Learn WordPress, a training site where you can learn how to create and manage websites with WordPress, WordPress essential training, theme development courses free video tutorials and articles.