When you are looking to generate interest in your products and services on a large platform you know that the best way to do this is by creating a website. Not only must you have a website to accomplish such but you must also have a great design that is not only cohesive but user friendly. Basic knowledge tells us that a website generally features a Home, About and Contact page but that doesn’t mean it has to stop there. If you are a creative agency trying to market your service you know that your site must appeal to potential customers and certain pages are key. One page that you will definitely want to have is a page showcasing your team. The ‘Meet the Team’ page is not a new concept by any means. A lot of agencies tend to have one to give a little insight into the people who help make the agency a reality. Your ‘Meet the Team’ page can be composed of different elements and can essentially be your ‘About’ page. You can showcase not only thee workers and founders but you can also offer links to the social networks of these members. Adding a little about each person is up to your own discretion but for the most part your page should consist of each team member’s photo and their title. In today’s tutorial I am going to walk you through creating your own mockup design for a ‘Meet the Team’ page, so power up your Photoshop and let’s get started.
Resources Needed
City Building Office #1 Office #2 Woman #1 Woman # 2 Man #1 Man #2Step 1 New Canvas
Start by opening up Photoshop and creating a new canvas. Give your canvas the dimensions of 1360 x 2000px and press OK for your canvas to appear.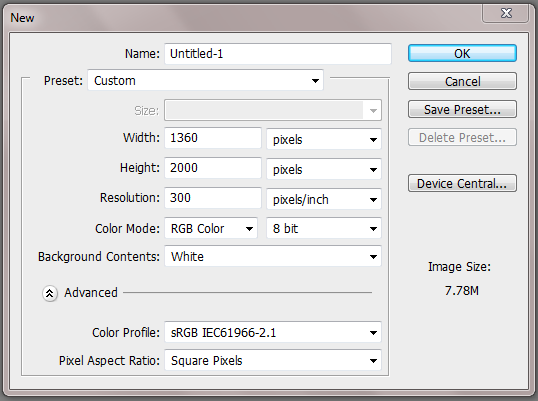
Step 2 Background Color
For this design I am going for a more business approach for the design agency so will be using clean colors. Create a new layer and call this “background” fill this layer with the color #e1e1e1.
Step 3 Guidelines
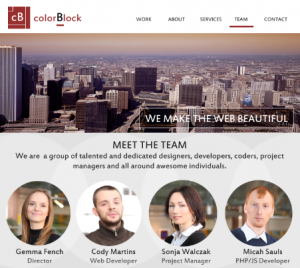
We want to make sure our elements are given enough space so we will create guidelines. To create guidelines you go to View > New Guide and then input the correct dimensions. Make sure that you put in “px” for pixels and not “in” Follow the dimensions below to place your guidelines in the right directions: Header: Horizontal; 150px Image Box: Horizontal; 600px Members: Horizontal; 1215px Banner: Horizontal; 1455px Images: Horizontal; 1895px Your image should look like this.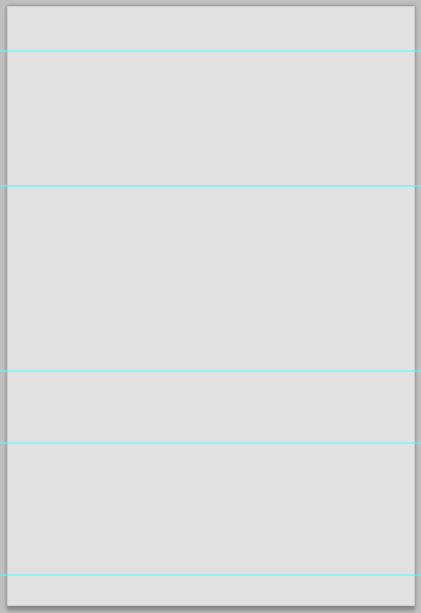
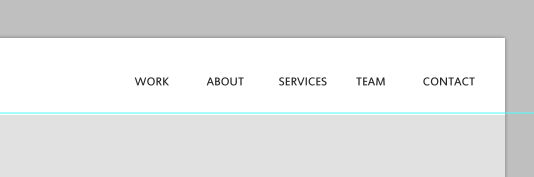
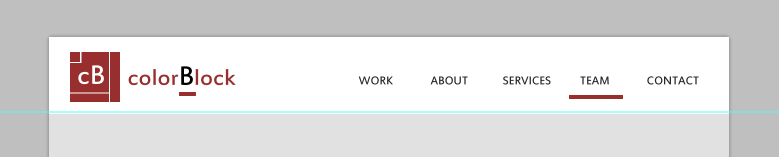
Step 4 Header
Now that we have our guidelines in place we can start with our header. Create a new layer and name it “header”. Use the Rectangular Marquee Tool to select the designated section and ill it in with #ffffff.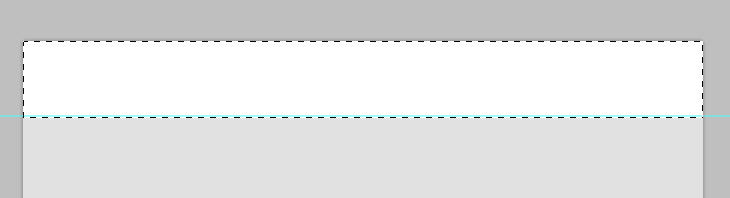 Select the typeface “Estrangelo Edessa” and make the font size 6pts. Make sure your caps lock is on before you switch to the color #282828 and type out your navigation. Set your navigation on the right side of your header.
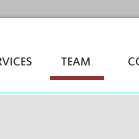
 Create a new layer called “nav marker” and with #982e2e create a skinny rectangle under the word TEAM.
Step 5 Logo
With the same color that you used to make the navigation marker make a square in the left portion of the header.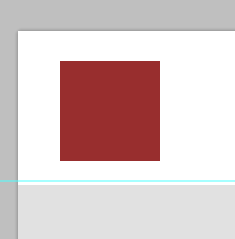 Use the Rectangular Marquee Tool to remove sections out of the square by selecting and deleting.
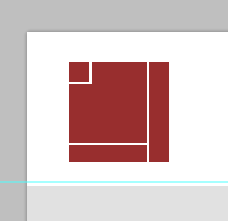 Add your desired letters into your box to create your logo. In this case I am using a lowercase “c” and capital “b”.
 Finish your logo by writing out the agency’s name beside the logo image.
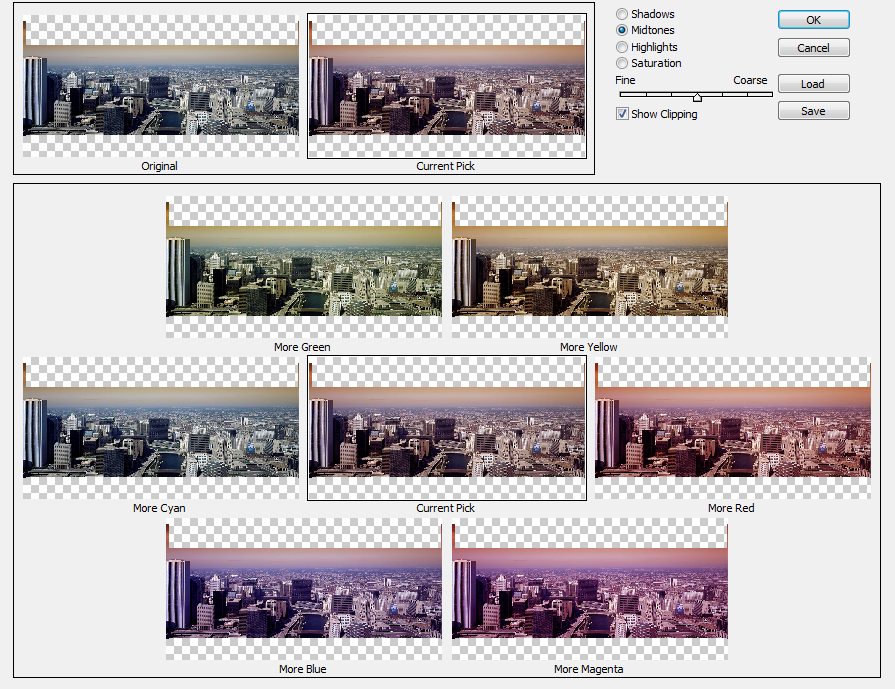
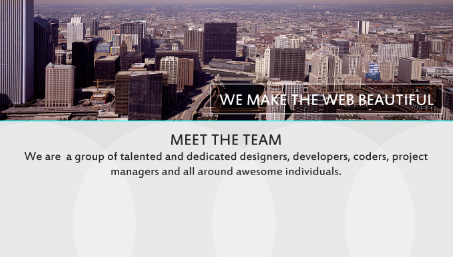
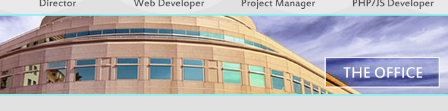
Step 6 City Image
Open up the photo of the city so that you can copy and paste it into the area just under the header. Notice that you will need to crop the image for it to fit inside. Go to Image > Adjustments > Variations and click More Red before pressing OK.
 Create a black rectangle in the bottom right hand corner of your image. Change the layer mode to Soft Light and add 4px white stroke with 45% opacity around it by accessing the Blending Options menu.
 Once that is done you can type in your desired text on top op of the black box.

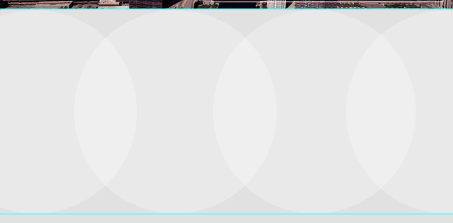
Step 7 Member Box
We are going to keep the member section the same color as our background but we want to add a design. To create a design first make a white circle the height of the section and change the layer mode to Soft Light and drop the opacity to 50%.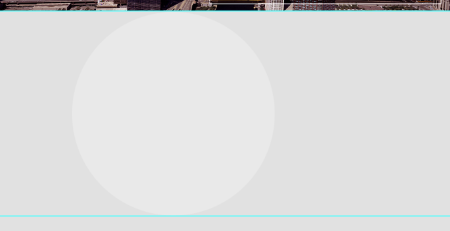 Now duplicate the layer three times and overlap the circles like you would a Venn-Diagram.
 Under the image of the city you want to add your “Meet the Team” text just like I have done.
 Add in the images of your team members by either using the Rectangular or Circular Tool to cut out a cropped portion of their heads and shoulders. The images used are Man #1, Man 2, Woman #1 and Woman #2.
 Finish by adding in the name of each member and their title.

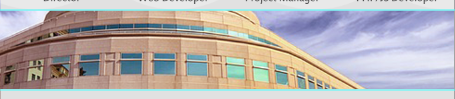
Step 8 Banner
Open up the building image and select the middle portion of it excluding the tree. Copy your selection and paste it in the area that is designated for your banner. Resize as necessary.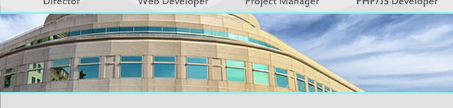 Go to Image > Adjustments > Variations and click More Red before pressing OK.
Step 9 Banner Text
Duplicate the black box that you created for your city image. Place it in the lower right hand corner of your new banner and make it smaller. Duplicate the layer so that the box appears slightly darker.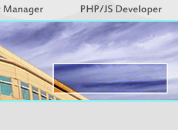 Now that your box is in place, type in your text, in this case “THE OFFICE” in white.
Step 10 Office Images
Open up your office images and the building image and copy them to your canvas. Scale them down as needed so that they are evenly spaced apart.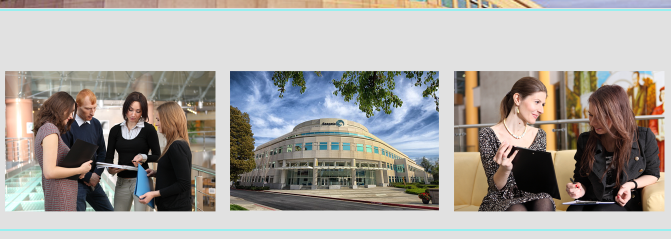 You can now add any information about the office just above your images just as I have done.

Step 11 Footer
Create a new layer and name it “footer”. Change your foreground color to #444444 and with the Rectangular Marquee Tool create your footer and fill it in. Add your navigation menu to the footer but change the color to #ffffff.
 Finish your footer by adding your copyright information and any other desired images and text.
 Download the PSD file
Conclusion
There are many ways in which you can design your Meet the Team page, there is no one solution. When you’re designing your Meet the Team page remember that you want to create an eye-catching design. Make sure that you allow yourself enough breathing room so that your images and text do not appear cramped and of course experiment with layout possibilities.Frequently Asked Questions (FAQs) about Creating a ‘Meet the Team’ Page
What are some creative ideas for a ‘Meet the Team’ page?
There are numerous creative ideas you can implement on your ‘Meet the Team’ page. You can use fun and quirky headshots instead of formal ones, or include interesting facts about each team member. You can also use interactive elements like hover effects, animations, or clickable profiles that reveal more information about each team member. The key is to reflect your company’s culture and values through this page.
How can I make my ‘Meet the Team’ page more engaging?
To make your ‘Meet the Team’ page more engaging, consider adding interactive elements such as videos, animations, or clickable profiles. You can also include personal quotes or fun facts about each team member to make the page more personable and relatable. Additionally, ensure the page is visually appealing with a clean layout and high-quality images.
What information should I include in each team member’s profile?
Each team member’s profile should include their name, job title, and a brief description of their role and responsibilities. You can also include their professional background, skills, and achievements. To make the profile more personal, consider adding hobbies, interests, or fun facts.
How can I ensure my ‘Meet the Team’ page reflects my company’s culture?
Your ‘Meet the Team’ page should be a reflection of your company’s culture and values. This can be achieved through the tone of the content, the design of the page, and the type of information you include about each team member. For example, if your company values creativity and innovation, you might choose a unique and creative layout for the page and include information about each team member’s creative pursuits or innovative ideas.
How often should I update my ‘Meet the Team’ page?
Your ‘Meet the Team’ page should be updated regularly to ensure it accurately represents your current team. This includes adding new team members when they join, updating existing profiles as roles or responsibilities change, and removing profiles of team members who have left the company.
Can I include social media links on my ‘Meet the Team’ page?
Yes, including social media links on your ‘Meet the Team’ page can be a great way to further connect with your audience. It allows visitors to engage with your team members on a more personal level and gain a better understanding of their personalities and interests.
What are some common mistakes to avoid when creating a ‘Meet the Team’ page?
Some common mistakes to avoid include using low-quality images, writing generic or impersonal descriptions, and not updating the page regularly. It’s also important to avoid making the page too cluttered or difficult to navigate.
How can I make my ‘Meet the Team’ page more SEO-friendly?
To make your ‘Meet the Team’ page more SEO-friendly, ensure you use relevant keywords in your content, include alt text for images, and use proper heading tags. You can also include links to other relevant pages on your website to improve internal linking.
Should I include contact information on my ‘Meet the Team’ page?
Including contact information on your ‘Meet the Team’ page can be beneficial as it provides visitors with a direct way to get in touch with your team. This could be a general contact email or specific contact information for each team member, depending on your preference and the size of your team.
How can I measure the success of my ‘Meet the Team’ page?
You can measure the success of your ‘Meet the Team’ page by tracking metrics such as page views, time spent on the page, and the bounce rate. You can also track any actions taken on the page, such as clicks on social media links or contact information.
 Gabrielle Gosha
Gabrielle is a creative type who specializes in graphic design, animation and photography.