Badges play a vital role when it comes to validating a brand, a company, or a credential. But, it should be done tactfully, as garnering credibility doesn’t come from ostentatious displays, which can often have the opposite of the intended effect. Badge design should be subtle but creative, distinct, and visually appealing to foster the instant recognition and clout that you’re looking for.
In this tutorial, I’ll walk you through the process of designing a badge in Adobe Illustrator. We’ll use various shape tools, the pen tool, the type tool, and few other options from the effects menu to achieve the final result. I hope you get some inspiration for your own badge designing. Let’s get started!
Resources:
Free Minimalist Textures
Birch Std Font
Seaside Resort NF Font
Abraham Lincoln Font
Channel Slanted 2 Font
Final result: (Downloaded the completed Illustrator file.)

Step 1
Create a new document in Adobe Illustrator with a 600px width and a 500px height.

Step 2
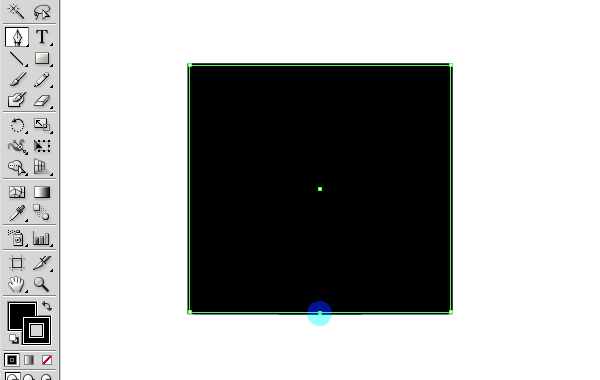
First of all, we’ll draw the basic shape of our badge. Pick a dark gray (#231F20) as the fill and stroke color. Choose a 3pt stroke weight from the top control bar. Now, select the rectangle tool and click the canvas to view the options window. Enter 185px for the width and 175px for the height and hit “OK” to get a rectangle. Label this layer as “Badge”.

Step 3
Now, add an anchor point at bottom midpoint of the rectangle using the pen tool (“P”).
Select the direct selection tool (“A”) and drag this new anchor point downward to get the desired length you want.

Step 4
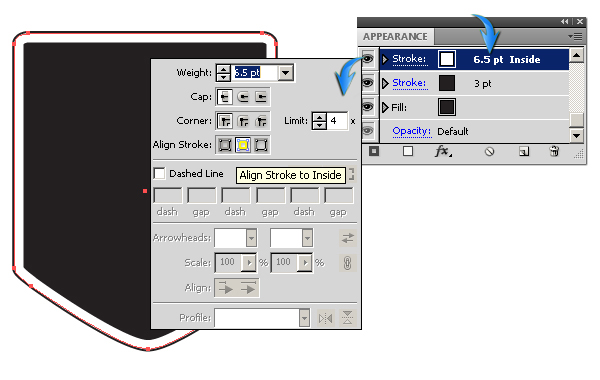
I want to make the badge corners rounded. To accomplish this, select the badge layer by clicking on the ring-shaped target present at right side of the respective layer. Now, go to “Effect” > “Stylize” > “Round Corners” and enter an 8px radius.

Step 5
Next, we’ll add few strokes to the badge to give it a nice frame. Select the badge layer and go to “Window” > “Appearance” or press “Shift + F6” to open the Appearance window. Double-click on the contents to view its items. Now, click on the stroke to select it and hit the options square present at the top-right corner of the Appearance panel. Choose “Add New Stroke” to get a new stroke above the previous one. Now, change the color of the new stroke to white and open its stroke panel. Make two adjustments here: increase its weight to “6.5pt” and choose “Align Stroke to Inside”.
Step 6
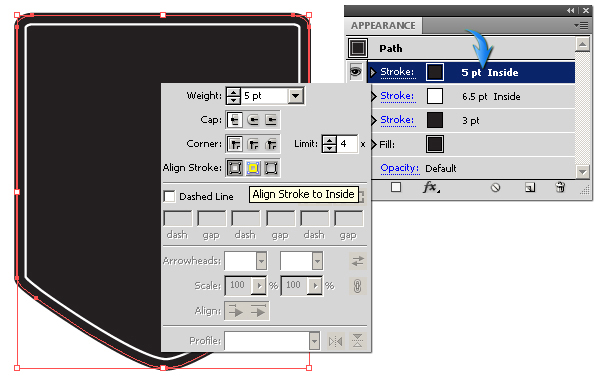
Add another new stroke above the previous two. Change its color to black and within the stroke panel select a 5pt weight. Make sure it is aligned inside like in Step 5.
Step 7
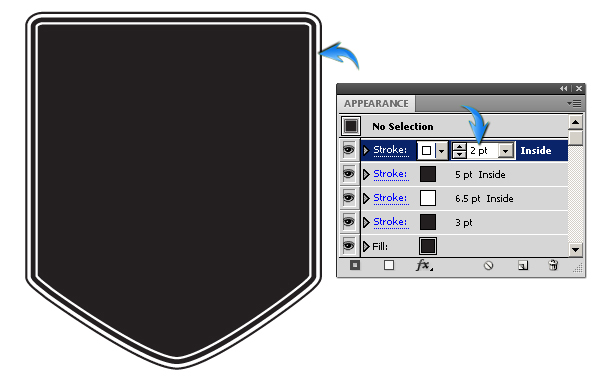
Add a new stroke above the rest and change its color to white. Select a 2pt weight and again choose “Align stroke to inside” to get the effect shown below.
Step 8
Next, we’ll make a ribbon for the badge. Pick #F41616 as your fill color and choose a white stroke color. Choose a 1pt weight stroke from top control bar. Now, select the rectangle tool and click on the canvas to open the rectangle options window. Enter 195px for your width and 40px for your height and press “OK”. This will be the ribbon’s front; position it as shown below.
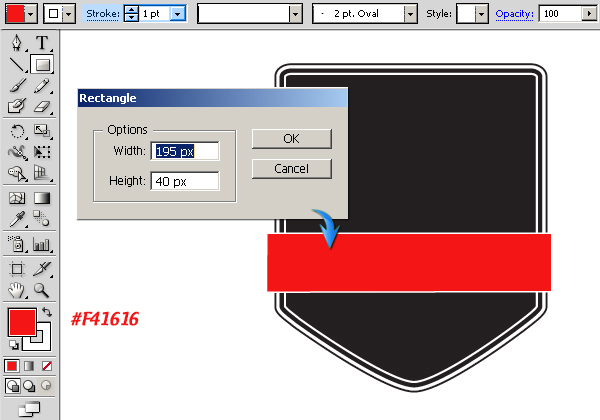
Duplicate this rectangle; change its fill color to black and set the stroke to “none”. Place it below the original ribbon layer, drag it 1-2 steps downwards, and increase its width a bit using the selection tool (“V”).

Step 9
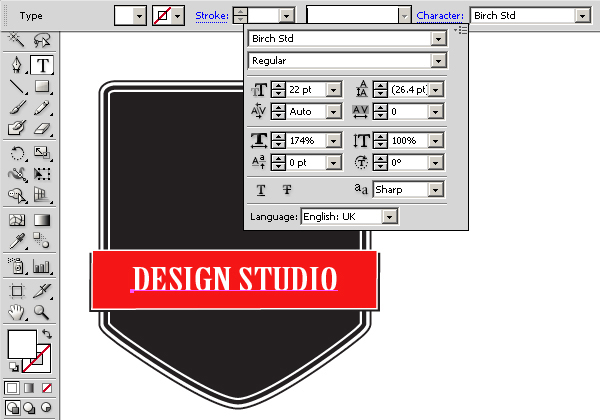
Now, select the type tool (“T”) to add text over the ribbon. We’ll use a white fill color with “none” as the stroke and then we’ll type in the desired text. I’ve used “Birch Std” font here. You can adjust font settings using the character panel.
Step 10
To make text shadow, duplicate the text layer and change the original layer fill color to black. Drag it one step downward and towards the right using the selection tool (“V”).
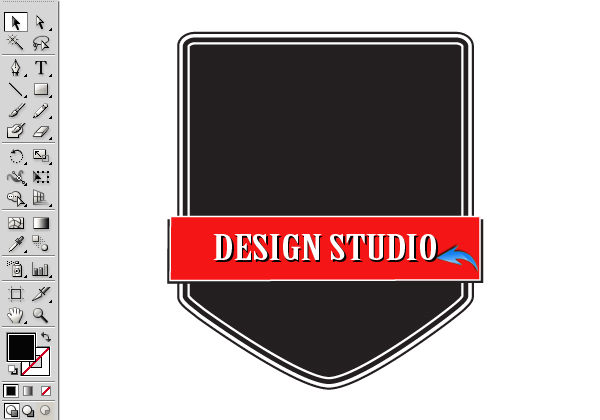
Step 11
Draw a thin rectangle horizontally with a white fill color, make its shadow using the same techniques that we employed for the text, and place it over the left side of the ribbon. Duplicate both rectangles and position them over the ribbon’s right side. Look below for clarity.

Step 12
Next, we’ll make ribbon’s sides. Pick #ED1515 as your fill color and select a white stroke (1pt weight). Select the pen tool (“P”) to draw the shape shown below. Place it below the ribbon’s frontmost layers.
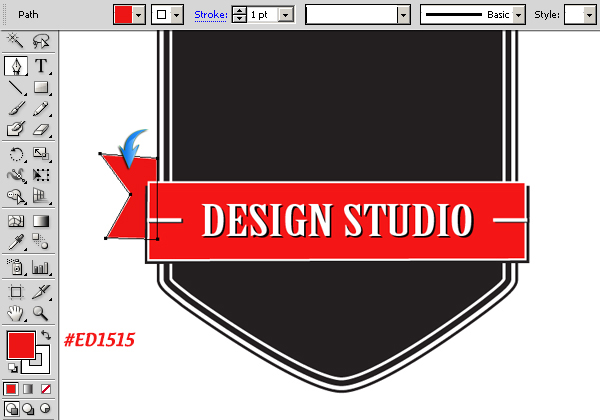
Create its shadow and drag it two steps downwards.

Step 13
Duplicate ribbon’s side and its shadow layers, select them, and go to “Object” > “Transform” > “Reflect”. Reflect vertically and position them behind the right side of the ribbon.

Step 14
Create a new layer above the rest. Pick white as your fill color and type in the title text using the type tool (“T”). I’ve used “Seaside Resort NF” font here.

Step 15
Select the title layer and go to “Effect” > “Warp” > “Arc”. Drag the bend slider to 26% and press “OK”. You can readjust the Arc settings anytime by editing it in the Appearance panel (“Shift + F6”).

Step 16
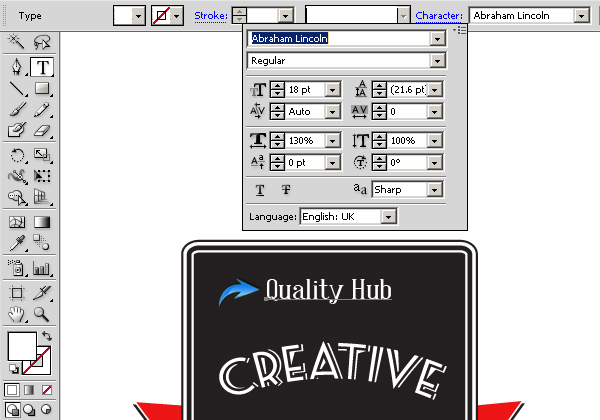
Now, we’ll add more text above the title. I’ve used “Abraham Lincoln” font with the settings shown below.
Step 17
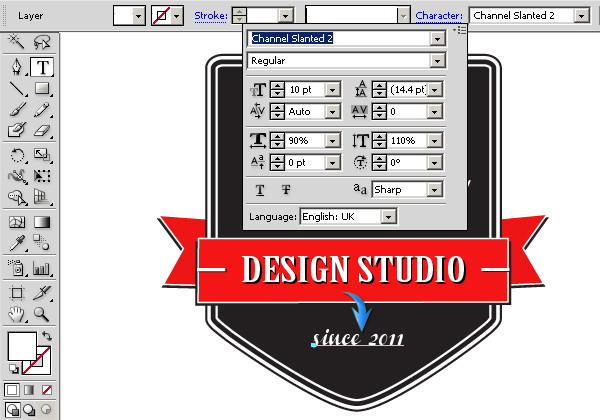
For the text below the ribbon, I’ve used “Channel Slanted 2” font with the following settings.
Step 18
Next, draw the triangular shape shown below using the pen tool with a white fill color. Resize and position it along the sides of the top and bottom text using the selection tool (“V”).

Step 19
Now we’ll decorate the title text. Draw a thin white rectangle above the rest of the layers. Set its fill color to “none” and give it a 1pt white stroke. Now, select this layer and edit the stroke panel. Check the Dashed line option and enter 4pt for dash and 4pt for gap to get the intended stitched effect.

Step 20
Select this stitched layer and apply the following settings for arc on it to align it with our title text.

Duplicate the stitched layer and increase its size to place it above the title text.
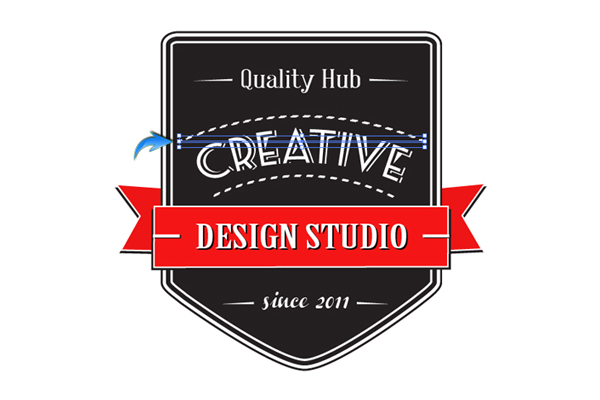
Final result:
That’s it! I Hope you enjoyed the creation of this badge and learned something useful. I’ll be waiting for your feedback.
 Anum Khan
Anum is Web and Graphic designer. Addicted to Photoshop and crazy for pixel perfection. She is also an active blogger, sharing her passions, skills and creative details on her blog Websoulz. She loves to connect with the community, sharing the latest design gossips and rolling her eyes on boring trends.


