
For the uninitiated, Wine (Wine Is Not an Emulator) is “a compatibility layer capable of running Windows applications on several POSIX-compliant operating systems, such as Linux, Mac OSX, and BSD.” It’s called “Not an Emulator” for a reason – instead of simulating an entire operating system in a virtual machine, it translates API calls in real time, making it possible to support demanding processes like 3D games and HD video.
Unfortunately, there is a downside to not running Windows inside a virtual machine: compatibility. Closed-source Windows libraries must be reverse-engineered in order to build matching POSIX API functions. As a result, there are still quite a few gaps in Wine’s library implementations. Many programs exhibit unusual behavior or seem to crash unpredictably.
But new applications are being supported all the time. WineHQ maintains a database of Wine compatiblity called AppDB. Here is the AppDB page for Adobe Photoshop CS6 If you look at the bottom, you can see a table labeled “Test Results.” A rating is associated with each result: Gold, Platinum, Silver, Bronze, or Garbage.
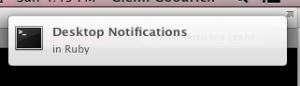
Wouldn’t it be great if you could just receive desktop notifications whenever new wine test results are submitted for your favorite apps?
It turns out that, with Ruby, you can quite easily.
Five things will be needed to accomplish this:
- Notification server to draw notifications on the screen
- Notification client compatible with the server
- Client bindings for Ruby
- Libraries for HTTP communication and HTML parsing
- A way to to make a daemon out of a Ruby script
There seem to be two big players in desktop notification right now: freedesktop and Growl. When it comes to which one you will want to use, the short of it is this:
- freedesktop – Linux / BSD
- Growl – Mac OS X / Windows
Freedesktop
Freedesktop (GNOME) notifications are described in the Desktop Notifications Specification. These notifications are communicated via D-Bus, a popular interprocess communication protocol in the POSIX world.
The GNOME desktop environment is not required to use freedesktop notifications. All you need is an implementation of D-Bus and the Desktop Notifications Specification. There are many servers from which to choose.
The archlinux wiki has an excellent page on Libnotify and some compatible notification servers.
Depending on your environment, you might already have a freedesktop notification server installed. An easy way to tell is to use the notify-send command. Depending on your distribution, you might need to install it with your package manager.
$ notify-send "Hello" "World" -t 2000For this tutorial, I used the dunst notification server. It’s lightweight and minimalistic, pairing well with window managers like dwm. One of the things I really liked about dunst is that notifications are drawn on top of everything else. For example, you can play a game or watch a movie, and notifications will pop up without minimizing the window.
Dunst is fairly popular, so it should be available through your package manager. In addition to the executable binary, you will need a D-Bus service file to start it on demand. Your package manager should create this for you, but if it doesn’t you will need to add org.knopwob.dunst.service to /usr/share/dbus-1/services with these contents:
[D-BUS Service]
Name=org.freedesktop.Notifications
Exec=/usr/bin/dunst
The appearance of dunst notifications can be configured using a dunstrc file. Here is my ~/.config/dunst/dunstrc:
[global]
    font = "Monospace 8"
    allow_markup = yes
    format = "<b>%s %p</b>\n%b"
    sort = yes
    indicate_hidden = true
    # geometry = "x5"
    idle_threshold = 0
    geometry = "300x5-20+20"
    alignment = left
    show_age_threshold = 10
    sticky_history = yes
    follow = mouse
    word_wrap = yes
    separator_height = 2
    padding = 20
    horizontal_padding = 10
    separator_color = frame
    startup_notification = true
    dmenu = "/usr/bin/dmenu -p dunst: -nb #FFFFFF -nf #000000 -sb #94DBFF -sf #000000"
    browser = firefox

[frame]
    width = 3
    color = "#000000"

[shortcuts]
    close = ctrl+space
    close_all = ctrl+shift+space
    history = ctrl+grave
    context = ctrl+shift+period

[urgency_low]
    background = "#ffffff"
    foreground = "#000000"
    timeout = 30

[urgency_normal]
    background = "107FC9"
    foreground = "#000000"
    timeout = 45

[urgency_critical]
    background = "#ff9999"
    foreground = "#000000"
    timeout = 0
Dunst seems to read this file once upon starting. If you would like to make changes and then see them in your notifications, you will need to kill dunst. If dunst is installed as a D-Bus service on your system, you will not need to restart it in the shell.
$ killall dunstWith Dunst installed, you have a way to draw notifications on the screen, but you still need a way to tell it what to say.
Libnotify implements the client side of the Freedesktop notifications. In order to use it, you will need both the binaries for your OS and the Ruby bindings. There is more than one gem available for the Ruby bindings, but the one that worked for me was libnotify:
$ gem install libnotify --version 0.8.1Once everything is installed, you can test your notification server and libnotify installation with the canonical hello world:
require 'libnotify'
Libnotify.show(:summary => "Hello", :body => "World", :timeout => 2.5)
Note: When I started this tutorial, notify-send seemed to create unstyled notifications, while libnotify worked properly (both work now). If making changes to your dunstrc doesn’t seem to be doing anything, make sure you try libnotify before giving up.
Growl
Unlike GNOME notifications, Growl does not use an interprocess communication protocol like D-BUS. Instead, it uses GNTP (Growl Network Transport Protocol), which runs on top of TCP. There are two big advantages to this:
- Platform independence
- Growl can receive notifications from remote clients
Growl notification servers are available for every major platform. Want to get a pop-up on your Windows machine when that Linux node finishes processing? Then Growl is the way to go.
- Growl – the original for Mac OS X
- Growl for Windows – seems to be free, unlike the OS X version
- growl-for-linux – also free
On the client side, I found a few gems.
ruby-growl comes with a “growl” executable that you can use to test your Growl server. It successfully worked with growl-for-linux (gol) on my system.
$ gem install ruby-growl --version 4.0
$ gol &
$ growl -H localhost -m "hello world"
#!/usr/bin/env ruby
require 'ruby-growl'
notif = Growl.new "localhost", "ruby-growl", "GNTP"
notif.notify("ruby-growl notification", "Hello World", "Greetings!")Mac OS X
In addition to Growl, if you have Mac OS X 10.8 (Mountain Lion) or newer, Mac OS X User Notifications are available to you. terminal-notifier is a client for the native notification server.
$ gem install terminal-notifier --version 1.4.2
$ terminal-notifier -title "Hello" -message "World"
require 'terminal-notifier'
TerminalNotifier.notify('Hello World', :title => 'Ruby',
:subtitle => 'Programming Language')Forking Matte Daemon
Once you get notifications working on your system, it’s time to create a daemon that shows them periodically. Thanks to the handy daemons gem, it’s easy to build daemons with Ruby.
$ gem install daemons --version 1.1.9The daemons gem makes it possible to write a script that can be issued start and stop commands. To do this, first you would need to write your actual daemon – the program running the infinite loop in the background. It might look like this:
# matte_daemon.rb
# Do nothing, sleep every 10 seconds
loop do
  sleep(10)
end
Next, you would write the wrapper script to control the daemon.
#!/usr/bin/env ruby
# matte_controller
require 'daemons'

Daemons.run('matte_daemon.rb')
Now it can be issued start and stop commands.
$ ruby matte_controller start
$ ruby matte_controller restart
$ ruby matte_controller stop
Of course, with execution permissions, you could place the controller in your PATH and execute it from anywhere – more like a real daemon. This is why I have left off the .rb extension for controllers in this tutorial.
$ matte_controller startA More Interesting Daemon
With what has been covered so far, it’s easy to create a funny popup daemon using libnotify.
# annoying_daemon.rb
require 'libnotify'

adv = ["basically", "just", "entirely", "practically"]
nouns = ["Doctors", "Lawyers", "Dermatologists", "Ruby Consultants"]
adj = ["angry", "mad", "furious", "outraged", "livid"]
poss = ["her", "his", "area man's", "this mom's"]

# Show a 3-second notification every 10 seconds
loop do
  annoy_str = "They're #{adv.sample} #{adj.sample} about #{poss.sample} secret"
  Libnotify.show(:summary => nouns.sample,
                  :body => annoy_str,
                  :timeout => 3)
  sleep(10)
end
Scraping Wine Test Results
Dates
If you look at an AppDB entry, you’ll see that wine test dates are in the form “MMM DD YYY.” Since the goal is to see a notification when a new test result is submitted, Ruby will need to understand dates like this internally in order to compare them. Fortunately, Ruby provides Date#parse which makes it easy to convert date strings into Date objects.
require 'date'
test_date = Date.parse('Aug 22 2013')
# => #<Date: 2013-08-22 ((2456527j,0s,0n),+0s,2299161j)>
Once dates have been processed from text into Date objects, they can be properly compared. This is how easy it is to compare the previous date with another, Aug 22 2012:
first_date = Date.parse('Aug 22 2013')
second_date = Date.parse('Aug 22 2012')
first_date > second_date
# => true
Scraping Dates from HTML
Web scraping always involves at least two things:
- Sending HTTP requests and extracting the HTML from HTTP responses
- Parsing the HTML to navigate the DOM
Ruby ships with open-uri for HTTP. For serious scraping, you will probably want to find a more optimal alternative, but it works for this tutorial. For parsing the html, Nokogiri is a popular gem.
$ gem install nokogiri --version 1.6.0Once Nokogiri is installed, you can start parsing through an AppDB test result page.
require 'open-uri'
require 'nokogiri'
require 'date'

url = "http://appdb.winehq.org/objectManager.php?&sClass=version&iId=25607"
doc = Nokogiri::HTML(open(url))
Nokogiri can use CSS selectors to navigate the DOM. As of this writing, AppDB test results are listed in a table with the class “historyTable.” This function call will return all of the row elements (
) in the table:result_rows = doc.css(".historyTable tr")Since you only need the latest test result, you just need the second row in the array (the first row is the header row).
latest_result_row = result_rows[1]Now that the first test result row is selected, you can get an array of column elements (
).latest_result_columns = latest_result_row.css("td")And if you look at an AppDB results table, you can see the test_date is the 3rd column, so it can be accessed like this:
test_date_text = latest_result_columns[2].text
test_date = Date.parse(test_date_text)
And there you go. Here is a full script to get the latest test data for any valid wine app id:
#!/usr/bin/env ruby
require 'open-uri'
require 'nokogiri'
require 'date'

app_id = ARGV[0]
app_url = "http://appdb.winehq.org/objectManager.php?sClass=version&iId=#{app_id}"

doc = Nokogiri::HTML(open(app_url))

# Get app name
name = doc.css("[text()*='Name']")[0].parent.next_element.text

# Get latest test data
result_rows = doc.css(".historyTable tr")
latest_result = result_rows[1]
latest_columns = latest_result.css("td")
distro = latest_columns[1].text
test_date = Date.parse(latest_columns[2].text)
wine_version = latest_columns[3].text
rating = latest_columns[6].text

puts "name:   #{name}"
puts "distro: #{distro}"
puts "date:   #{test_date}"
puts "wine:   #{wine_version}"
puts "rating: #{rating}"
$ ruby latest_test_data.rb 25823
name: EVE Online
distro: Ubuntu 13.04 "Raring" x86_64 (+ variants like Kubuntu)
date: 2013-06-30
wine: 1.6-rc4
rating: Silver Storing Dates
The notification system will need to store test result dates somewhere in order to know whether a given test result is newer than the last one it saw. A simple key-value store can do the job nicely.
Moneta is a universal interface to key-value stores. It supports almost every back-end available, and it could not be easier to use.
$ gem install moneta --version 0.7.19
$ gem install daybreak --version 0.3.0
The back-end doesn’t really matter for this project, but in this case I used Daybreak. Daybreak is an excellent back-end for Moneta for a couple of reasons. First, it’s extremely fast, but more importantly, it doesn’t involve managing another process like Redis or MongoDB. This will make things much simpler. Here is how you would go about using Daybreak with Moneta:
require 'moneta'
store = Moneta.new(:Daybreak, :file => 'database.db')
store[123456] = 'Item No. 123456'
store[123456]
# => "Item No. 123456"
store.close
I should point out a quirk. Although Moneta can serialize objects, it does not seem to be aware of changes made to them.
store = Moneta.new(:Daybreak, :file => "test.db")
store[0] = { status: "unchanged" }
# => {:status=>"unchanged"}
store[0][:status]
# => "unchanged"
store[0][:status] = "changed"
# => "changed"
store[0][:status]
# => "unchanged"
The way around this is to store entire objects every time a change is made. This could be an issue if you ever want to serialize something large.
Scraping Daemon
It’s time to put everything together. The objective was to build a daemon that notifies the user when new test results are submitted for specific apps on WineHQ’s AppDB. Here is what I came up with:
winewatcher.rb
#!/usr/bin/env ruby
require 'open-uri'
require 'nokogiri'
require 'libnotify'
require 'moneta'
require 'date'

module WineWatcher

  class TestResult
    attr_accessor :app_name, :distribution, :test_date, :wine_version, :rating

    def to_h
      {
        app_name: @app_name,
        test_date: @test_date
      }
    end

    def to_s
      "App: #{@app_name}\nDistribution: #{@distribution}\nDate: #{@test_date}\n" +
      "Wine Version: #{@wine_version}\nRating: #{@rating}\n"
    end
  end

  class Watcher

    BASE_URL = "http://appdb.winehq.org/objectManager.php?sClass=version&iId="
    NOTIFY_RESULT_EXPIRATION = 0
    NOTIFY_WATCH_EXPIRATION = 2
    MIN_ACCESS_INTERVAL = 2

    def initialize
      @dates = {}
      @apps = []
      @app_index = 1
      @results = Moneta.new(:Daybreak, :file => "winewatcher.db")
    end

    # To use a different notification system, just change the call here
    def notify(summary, body, timeout)
      Libnotify.show(:summary => summary,
                    :body => body,
                    :timeout => timeout)
    end

    # Only add apps not already being watched
    # Notify user the name of the app
    def add_app(app_id)
      if !@apps.include?(app_id)
        @apps << app_id
        if (!@results.key?(app_id))
          latest_result = get_latest_result(app_id)
          @results[app_id] = latest_result.to_h
          sleep MIN_ACCESS_INTERVAL
        end
        notify("WineWatcher",
              "Watching #{@results[app_id][:app_name]}",
              NOTIFY_WATCH_EXPIRATION)
      end
    end

    # If the most recent date is newer than the one in the database,
    # Notify the user and update the date
    def check_next_app
      app_id  = @apps[@app_index % @apps.size]
      latest_result = get_latest_result(app_id)
      if (latest_result.test_date > @results[app_id][:test_date])
        notify("WineWatcher: New Test Result",
              latest_result.to_s,
              NOTIFY_RESULT_EXPIRATION)
        # wasteful to assign whole hash but assigning keys doesn't seem to work
        @results[app_id] = latest_result.to_h
      end
      @app_index += 1
    end

    # Pull all of the information needed from AppDB for a test result
    def get_latest_result(app_id)
      url = BASE_URL + app_id.to_s
      doc = Nokogiri::HTML(open(url))
      row = doc.css(".historyTable tr")[1]
      columns = row.css("td")
      app_name = doc.search("[text()*='Name']")[0].parent.next_element.text.strip
      result = TestResult.new
      result.app_name = app_name
      result.distribution = columns[1].text.strip
      result.test_date = Date.parse(columns[2].text.strip)
      result.wine_version = columns[3].text.strip
      result.rating = columns[6].text.strip
      return result
    end

  end
end
winewatcher_daemon.rb
#!/usr/bin/env ruby

# The number of seconds between checking each app.
# In actual use, this number should be much higher. There's no reason to hit
# WineHQ more often than once every 10-60 minutes, as Test Results aren't
# submitted that often.
APP_CHECK_INTERVAL = 7

# move to a folder where the database can be written
Dir.chdir Dir.home

watcher = WineWatcher::Watcher.new
watcher.add_app(14322)
watcher.add_app(1424)
watcher.add_app(24498)
watcher.add_app(25823)

loop do
  watcher.check_next_app
  sleep(APP_CHECK_INTERVAL)
end
winewatcher_controller
#!/usr/bin/env ruby
require 'daemons'
require './winewatcher'

Daemons.run('winewatcher_daemon.rb')
Daemons Gem Problems
It turns out that the daemons gem does something odd. For each daemon, it changes the working directory to ‘/’ – away from files you might require unless they are in your Ruby load path, and a location where it does not have permissions to write. I mention this because it was unexpected for me and difficult to nail down. I solved the problems by requiring the winewatcher class file inside the wrapper script and by changing the current directory to home inside the daemon.
Conclusion
The source code for this project is available at github.
Once you have libnotify and a notification server installed, you can try it out. Make sure you have write permissions for your home directory.
$ git clone http://github.com/rlqualls/winewatcher_tutorial
$ cd winewatcher_tutorial
$ bundle
$ ruby resetdb.rb
$ ruby winewatcher_controller start
$ ruby winewatcher_controller stop
Resources
- Bastard’s Book: An Intro to Web Scraping
- Nokogiri parsing tutorial
- Libnotify for Ruby
- Moneta
- Daybreak
Frequently Asked Questions (FAQs) about Desktop Notifications in Ruby
How can I install WineWatcher on my system?
WineWatcher is a Ruby gem, so you can install it by using the gem install command in your terminal. Here’s how you can do it:gem install winewatcher
After running this command, the gem will be installed on your system and you can start using it to get desktop notifications.
What is the purpose of the DWM.exe file in the context of desktop notifications?
DWM.exe, or Desktop Window Manager, is a Windows system file that is responsible for managing visual effects on the desktop. It’s not directly related to desktop notifications, but it plays a crucial role in managing the graphical user interface, which includes the display of notifications.
How can I replace the default notification daemon on KDE?
To replace the default notification daemon on KDE, you need to disable the built-in notification system first. You can do this by going to System Settings > Notifications > Applications and unchecking the “Enable Notifications” box. After that, you can install and configure your preferred notification daemon.
How can I remove Dunst as a notify manager on KDE?
To remove Dunst as a notify manager on KDE, you need to stop the Dunst service first. You can do this by running the following command in your terminal:systemctl --user stop dunst
After stopping the service, you can uninstall Dunst by using the package manager of your Linux distribution. For example, on Ubuntu, you can use the apt-get remove command.
How can I customize the appearance of desktop notifications in Ruby?
The appearance of desktop notifications in Ruby can be customized by using different options provided by the notification library you’re using. For example, with the notify-send library, you can specify the icon, urgency level, and timeout duration of the notification.
How can I handle click events on desktop notifications in Ruby?
Handling click events on desktop notifications in Ruby can be a bit tricky because it depends on the notification library and the desktop environment you’re using. Some libraries provide built-in support for click events, while others require you to use additional tools or libraries.
Can I use WineWatcher to get desktop notifications for other applications, not just wine?
Yes, you can use WineWatcher to get desktop notifications for any application that can be monitored by inotify, a Linux kernel subsystem that notices changes to the filesystem and reports those changes to applications.
How can I troubleshoot issues with desktop notifications in Ruby?
Troubleshooting issues with desktop notifications in Ruby usually involves checking the error messages, verifying the installation of the notification library, and testing the notification code with different options.
Can I use desktop notifications in Ruby on non-Linux platforms?
Yes, you can use desktop notifications in Ruby on non-Linux platforms, but you need to use a notification library that supports your platform. For example, the ruby-growl library can be used for desktop notifications on macOS.
How can I disable desktop notifications in Ruby?
Disabling desktop notifications in Ruby can be done by either not calling the notification code or by using a configuration option provided by the notification library. For example, with the notify-send library, you can use the –hint=int:transient:1 option to make the notifications disappear automatically after a short time.
 Robert Qualls
Robert is a voracious reader, Ruby aficionado, and other big words. He is currently looking for interesting projects to work on and can be found at his website.