Ubuntu 12.04 LTS Precise Pangolin: Kick-start your installation

Ubuntu 12.04 has arrived and this is the guide to get you up and running in no time at all.
Representing the latest release in an excellent pedigree there is no doubt that Ubuntu 12.04 LTS looks great and does the job exceedingly well. Naturally, things may feel different, particularly in view of the new features found, but on the whole we are going to discover that Ubuntu remains steadfast, reliable, easy to use, highly customisable and secure.
So let’s begin …
Key Takeaways
- Ubuntu 12.04 LTS Precise Pangolin requires a minimum of 512MB RAM, 5GB hard drive space, and a 1GHz processor speed. It supports both 32-bit and 64-bit PC platforms, as well as ARM EABI for some versions of the Raspberry Pi.
- The installation process for Ubuntu 12.04 LTS Precise Pangolin involves downloading an iso image, burning it to a CD, booting from the CD, and following the installation prompts. An active internet connection is required throughout the process.
- After installation and first boot, Ubuntu will automatically check for updates. Users may be asked to confirm the use of optional drivers for their video card and install operating system updates. Users can also manually start the Update Manager to check for updates.
Requirements:
Assuming that your host computer meets the specific requirements you will need to download an iso image of Ubuntu 12.04.
You can obtain this from the Ubuntu Website where you can elect to choose either, the 32-bit or 64-bit version; but given the range of multimedia plug-ins associated with today’s desktop environment the 32-bit version is advised (by Canonical); but I would suggest using the 64-bit version.
When the download is complete:
- Burn the image to a blank CD with your favourite CD/DVD burning software.
- Insert the media and boot from that drive.
You should be aware that during the installation an active internet connection is required and for those wishing to install this operating system on a mobile device (i.e. Laptop or Netbook), it is advised that a mains power supply is used or made available throughout this process.
Installation
In this first part of this article we will take a quick trip through the typical installation process.
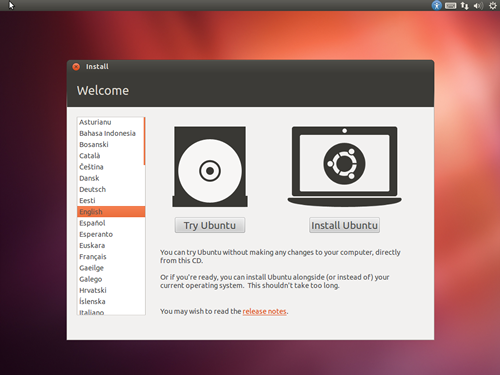
From the boot screen, select your language and choose “Install Ubuntu”
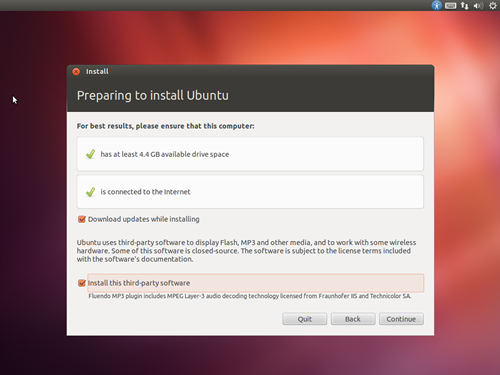
On the next screen you will be shown the requirements of the installer.
Ensure that the following checkboxes are ‘selected’.
- Download updates while installing.
- Install this third-party software.
In many respects, I would say that checking these boxes should be considered as a requirement as this action will ultimately make the entire process a little easier.
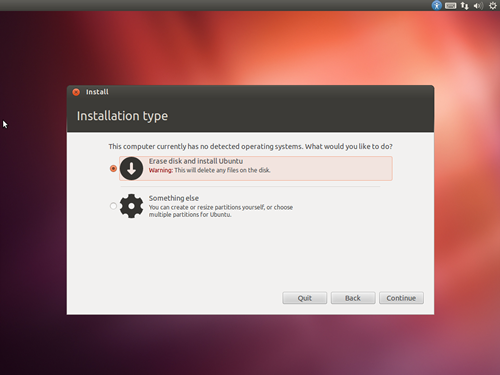
In the next screen we will simply confirm that we want to erase the contents of our hard drive and install Ubuntu.
Note:
These guidelines are for a typical installation.
If you are attempting to ‘dual-boot’ then your screen may look different at this stage.
To proceed, choose “Erase disk and install Ubuntu” and click “continue”.
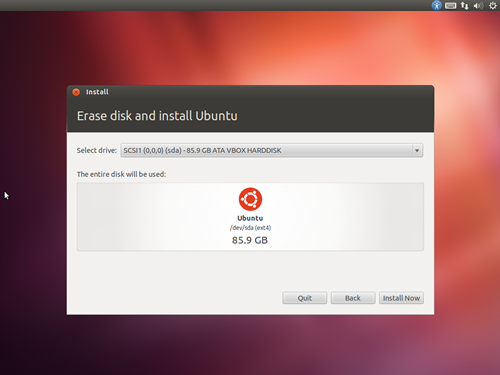
As the installation method chosen will remove all the data from our hard drive the resulting screen will act as a confirmation of our previous instruction.
Note:
If you have made a mistake and wish to salvage any existing data (or attempt a completely different type of installation)
then this is the time to quit and to start again.
Confirm the correct hard disk has been chosen and if you are happy to proceed, click ‘install now’.
Ubuntu will now begin the installation process and the installer will ask a few simple questions.
Don’t worry, there is no time limit.
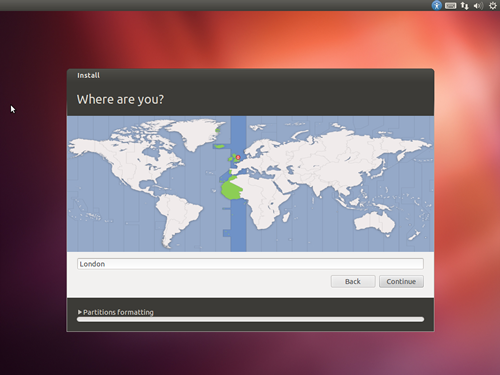
The first screen will ask us to confirm our time zone/location.
By using your mouse simply choose your closest geographical location.
When done, click ‘continue’ to proceed.
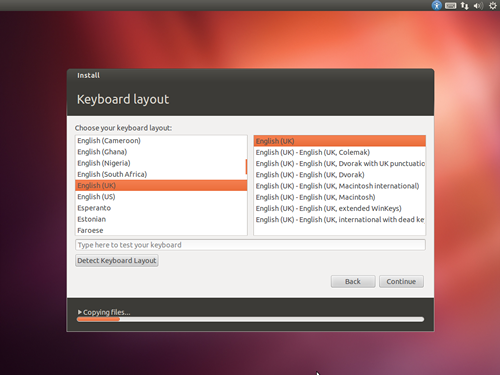
The next screen will ask us to confirm our keyboard layout.
Again, this is relatively straight forward and a test field is provided in order that we can validate our selection.
As before, when done, click ‘continue’ to proceed.
The final screen will ask us to create a user identity.
Start with your name or preferred alias and complete the subsequent fields.
In general all usernames/passwords/computer names should be no longer than 16 characters long and they should not contain spaces or non-standardised characters.
Remember to keep your password safe at all times.
When done, click ‘continue’ to proceed.

The basic steps are now complete and from this point onwards (and until prompted) you can click through the feature dialogue on the main installation screen by using the left and right arrows on the main display area.
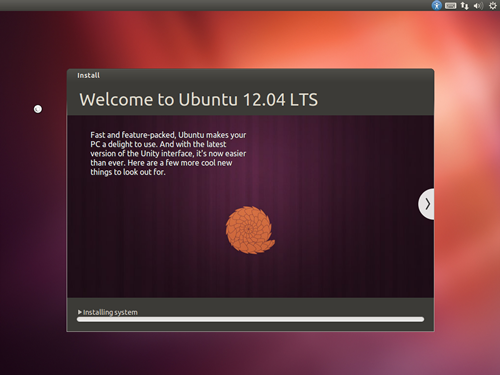
Please be patient.
Depending on the speed of your internet connection the installation process may take some time and when complete you will be required to reboot.
As indicated below click ‘restart now’ to in order to complete the process.
Your computer will now reboot and ask you to remove the installation media from your optical drive.
(You will be asked to confirm this by pressing the ‘return/enter key’).

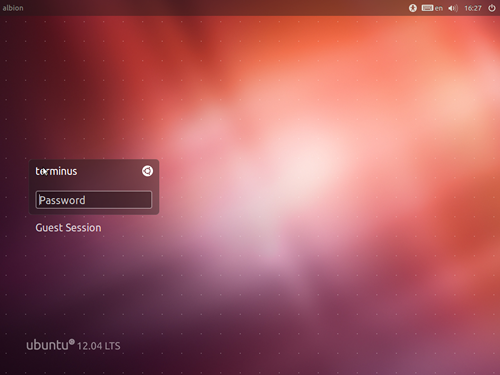
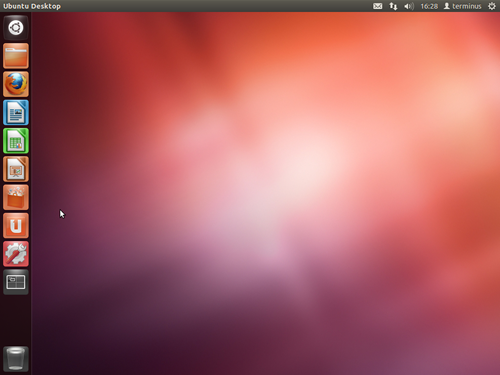
After a successful reboot you will be welcomed by the Ubuntu 12.04 login screen:
Login with the password created during the installation process to uncover your crisp and shiny new desktop.
Well done, you have now successfully installed Ubuntu 12.04 LTS Precise Pangolin.
And this is where the fun begins …
What happens after first boot
Just like a typical Windows desktop, Ubuntu will automatically check for updates and depending on the options available to you, you may be asked to:
- Confirm the use of any optional drivers for your video card (You can also find this in System Settings > Hardware > Additional Drivers.)
- Install operating system updates.
With regard to system updates, when prompted simply click the ‘yes’ button to update.
Note:
If you are not prompted to update the system you can always start the ‘Update Manager’ by opening the ‘Dash’ and typing ‘Update Manager’ into the search bar. When found, click the icon to open the tool. Choose ‘check’ and then ‘install updates’ if any are available.
And that’s it …
In the next installment we will take up the running with a check-list of post install ‘tips and tricks’ that will deliver a fully functional desktop computer suitable for most home and office environments, but before we ‘jump in’ I am sure you may want to spend some time discovering your new system. There are lots to discover and may I suggest starting with Ubuntu One, Terminal, Rhythmbox, Shotwell Photo Manager, Gwibber, Libre Office, and Transmission to name but a few.
Until next time, have fun …
Frequently Asked Questions (FAQs) about Ubuntu 12.04 LTS Precise Pangolin Installation
What are the system requirements for Ubuntu 12.04 LTS Precise Pangolin?
Ubuntu 12.04 LTS Precise Pangolin requires a minimum of 512MB RAM, but 1GB is recommended for a comfortable usage. The hard drive space should be at least 5GB, but 20GB is recommended. The processor speed should be at least 1GHz. It supports both 32-bit and 64-bit PC platforms, as well as ARM EABI for some versions of the Raspberry Pi.
How can I upgrade from a previous version of Ubuntu to Ubuntu 12.04 LTS Precise Pangolin?
You can upgrade to Ubuntu 12.04 LTS Precise Pangolin from the previous LTS version by using the Update Manager. Open the Update Manager, click on the ‘Check’ button to check for new updates, and then click on the ‘Upgrade’ button.
What are the new features in Ubuntu 12.04 LTS Precise Pangolin?
Ubuntu 12.04 LTS Precise Pangolin comes with several new features. These include a new HUD (Heads-Up Display) that allows you to search for menu items within applications, a new privacy tool for managing your personal data, and improvements to the Unity interface.
How can I install Ubuntu 12.04 LTS Precise Pangolin alongside Windows?
You can install Ubuntu 12.04 LTS Precise Pangolin alongside Windows by using the Ubuntu installer’s ‘Install alongside Windows’ option. This will create a dual-boot system where you can choose to boot into either Ubuntu or Windows at startup.
How can I create a bootable USB stick for Ubuntu 12.04 LTS Precise Pangolin on Windows?
You can create a bootable USB stick for Ubuntu 12.04 LTS Precise Pangolin on Windows by using a tool like Rufus or UNetbootin. You’ll need to download the Ubuntu 12.04 LTS ISO file and then use the tool to write this file to your USB stick.
How can I troubleshoot problems with my Ubuntu 12.04 LTS Precise Pangolin installation?
You can troubleshoot problems with your Ubuntu 12.04 LTS Precise Pangolin installation by checking the Ubuntu forums and the Ubuntu documentation. These resources contain a wealth of information and solutions to common problems.
How can I get help with Ubuntu 12.04 LTS Precise Pangolin?
You can get help with Ubuntu 12.04 LTS Precise Pangolin through the Ubuntu forums, the Ubuntu documentation, and the Ubuntu community. These resources are full of helpful information and friendly people who can assist you with any problems or questions you might have.
How can I keep my Ubuntu 12.04 LTS Precise Pangolin system up to date?
You can keep your Ubuntu 12.04 LTS Precise Pangolin system up to date by using the Update Manager. This tool will automatically check for updates and allow you to install them with a single click.
How can I customize the look and feel of Ubuntu 12.04 LTS Precise Pangolin?
You can customize the look and feel of Ubuntu 12.04 LTS Precise Pangolin by using the Appearance settings. Here, you can change the desktop background, the theme, the font, and other visual settings.
How can I install additional software on Ubuntu 12.04 LTS Precise Pangolin?
You can install additional software on Ubuntu 12.04 LTS Precise Pangolin by using the Ubuntu Software Center. This tool allows you to browse and install thousands of free and paid applications with a single click.
Jonathan is an independent web developer, server administrator and application programmer and for nearly 20 years he has been working behind the scenes to support companies, organisations and individuals from all over the world to realise their digital ambitions. As a practitioner of many the computer languages Jonathan enjoys all things Linux, writing code, building computers, playing the XBOX, history and getting 'out and about' in the big outdoors. He thrives on new challenges, works around the clock and prides himself on being friendly, honest, reliable and ultimately, the complete professional.


Published in
·Design·Design & UX·Illustration·Photography & Imagery·Resources·Technology·UI Design·Web·August 19, 2015