Steam-Powered DOTA on Rails

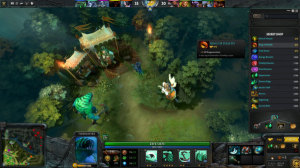
After writing a couple of “serious” articles on building authentication systems with Rails, I decided to have a break and play some games. I just Googled for online games and stumbled upon Dota 2. Dota 2 is an immensely popular (more than 10,000,000 unique players last month) battle arena game developed by Valve.
The game is quite complex and some web services like DotaBuff were created to help players track their progress. After visiting DotaBuff and seeing all of its beautiful tables and graphs, I just couldn’t stop myself from searching for information about the Dota 2 API. The Ruby thing to do is to share my research with you!
In this article, we are going to work with Dota 2 API. We’ll create an app that borrows basic functionality from DotaBuff: a user logs in via Steam and sees a list of his recent matches and statistics. I’ll pinpoint all the gotchas I faced during development of this app and give some advice on how this can be implemented in production.
Source code is available on GitHub.
Working demo can be found at sitepoint-dota.herokuapp.com.
Key Takeaways
- Steam Authentication Integration: Utilize the `omniauth-steam` gem to authenticate users via Steam, allowing access to their Dota 2 match data.
- Dota 2 API Utilization: Implement the Dota 2 API to fetch user match data, demonstrating how to handle API requests within a Rails application.
- Match Information Display: Create functionality to display detailed match information, including participants, match outcomes, and individual player stats.
- User Match Interaction: Enable users to view a list of their recent matches post-authentication, improving user engagement with dynamic content.
- Extensive Data Modeling: Illustrate complex data relationships in Rails, such as users having multiple matches and matches containing multiple players.
- Practical Application Setup: Provide a step-by-step guide on setting up a Rails application from scratch, configuring routes, models, and controllers to support the app’s functionality.
What is Dota?
According to Wikipedia, Dota 2 is a free-to-play multiplayer online battle arena video game. It is the stand-alone sequel to the Defense of the Ancients modification for Warcraft III: The Frozen Throne. Its mechanics are quite complex, so I will just give you a quick overview.
Originally, DotA (Defense of the Ancients) was a custom map for Warcraft III developed by a person called IceFrog. After a couple of years, it became so popular that Valve decided to hire IceFrog and create a standalone version of the game, which they called it Dota 2. It was released in 2013 and now is considered one of the most popular online games in the world. Many professional competitions with money prizes are being held and streams by experienced players are being watched by hundreds of people.
Talking about gameplay, there are two teams (Radiant, good, and Dire, evil) with (typically) 5 players each. At the start of the game, each player picks one hero from a pool containing more than 100 heroes and enters the game. Each team has their base and the ultimate goal is to destroy the main building on the enemy’s base while protecting your own. Players can buy various artifacts (each hero may take up to 6 items at once), kill creeps (creatures, controlled by AI) or enemy heroes to earn gold and experience. Each hero has unique set of abilities that players use to help their teammates or wreck havoc upon enemies. That’s Dota in a nutshell.
Let’s proceed and see what goodies the Dota 2 API present.
Preparations
As always we will do some preparations before proceeding to the interesting part. Create a new Rails app called Doter:
$ rails new Doter -TI will use Rails 4.2.1 throughout this article, but the same solution can be implemented with Rails 3.
If you wish to follow along, hook up the bootstrap-sass gem for styling:
Gemfile
[...]
gem 'bootstrap-sass'
[...]
Run
$ bundle installand drop these lines into application.scss:
application.scss
@import 'bootstrap-sprockets';
@import 'bootstrap';
@import 'bootstrap/theme';
Now, tweak layout like this:
views/layouts/application.html.erb
<nav class="navbar navbar-inverse">
  <div class="container">
    <div class="navbar-header">
      <%= link_to 'Doter', root_path, class: 'navbar-brand' %>
    </div>
    <div id="navbar">
    </div>
  </div>
</nav>
<div class="container">
  <% flash.each do |key, value| %>
    <div class="alert alert-<%= key %>">
      <%= value %>
    </div>
  <% end %>
  <div class="page-header"><h1><%= yield :page_header %></h1></div>
  <%= yield %>
</div>
Add a page_header helper method to provide content for the yield block:
application_helper.rb
module ApplicationHelper
  def page_header(text)
    content_for(:page_header) { text.to_s.html_safe }
  end
end
Lastly, set up the routes. I’d like to display user’s matches on the main page of the site, so create an empty MatchesController:
matches_controller.rb
class MatchesController < ApplicationController
end
The corresponding model will be added a bit later. Now, the actual routes:
config/routes.rb
[...]
root to: 'matches#index'
[...]
Don’t forget to create a view for the index action:
views/matches/index.html.erb
<% page_header 'Your matches' %>Great, preparations are done and we can move forward!
Authenticating via Steam
Steam, like many other web platforms, supports the OAuth protocol and you can authenticate your user to get their details, like uID, nickname, avatar etc. (you can read my Rails Authentication with OAuth 2.0 and OmniAuth article to learn more about this protocol). You do not have to do that to actually perform Steam API calls, but we need the user’s id to show the list of matches. Therefore, we will use the https://github.com/reu/omniauth-steam gem by Rodrigo Navarro that adds a Steam authentication strategy to OmniAuth:
Gemfile
[...]
gem 'omniauth-steam'
[...]
Don’t forget to run
$ bundle installNow create Omniauth initializer file:
config/initializers/omniauth.rb
Rails.application.config.middleware.use OmniAuth::Builder do
  provider :steam, ENV['STEAM_KEY']
end
Okay, where is this key? Visit this page (you will need Steam account to proceed) and simply register a new key. Among all web platforms supporting OAuth, Steam provides the fastest way to register your application.
Now let’s decide what user information do we want to store. Actually, Steam provides a pretty minimalistic set of data, so we have don’t have many options to choose from. I’m going to stick with the following:
uid(string, index, unique) – User’s unique identifier.nickname(string) – User’s nickname (Steam also provides name).avatar_url(string) – Link to user’s avatar. By the way, we can’t choose avatar size.profile_url(string) – User’s profile URL on Steam.
Run the following command:
$ rails g model User uid:string nickname:string avatar_url:string profile_url:stringOpen the migration file and add this line:
db/migrations/xxx_create_users.rb
[...]
add_index :users, :uid, unique: true
[...]
after the create_table method.
Apply the migration:
$ rake db:migrateAdd some routes:
config/routes.rb
[...]
match '/auth/:provider/callback', to: 'sessions#create', via: :all
delete '/logout', to: 'sessions#destroy', as: :logout
[...]
The first one is the callback route where the user will be redirected after a successful authentication. I had to use match here because, for some reason, Steam seems to be sending a POST request instead of a GET (that’s what most other platforms do). The second route will be used to log the user out.
Now, the controller to handle those routes. I’ll start with the create action:
sessions_controller.rb
class SessionsController < ApplicationController
  skip_before_filter :verify_authenticity_token, only: :create
  def create
    begin
      @user = User.from_omniauth request.env['omniauth.auth']
    rescue
      flash[:error] = "Can't authorize you..."
    else
      session[:user_id] = @user.id
      flash[:success] = "Welcome, #{@user.nickname}!"
    end
    redirect_to root_path
  end
end
That skip_before_filter is another gotcha with authentication via Steam. It sends a POST request, but of course it does not provide the CSRF token. Therefore, by default, you will get an error saying that someone is trying to potentially sending malicious data. As such, we have to skip this check for the create action.
The create action itself is simple. Fetch the user’s data stored inside request.env['omniauth.auth'] and create a new user or find an existing one based on said data (we’ll introduce the from_omniauth method in a moment). If everything is okay, store the user’s id inside the session, set the welcome message, and redirect to the main page.
Now the from_omniauth method:
models/user.rb
[...]
class << self
  def from_omniauth(auth)
    info = auth['info']
    # Convert from 64-bit to 32-bit
    user = find_or_initialize_by(uid: (auth['uid'].to_i - 76561197960265728).to_s)
    user.nickname = info['nickname']
    user.avatar_url = info['image']
    user.profile_url = info['urls']['Profile']
    user.save!
    user
  end
end
[...]
Find a user by his uID or create a new one and then simply fetch all the necessary data. But what is that 76561197960265728 number? This is the third gotcha. While authenticating via Steam, the user’s 64-bit uID will be returned. However, when listing Dota 2 matches, the user’s 32-bit ids are used, instead. There is surely a reason for that, but I wasn’t able to find any explanation. Anyway, we have to convert the 64-bit id to 32-bit and the easiest way to do that is to subtract this large number. Don’t worry, Ruby takes care of BigInt numbers for us transparently, so you don’t have to perform any additional actions.
The destroy action is even simpler:
sessions_controller.rb
def destroy
  if current_user
    session.delete(:user_id)
    flash[:success] = "Goodbye!"
  end
  redirect_to root_path
end
We need the current_user method to check if the user is logged in:
application_controller.rb
[...]
private
def current_user
  return nil unless session[:user_id]
  @current_user ||= User.find_by(id: session[:user_id])
end
helper_method :current_user
[...]
The helper_method ensures that this method can be called from the views, as well.
Modify the layout:
views/layouts/application.html.erb
[...]
<nav class="navbar navbar-inverse">
  <div class="container">
    <div class="navbar-header">
      <%= link_to 'Doter', root_path, class: 'navbar-brand' %>
    </div>
    <div id="navbar">
      <% if current_user %>
        <ul class="nav navbar-nav pull-right">
          <li><%= image_tag current_user.avatar_url, alt: current_user.nickname %></li>
          <li><%= link_to 'Log Out', logout_path, method: :delete %></li>
        </ul>
      <% else %>
        <ul class="nav navbar-nav">
          <li><%= link_to 'Log In via Steam', '/auth/steam' %></li>
        </ul>
      <% end %>
    </div>
  </div>
</nav>
[...]
I’ve already mentioned that Steam does not allow changing the avatar size, so we have to apply some styling to make look it nice:
application.scss
[...]
nav {
  img {
    max-width: 48px;
  }
}
You may now restart the server and see this all in action!
Integrating with the Steam API
The next step is integrating with the Steam API. If you need to access the basic Steam Web API, you may use either steam-web-api by Olga Grabek or steam-api by Brian Haberer. However, as long as we are going to work specifically with Dota 2-related stuff, it would be nice to have a separate gem that provides some convenient methods. Fortunately, there is dota gem by Vinni Carlo Canos that provides many useful features (though it is not 100% finished). Before proceeding, you may want to read up on the Dota 2 API. Unfortunately, there is no page with comprehensive and up-to-date documentation on it yet, but here are some resources:
When you are ready, drop the new gem into the Gemfile:
Gemfile
[...]
gem 'dota', github: 'vinnicc/dota', branch: 'master'
[...]
At the time of writing I had to specify the master branch, because recently we have revealed that some changes were made to Dota 2 API and they are accounted for in the latest pull request, however a new version of the gem is not released yet. By the way, I wanted to warn you that some aspects of Dota 2 API may change from time to time and you should watch out for it.
Run
$ bundle installCreate an initializer:
config/initializers/dota.rb
Dota.configure do |config|
  config.api_key = ENV['STEAM_KEY']
end
Put the Steam key that you’ve obtained earlier in this file.
Basically, that’s it. You are now ready to perform API requests.
Getting User Matches
I want to get the list of user matches as soon as they authenticate via Steam. However, before we proceed, I wanted to point out one thing. The solution described in this article is implemented for demonstration purposes only. If you want to build a real world application similar to DotaBuff, you will have to implement a more complex system with some background process that constantly checks if there are any new matches played by the specific user (or even if there are any new matches at all) and loads the corresponding data. Then when a user logs in, you simply provide a list of all matches from you local database, not by sending a synchronous call to the Dota 2 API. Loading information for even 40 matches can take up to 1 minute – and users typically have hundreds of them.
It will require loads of storing capacity (just imagine how many matches are being played every day) and obviously I can’t afford to set up such an environment. However, when you do have fair amount of data, you can display really interesting statistical information like what is provided by DotaBuff.
Okay, moving on, what info about a single match can we fetch? Here is the list of available methods that you can utilize. We will store the following:
uid(string, index) – Unique identifier of the match.winner(string) – Which team won the match. Actually, this will either be “Radiant” or “Dire”.first_blood(string) – When first blood (first hero kill) occurred. Dota 2 API returns a number of seconds since the match started, but we’ll store a formatted value instead. Feel free to make this column integer and store the raw value instead.started_at(datetime) – When the match was started.mode(string) – Match mode. Here is the list of all available modes. We are going to store the title of it, but you may also store its ID (Dota 2 API provides both).match_type(string) – Type of the match. Here is the list of all available types. Again, you can either store its title or id. Don’t call this columntypebecause it is reserved for single table inheritance!duration(string) – Duration of the match. Again, API provides a number of seconds, but we’ll store a formatted value.user_id(integer, index) – Foreign key to establish one-to-many relation between matches and users.
Create and apply the migration:
$ rails g model Match uid:string winner:string started_at:datetime mode:string match_type:string duration:string user:references
$ rake db:migrate
Make sure you have these lines inside model files:
models/user.rb
[...]
has_many :matches
[...]
models/match.rb
[...]
belongs_to :user
[...]
On to the actual match loading. I want to do this as soon as user has logged in:
sessions_controller.rb
[...]
def create
  begin
    @user = User.from_omniauth request.env['omniauth.auth']
  rescue
    flash[:error] = "Can't authorize you..."
  else
    @user.load_matches!(1)
    session[:user_id] = @user.id
    flash[:success] = "Welcome, #{@user.nickname}!"
  end
  redirect_to root_path
end
[...]
1 is the number of matches to load. Here is the load_matches! method:
models/user.rb
[...]
 def load_matches!(count)
    matches_arr = Dota.api.matches(player_id: self.uid, limit: count)
    if matches_arr && matches_arr.any?
      matches_arr.each do |match|
        unless self.matches.where(uid: match.id).any?
          match_info = Dota.api.matches(match.id)
          new_match = self.matches.create({
                                            uid: match.id,
                                            winner: match_info.winner.to_s.titleize,
                                            first_blood: parse_duration(match_info.first_blood),
                                            started_at: match_info.starts_at,
                                            mode: match_info.mode,
                                            cluster: match_info.cluster,
                                            duration: parse_duration(match_info.duration),
                                            match_type: match_info.type
                                          })
        end
      end
    end
  end
[...]
First of all, load matches for the provided player (don’t forget that we use the 32-bit Steam ID here, not 64-bit). Of course, the matches method does not actually load everything – it has a limit option set to 100 by default, but we override it with our own value. This method accepts some other options, read more here.
Next we check if a match with that id was already loaded, and, if not, load its data. Why do we have to call the matches method again, but this time providing the exact match id? The gotcha here is that the first call will return a limited number of fields for performance reasons, so to get the full info we have to query for a specific match.
After that we simply save all the necessary info to the table. parse_duration formats number of seconds like xx:xx:xx:
models/user.rb
[...]
private
def parse_duration(d)
  hr = (d / 3600).floor
  min = ((d - (hr * 3600)) / 60).floor
  sec = (d - (hr * 3600) - (min * 60)).floor
  hr = '0' + hr.to_s if hr.to_i < 10
  min = '0' + min.to_s if min.to_i < 10
  sec = '0' + sec.to_s if sec.to_i < 10
  hr.to_s + ':' + min.to_s + ':' + sec.to_s
end
[...]
Now just load all the matches:
matches_controller.rb
[...]
def index
  @matches = current_user.matches.order('started_at DESC') if current_user
end
[...]
and render them:
views/matches/index.html.erb
<% page_header 'Your matches' %>
<% if @matches && @matches.any? %>
  <table class="table table-striped table-hover">
    <% @matches.each do |match| %>
      <tr>
        <td>
          <%= link_to match.started_at, match_path(match) %>
        </td>
      </tr>
    <% end %>
  </table>
<% end %>
I’ve decided to provide a minimal set of data on this page and use the show action to display more detailed info. Let’s introduce a new route:
config/routes.rb
[...]
resources :matches, only: [:index, :show]
[...]
The controller’s action:
matches_controller.rb
[...]
def show
  @match = Match.find_by(id: params[:id])
end
[...]
And now the view:
views/matches/show.html.erb
<% page_header "Match #{@match.uid} <small>#{@match.started_at}</small>" %>
<h2 class="<%= @match.winner.downcase %>"><%= @match.winner %> won</h2>
<ul>
  <li><strong>Mode:</strong> <%= @match.mode %></li>
  <li><strong>Type:</strong> <%= @match.match_type %></li>
  <li><strong>Duration:</strong> <%= @match.duration %></li>
  <li><strong>First blood:</strong> <%= @match.first_blood %></li>
</ul>
Here we provide all the available info. It would be nice to use different colors for Radiant and Dire teams, so I’ve introduced two CSS classes:
application.scss
[...]
$radiant: #92A524;
$dire: #C23C2A;
.dire {
  color: $dire;
}
.radiant {
  color: $radiant;
}
[...]
That’s pretty nice, but not very informative. Did the user win the match? What hero did they play? What items did they have? How many kills did they have? It would be great to display this info as well, so let’s proceed to the next step and improve our app further!
Loading Players
We can answer all those questions by simply loading information about the players participating in the match. The radiant and dire methods called on the match instance return an array of player objects, each having its own methods. There is a lot of info available here and we are going to store most of it:
match_id(integer, index) – Foreign key to establish one-to-many relation.uid(string) – Player’s 32-bit unique id.hero(text) – Player’s hero. This is going to be a serialized attribute storing hero’s id, name and a link to its picture.level(integer) – Hero’s level by the end of the match.kills(integer) – Player’s kills.deaths(integer) – Player’s deaths.assists(integer) – player’s assists.last_hits(integer) – Player’s last hits (how many creeps has they killed).denies(integer) – Player’s denies (how many allied creeps has he denied not allowing enemies receive gold for killing them).gold(integer) – Amount of gold player was having by the end of the match.gpm(integer) – Gold per minute gained.xpm(integer) – Experienced per minute gained.status(string) – Status of the player by the end of the match. They may have stayed till the end of the game, abandoned for some reason, left safely (for example, if poor network connection was detected) or never connected to the game.gold_spent(integer) – Total amount of gold spent during the match by the player.hero_damage(integer) – Total amount of damage dealt to enemy heroes.tower_damage(integer) – Total amount of damage dealt to enemy towers.hero_healing(integer) – Total amount of healing inflicted to allied heroes.items(text) – Serialized attribute containing an array of items that player had by the end of the game. We will store each item’s id, name, and a link to its picture.slot(integer) – Player’s slot in the team (from 1 to 5).radiant(boolean) – This indicates the player’s team. In the simplest scenario, there are only two possibilities (radiantordire, however it seems that you can be marked asobserver), so I’ve used a boolean attribute, but you may use your own method of storing this info.
That’s a lot of data to store! Create and apply the appropriate migration:
$ rails g model Player match:references uid:string hero:text level:integer kills:integer deaths:integer assists:integer last_hits:integer denies:integer gold:integer gpm:integer xpm:integer status:string gold_spent:integer hero_damage:integer tower_damage:integer hero_healing:integer items:text slot:integer radiant:boolean
$ rake db:migrate
Add the following lines to our model files:
models/match.rb
[...]
has_many :players, dependent: :delete_all
[...]
models/player.rb
[...]
belongs_to :match
serialize :hero
serialize :items
[...]
Alter the load_matches! method like this:
model/user.rb
[...]
def load_matches!(count)
    matches_arr = Dota.api.matches(player_id: self.uid, limit: count)
    if matches_arr && matches_arr.any?
      matches_arr.each do |match|
        unless self.matches.where(uid: match.id).any?
          match_info = Dota.api.matches(match.id)
          new_match = self.matches.create({
                                            uid: match.id,
                                            winner: match_info.winner.to_s.titleize,
                                            first_blood: parse_duration(match_info.first_blood),
                                            started_at: match_info.starts_at,
                                            mode: match_info.mode,
                                            cluster: match_info.cluster,
                                            duration: parse_duration(match_info.duration),
                                            match_type: match_info.type
                                          })
        end
      end
    end
  end
[...]
The load_players! method will accept two separate objects with info about Radiant and Dire teams.
model/match.rb
[...]
def load_players!(radiant, dire)
  roster = {radiant: radiant, dire: dire}
  roster.each_pair do |k, v|
    v.players.each do |player|
      self.players.create({
                              uid: player.id,
                              items: player.items.delete_if {
                                  |item| item.name == "Empty"
                              }.map  {
                                  |item| {id: item.id, name: item.name, image: item.image_url}
                              },
                              hero: {id: player.hero.id,
                                     name: player.hero.name,
                                     image: player.hero.image_url},
                              level: player.level,
                              kills: player.kills,
                              deaths: player.deaths,
                              assists: player.assists,
                              last_hits: player.last_hits,
                              denies: player.denies,
                              gold: player.gold,
                              gpm: player.gpm,
                              xpm: player.xpm,
                              status: player.status.to_s.titleize,
                              gold_spent: player.gold_spent,
                              hero_damage: player.hero_damage,
                              tower_damage: player.tower_damage,
                              hero_healing: player.hero_healing,
                              slot: player.slot,
                              radiant: k == :radiant
                          })
    end
  end
end
[...]
Each object (radiant and dire) responds to a players method that actually returns an array of players. Much of this method is pretty simple, so I’ll explain the possibly unclear bits.
items: player.items.delete_if {
    |item| item.name == "Empty"
}.map  {
    |item| {id: item.id, name: item.name, image: item.image_url}
},
Here we call items on the player object to fetch the items that player had by the end of the match. items returns another object that is an instance of a separate class. This object responds to three main methods: id (item’s id), name (item’s name) and image_url (URL to an item’s picture stored on Dota 2 CDN). Each player has 6 slots to store items. If a slot was empty, the name “Empty” is specified. We don’t really need to save information about empty slots, so simply remove all those elements. After that, generate a hash containing all the info and store it inside the column. Thanks to serialization, later we can fetch this hash and use it normally.
hero: {id: player.hero.id,
       name: player.hero.name,
       image: player.hero.image_url},
The idea here is the same. hero returns a separate object that responds to three main methods: id (hero’s id), name (hero’s name) and image_url (hero’s picture).
Update 05/05/2015
I’ve found out that we can choose the size of hero’s portrait by providing an optional argument to the image_url method. Here is the list of all possible values:
* :full – full quality horizontal portrait (256x114px, PNG). This is used by default.
* :lg – large horizontal portrait (205x11px, PNG).
* :sb – small horizontal portrait (59x33px, PNG). I recommend using this one as we need the smallest portrait possible.
* :vert – full quality vertical portrait (234x272px, JPEG). Strangely enough this can only be *.jpg*.
Load the players, grouping them by team – true for Radiant, false for Dire. By the way, this seems pseudo-philosophical: Radiant are the good, so they are “true” and Dire are bad, chaotic, so they are “false” :).
matches_controller.rb
[...]
def show
  @match = Match.includes(:players).find_by(id: params[:id])
  @players = @match.players.order('slot ASC').group_by(&:radiant)
end
[...]
Update the view, accordingly:
views/matches/show.html.erb
<% page_header "Match #{@match.uid} <small>#{@match.started_at}</small>" %>
<h2 class="<%= @match.winner.downcase %>"><%= @match.winner %> won</h2>
<ul>
  <li><strong>Mode:</strong> <%= @match.mode %></li>
  <li><strong>Type:</strong> <%= @match.match_type %></li>
  <li><strong>Duration:</strong> <%= @match.duration %></li>
  <li><strong>First blood:</strong> <%= @match.first_blood %></li>
</ul>
<h3 class="radiant">Team Radiant</h3>
<%= render 'players_table', players: @players[true] %>
<h3 class="dire">Team Dire</h3>
<%= render 'players_table', players: @players[false] %>
I am using partial to avoid code duplication:
views/matches/_players_table.html.erb
<table class="table table-hover table-striped info-table">
  <tr>
    <th>Player ID</th>
    <th>Hero</th>
    <th>Level</th>
    <th>Items</th>
    <th>Kills</th>
    <th>Deaths</th>
    <th>Assists</th>
    <th><abbr title="Last hits">LH</abbr></th>
    <th><abbr title="Denies">DN</abbr></th>
    <th>Gold (spent)</td>
    <th><abbr title="Gold per minute">GPM</abbr></th>
    <th><abbr title="Experience per minute">XPM</abbr></th>
    <th><abbr title="Hero damage">HD</abbr></th>
    <th><abbr title="Tower damage">TD</abbr></th>
    <th><abbr title="Hero healing">HH</abbr></th>
  </tr>
  <% players.each do |player| %>
    <tr>
      <td>
        <% if player.abandoned_or_not_connected? %>
          <abbr class="text-muted" title="<%= player.status.titleize %>"><%= player.uid %></abbr>
        <% else %>
          <%= player.uid %>
        <% end %>
      </td>
      <td><%= render 'player_hero', hero: player.hero %></td>
      <td><%= player.level %></td>
      <td>
        <% player.items.each do |item| %>
          <%= image_tag item[:image], alt: item[:name], title: item[:name] %>
        <% end %>
      </td>
      <td><%= player.kills %></td>
      <td><%= player.deaths %></td>
      <td><%= player.assists %></td>
      <td><%= player.last_hits %></td>
      <td><%= player.denies %></td>
      <td><%= player.gold %> (<%= player.gold_spent %>)</td>
      <td><%= player.gpm %></td>
      <td><%= player.xpm %></td>
      <td><%= player.hero_damage %></td>
      <td><%= player.tower_damage %></td>
      <td><%= player.hero_healing %></td>
    </tr>
  <% end %>
</table>
Let’s move from top to bottom. info-table is a CSS class to apply some special styling to images inside this table:
application.scss
.info-table {
  img {
    width: 30px;
  }
}
The idea here is that all the pictures returned by Dota 2 API are pretty big, so we just make them smaller.
abandoned_or_not_connected? is the method that does pretty much what is says – checks if the players left the game or haven’t connected at all:
models/player.rb
[...]
def abandoned_or_not_connected?
  status != 'played'
end
[...]
If the player hasn’t stayed till the end of the match, we take note.
player_hero is yet another partial:
views/matches/_player_hero.html.erb
<%= image_tag hero[:image], alt: hero[:name], title: hero[:name] %>Great! Now this looks much more informative. However, the user still has no easy way to check if they won a match. Let’s fix this!
Who Won?
To find this out, simply have to find out what team a user played for and which team won the match. I’ll tweak the view like this:
views/matches/index.html.erb
<% if @matches && @matches.any? %>
  <table class="table table-striped table-hover info-table">
    <% @matches.each do |match| %>
      <tr>
        <td>
          <%= link_to match.started_at, match_path(match) %>
          <% if current_user.won?(match) %>
            <span class="label label-success">won</span>
          <% else %>
            <span class="label label-danger">lost</span>
          <% end %>
        </td>
      </tr>
    <% end %>
  </table>
<% end %>
Introduce the won? method that accepts the only argument – the match object:
models/user.rb
[...]
def won?(match)
  player = find_self_in(match)
  (player.radiant? && match.winner == 'Radiant') || (!player.radiant? && match.winner == 'Dire')
end
private
def find_self_in(match)
  match.players.find_by(uid: uid)
end
[...]
Nice! How about showing the player’s hero? Here you go:
views/matches/index.html.erb
<table class="table table-striped table-hover info-table">
  <% @matches.each do |match| %>
    <tr>
      <td>
        <%= render 'player_hero', hero: current_user.played_for_in(match) %>
        <%= link_to match.started_at, match_path(match) %>
        <% if current_user.won?(match) %>
          <span class="label label-success">won</span>
        <% else %>
          <span class="label label-danger">lost</span>
        <% end %>
      </td>
    </tr>
  <% end %>
</table>
models/user.rb
[...]
def played_for_in(match)
  find_self_in(match).hero
end
[...]
For production, it is absolutely imperative to use caching here. For example, you could use model caching like this:
def played_for_in(match)
  Rails.cache.fetch(self.uid + '_played_for_in_' + match.uid) { find_self_in(match).hero }
end
Just don’t forget to set up the appropriate flush caching conditions.
Conclusion
We come to the end of this article. We’ve employed basic Dota 2 API methods and created an app to present a user with basic information about their recent matches. Feel free to expand this demo further and share the results!
Working with Dota 2 API is fun and I hoped you liked it, too! Are you interested in seeing the second part on this topic? If so, in the next article I will cover fetching data for live Dota 2 matches.
Thank you for reading. Good luck and have fun (as Dota players say)!
Frequently Asked Questions (FAQs) about Steam-Powered Dota on Rails
What is the concept behind Steam-Powered Dota on Rails?
Steam-Powered Dota on Rails is a unique blend of the popular game Dota and the concept of rail transportation. It incorporates the strategic elements of Dota with the thrill of rail navigation. The game is designed to provide an immersive gaming experience by combining these two different worlds. It’s a fresh take on the Dota universe, offering a new perspective and gameplay mechanics that are both challenging and fun.
How does the gameplay of Steam-Powered Dota on Rails differ from traditional Dota?
Unlike traditional Dota, which is a multiplayer online battle arena game, Steam-Powered Dota on Rails introduces a new element of rail transportation. This means that players not only have to strategize their battles but also their movements and routes along the rail tracks. This adds a layer of complexity and excitement to the game, making it a unique gaming experience.
Can I play Steam-Powered Dota on Rails on different platforms?
Currently, the game is designed for the Steam platform. However, the developers are constantly working on updates and there might be possibilities of expanding to other platforms in the future. Keep an eye on the official website or social media channels for any announcements regarding this.
What are the system requirements for Steam-Powered Dota on Rails?
The game is designed to be compatible with a wide range of systems. However, for the best gaming experience, it is recommended to have a system with a good graphics card, sufficient RAM, and a fast processor. The exact system requirements can be found on the game’s official Steam page.
Are there any tutorials or guides available for Steam-Powered Dota on Rails?
Yes, there are several tutorials and guides available online to help you get started with the game. These guides provide detailed instructions on the game mechanics, strategies, and tips to improve your gameplay. You can find these guides on various gaming forums, YouTube, and the game’s official website.
Is Steam-Powered Dota on Rails a multiplayer game?
Yes, Steam-Powered Dota on Rails is a multiplayer game. You can team up with your friends or other players from around the world and strategize your moves together. The game offers a cooperative gameplay experience, making it a great choice for social gaming.
How often are updates and new features added to the game?
The developers are constantly working on improving the game and adding new features. Updates are released regularly to enhance the gameplay experience and introduce new challenges. Keep an eye on the game’s official website or social media channels for announcements about updates.
Can I customize my character in Steam-Powered Dota on Rails?
Yes, the game offers a variety of customization options for your character. You can choose from different outfits, weapons, and accessories to personalize your character. This adds a layer of personalization to the game, allowing you to express your style and personality.
Is there a community for Steam-Powered Dota on Rails players?
Yes, there is a vibrant community of players for Steam-Powered Dota on Rails. You can join various online forums, social media groups, and Discord channels to connect with other players, share your experiences, and learn from each other.
Where can I buy or download Steam-Powered Dota on Rails?
You can buy or download Steam-Powered Dota on Rails from the official Steam store. Just search for the game in the store, and you can purchase or download it directly to your system.
Ilya Bodrov is personal IT teacher, a senior engineer working at Campaigner LLC, author and teaching assistant at Sitepoint and lecturer at Moscow Aviations Institute. His primary programming languages are Ruby (with Rails) and JavaScript. He enjoys coding, teaching people and learning new things. Ilya also has some Cisco and Microsoft certificates and was working as a tutor in an educational center for a couple of years. In his free time he tweets, writes posts for his website, participates in OpenSource projects, goes in for sports and plays music.