

It’s IoT Week at SitePoint! All week we’re publishing articles focused on the intersection of the internet and the physical world, so keep checking the IoT tag for the latest updates.
Recently at SitePoint, in conjuncture with Flippa.com, we held our first company-wide Hack Day.

Thursday morning began with an ‘open mic’ meeting where anyone in the company could pitch any idea they liked. Everyone voted on their favorites and we had two days to plan, build and present our idea back to the group late Friday.
It was serious and there were prizes – we even had t-shirts made!
The Pitches
There were some great pitches made including:
- InstaGran: Send a printed postcard with personal message to your grandmother – for free.
- Bot-bot: An event/table tennis/fuusball organising Slackbot.
- Minority Report: Using machine learning on historical records for better website valuations.
- Creepr: Provide better choices to your customers by understanding them better.
However, this article is about an IoT idea pitched by SitePoint lead developer, Jude Aakjær.
Jude’s Idea: SparkleMotion
You may not know that the SitePoint HQ is actually an open-plan, three storey building currently housing four companies that share resources – Flippa.com, Influx.com, PromisePay.com and, of course, SitePoint. Throughout the building we have a scattering of variously-sizes boardrooms and meeting spaces.
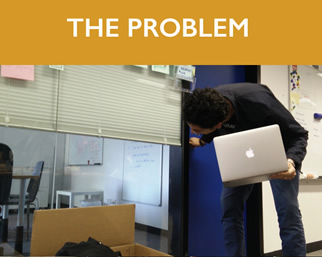
The Problem? Getting a Room
Though we have a calendaring system for booking these rooms, it’s fair to say that it isn’t rigorously adhered to.
What’s more, it’s common for people to need to take Skype, Hangouts or phone calls with no advanced notice. You’ll see these poor wretches stumbling through the building carrying a laptop, peeking under blinds, searching for a place of refuge.
Jude’s idea was to build IoT hardware and software that would know which rooms were currently occupied and that made that information readily available – via both an indicator light in-situ and a web front-end. He dubbed it ‘SparkleMotion’ and wanted to build a proof of concept. It would be our first IoT project.

Although Sparklemotion didn’t technically win the vote, a handful of us were sufficiently inspired to want to work on it regardless. Who said this was a democracy, anyway?
Our self-assembled team was our sysadmin, Adam Bolte, SitePoint managing editor, Adam Roberts, Video Content Manager, Angela Molina and SitePoint Design and UX editor, Alex Walker.
Had any of us built electronics before? No. But collectively we’d seen most episodes of MacGuyver, so we felt well-prepared.
The Scope
We estimated that in two days could likely build:
- The internet-enabled Arduino unit with motion sensor unit
- A simple server to monitor signaling
- A web front-end
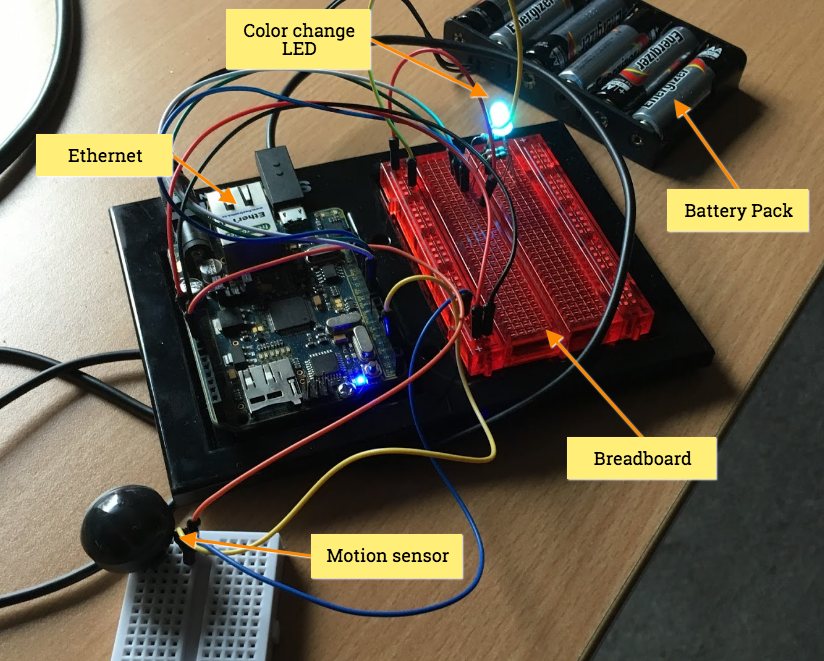
1. The Hardware Build
Before Hack Days started, we had spruiked the SparkleMotion concept around the office and found out the basics of how it would need to work. A few people around the office donated Arduino kits and a PIR motion sensor was sourced.
As none of the team had used an Arduino, and our C skills hovered somewhere between rusty and non-existent, we found the setup instructions in the Sparkfun kit to be super handy. It had some great beginners tutorials and we used it extensively to work out how the Arduino functioned.
Arduinos function perfectly for this kind of hacking, you can quickly prototype out a working piece of electronics without having to solder, and with fairly limited programming skills. They consist of a microcontroller with several digital and analog I/O pins that can be plugged into lights, motors, sensors, LCD boards, really anything you can imagine!
We got our SparkFun board and started playing…
Our basic battle plan was
- Turn a light on and off!
- Get an RGB light working
- Work out the motion sensor
- Talk to the internet!
Turning a light on and off was pretty simple, so we quickly moved on to driving an RGB light. This showed that there were two ways of reading and writing data, analog, and digital. Digital writes involve turning switches either ON or OFF and in the example of our RGB LED, this means cycling through all the combinations afforded by the three switches.
// Red (turn just the red LED on):

digitalWrite(RED_PIN, HIGH);
digitalWrite(GREEN_PIN, LOW);
digitalWrite(BLUE_PIN, LOW);
However, by doing an analogWrite, we can set each color to a specific intensity, from 0 to 255. This means we have a much larger spectrum of colors we can write to.
// Whatever values we want!
analogWrite(RED_PIN, 4);
analogWrite(BLUE_PIN, 200);
analogWrite(GREEN_PIN, 150);
After being amazed by seeing the LED go through all the colors of the rainbow, we turned our attention to the PIR sensor. Unfortunately, we had zero documentation provided with the sensor we bought, however, some Internet Investigating turned up that our PIR had ground, power, and information pins. We plugged it in, wrote some code and got to testing! This is where the difference between digital and analog really became obvious. By using digitalRead we got either 1 or 0 back; motion or no motion.
However by using analogRead we got back a value from 0 to 255, based on the proximity and intensity of motion. Taking that analog value from the PIR and plugging it into the analog color display of our LED meant we had a light that changed color based on how close you came to it. Pretty cool!
So by now we had a light that responded to motion, next step was to connect it to the internet. This is where the Arduino specification really rescued us. How? Well the Sparkfun board didn’t have any internet connectivity out of the box, but we also had another Arduino board that did have a built-in Ethernet port! Thanks to the standard shape and pin location of the Arduino’s, we did a lift and shift transplant onto a different board with zero glitches!
One thing we found out working this project is that the Arduino community is absolutely awesome, and has loads of examples for almost everything you need. A quick search led us to a tutorial on communicating with the internet and after initially testing it out we then adapted it to our particular needs. In this case, communicating with a web app.


2. The Server
The grand vision for SparkleMotion extended beyond just showing the status of one room, we wanted something that could show multiple rooms and connect into calendars to display upcoming events. As SitePoint uses RoR extensively, this was the logical choice to build a quick API in. Sure, we could have spun something up using Elixir or Node.js but given the short timeframe it was decided we should go with something we knew!
Still, we did play around with Rails 5 and especially the API only method of project creation, which slims down what is generated by rails new. After modeling a simple room model, we moved onto creating a simple controller to update room state, or show the room state.
class RoomsController < ApplicationController
  before_action :ensure_valid_room

  def state
    render plain: room.state
  end

  def update
    room.update_attribute(:occupied, params[:state] == "1")
    render :ok
  end

  private

  def room
    @_room ||= Room.where(id: params[:id] || params[:room_id]).first
  end

  def ensure_valid_room
    not_found if room.nil?
  end
end
To get the calendar bookings, we started to explore the Google Calendar API to get data from our shared calendar. However, with time running short on the final day we did what all great Hack projects do… fake it! The Google API Explorer is a great tool to make real API calls and see what data you’ll get back. We used the events list API call to get real data in the format our worker service will do in the future, and stored that in the database. Hey, if kludging it was good enough for the first iPhone presentation, then it is good enough for us!
Once we had our events stored against the room, it was a simple task to check if any events were scheduled for the next 15 minutes, or if there was an event scheduled right now. The Range#cover? method is really handy here, and we can make good use of ActiveSupport’s time extensions.
# event is our parsed JSON event from the Google Calendar API
start_date = event['start']['dateTime'].to_datetime
if ((start_date - 15.minutes) ... start_date).cover? Time.current
  return true
end
With all this in place, it is now pretty trivial to show our four different room states:
- Room is occupied!
- Empty but there is a booking soon
- Empty but is booked right now
- Empty
3. The Web Front-end
We wanted a reasonably attractive visual representation of which rooms were free – and obviously, we need it quickly. Alex concentrated on the front-end by pulling together these components:
- Hugo static site generator
- Freelancer template
- An SVG map component
- Calendar component
We started with Hugo – a great static site generator written in Go. You can create the site as HTML components – navigation, footer etc – which Hugo then compiles into a static site, ready for upload. It was a fast way to get a basic site structure working quickly.
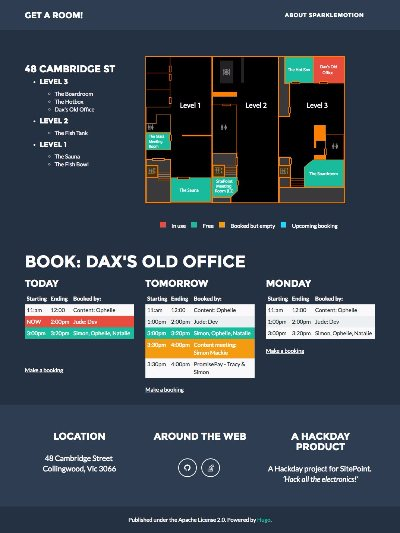
Hugo also has a great theme system that allowed us a get a solid look and feel in seconds. We chose the Freelancer theme as our starting point for it’s dark-cool look and sparse, functional layout.
Alex drew the SVG plans up from scratch, pacing out the building to get rough scale. CSS classes were created for the room states.
Room States
We decided on four room states, indicated by four colors.
- Red – Room is Occupied!
- Green – Empty
- Blue – Empty but there is a booking soon
- Yellow – Empty but is booked right now
Adam Roberts wrote some JavaScript that took the signaling from the server and attached an extra CSS class to appropriate room ID in the SVG.
Ultimately, we knew we would need to integrate the data from the sensor with the data from the calendar, but for v0.1 we just wanted to get our front-end map showing us when someone was occupying the room with the sensor.
We tested and re-tested and prepared.
Friday 4:00pm: Show time, Show time!

We gathered in the Sauna and each team presented their project. Angela took the lead as our presenter and she walked the audience through our build process and issues.
However, the moment of truth came when we brought the live web front-end up on the projector screen and Jude headed off to the monitored meeting room. Tense seconds passed as we watched a green room on a map, and waited for it to turn red…
To our great relief, it did, and a cheer went up in the room.
We have to say it: There’s a different kind of buzz to making hardware that operates in the real world rather than entirely behind a screen.
The Decision
It was a tight run race against some tough competition. Winners were to be selected by a combination of voting by hack day participants and scoring by the Flippa CEO and SitePoint GM respectively.
Minority Report won the participants vote after showing some cool applications of Amazon’s machine learning service.
But it was SparkleMotion that won the judges awards. Yay! Team Sparkle get a group lunch and the opportunity to take things to the next level.
So, Where to Now?
Step 1: GCal Intergration
Booking a room by clicking on a map feels much more natural than clicking on a calendar. Plugging the GCal API into the web UI shouldn’t take too long to do.
Step 2: Getting Six Room Sensors in Place
Our next step is to get sensors into every meeting room. This means we need six sensors – but not necessarily six processors. Our group of sensors could talk to a single central control unit.
We could build these sensors units from raw components again, but there are practical issues to solve for each unit.
- We don’t have an obvious case for the sensor units.
- How do we power it? Mains, USB. We don’t want to have to manage batteries.
- Are we going to require an electrician for setup? (Ideally not)
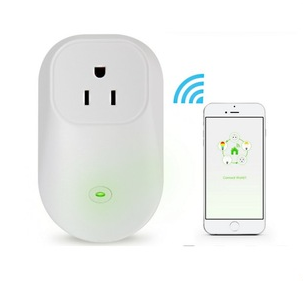
We think this might be a good place to slot in ‘prefab’ sensor components. Units like the one pictured here operate from any standard power outlet and have built-in wi-fi. They are designed to communicate with a simple phone app. If we were able to sniff the wi-fi signal being transmitted by these units and work out how to talk to them, we’ll have a relatively inexpensive, attractive, wi-fi-ready mains-powered unit we can deploy in almost any room without the need for a qualified electrician.
True, the power outlet in any given may not always be optimally positioned – but we think a three-foot extension cable can solve this issue most of the time. A hack, perhaps, but we think a worthwhile one for the MVP.
Step 3: Interactive Point-of-Presence Displays
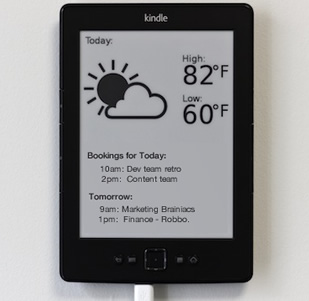
We can see the potential to use low-power tablets – even old E-Paper Kindles – to broadcast the upcoming bookings on the door of each room. E-paper requires little power and repurposing old tech to do something useful always feels good!
That just about covers us off for now.

Look out for more in our next article ‘SparkleMotion II – Sparkle Harder’.
 Alex Walker
Alex has been doing cruel and unusual things to CSS since 2001. He is the lead front-end design and dev for SitePoint and one-time SitePoint's Design and UX editor with over 150+ newsletter written. Co-author of The Principles of Beautiful Web Design. Now Alex is involved in the planning, development, production, and marketing of a huge range of printed and online products and references. He has designed over 60+ of SitePoint's book covers.
 Jude Aakjaer
Always thinking he'd end up doing something art based, Jude descended down the programming path when his computer could no longer run 3D modelling software. After ten years working with clients, he joined SitePoint to run the internal dev team and has never enjoyed his coffee more.