
This article was peer reviewed by Panayiotis Velisarakos, Dan Prince and Julian Motz. Thanks to all of SitePoint’s peer reviewers for making SitePoint content the best it can be!
When starting an open source project, one of the most important things is to create project documentation. Documentation is essential if we want our project to be used by others, and it can be done in many ways:
- GitHub Wiki – GitHub lets us make a wiki associated with each project. It is composed of pages written with markdown and is definitely a tool to take into consideration to build documentation. However, it does have a few limitations: contributions to a wiki don’t appear in the project contributions; is limited to a strict structure and layout; you must host assets in other locations.
- README – we can create a README.md, which will show on the GitHub project page. It might be a good solution if the documentation will be very short, otherwise it gets a big one page full of information. Usually this serves to introduce the project and not to show documentation.
- Self Hosted – we can create a custom site for our documentation. This gives us total freedom to create what we want, but it prevents possible contributions to our documentation. It also comes with the price of hosting.
- GitHub Pages – GitHub also provides a way of hosting a static site for each project. By creating a branch called gh-pages in your project’s repo, GitHub will publish its contents as a website. This is great to place a documentation site, although, maintaining documentation in a separate branch is not optimal: documentation files get hard to find for contributors and contributions won’t show up in the master branch.
Fortunately, there’s a way of combining the best parts of the options above.
Introducing Hexo
Hexo is a static site generator built with Node.js. It is mostly used as a blog framework, but it has a deploy integration for GitHub which makes it a great fit to build a documentation site for a GitHub project.
With Hexo, we can create markdown files and HTML layouts which will be converted to static HTML files when deployed. Hexo provides a deploy configuration which builds our static files into a GitHub branch. This means we can maintain our documentation as markdown in our project’s master branch and deploy it, with one command, to gh-pages.
Installing Hexo
Hexo is built with Node.js, so to install and use it we’ll need Node.js installed in our system. We’ll also need Git which will be used by Hexo to deploy our documentation site to gh-pages.
Installing Node.js
To install Node I recommend using a version manager, such as nvm. There are other version managers out there that you can use, but they all make life easier when it comes to installing and switching between Node.js versions.
Using nvm, let’s run the following:
nvm install 4
This will install the most recent release of Node.js 4.x, which also comes with npm ready to use.
Installing Git
We’ll also need Git installed in our system. If you’re not sure you already have it, run the following:
git --version
If the result is a Git version you can skip this section. If instead you see an error, you’ll have to install it first.
Windows
On a windows system we can run an installer provided by Git.
OS X
On OS X, we can install it in one of three different ways:
- Using the installer.
- Using Homebrew by running
brew install git. - Using MacPorts by running
sudo port install git +doc +bash_completion +gitweb.
Usually, I prefer using Homebrew to install this type of software, but if you’re more familiar with MacPorts or just want to use the installer, there’s nothing wrong with that.
Linux – Ubuntu or Debian
On an Ubuntu or Debian-based system we can install Git with apt:
sudo apt-get install git-core
Linux – Fedora, Red Hat or CentOS
On a Fedora, Red Hat or CentOS system we can install Git with yum:
sudo yum install git-core
Installing Hexo CLI
After installing Node.js and Git we can now finally install Hexo by running:
npm install -g hexo-cli
To make sure everything is set up, type the following:
hexo --version
If you see a list of versions, good news: you have everything ready to use Hexo!
Setting Up
Now that we have Hexo installed, we can now start to create our documentation on our GitHub master branch. To follow this article, you can either:
- Create the documentation for one of your existing GitHub projects
- Create a new repo here
For simplicity, I’ll assume you’re creating a new project called hexo-documentation, but you can follow the article with an existing one.
Let’s clone the GitHub repo locally by running:
git clone https://github.com/USERNAME/REPOSITORY.git
Replace USERNAME with your username and REPOSITORY with the name you gave to your repo. In my case, the command would be:
git clone https://github.com/sitepoint-editors/hexo-documentation.git
Now let’s cd into it and create a folder called docs:
cd hexo-documentation
mkdir docs
The docs folder is where our documentation site will be, and it’s where we’ll initialize Hexo by running:
hexo init docs
What the command above does is add a bunch of Hexo’s configuration and dependency settings. But we still need to install those dependencies, which are defined in a package.json file inside the docs folder. To do so, let’s run the following:
cd docs
npm install
If no error occurred we now have Hexo’s dependencies installed, as well as the following structure inside our docs folder:
- _config.yml – our site configuration data.
- package.json – Node.js dependencies.
- scaffolds – used for blog posts (in this article we won’t be covering the Hexo blogging feature).
- source – where we’ll put our markdown files, as well as anything that we want to be public such as images.
- themes – where the theme we’re using is placed.
We can already check our site running by executing:
hexo generate
hexo server
The first command will generate our static site from our source files, using the selected theme. The second one will start a server that provides those static files. We can now visit http://localhost:4000/, which will show something like the following:
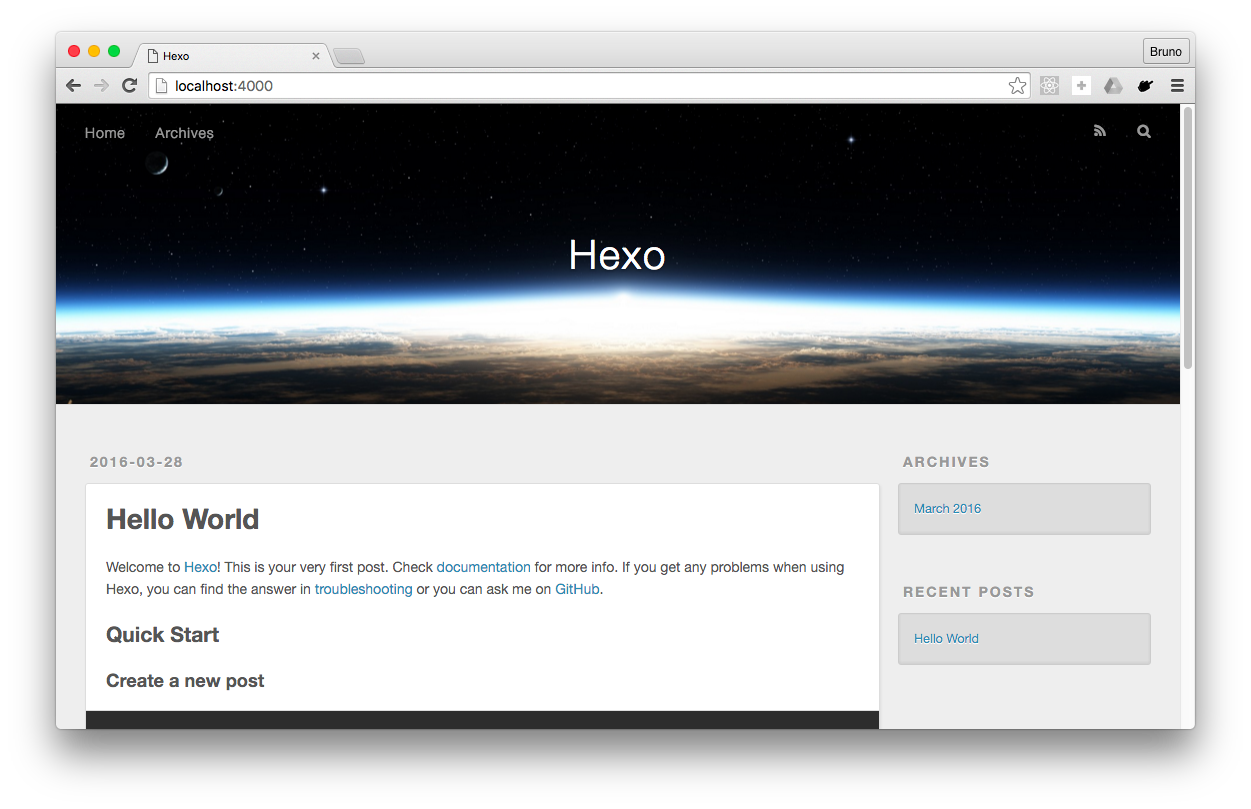
At the moment it looks more like a blog than a documentation site, but we’ll get to that.
Creating a Theme
To change the current look of the site, we’ll need to create a Hexo theme. A theme defines the looks and layout of your site. There are a lot of themes created for Hexo that you can use for free. In this article though, we’ll create a simple one from scratch.
Hexo comes with a theme by default, you can see it inside the docs/themes folder. You can have multiple themes there, but only one can be active at a time. So, let’s create our own. Inside the themes folder let’s create a directory for our theme. Let’s name it ‘documentation’.
Now, a Hexo theme should have the following structure:
- _config.yml – extra configuration for the theme.
- languages – internationalization support (i18n).
- layout – the theme layouts (that will give structure to the pages).
- scripts – the place to put plugin scripts for Hexo.
- source – any assets placed here will be processed by Hexo and put as public. Files starting with
_(underscore) are ignored.
We’ll create a simple and static theme, so we won’t need the scripts folder. And we’ll write in English only, so we can discard the languages folder as well.
What we’ll do is create a layout for our pages, and some CSS to put everything in order. We’ll use Sass to generate the CSS so we can define some variables and divide our CSS into modules. Hexo can’t process Sass on its own, but fortunately there’s a plugin for it, hexo-renderer-sass, and we can install it with npm.
So with the terminal at ./docs(note it’s not inside the theme), let’s run:
npm install --save hexo-renderer-sass
Now, back to the theme. Let’s configure Sass, otherwise it won’t be used. So in the docs/themes/documentation/_config.yml let’s add the following:
node_sass:
  outputStyle: nested
  precision: 4
  sourceComments: false
You can see a full list of available configuration properties for Sass here.
Great! Now we can start using Sass. We won’t go into detail about the writing of the Sass styles, as it is not relevant to the article’s scope and it is quite extensive. In any case, you can find them here, and you can copy these files into your project or create your own styles.
Let’s move on to the layout. This is the most important piece when building a theme. It defines the layout of your pages with a template language. Although you can use others, by default, Hexo provides Swig as the template engine, and that’s what we’ll use. So, let’s create a file docs/themes/documentation/layout/default.swig with:
<!DOCTYPE html>
<html>
<head>
  <meta charSet='utf-8' />
  <title>{{config.title + ' - ' + page.title}}</title>
  <link href='https://cdnjs.cloudflare.com/ajax/libs/normalize/4.0.0/normalize.min.css' rel='stylesheet' type='text/css'>
  <link href='https://fonts.googleapis.com/css?family=Open+Sans:400,600,300,700' rel='stylesheet' type='text/css'>
  <link href='{{ url_for("css/docs.css") }}' rel='stylesheet'>
</head>
<body>
  <div class='menu'>
    <div class='logo'>
      Documentation
    </div>
    <nav class='menu-nav'>
      {% for section in site.data.nav %}
        <ul class='nav'>
          <span>{{ section.title }}</span>
          <ul class='nav'>
            {% for item in section.items %}
              <li>
                <a href='{{item.href || url_for(item.id + ".html") }}'{% if item.id == page.id %} class='active'{% endif %}>{{item.title}}</a>
              </li>
            {% endfor %}
          </ul>
        </ul>
      {% endfor %}
    </nav>
    <a class='footer' href='https://github.com/sitepoint-editors/hexo-documentation'>
      Project on github
    </a>
  </div>
  <div class='page'>
    <div class='page-content'>
      <h1>{{page.title}}</h1>
      {{page.content}}
    </div>
  </div>
  <div class='switch-page'>
    {% if page.prev %}
      <a class='previous' href='{{ url_for(page.prev) }}'>Previous</a>
    {% endif %}
    {% if page.next %}
      <a class='next' href='{{ url_for(page.next) }}'>Next</a>
    {% endif %}
  </div>
</body>
</html>
Let’s break this down to see what we’re doing here.
<head>
  <meta charSet='utf-8' />
  <title>{{config.title + ' - ' + page.title}}</title>
  <link href='https://cdnjs.cloudflare.com/ajax/libs/normalize/4.0.0/normalize.min.css' rel='stylesheet' type='text/css'>
  <link href='https://fonts.googleapis.com/css?family=Open+Sans:400,600,300,700' rel='stylesheet' type='text/css'>
  <link href='{{ url_for("css/docs.css") }}' rel='stylesheet'>
</head>
In the header we’re setting up:
- a title – Hexo provides variables that we can use to build a smart title. In our case, we’re concatenating the site’s title, set in the configuration file, and the page title, defined in each page.
- links – we’re including: the normalize CSS stylesheet, so that our site’s base styles are consistent across browsers; Open Sans font family from Google Fonts, to give a better look to the text; and finally our created styles generated from the Sass files. Note that for this last one we’re calling a Hexo helper function
url_for, since we don’t know where the site will be located. What this does is basically to concatenate the root URL with the URL passed through as an argument.
Next follows the body. It is mostly normal HTML except some parts that I’ll explain in more detail.
{% for section in site.data.nav %}
  <ul class='nav'>
    <span>{{ section.title }}</span>
    <ul class='nav'>
      {% for item in section.items %}
        <li>
          <a href='{{item.href || url_for(item.id + ".html") }}'{% if item.id == page.id %} class='active'{% endif %}>{{item.title}}</a>
        </li>
      {% endfor %}
    </ul>
  </ul>
{% endfor %}
This is what generates our menu. It is iterating through a structure, site.data.nav, that we’ll setup later on in our site’s _data folder. It expects each item in site.data.nav to be have a title and an items array which contains the actual navigation links. It loops through those items and generates the link for each one.
The next important part we’re setting up in this file is the content area:
<div class='page-content'>
  <h1>{{page.title}}</h1>
  {{page.content}}
</div>
Here we’re including the current page title, followed by the page’s content. In our case the page content here will be the resulting HTML generated from the markdown files we’ll write.
Finally, as more of an extra, we’re including a previous and next page buttons:
{% if page.prev %}
  <a class='previous' href='{{ url_for(page.prev) }}'>Previous</a>
{% endif %}
{% if page.next %}
  <a class='next' href='{{ url_for(page.next) }}'>Next</a>
{% endif %}
In the code above we’re assuming each page should have a prev and a next property where applicable. And we’ll see later how we define that. This renders a link depending on whether each one is available or not.
And that’s it! Not only for our layout file, but for our theme as well. The final missing piece is changing the actual theme you want Hexo to use for your site. To do this, in docs/_config.yml you need to change the theme property to:
theme: documentation
All done! We can now head on to actually creating our content.
Creating Content
Now we have reached the most important part of the process, the creation of the actual documentation for our project. For this we’ll be working in the docs/source folder. This is where all pages will go, as well as our menu data structure.
Let’s start with the menu data. Hexo provides a way for us to define data structures which will be available in site.data. For this, inside docs/source, let’s create a new folder called _data. Hexo will go through this folder if it exists and process the supported files in it into the site.data variable, namespaced by file name.
Since our theme is looking to find our menu data in site.data.nav, we’ll create a nav.yml file. Let’s put the following content in it:
- title: Introduction
  items:
  - id: index
    title: What is it
  - id: how-it-works
    title: How it works
- title: Usage
  items:
  - id: installation
    title: Installation
  - id: using
    title: Using It
Here we’re including two sections with two pages in each. And that’s it, our menu is all setup. We just need to create the pages now. Since we’re going to write them in markdown, let’s create the following files:
index.mdhow-it-works.mdinstallation.mdusing.md
Now let’s put some content in them. The first thing to do when creating a new content file is writing the front-matter which is where you define your page’s settings. This is a block prefixed and suffixed by three dashes and usually written in YAML format.
Let’s start from the index.md file then.
---
layout: default
id: index
title: What is it?
next: how-it-works.html
---

This is our index markdown file

- one
- two
- three
We’re setting four values in this page’s front-matter:
- layout – the layout to use for this page.
- id – unique identificator of the page.
- title – the page title, will be available in
page.title. - next – variable indicating the next page.
We follow the settings with some markdown content. When the site is built, this content will be converted to HTML and put into a static HTML file using the layout we created earlier for our theme.
The other files follow the exact same rules, so we won’t go through them here.
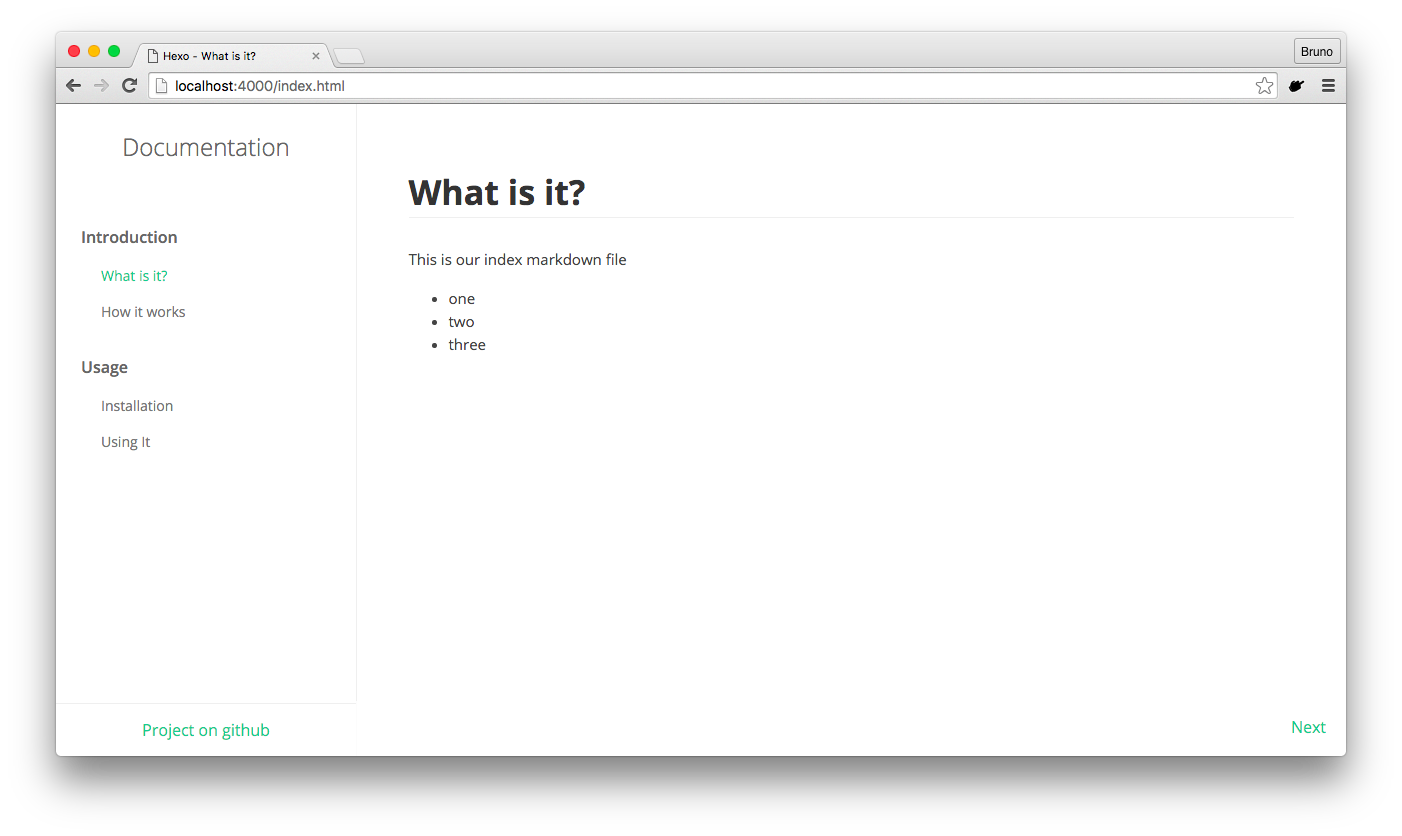
We can now check our site by running:
hexo generate
hexo server
When visiting http://localhost:4000/, it should look like the following image, if you included the styles:
Deploying to GitHub Pages
Now that we have our documentation site all done, we need to be able to deploy it to GitHub pages. If we were doing this manually, we’d have to create a gh-pages branch, generate our Hexo site locally, copy paste the resulting static files into our gh-pages local working copy branch, commit and push it, only to realize we had a typo so we needed to do this all over again.
Fortunately, Hexo provides a much better way to deploy to gh-pages. For this we’ll need the hexo-deployer-git package, which we can install by running the following command in docs/:
npm install --save hexo-deployer-git
All we have to do now is set the configuration in the docs/_config.yml file. Let’s open it and head to the deployment section, which should be all the way at the bottom, and add the following:
deploy:
  type: git
  repo: https://github.com/sitepoint-editors/hexo-documentation
  branch: gh-pages
  message: "Docs updated: {{ now('YYYY-MM-DD HH:mm:ss') }})"
And that’s it! Before deploying, let’s change some final configurations for the site as well:
# Site
title: Hexo documentation
subtitle: Hexo documentation article
description: Hexo documentation article
author: Bruno Mota
language: en
timezone: GMT

# URL
url: http://sitepoint-editors.github.io/hexo-documentation
root: /hexo-documentation/
Great, so all that is left to do is to actually deploy! In the terminal, run the following:
hexo generate
hexo deploy
Hexo will now deploy the generated output to the gh-pages branch for us. After it is complete, we can visit the resulting site at http://sitepoint-editors.github.io/hexo-documentation/.
Conclusion
Documentation is essential if you want your work to be used by others. There are simple ways of creating project documentation on GitHub but they don’t always facilitate the best results. For medium to large projects it is often necessary to have a documentation site to hold all the information. Hexo not only enables this but also provides a quick setup and deploy process that makes this framework a great tool for the job. Thanks, Tommy Chen for the superb work on Hexo!
Let me know in the comments if you’ve decided to give Hexo a try, I’d love to hear how you get on!
Frequently Asked Questions (FAQs) about Hexo Project Documentation
How do I install Hexo on my system?
To install Hexo, you need to have Node.js and Git installed on your system. Once these are installed, you can use the npm command to install Hexo. The command is ‘npm install -g hexo-cli’. After running this command, Hexo will be installed globally on your system. You can verify the installation by typing ‘hexo version’ in your terminal. If Hexo is installed correctly, it will display the version number.
How do I create a new Hexo project?
After installing Hexo, you can create a new project by using the ‘hexo init’ command followed by your project name. For example, ‘hexo init myproject’. This command will create a new directory with the specified project name and set up the necessary Hexo files within it. After the setup is complete, navigate to your project directory using ‘cd myproject’, and then run ‘npm install’ to install all the necessary dependencies.
How do I configure my Hexo project?
Hexo uses a file named ‘_config.yml’ for its configuration. This file is created automatically when you initialize a new Hexo project. You can open this file in any text editor to modify the configuration. The file contains various sections like ‘title’, ‘description’, ‘author’, etc., where you can input your details. Remember to save the file after making any changes.
How do I generate and preview my Hexo site?
After configuring your Hexo project, you can generate the static files using the ‘hexo generate’ command. This command will create a ‘public’ directory in your project folder containing all the static files. To preview your site, use the ‘hexo server’ command. This will start a local server, and you can view your site by navigating to ‘http://localhost:4000‘ in your web browser.
How do I deploy my Hexo site?
Hexo supports various deployment methods like Heroku, GitHub Pages, etc. The deployment configuration is done in the ‘_config.yml’ file under the ‘deploy’ section. After configuring the deployment, you can use the ‘hexo deploy’ command to deploy your site.
How do I write a new post in Hexo?
You can create a new post in Hexo using the ‘hexo new’ command followed by the post title. For example, ‘hexo new “My First Post”‘. This command will create a new markdown file in the ‘source/_posts’ directory. You can open this file in any text editor to write your post.
How do I customize the theme of my Hexo site?
Hexo supports various themes which you can use to customize the look of your site. You can download a theme and extract it into the ‘themes’ directory of your project. Then, modify the ‘theme’ field in the ‘_config.yml’ file to the name of your new theme.
How do I add plugins to my Hexo site?
Hexo supports various plugins which you can use to add extra functionality to your site. You can install a plugin using npm and then enable it in the ‘_config.yml’ file under the ‘plugins’ section.
How do I update Hexo to the latest version?
You can update Hexo to the latest version by using the ‘npm update’ command. This command will update all the npm packages, including Hexo, to their latest versions.
How do I troubleshoot common issues in Hexo?
Hexo has a detailed documentation which covers various common issues and their solutions. You can refer to this documentation if you face any issues while using Hexo. If you can’t find a solution in the documentation, you can also ask for help in the Hexo community.
 Bruno Mota
Bruno is a web developer with a special enthusiasm on JavaScript. He has a master degree on informatics engineering from Porto University and has been working on web products for the last 7 years. His latest project Relax, is an open source CMS built with the latest JavaScript techs.