In the first part of this series we created the client side of our PhoneRTC application and in this article we create the server side that coordinates clients.
Signaling Server
The server-side component of the app is called the “signaling server”, as it’s used for exchanging information between peers.
Start by creating a new koler-server directory outside the www directory. Everything inside the www directory is packaged when building the app and we don’t want the server component included. Inside the new directory, open your terminal and install express, lodash and Socket.io as dependencies.
npm install express lodash socket.ioCreate a new JavaScript file called koler.js and require the dependencies installed.
var express = require('express');
var app = express();
var _ = require('lodash');
var sock = require('socket.io');
Create a new server instance that will run on port 4000.
var server = app.listen(4000, function(){

  var host = server.address().address
  var port = server.address().port

  console.log('Example app listening at http://%s:%s', host, port)

});
Use the new server instance for Socket.io.
var io = sock.listen(server);Create an array for storing users. When a user logs in, push an object containing the ID and socket ID assigned to the user. This allows us to refer to this user later when sending messages or removing the user from the users array.
var users = [];

io.on('connection', function(socket){

  socket.on('login', function(data){
    users.push({'id': data.id, 'socket': socket.id});
  });

});
Earlier we were sending messages using SocketService.emit('sendMessage') and passing an object containing the data we want to pass. The following is the server-side code for processing that message.
The name of the message you are sending on the front-end should match the name of the event on the server. In this case the name of the message is sendMessage. Once the message is received, the peer ID passed is converted to a number so it can be used with the find method in lodash to find the user with that ID. The socket ID was stored as a number and that’s why the lodash condition wouldn’t match if the data type is different.
The message is then sent to that user. So when we were sending messages from the front end, we were actually sending it to the server. The server then sends that message to its destination. That is accomplished by using the to method in Socket.io. This method accepts the socket ID of the user you want to send the message to.
socket.on('sendMessage', function(message){

  var peer_id = Number(message.peer_id);
  var contact = _.find(users, { 'id': peer_id });

  io.to(contact.socket).emit('messageReceived', message);
});
To avoid populating the users array with users that are already disconnected we add the following code. It removes the user from the users array when they disconnect. Socket.io has a disconnect event built in to it, so all we have to do is determine which users need to be removed by using the current socket ID as the basis.
The remove function in lodash accepts the array as its first argument and the function containing the condition to be checked for each user. It loops through each user and checks if the current value of the socket property is the same as the socket ID of the current socket connection.
socket.on('disconnect', function(){

  _.remove(users, function(user){
    return user.socket == socket.id;
  });

});
Now we can start the server by executing node koler.js in terminal.
Deployment
Returning to the front end, we can now install PhoneRTC. As mentioned earlier I’m only going to mention deployment in Android since I don’t have access to the Mac platform for iOS. If you’re on a Mac and are planning to deploy on iOS, you can follow the installation instructions on the official wiki of the PhoneRTC project.
When I first deployed an app that uses phoneRTC, I didn’t have any luck with the original project. Even the phoneRTC demo app didn’t work when I tested it on my phone (the audio from the phone comparable to that of a choking person). What worked for me is the fork from cesterlizi.
However I encourage you to install the original project first as it has the most activity, my phone might be a special case. Here’s the command for installing phoneRTC from the original project:
cordova plugin add https://github.com/alongubkin/phonertc.gitNote that installing the plugin might take some time depending on your internet connection.
If you decided to install the cesterlizi fork you need to update the PhoneRTCPlugin.java file. Search for that file inside the plugins/com.dooble.phonertc directory. It should be inside the plugins/com.dooble.phonertc/src/android/com/dooble/phonertc directory. Open the file and look for the createVideoView function:
private void createVideoView() {
  Point size = new Point();
  size.set(_videoConfig.getContainer().getWidth() * _videoConfig.getDevicePixelRatio(),
  _videoConfig.getContainer().getHeight() * _videoConfig.getDevicePixelRatio());

  _videoView = new VideoGLView(cordova.getActivity(), size);
  VideoRendererGui.setView(_videoView);

  webView.addView(_videoView, _videoParams);
}
Replace the last line of the function with:
//webView.addView(_videoView, _videoParams); //remove this line
((WebView) webView.getView()).addView(_videoView, _videoParams);
And inside the refreshVideoView function, replace:
if (_videoView != null) {
  webView.removeView(_videoView); //remove this line
  _videoView = null;
}
With:
if (_videoView != null) {
  ((WebView) webView.getView()).removeView(_videoView); //replacement
  _videoView = null;
}
And in the onSessionDisconnect function, replace:
if (_videoView != null) {
  _videoView.setVisibility(View.GONE);
  webView.removeView(_videoView); //remove this line
}
With:
if (_videoView != null) {
  _videoView.setVisibility(View.GONE);
  ((WebView) webView.getView()).removeView(_videoView); //replacement
}
The changes made relate to the pluggable webviews in Cordova. If you stick with the old code, you will see an error when compiling the app to Android
Once those changes are made, compile the app. Do this by executing cordova build in terminal. If the build completes successfully, connect your device and copy the apk file to it. You can find the apk file in the platforms/android/build/outputs/apk directory. If you’ve used the original project and the build returns an error then uninstall the plugin using:
cordova plugin rm com.dooble.phonertcAnd install the fork.
cordova plugin add https://github.com/cesterlizi/phonertc.gitOnce you’ve installed the app on your phone, you can test the app by installing the browser platform so that you can test with your phone and browser. To do that, execute the following.
cordova platform add browserThis should add a browser folder in the platforms directory. Open the platforms/browser/cordova/run file. If you’re on linux, you can add either of the following in the switch statement for the browser to run.
case 'linux': spawn('google-chrome', ['--test-type', '--disable-web-security', '--user-data-dir=/tmp/temp_chrome_user_data_dir_for_cordova_browser', project]);case 'linux': spawn('chromium-browser', ['--test-type', '--disable-web-security', '--user-data-dir=/tmp/temp_chromium_user_data_dir_for_cordova_browser', project]);Once added, you can run a browser instance which has all the features for running a Cordova app.
cordova run browserHere’s how the app looks in the browser:
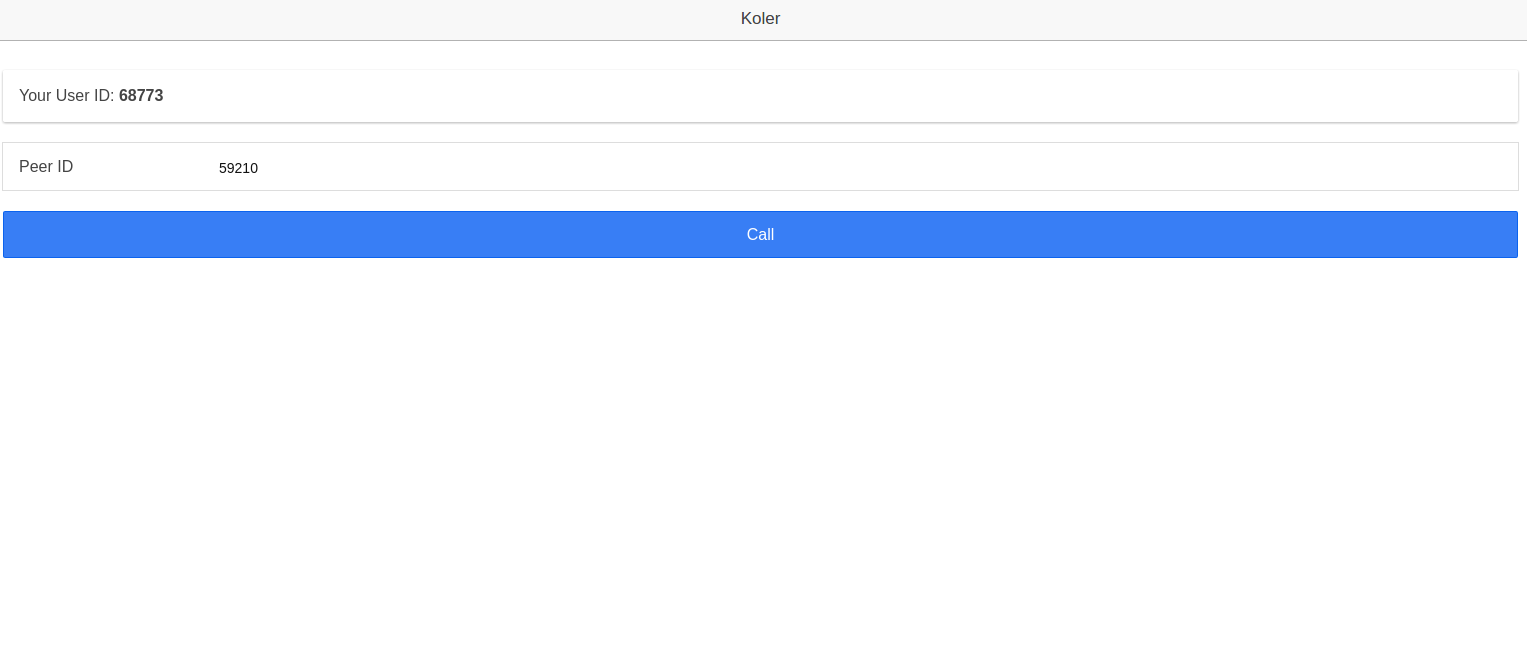
You can use the device emulator on Chrome to make it look more like an actual mobile app.
Here’s how it looks on mobile:
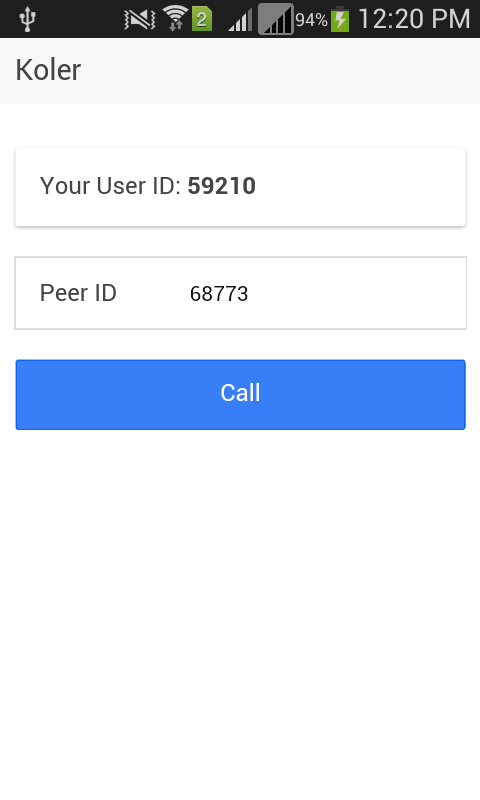
When the user is initiating a call:

And when the call is in progress:

Conclusion
That’s it! In this tutorial you’ve learned how to build an audio calling app with Ionic, Cordova, PhoneRTC and Socket.io. You can find the complete code that I’ve used in this tutorial on Github.
I would love to hear your experiences and ideas on what you’ve learnt.
Frequently Asked Questions about Creating a PhoneRTC Calling App Server-Side
What is PhoneRTC and how does it work?
PhoneRTC is a WebRTC solution for mobile applications. It is a standalone library that enables real-time voice and video communication in iOS and Android apps. It works by establishing a peer-to-peer connection between devices, allowing them to communicate directly without the need for an intermediary server. This is achieved through the use of WebRTC (Web Real-Time Communication), an open-source project that provides web browsers and mobile applications with real-time communication capabilities via simple APIs.
How do I set up a PhoneRTC server?
Setting up a PhoneRTC server involves several steps. First, you need to install Node.js and npm (Node Package Manager) on your server. Then, you can install the PhoneRTC package using npm. After that, you need to create a server script that will handle the signaling between the peers. This script will use the PhoneRTC API to create and manage the peer connections.
What are the requirements for using PhoneRTC?
To use PhoneRTC, you need a server running Node.js and a mobile application that can run PhoneRTC. The mobile application can be built using any technology that supports WebRTC, such as Cordova, Ionic, or React Native. The server needs to have a public IP address and should be capable of running a Node.js application.
How can I troubleshoot issues with PhoneRTC?
Troubleshooting issues with PhoneRTC can be done by checking the server logs for any errors or unusual activity. You can also use the Chrome Developer Tools to inspect the WebRTC traffic and check for any issues with the peer connections. If you’re having issues with audio or video quality, it could be due to network conditions or device limitations.
Can I use PhoneRTC with other backend servers?
Yes, PhoneRTC can be used with any backend server that supports WebRTC. This includes popular backend servers like Express.js, Koa.js, and Hapi.js. You just need to integrate the PhoneRTC library into your server code and use the PhoneRTC API to manage the peer connections.
How secure is PhoneRTC?
PhoneRTC uses WebRTC for communication, which is designed with security in mind. All data sent over a WebRTC connection is encrypted, and the connection itself is established using secure protocols. However, the security of your PhoneRTC application also depends on the security of your server and your application code.
How can I improve the performance of my PhoneRTC application?
The performance of your PhoneRTC application can be improved by optimizing your server and network conditions. This includes ensuring that your server has enough resources to handle the peer connections, and that your network has sufficient bandwidth for the audio and video data. You can also optimize the performance of your application code by using efficient algorithms and data structures.
Can I use PhoneRTC for group calls?
Yes, PhoneRTC supports group calls. You can create a group call by establishing a peer connection between each participant in the call. However, keep in mind that the performance of group calls can be affected by the number of participants and the network conditions.
What are the alternatives to PhoneRTC?
There are several alternatives to PhoneRTC, including other WebRTC libraries like PeerJS and SimpleWebRTC. There are also commercial solutions like Twilio and Agora that provide more features and support.
How can I contribute to the PhoneRTC project?
PhoneRTC is an open-source project, so you can contribute by submitting bug reports, proposing new features, or contributing code. You can find the source code and issue tracker on the PhoneRTC GitHub page.
 Wern Ancheta
Wern is a web developer from the Philippines. He loves building things for the web and sharing the things he has learned by writing in his blog. When he's not coding or learning something new, he enjoys watching anime and playing video games.