In the first phase of the Padsteroids tutorials we created the iPad application and added some simple drawing to it. In phase two we will add interactivity by adding controls for the player to manoeuvre the spaceship around the screen and fire a laser beam which will, in the completed application, be used to destroy asteroids.
The iOS toolkit comes with a rich set of controls, buttons, list boxes, date controls and so on. But this is a game, and for this game we want to have something like joysticks. Sadly there is no native joystick control so we are going to create a new view called ‘CircleControlView’ that acts like a joystick. And we will use two of these controls, one to fire the laser, and the other to move the ship.
Building the CircleControlView
Creating the new CircleControlView class starts with using the ‘New > File’ option on the Padsteroids folder as shown in Figure 1. This is exactly the same process that we used to create the GameSurface view.

As with the GameSurface view the next steps are to select that we want to create an Objective-C class, and that it should descend from UIView. Then we need to name it CircleControlView as shown in Figure 2.

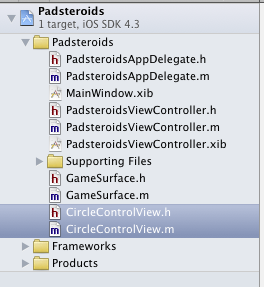
If you have created the CircleControlView class properly you should see new CircleControlView.h and CircleControlView.m classes added to your project as you can see in Figure 3.
The next step is to dig into the CircleControlView.h file and add both some member variables and two accessors as shown in Listing 1.
Listing 1. CircleControlView.h
#import <UIKit/UIKit.h>

@interface CircleControlView : UIView {
    BOOL initializedCenter;
    CGPoint centerPoint;
}

- (double)getAngle;
- (double)getDistance;

@end
The initializedCenter is a Boolean that indicates whether the center has been initialized for the control. And the centerPoint stores the current location of the joystick within the view. The two accessors, getAngle and getDistance return the angle of the joystick from the center in degrees, and the distance from the center as a percentage of the total available distance. For example, the control could be at zero degrees and zero distance, meaning that it’s in the center. Or it could be at 25 degrees at 50% distance, meaning that it’s been moved up and to the right at half way between the center of the control and the perimeter of the circle.
With the definition for the class all set up it’s time to change around the CircleControlView.m class to implement this new interface. The new code for the initialization and drawing of the control is in Listing 2.
Listing 2. CircleControlView.m Initialization and Drawing
#import "CircleControlView.h"

@implementation CircleControlView

- (id)initWithFrame:(CGRect)frame {
    self = [super initWithFrame:frame];
    if (self) {
        initializedCenter = NO;
    }
    return self;
}

- (void)drawRect:(CGRect)rect {
    if ( initializedCenter == NO ) {
        centerPoint.x = self.bounds.size.width / 2;
        centerPoint.y = self.bounds.size.height / 2;
        initializedCenter = YES;
    }

    CGContextRef context = UIGraphicsGetCurrentContext();

    CGContextSetShouldAntialias( context, true );

    CGContextSetFillColorWithColor(context, [UIColor blueColor].CGColor);
    CGContextSetAlpha( context, 0.2 );
    CGContextFillEllipseInRect( context, CGRectInset( self.bounds, 5, 5 ) );

    CGContextSetAlpha( context, 0.7 );
    CGContextSetStrokeColorWithColor(context, [UIColor blueColor].CGColor);
    CGContextSetLineWidth(context, 2.0);
    CGContextStrokeEllipseInRect( context, CGRectInset( self.bounds, 5, 5 ) );

    CGContextSetAlpha( context, 0.5 );

    CGRect ballRect;
    ballRect.origin.x = centerPoint.x - 20;
    ballRect.origin.y = centerPoint.y - 20;
    ballRect.size.width = 40;
    ballRect.size.height = 40;

    CGContextSetFillColorWithColor(context, [UIColor blueColor].CGColor);
    CGContextSetLineWidth(context, 1.0);
    CGContextFillEllipseInRect( context, ballRect );
}
The drawing code is the most interesting part. It starts with initializing the center point if this is the first time the control is being drawn. It the uses drawing to draw a filled circle, then the border of the circle, and finally the control ball in it’s current location. Feel free to play with the colors and the sizings and such, part of the fun of developing your own controls is that you have complete control over the look and feel.
The next step is to add the user interactivity to the control using the methods shown in Listing 3.
Listing 3. CircleControlView.m Interaction Control
- (void)touchesBegan:(NSSet *)touches withEvent:(UIEvent *)event {
}

- (void)touchesEnded:(NSSet *)touches withEvent:(UIEvent *)event {
    centerPoint.x = self.bounds.size.width / 2;
    centerPoint.y = self.bounds.size.height / 2;
    [self setNeedsDisplay];
}

- (void)touchesMoved:(NSSet *)touches withEvent:(UIEvent *)event {
    centerPoint = [[touches anyObject] locationInView: self];
    [self setNeedsDisplay];
}
These are fairly standard UI methods; touchesBegan, touchesMoved and touchesEnd. iOS sends these events as the player touches the control and moves around. When they finish the touch the touchesEnded method is called. In this case we use the touchesMoved method to track the users thumbs as they move the joystick. And the touchesEnded method to return the joystick to the center position. Listing 4 shows the accessor methods for the class.
Listing 4. CircleControlView.m Accessors.
- (double)getDistance {
    double d = 0.0;

    CGPoint circCenter;
    circCenter.x = self.bounds.size.width / 2;
    circCenter.y = self.bounds.size.height / 2;

    double d1 = ( circCenter.x - centerPoint.x ) * ( circCenter.x - centerPoint.x );
    double d2 = ( circCenter.y - centerPoint.y ) * ( circCenter.y - centerPoint.y );
    d = sqrt( d1 + d2 );

    d = d / (double) ( self.bounds.size.width / 2 );

    return d;
}

- (double)getAngle {
    double angle = 0.0;

    CGPoint circCenter;
    circCenter.x = self.bounds.size.width / 2;
    circCenter.y = self.bounds.size.height / 2;

    if ( circCenter.x == centerPoint.x && circCenter.y == centerPoint.y ) {
        angle = 0.0;
    } else if ( circCenter.x == centerPoint.x && centerPoint.y < circCenter.y  ) {
        angle = 0.0;
    } else if ( circCenter.x == centerPoint.x && centerPoint.y > circCenter.y ) {
        angle = 180.0;
    } else if ( centerPoint.x < circCenter.x && centerPoint.y == circCenter.y ) {
        angle = 270.0;
    } else if ( centerPoint.x > circCenter.x && centerPoint.y == circCenter.y ) {
        angle = 90.0;
    } else {
        double p1 = abs( centerPoint.x - circCenter.x );
        double p2 = abs( centerPoint.y - circCenter.y );
        angle = atan( p1 / p2 ) * 57.29577951;
        if ( centerPoint.x > circCenter.x && centerPoint.y > circCenter.y ) {
            angle = 180 - angle;
        } else if ( centerPoint.x < circCenter.x && centerPoint.y > circCenter.y ) {
            angle = 180 + angle;
        } else if ( centerPoint.x < circCenter.x && centerPoint.y < circCenter.y ) {
            angle = 360 - angle;
        }
    }

    while ( angle > 360.0 ) {
        angle -= 360.0;
    }
    while ( angle < 0 ) {
        angle += 360.0;
    }

    return angle;
}

- (void)dealloc {
    [super dealloc];
}

@end
These methods look tricky, but it’s really just a bunch of math to get the angle and distance from the current control point where the user has placed their thumb to the center of the control. The getDistance method uses they Pythagorean theorem to get the distance and returns it as a percentage. And the getAngle method does a lot of trig work to find out the angle for the given quadrant.
With the controls developed it’s time to update the GameSurface class so that we can move the ship around.
Updating the GameSurface
We will start with simply moving the ship, then move to firing the laser later in this tutorial. To move the ship we need to add a moveShip method as shown in Listing 5.
Listing 5. Updated GameSurface.h
#import <UIKit/UIKit.h>

@interface GameSurface : UIView {
    CGPoint shipLocation;
    double shipDirection;
}

- (void)moveShip:(float)distance angle:(float)angle;

@end
Then we need to implement the method by adding it to the GameSurface.m file as shown in Listing 6.
Listing 6. moveShip in GameSurface.m
- (void)moveShip:(float)distance angle:(float)angle {
    shipLocation.x -= ( distance * 3.0 ) * cos((angle+90.0) * 0.0174532925);
    shipLocation.y -= ( distance * 3.0 ) * sin((angle+90.0) * 0.0174532925);
    shipDirection = angle;
    [self setNeedsDisplay];
}
The code for moveShip changes the location of the ship by altering it’s x and y coordinates by a value calculated from the angle and the distance values passed in. It also stores the current angle of the ship so that when it’s rendered it’s pointing in the right direction.
With those changes made it’s time to add references to the game surface and the two circle controls to the PadsteroidsViewController.h
Listing 7. PadsteroidsViewController.h
#import <UIKit/UIKit.h>

#import "CircleControlView.h"
#import "GameSurface.h"

@interface PadsteroidsViewController : UIViewController {
    IBOutlet CircleControlView *motionControl;
    IBOutlet CircleControlView *fireControl;
    IBOutlet GameSurface *gameSurface;
}

@end
It’s important that we make that modification now because as we change the XIB file we are going to link the controls and views to the PadsteroidsViewController class.
Updating the PadsteroidsViewController.xib
Most of the coding changes we need to move the ship around have been made, so now it’s time to add the CircleControlViews for motion and fire control to the interface that’s defined in PadsteroidsViewController.xib.
Step one is to open up the XIB file and select the Identity Inspector from the ‘View > Utilities’ menu. Down at the bottom of the panel is the set of available objects to add to the view as shown in Figure 4.

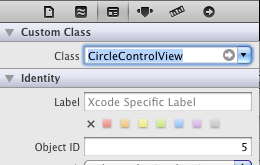
Scroll down a little and you will find the View object. Drag a View object onto the main view and it will appear in the interface. From there, change the Class at the top of the panel from UIView to CircleControlView as shown in Figure 5.
Now we need to size the view appropriately. Move to the Sizing Inspector and set the view to the sizes shown in Figure 6.

Now change over to the Attribute Inspector and change the Mode to Redraw, the Background to Clear Color, and make sure the User Interaction Enabled checkbox is selected as shown in Figure 7.

We need two of these controls, so follow the same process to add another view, change it to CircleControlView, and set it’s sizings to the ones shown in Figure 8.

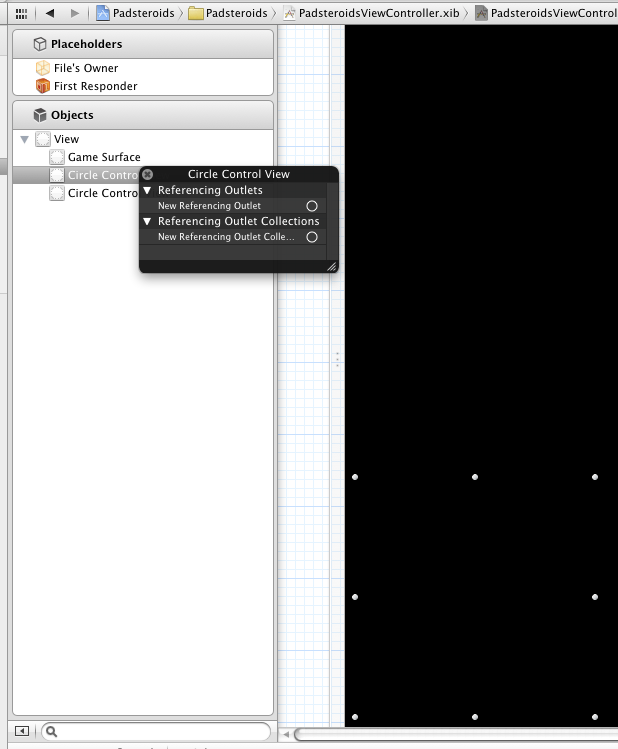
You also need to set the attributes for this control as shown in Figure 7. Now you should have two controls in the view. One at the lower right, and the other at the lower left. The one on the lower left controls firing the laser. The one on the right is the motion controller.
The next step is to link these to the PadsteroidsViewController which is considered to the be the “File’s Owner”. The first step is to right click on the CircleControlViewer on the left hand side. You should see a popup window as shown in Figure 9.
From there, click on the small ‘O’ at the right of New Referencing Outlet and drag it to the “File’s Owner” placeholder. You should see something like Figure 10.
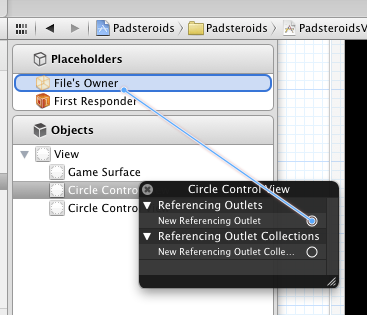
From there, let go of the mouse button and it should bring up another popup menu that gives the list of the possible connection points as shown in Figure 11.
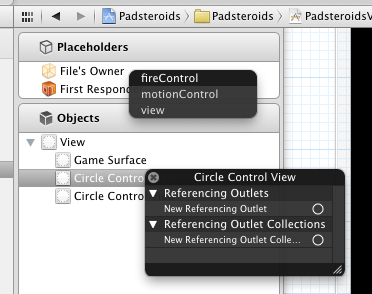
For the fire control select the fireControl item. Repeat the process for the motion control and connect it to the motionControl point. You also need to connect the game surface to the gameSurface item as shown in Figure 12.

This can be really alien the first time you do it. The Xcode interface builder is unlike any other user interface builder I’ve used in the past. But once you get used to it, it starts to make sense.
Finishing The Code Changes For Motion
The last step to get the motion control going is to make some minor modifications to the PadsteroidsViewController.m file as shown in Listing 8.
Listing 8. Updating PadsteroidsViewController.m
#import "PadsteroidsViewController.h"

@implementation PadsteroidsViewController

- (void)dealloc {
    [super dealloc];
}

- (void)didReceiveMemoryWarning {
    [super didReceiveMemoryWarning];
}

- (void)viewDidLoad {
    [super viewDidLoad];

    [NSTimer scheduledTimerWithTimeInterval:0.01
                                     target:self
                                   selector:@selector(gameUpdate:)
                                   userInfo:nil
                                    repeats:YES];
}

- (void)gameUpdate:(NSTimer*)theTimer {
    if ( [motionControl getDistance] > 0 ) {
        [gameSurface moveShip:[motionControl getDistance] angle:[motionControl getAngle]];
    }
}

- (void)viewDidUnload {
    [super viewDidUnload];
}

- (BOOL)shouldAutorotateToInterfaceOrientation:(UIInterfaceOrientation)interfaceOrientation {
    return YES;
}

@end
What we are doing here is creating a timer in the viewDidLoad function, then responding to that timer in the new gameUpdate method. The gameUpdate method looks at the current position of the motionControl. If the distance is greater than zero it means that the user has moved the control away from the center point indicating that they want to move the ship. It then calls the moveShip method to move the ship around given the angle and distance.
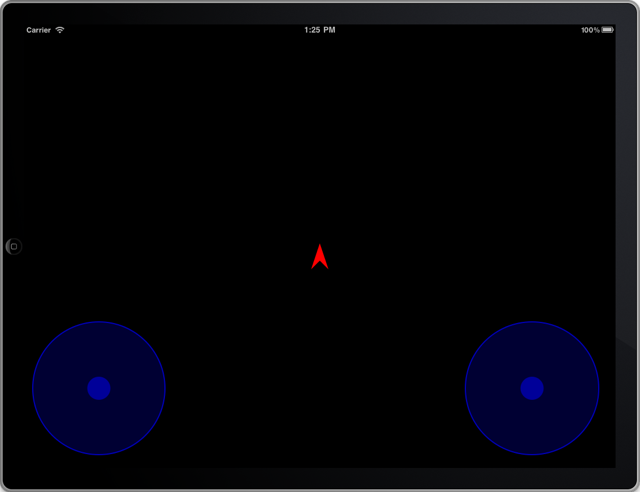
If everything is hooked up properly you should see something like that which is shown in Figure 13 when you launch the application.
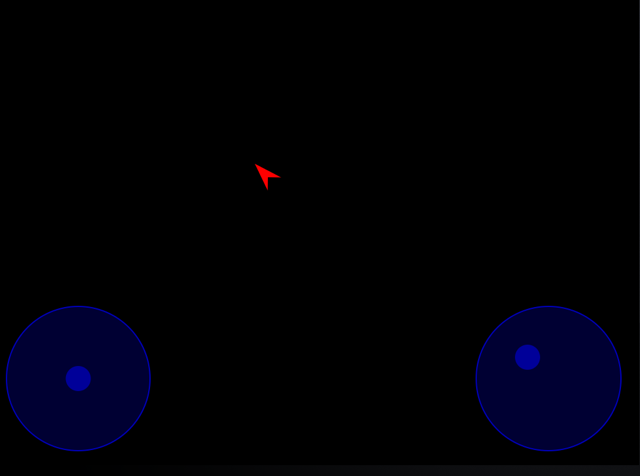
And by moving the motion control you should be able to move the ship around as you can see in Figure 14.
Alright! Now we have a game that’s actually starting to feel like a game. But to bring the whole thing to life we need to be able to do something more than move, we need to be able to shoot something.
Adding the Laser
What would a game be without some way to blow stuff up? For that we are going to add a laser to the spaceship and hook that up to the fire control so that the player can point and shoot in whichever direction they like. Listing 9 shows the additions we need to make to the GameSurface.h file.
Listing 9. New GameSurface.h
#import <UIKit/UIKit.h>

@interface GameSurface : UIView {
    CGPoint shipLocation;
    double shipDirection;

    BOOL gunEnabled;
    double gunDirection;
}

- (void)moveShip:(float)distance angle:(float)angle;

- (void)enableGun:(float)distance angle:(float)angle;
- (void)disableGun;

@end
The additions amount to two new methods enableGun and disableGun. The enableGun method is called when the user has moved the firing joystick with his thumb. And the disableGun is called when the player has released the firing joystick.
Now that we have a way to enable and disable the gun in the interface we have to start making the changes required to add support for it in the class. This starts with modifying the drawRect method as shown in Listing 10.
Listing 10. New drawRect for the GameSurface.m
- (void)drawRect:(CGRect)rect
{
    CGContextRef context = UIGraphicsGetCurrentContext();
    CGContextSetFillColorWithColor(context, [UIColor redColor].CGColor);

    CGContextTranslateCTM( context, ( self.bounds.size.width / 2 ) + shipLocation.x, ( self.bounds.size.height / 2 ) + shipLocation.y );

    if ( gunEnabled ) {
        CGContextSaveGState(context);

        CGContextSetStrokeColorWithColor(context, [UIColor greenColor].CGColor);
        CGContextSetLineWidth(context, 5.0);

        CGPoint target;
        target.x = ( 1000.0 * cos((gunDirection+90.0) * 0.0174532925) ) * -1;
        target.y = ( 1000.0 * sin((gunDirection+90.0) * 0.0174532925) ) * -1;

        CGContextMoveToPoint(context, 0.0, 0.0);
        CGContextAddLineToPoint(context, target.x, target.y);

        CGContextStrokePath(context);

        CGContextRestoreGState(context);
    }

    CGContextSaveGState(context);
    CGContextRotateCTM(context, shipDirection * 0.0174532925 );

    CGContextMoveToPoint(context, 0.0, -15.0);
    CGContextAddLineToPoint(context, 15.0, 30.0);
    CGContextAddLineToPoint(context, 0.0, 15.0);
    CGContextAddLineToPoint(context, -15.0, 30.0);
    CGContextAddLineToPoint(context, 0.0, -15.0);
    CGContextFillPath(context);

    CGContextRestoreGState(context);
}
The additions amount to adding support for the gun when it’s enabled by drawing a line from the ship to well off screen in the direction of the shot.
The enable and disable methods for the gun are shown in Listing 11.
Listing 11. Gun methods in GameSurface.m
- (void)enableGun:(float)distance angle:(float)angle {
    gunEnabled = YES;
    gunDirection = angle;

    CGPoint laserStart, laserEnd;
    laserStart.x = ( self.bounds.size.width / 2 ) + shipLocation.x;
    laserStart.y = ( self.bounds.size.height / 2 ) + shipLocation.y;
    laserEnd.x = laserStart.x + ( 1000.0 * cos((gunDirection+90.0) * 0.0174532925) ) * -1;
    laserEnd.y = laserStart.y + ( 1000.0 * sin((gunDirection+90.0) * 0.0174532925) ) * -1;

    [self setNeedsDisplay];
}

- (void)disableGun {
    gunEnabled = NO;
    [self setNeedsDisplay];
}
The last change we need to make is to the gameUpdate method in PasteroidsViewController.m. The new code is shown in Listing 12.
Listing 12. Updated gameUpdate in PadsteroidsViewController.m
- (void)gameUpdate:(NSTimer*)theTimer {
if ( [motionControl getDistance] > 0 ) {
[gameSurface moveShip:[motionControl getDistance] angle:[motionControl getAngle]];
}
if ( [fireControl getDistance] > 0 ) {
[gameSurface enableGun:[fireControl getDistance] angle:[fireControl getAngle]];
} else {
[gameSurface disableGun];
}
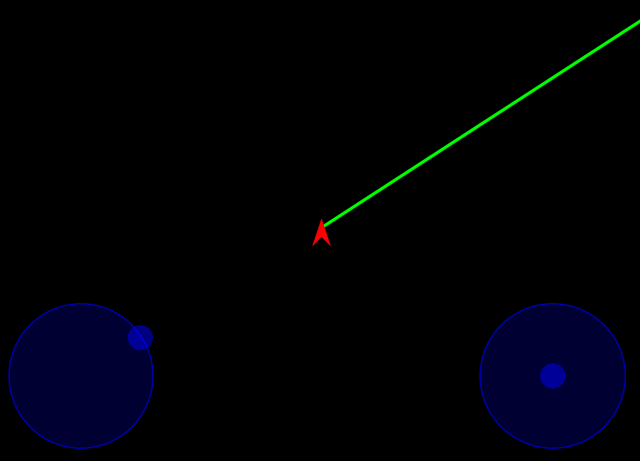
}Here we are adding monitoring for the fireControl view and then sending the enableGun or disableGun message to the game surface as appropriate. If everything goes as planned you should be able to use the left hand stick to fire the laser as shown in Figure 15. This is starting to look and feel like a real game at this point.
Conclusion
There is a lot to learn in this part of our tutorial. You learn about how to handle touches on a view in the interface. As well as how to hook up objects in the interface builder. And also how to create a timer and use it to drive game play.
With the ability to move and fire we have added some interactivity to our little Padsteroids game. The next step, which will be in the final article of the tutorial, will be to dynamically add some asteroid views to the game surface, move them around in random directions with random velocities, and the build a collision detection system so the laser can blast them out of existence.
Ed: Once you have read Padsteroids Phase One and Padsteroids Phase Two of the series, don’t forget you can check or troubleshoot your code by comparing to the Padsteroids Project on GitHub.
 Jack Herrington
Jack Herrington is an engineer, author, and presenter who lives and works in the San Francisco Bay Area. He lives with his wife, daughter and two adopted dogs. When he's not writing software, books, or articles you can find him cycling, running, or in the pool training for triathlons. You can keep up with Jack's work and his writing at http://jackherrington.com.