Toolkit: A Front-End Framework for the Modern Web

Key Takeaways
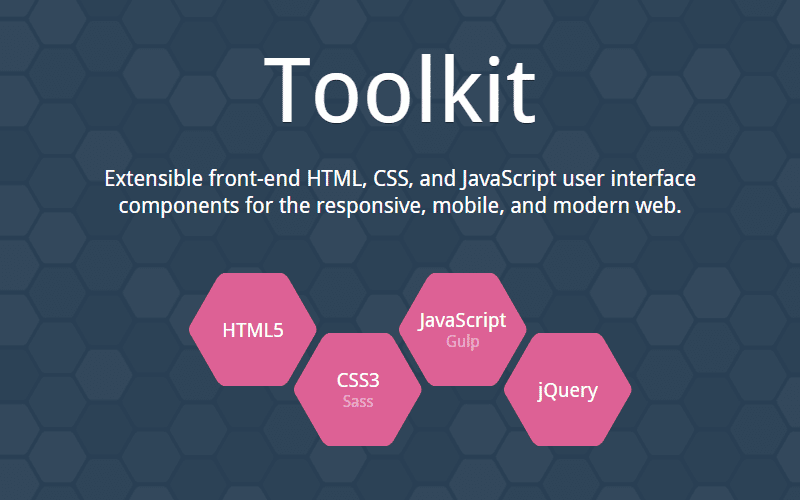
- Toolkit is a front-end framework developed by Miles Johnson that is designed to be customizable and extensible. It uses modern technology such as HTML5, CSS3, Sass, Gulp, and new browser APIs.
- The framework emphasizes decoupling JavaScript, CSS, and HTML to allow for customizable alternatives and mitigate coupling issues. This is achieved through the use of specific data attributes for element traversal, look-up, and event binding.
- Toolkit’s CSS is lightweight and themeless, making it easy to style and integrate. It also allows for customization of CSS class names to avoid class name collision, and supports extensible JavaScript through a flexible inheritance-based object-oriented class system.
- The framework includes an array of features such as ARIA support, right-to-left (RTL) support, BEM naming convention, responsive options, integrated debugging, customizable templates, and more. Future development plans include removing jQuery as a dependency, rewriting the JavaScript layer using ECMAScript 6, and adding Less support.
Titon Toolkit, or simply Toolkit, is a project that I’ve been working on in my free time for the past 4 years. It started out as a MooTools UI framework, which slowly transitioned to jQuery, with plans to be vendorless for 3.0. So why did I write another framework? At its inception, the world of “CSS/JavaScript frameworks” was still young, with Bootstrap and Foundation being about a year old. I was intrigued with the concept of a front-end framework and set out to build my own, with the main selling point being customizability and extensibility.
So, what is Toolkit exactly? Toolkit is a front-end framework that provides a collection of powerful state-based, role-specific user interface components and utility classes for the responsive, mobile, and modern web. It makes use of the latest and greatest in technology — HTML5 for semantics, CSS3 for animations and styles, Sass for CSS pre-processing, Gulp for task and package management, and powerful new browser APIs for the JavaScript layer, just to name a few.
The core of Toolkit is based on strict but important design principles, which include responsive design, mobile-first design, semantic markup, progressive enhancement, graceful degradation, continuous integration, and configuration over convention. These principles ultimately shape the decisions behind Toolkit.
So, is Toolkit just another front-end UI framework? Yes but, as mentioned, with some key differences: Toolkit was built to be extremely extensible, easily customizable, and efficiently architected.
Let’s look at some of its unique features.
Decoupled JavaScript, CSS, and HTML
A running paradigm in front-end development is tying JavaScript to a fixed CSS structure via class names as well as a fixed HTML structure. Toolkit disagrees with this approach and strives to decouple the CSS, JavaScript, and HTML as much as possible, which opens up the possibility of customizable alternatives. Toolkit mitigates many coupling issues by requiring specific data attributes — all of which are used for element traversal, look-up, and event binding.
The following example uses Toolkit’s carousel component as a proof of concept.
<div class="carousel" data-carousel>
  <div class="carousel-items">
    <ul data-carousel-items>
      <li>...</li>
      <li>...</li>
      <li>...</li>
    </ul>
  </div>
  <button type="button" class="carousel-prev" data-carousel-prev>
  </button>
  <button type="button" class="carousel-next" data-carousel-next>
  </button>
</div>
With decoupling in place, custom HTML is now possible, which isn’t the case when using alternative frameworks. No longer is the markup tied to the JavaScript component; the JavaScript component is now tied to the markup via data-* attributes. Want to add new markup to a component? Go for it! Want to change the markup to match the project? Feel free! Want to remove component functionality? Remove away! Data attributes provide what we think is a much better level of customization.
Easier CSS Styling
Tired of having to overwrite styles? Or dealing with bloat? Toolkit sure was. Because of this, the CSS found in Toolkit is extremely lightweight as it only defines the very bare minimum for the component to function correctly — mainly layout and structural styles. You could say that Toolkit is a themeless and styleless front-end framework. By being themeless, Toolkit is easy to style, and even easier to integrate.
Furthermore, Toolkit opted out of providing Sass variables for CSS theme customization (e.g. for border size, background color, text size, font family, etc). If you want to style an element, you can do so the old fashioned way, using CSS (or Sass, or Less)! You can also take this a step further by integrating Toolkit as a Compass extension, which allows for Toolkit’s Sass files to be imported into scope and compiled directly in your own Sass files.
Customizable CSS Class Names
Another pain point found in existing frameworks is CSS class name collision. Toolkit resolves this issue in one of two ways.
The first way is through customizable Sass variables that allow most CSS class names to be customized. Using this approach will require compilation of the Sass files, either through a Compass extension, or in the source directly.
// Built-in BEM classes!
$carousel-class-items: bem("carousel", "slides");
The second approach allows for global namespacing by prefixing classes. This works wonders when integrating the framework into an existing codebase where collisions are abundant. Enabling namespaces is as easy as modifying a Sass variable and a JavaScript property.
$namespace: "tk-"; // Sass
Toolkit.namespace = 'tk-'; // JavaScriptDo note, however, that namespaces are not applied to state, animation, or behavioral class names.
Extensible JavaScript
The entire JavaScript layer in Toolkit is built around a flexible inheritance based object-oriented class system. Each class manages its own state, events, and behaviors, which allow for complex interactions as each instance is unique. Since this class layer is so flexible, it allows for custom classes to be written, or existing classes to be extended via inheritance.
var Toolkit.Tooltip = Toolkit.Component.extend({
  constructor: function() {
    // ...
  }
});
On top of this, each class supports a set of options for customizability. These options can be set globally, through the constructor, or as data attributes. Option groups and even responsive options are built into the core.
$('.carousel').carousel({
  itemsToShow: 1,
  itemsToCycle: 1,
  autoCycle: false,
  responsive: {
    tablet: {
      breakpoint: '(min-width: 641px)',
      itemsToShow: 2
    },
    desktop: {
      breakpoint: '(min-width: 1281px)',
      itemsToShow: 3
    }
  },
  groups: {
    static: {
      infinite: false,
      loop: false
    },
    dynamic: {
      infinite: true,
      autoCycle: true
    }
  }
});
Flexbox Support
Although experimental, Toolkit offers built-in flexbox support through the Flex component. The Flex component shines in the building of layout and grid based structures through the concept of regions and blocks. A region is an object that contains blocks or other regions, while a block is an object that contains content and is aligned within the main and cross axis. Although being analogous to rows and columns, regions and blocks are packaged with additional support for growing, shrinking, ordering, wrapping, nesting, alignment, and responsiveness.
<div class="region region--grid flow-center">
  <div class="block no-shrink">...</div>
  <div class="block">...</div>
  <div class="block order-2">...</div>
  <div class="block order-1">...</div>
  <div class="block">...</div>
  <div class="block no-grow">...</div>
</div>
Feature Packed
Besides the highlights already mentioned, Toolkit supports an array of features that include:
- ARIA support
- Right-to-left (RTL) support
- BEM naming convention
- Option groups
- Responsive options
- Nested components
- Integrated debugging
- Event hooks
- Customizable templates
- Automatic conflict resolution
- New jQuery events and methods
- New Sass mixins and functions
- Modular architecture with custom builds
- Smaller CSS and JS filesizes
- Robust testing suite
- Travis CI support
- And more…
If you’d like to test out some of Toolkit’s components, you can visit this interactive demo page.
Down the Pipeline
The JavaScript ecosphere is constantly evolving with new technology, functionality, and specifications. Toolkit aims to be a part of this evolution by continuously staying in sync with the latest JavaScript developments. The roadmap as it currently stands includes the following breaking, but interesting, changes for the next 3.0 major release, some of which have already started development.
- Target evergreen browsers and their previous 3 releases.
- Remove jQuery as a dependency and polyfill any functionality not present.
- Rewrite the JavaScript layer using ECMAScript 6 functionality like classes, arrow functions, modules, generators, promises, and more.
- Integrate Babel for ES6 -> ES5 compilation.
- Integrate template rendering instead of DOM manipulation.
- Look into using webpack as the bundler and build tool.
- Add Less support by integrating a Sass to Less transpiler.
- Rewrite components using a flux-based uni-directional data flow system
There’s also some discussion about integrating with external frameworks, but this is currently under RFC.
- Polyfill integration for missing browser features
- Custom web components through Polymer or another service
- React and Toolkit component integration
Why not help my work on Toolkit by offering some advice on the direction it should take? Community feedback and contributions are very much appreciated! I’m always looking for new team members and contributors, so if you’re interested, come chat in #titon on freenode.net.
In Closing
It’s been a wonderful experience showcasing Toolkit and its features to all of you. I hope you enjoyed it and find as much use out of Toolkit as I have. If you’re looking for any more information on Toolkit, I suggest visiting the official website, our Twitter account, or the GitHub repo. Cheers!
Frequently Asked Questions (FAQs) about Front-End Framework Toolkit for Modern Web
What is a front-end framework toolkit and why is it important for modern web development?
A front-end framework toolkit is a pre-prepared library that is designed to be used as a base in front-end web development. It provides a structure and set of standards for the software, making it easier to design and code. The importance of a front-end framework toolkit in modern web development cannot be overstated. It helps in creating responsive, efficient, and scalable websites. It also saves time and effort by providing pre-written code that developers can utilize, allowing them to focus on more complex aspects of web development.
How does a front-end framework toolkit differ from CSS libraries?
While both front-end framework toolkits and CSS libraries are used in web development, they serve different purposes. A front-end framework toolkit is a comprehensive package that includes HTML, CSS, and JavaScript components. It provides a complete structure for building a website or web application. On the other hand, a CSS library is a collection of pre-written CSS that can be used to style a website. It does not include HTML or JavaScript components.
What are some examples of front-end framework toolkits?
There are several front-end framework toolkits available for modern web development. Some of the most popular ones include Bootstrap, Foundation, AngularJS, ReactJS, and Vue.js. Each of these toolkits has its own unique features and advantages, and the choice of toolkit often depends on the specific requirements of the project.
How can I choose the right front-end framework toolkit for my project?
Choosing the right front-end framework toolkit for your project depends on several factors. These include the size and complexity of your project, your familiarity with the toolkit, the specific features you need, and the community support available for the toolkit. It’s recommended to research and compare different toolkits before making a decision.
Can I use multiple front-end framework toolkits in a single project?
While it’s technically possible to use multiple front-end framework toolkits in a single project, it’s generally not recommended. Using multiple toolkits can lead to conflicts and inconsistencies in the code, making it harder to maintain and debug. It’s usually better to choose one toolkit that best fits your needs and stick with it throughout the project.
Are front-end framework toolkits suitable for beginners in web development?
Yes, front-end framework toolkits are suitable for beginners in web development. In fact, they can be a great learning tool. They provide a structured approach to web development and include pre-written code that beginners can study and learn from. However, it’s also important for beginners to understand the basics of HTML, CSS, and JavaScript before diving into a toolkit.
How can I learn to use a front-end framework toolkit?
There are many resources available for learning to use a front-end framework toolkit. These include online tutorials, video courses, books, and community forums. Many of the popular toolkits also have extensive documentation and learning resources on their official websites.
What are the advantages of using a front-end framework toolkit?
Using a front-end framework toolkit has several advantages. It can save time and effort by providing pre-written code and a structured approach to web development. It can also help in creating responsive, efficient, and scalable websites. Additionally, most toolkits come with community support, which can be a valuable resource for solving problems and learning new techniques.
Are there any disadvantages to using a front-end framework toolkit?
While there are many advantages to using a front-end framework toolkit, there can also be some disadvantages. These include the learning curve associated with mastering a new toolkit, the potential for over-reliance on the toolkit at the expense of understanding the underlying code, and the possibility of the toolkit becoming outdated or unsupported in the future.
Can I create my own front-end framework toolkit?
Yes, it’s possible to create your own front-end framework toolkit. However, it requires a deep understanding of web development and a significant amount of time and effort. For most developers, it’s more efficient to use an existing toolkit and customize it to fit their needs.
Miles is a full-stack web developer who loves to dabble in PHP, Hack, JavaScript, CSS, and HTML, among a handful of other technologies. As the lead developer behind the Titon Project, his primary focus is a fully featured back-end Hack Framework that runs on HHVM, and an ES6 and CSS3 based front-end user interface Toolkit.