iOS Universal Links for a Seamless App User Experience

Key Takeaways
- iOS Universal Links, introduced with iOS 9, enable a seamless transition from web content to the corresponding app, enhancing user experience and simplifying content sharing.
- To set up Universal Links, a JSON configuration file named apple-app-site-association must be uploaded to the server, specifying the domain and supported routes. This file must be accessible via HTTPS, without redirects.
- Configuring the app for Universal Links involves enabling the Associated Domains entitlement for the App ID in the Apple Developer Member Center, and handling incoming links in the AppDelegate.
- Universal Links are not only more user-friendly, but also more secure than traditional deep linking, as they are verified by Apple, reducing the risk of URL spoofing attacks.
One of the more interesting features introduced with iOS 9 was Universal Links. Supporting this feature in your app allows any links to content on the web to be seamlessly opened in the app itself. If it isn’t present on the device, the system falls back to using Safari to open the link.
This is great for a variety of reasons :
- You don’t have to worry about URI schemes and documenting the supported routes/paths.
- It’s secure, because Apple requires the upload of a configuration file to your server (more on this later). Since you have control over this, there is little chance another app can associate itself with your links.
- The same link that routes to your web content can be used and parsed on your app. This makes sharing content easier.
- The fallback just works, which means you don’t have to worry about situations where the app might not be installed.
In this article, I’ll show how to setup your own server, and handle the corresponding links in your app.
Server Setup
The server app will be a simple Rails app that displays a list of authors and some of their books. The easiest way for you to get started is to clone the app on Heroku, just click the button below.

If you don’t want to take this option, you can also deploy the app yourself by cloning the app on Github and push it to a host of your choice.
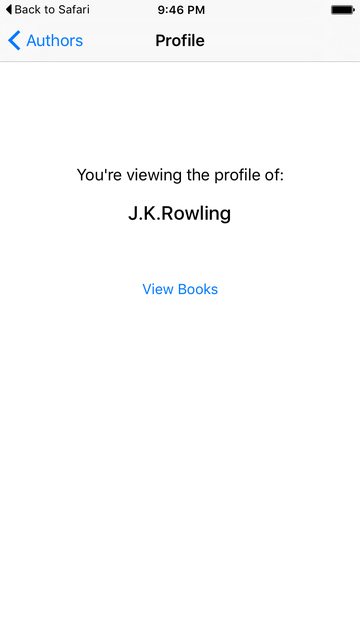
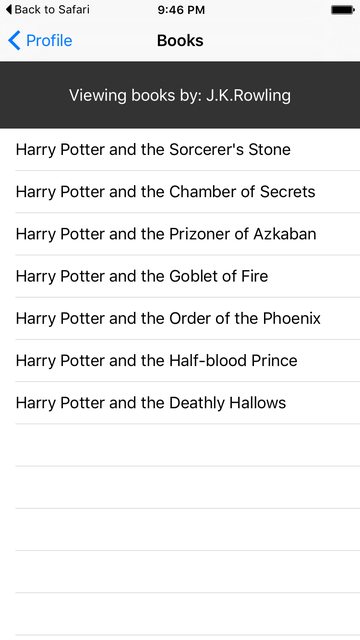
You can see the app in action here. By default, it shows a list of authors. Clicking on any author displays a list of books written by them.
The App-Site-Association File
Just having a server running online isn’t enough. To securely associate your iOS app with a server, Apple requires that you make available a configuration file, called apple-app-site-association. This is a JSON file which describes the domain and supported routes.
The apple-app-site-association file needs to be accessible via HTTPS, without any redirects, at https://{domain}/apple-app-site-association.
Note: Depending on your web app and frameworks used, you might have to setup routes on your web app to handle the above path.
The file looks like this:
{
   "applinks": {
       "apps": [ ],
       "details": [
           {
               "appID": "{app_prefix}.{app_identifier}",
               "paths": [ "/path/to/content", "/path/to/other/*", "NOT /path/to/exclude" ]
           }
       ]
   }
}Note: .json should not be appended to the file name.
The keys are as follows:
apps: Should have an empty array as its value, and it must be present. This is how Apple wants it.details: Is an array of dictionaries, one for each iOS app supported by the website. Each dictionary contains information about the app, the team and bundle IDs. In the example app, it’s72H8ZPD4X8.com.behindtechlines.UniversalLinksDemoand the paths supported by the app.
{
"applinks": {
  "apps": [],
  "details": [
    {
      "appID": "72H8ZPD4X8.com.behindtechlines.UniversalLinksDemo",
      "paths": [
        "/authors",
        "/authors/*/books",
        "/authors/*"
      ]
    }
]
}
}
There are 3 ways to define paths:
- Static: The entire supported path is hardcoded to identify a specific link, e.g. /static/terms
- Wildcards: A
*can be used to match dynamic paths, e.g. /authors/* can matches the path to any author’s page.?inside specific path components, e.g. authors/1? can be used to match any authors whose ID starts with 1. - Exclusions: Prepending a path with
NOTexcludes that path from being matched.
The order in which the paths are mentioned in the array is important. Earlier indices have higher priority. Once a path matches, the evaluation stops, and other paths ignored. Each path is case-sensitive.
Supporting Multiple Domains
Each domain supported in the app needs to make available its own apple-app-site-association file. If the content served by each domain is different, then the contents of the file will also change to support the respective paths. Otherwise, the same file can be used, but it needs to be accessible at every supported domain.
Note: This means that if you need both example.com and www.example.com supported in your app, the association file should be accessible at both these domains.
Signing the App-Site-Association File
If your app targets iOS 9 and your server uses HTTPS to serve content, you don’t need to sign the file. If not (e.g. when supporting Handoff on iOS 8), it has to be signed using a SSL certificate from a recognized certificate authority.
Note: This is not the certificate provided by Apple to submit your app to the App Store. It should be provided by a third-party, and it’s recommended to use the same certificate you use for your HTTPS server (although it’s not required).
To sign the file, first create and save a simple .txt version of it. Next, in the terminal, run the following command:
cat <unsigned_file>.txt | openssl smime -sign -inkey example.com.key -signer example.com.pem -certfile intermediate.pem -noattr -nodetach -outform DER > apple-app-site-associationThis will output the signed file in the current directory. The example.com.key, example.com.pem, and intermediate.pem are the files that would made available to you by your Certifying Authority.
Note: If the file is unsigned, it should have a Content-Type of application/json. Otherwise, it should be application/pkcs7-mime.
App Setup
Next is the app, that mirrors the server. It will target iOS 9 and will be using Xcode 7.2 with Swift 2.1.
The app will talk to the server and display the following:
- The list of authors: Calling /authors.json on the server will get you the data.
- The profile of an author: Called when an author is tapped. The endpoint in this case is /authors/:id.json.
- The list of books of an author: Available from /authors/:id/books.json.
The app code can be found on Github.
This is how the app looks:

Important – Changes Required
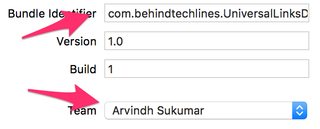
If you intend to create your own instance of the sample server and clone the iOS sample app, make the following changes:
- Change the bundle ID to something that will be used in your app ID in the Member Center.
- The team should be the one associated with your developer account.
kBaseURLin AppDelegate.swift should point to your instance of the web server.- Update /public/association.json on the Rails app with your App ID prefix and suffix.
Enabling Universal Links
The setup on the app side requires two things:
- Configuring the app’s entitlement, and enabling universal links.
- Handling Incoming Links in your AppDelegate.
Configuring Entitlements
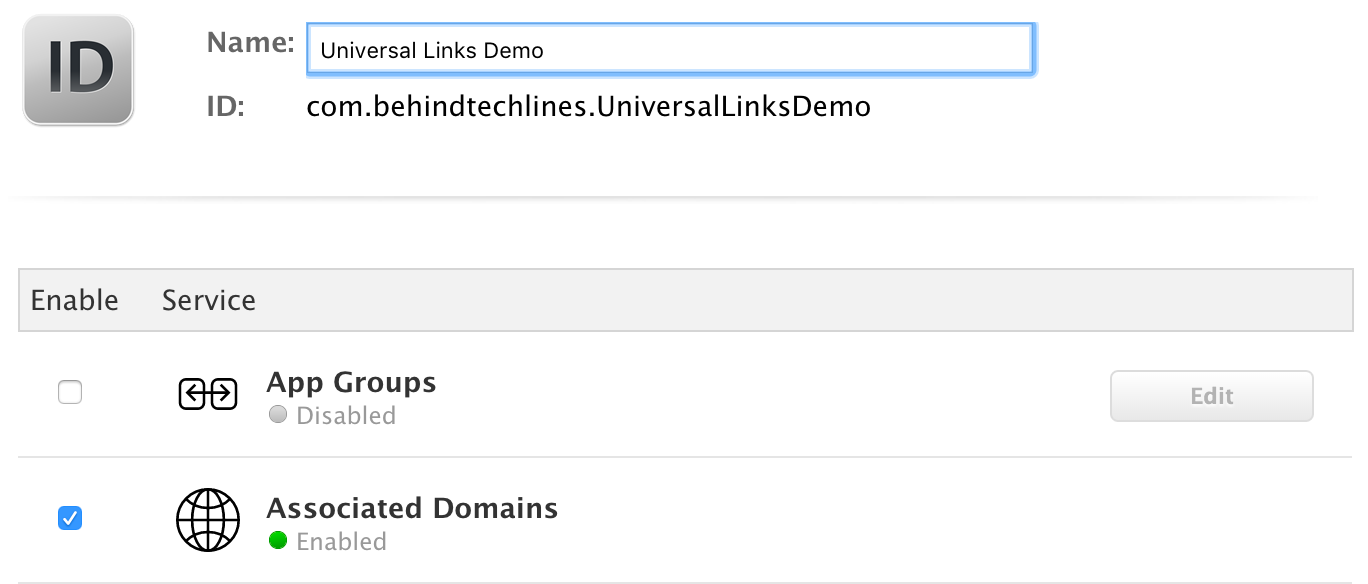
The first step in configuring your app’s entitlements is to enable it for your App ID. Do this in the Apple Developer Member Center.
Click on Certificates, Identifiers & Profiles and then Identifiers. Select your App ID (create it first if required), click Edit and enable the Associated Domains entitlement.
Next, get the App ID prefix and suffix by clicking on the respective App ID.
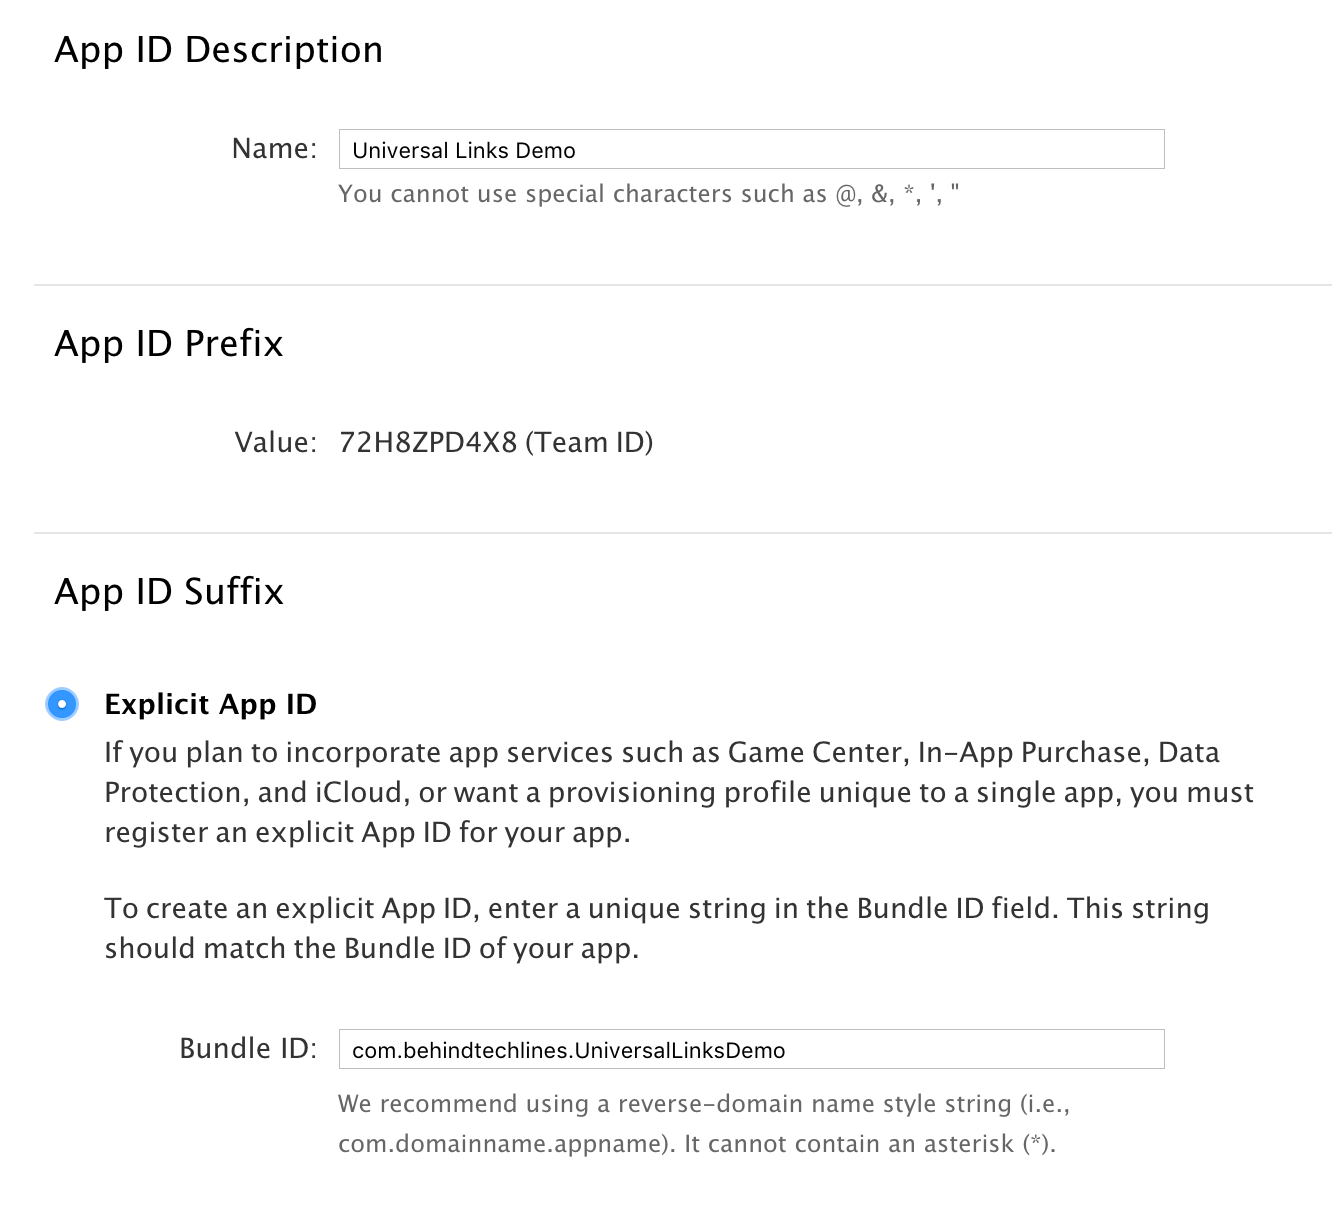
The App ID prefix and suffix should match the one in the apple-app-site-association file.
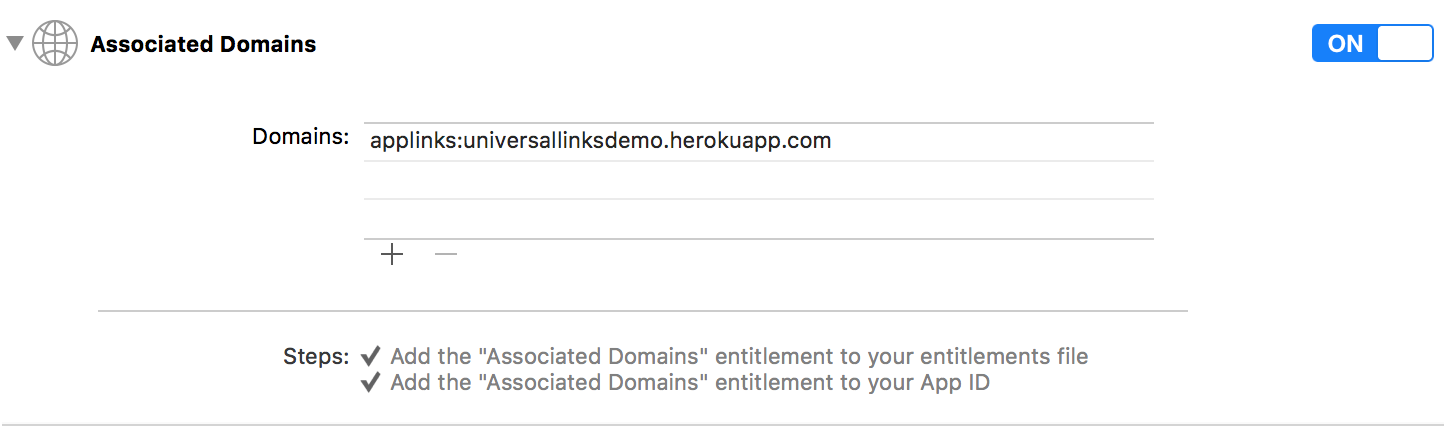
Next in Xcode, select your App’s target, click Capabilities and toggle Associated Domains to On. Add an entry for each domain that your app supports, prefixed with applinks:.
For example: applinks:www.example.com and applinks:example.com.
Which looks like this for the sample app:
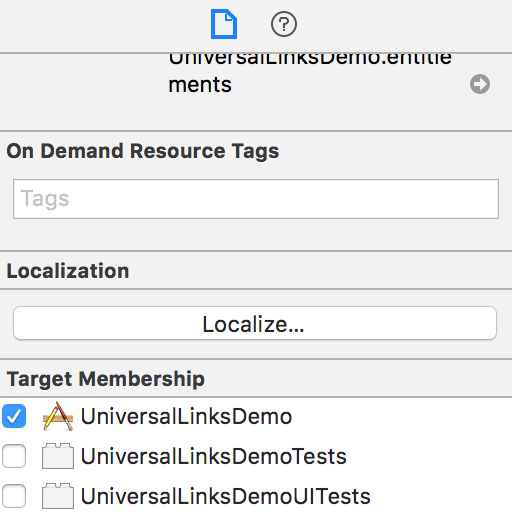
Note: Ensure you have selected the same team and entered the same Bundle ID as the registered App ID on the Member Center. Also ensure that the entitlements file is included by Xcode by selecting the file and in the File Inspector, ensure that your target is checked.
Handling incoming links
application:continueUserActivity:restorationHandler: in the UIApplicationDelegate method in AppDelegate.swift handles incoming links. The method gives an NSUserActivity object, with an activityType value of NSUserActivityTypeBrowsingWeb and a webpageURL property containing the URL. You parse this URL to determine the right action in the app.
For example, in the sample app:
let router = SHNUrlRouter()

func application(application: UIApplication, didFinishLaunchingWithOptions launchOptions: [NSObject: AnyObject]?) -> Bool {

      bindRoutes()

      return true
  }

  func bindRoutes(){
    // Register routes that're handled

      let storyboard = UIStoryboard(name: "Main", bundle: nil)
      let root = self.window?.rootViewController as! UINavigationController

      router.register("/authors") { (params) -> Void in

          let list: AuthorsTableViewController = storyboard.instantiateViewControllerWithIdentifier("AuthorsTableViewController") as! AuthorsTableViewController

          root.pushViewController(list, animated: true)
      }

      router.register("/authors/{id}") { (params) -> Void in

          let profileVC: AuthorProfileViewController = storyboard.instantiateViewControllerWithIdentifier("AuthorProfileViewController") as! AuthorProfileViewController
          profileVC.authorID = Int(params["id"]!)
          root.pushViewController(profileVC, animated: true)
      }

      router.register("/authors/{id}/books") { (params) -> Void in

          let list: BooksTableViewController = storyboard.instantiateViewControllerWithIdentifier("BooksTableViewController") as! BooksTableViewController
          list.authorID = Int(params["id"]!)
          root.pushViewController(list, animated: true)
      }

  }

  func application(application: UIApplication, continueUserActivity userActivity: NSUserActivity, restorationHandler: ([AnyObject]?) -> Void) -> Bool {

      if userActivity.activityType == NSUserActivityTypeBrowsingWeb {
          let url = userActivity.webpageURL!
          self.router.dispatch(url)
      }

      return true
  }
The SHNURLRouter library matches the incoming links and takes the appropriate action.
Testing Universal Links
If you have your own server instance running and associated with your app, you can now test Universal Links.
Generally, any supported link clicked in Safari, or in instances of UIWebView/WKWebView should open the app. A good testing source is the read me of a Github repo. You can fork and edit any of the sample apps in this article.
If you don’t have your own server or just want to see this in action, click the links in the read me here.
Note: For iOS 9.2 and less, this will only work on a device. iOS 9.3 (still in beta at the time of writing) also supports the simulator.
You can save the links in any app that supports opening them, for example Telegram, and proceed from there.
Note: iOS remembers the user’s choice when opening Universal Links. If they tap the top-right breadcrumb to open the link in Safari, all further clicks will take them to Safari, and not the app. They can switch back to opening the app by default by choosing Open in the app banner on the website.
Conclusion
And that’s about it. Not much code to it, but a lot of configuration. A key takeaway is that you need control of your own server to support Universal Links. If you do, it’s the best way to transition your user from your website to your app.
Any questions or comments, please let me know below.
Frequently Asked Questions on iOS Universal Links
What are the benefits of using iOS Universal Links over traditional deep linking?
iOS Universal Links offer a more seamless user experience compared to traditional deep linking. They allow users to be directed to a specific content within an app from a website, bypassing the need to navigate through the app’s interface. This can significantly improve user engagement and retention. Additionally, Universal Links are more secure as they are verified by Apple, reducing the risk of URL spoofing attacks.
How do I set up iOS Universal Links for my app?
Setting up iOS Universal Links involves a few steps. First, you need to enable Associated Domains on your app’s Capabilities. Then, you need to create an apple-app-site-association file that contains JSON data about the URLs that your app can handle. This file should be uploaded to your HTTPS web server. You also need to handle Universal Links in your app by implementing the application:continueUserActivity:restorationHandler: method.
What is the apple-app-site-association file?
The apple-app-site-association file is a crucial component in setting up iOS Universal Links. It is a JSON file that specifies the URLs that your app can open. This file needs to be accessible via HTTPS, without any redirects, at the root of your domain. If the file is correctly set up and reachable, iOS will parse it and set up Universal Links for your app.
Can I use Universal Links with multiple domains?
Yes, you can use Universal Links with multiple domains. Each domain must have its own apple-app-site-association file. You also need to list each domain in your app’s entitlements file, under the Associated Domains section.
Why are my Universal Links not working?
There could be several reasons why your Universal Links are not working. It could be that your apple-app-site-association file is not correctly formatted or not accessible. It could also be that you haven’t properly set up your app to handle Universal Links. Debugging Universal Links can be tricky, but Apple provides several tools and documentation to help you troubleshoot.
How can I test my Universal Links?
You can test your Universal Links by tapping a link to your website from an iOS device. If your Universal Links are set up correctly, your app should open and display the linked content. If your app isn’t installed, tapping the link should open your website in Safari.
Can Universal Links open my app from other apps?
Yes, Universal Links can open your app from other apps. If a user taps a Universal Link within another app, iOS will open your app if it’s installed. If your app isn’t installed, the link will open in Safari.
How do Universal Links improve user experience?
Universal Links improve user experience by providing a seamless transition between your website and your app. They allow users to access specific content within your app directly from your website, without having to navigate through your app’s interface. This can significantly improve user engagement and retention.
Are Universal Links secure?
Yes, Universal Links are secure. They are verified by Apple, which reduces the risk of URL spoofing attacks. Additionally, because they use HTTPS, they provide the same level of security as a secure website.
Can I use Universal Links with my custom URL scheme?
Yes, you can use Universal Links with your custom URL scheme. However, Universal Links offer several advantages over custom URL schemes, such as improved security and a better user experience. Therefore, it’s recommended to use Universal Links whenever possible.
Arvindh is an iOS developer who has published multiple apps on the iOS and Mac App Stores. An accountant by qualification, he found his true calling with Software Development, and now works as lead iOS developer with Real Image Media Technologies in India, building apps in the media and entertainment domains.