In Part 1 we introduced Android Wear, how to sign up for the program and getting the emulator working. Lets move towards some development, adding support libraries to our Android wear project.
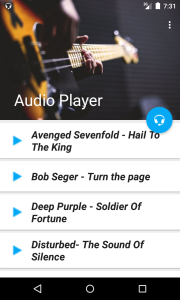
Android Preview App
To recap the steps from my previous article on how to get started:
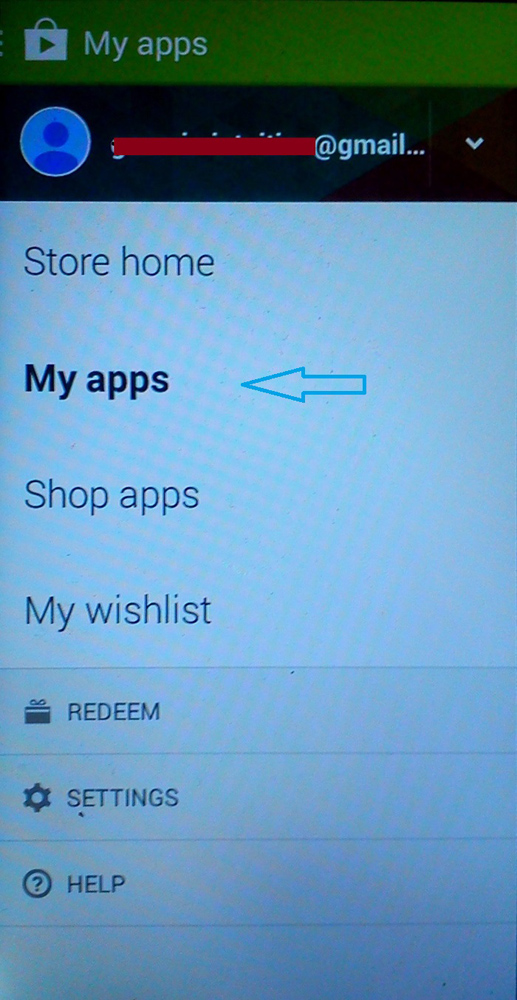
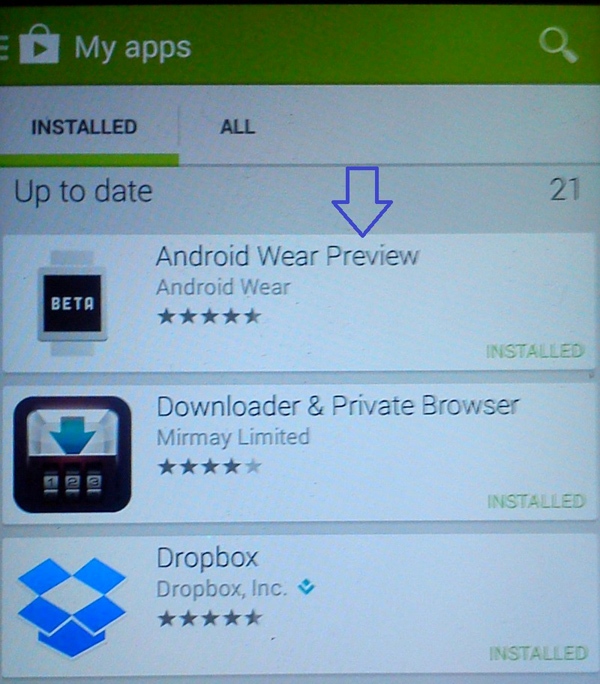

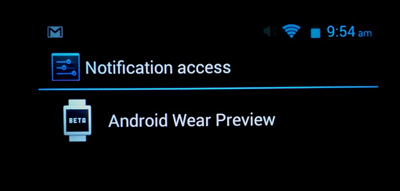
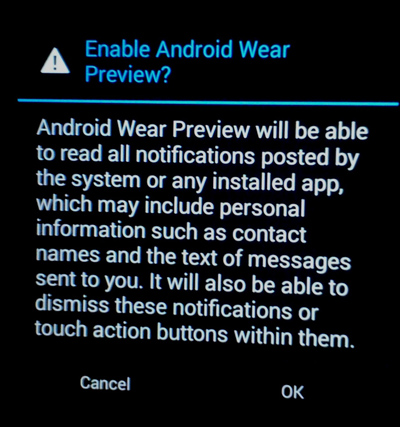
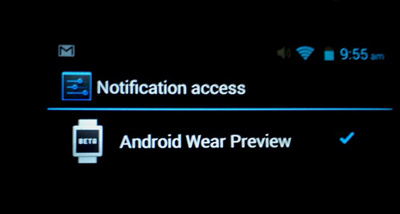
As shown above, by opening the Android Wear Preview App, you will see the following message:

Now, tap the message:
Use USB to connect your device to the development machine.
Note: No other Android devices should be connected to the machine.
Ensure that the Android Wear Emulator is running. The emulator should be in the same state, showing the time and disconnected icon that indicates no device is connected.
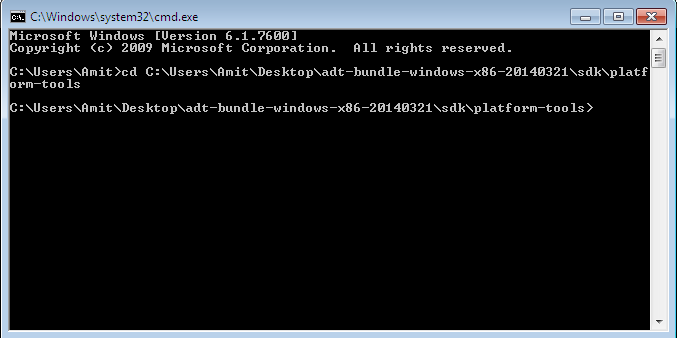
Open a terminal and follow these steps:
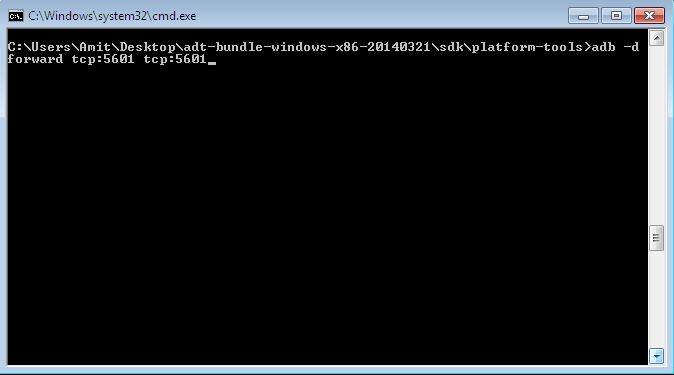
adb -d forward tcp:5601 tcp:5601
To explain:
adb: Android Debug Bridge, a client-server program which communicates with an emulator instance or connected Android device.
-d: Directs an adb command to the attached USB device.
forward: Port forwarding which forwards requests on a specific host port to a different port.
You can also try these commands:
adb devices: Prints a list of all emulators and devices connected.
adb version: Prints adb version number.
The Android Wear emulator will now show the ‘g’ orb icon, indicating that it is paired to your Android Device.
Adding the Android Wear Preview support library
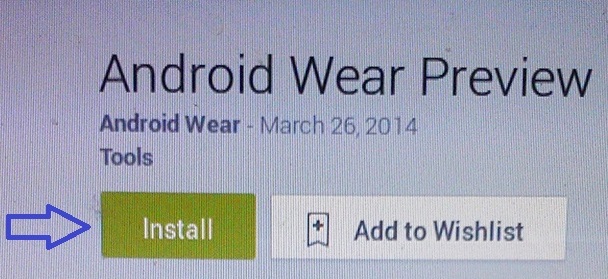
To add the Android support library and the several APIs it includes, you must sign up for the Developer Preview.
Read my previous article to remind yourself of the preview support library download link.
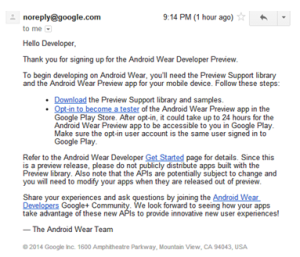
The email sent by Google after successfully signing up can be seen below:
After downloading and unzipping the package, add the library to your project by following these steps:
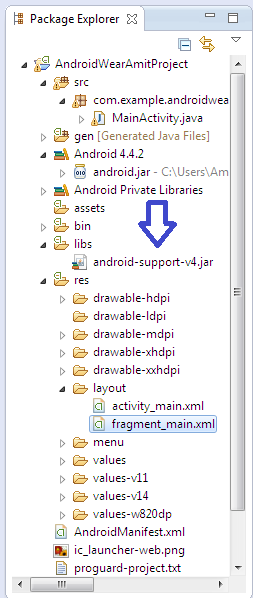
- Create a libs/ directory in your Android app project root.
- Copy the v4 support library JAR file from your Android SDK directory into your project libs/ directory.
SDK Directory path:/extras/android/support/v4/android-support-v4.jar
Here, the path is: adt-bundle-windows-x86–20140321/sdk/extras/android/support/v4
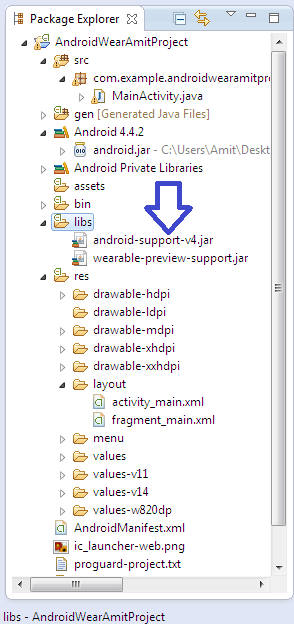
- Copy the 30kb jar file wearable-preview-support.jar from the Android SDK directory to your project libs/ directory.
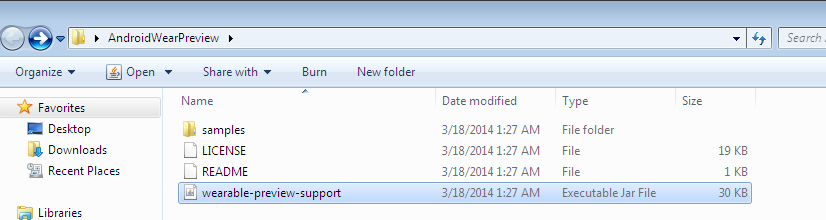
- Paste the wearable-preview-support.jar file into the libs/ directory.
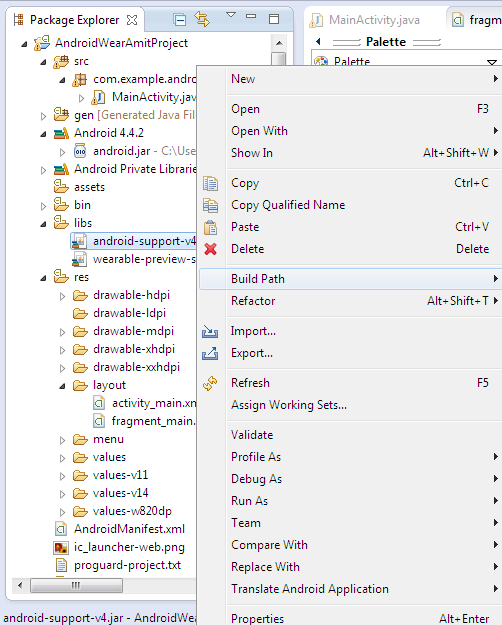
- Right click on the JAR file and select Build Path > Add to Build Path.

Let’s create Notifications
Notifications make the wearable experience what it is and can be enhanced in various ways.
The code snippet below should be added to the MainActivity.java file. You can find this file by expanding the src/ node. I am assuming that you’re well versed with the Android Directory Structure.
Note: You can create a java file in the src/ node while initiating the project, instead of creating the default MainActivity.java file
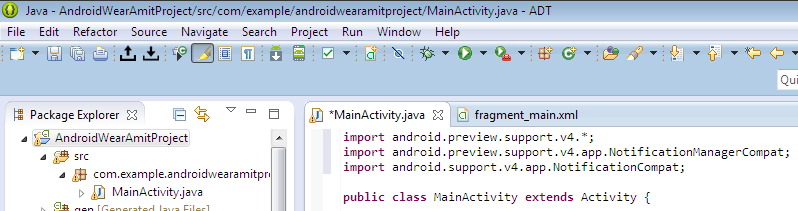
Lets start by importing the required classes:
Start with importing classes
Create Notifications
For Notifications, we use the following two APIs:
We will use the following classes and methods:
- Intent: Is a class which gives an abstract description of an operation to be performed.
- PendingIntent: Is a class which gives a description of an Intent and the target action to perform.
- putExtra(): A method which adds extended data to the Intent.
- getActivity(): A method that retrieves a
PendingIntentto start a new activity. - setSmallIcon(): A method that sets small icon.
- setContentTitle(): A method that sets the first line of text.
- setContentText(): A method that sets the second line of text.
- setContentIntent(): When a notification is clicked, this method supplies a
PendingIntentto be sent. - notify(): This method causes a thread (which is waiting) to be woken.
The code snippet for a notification is below:
// Unique ID for notification
int id = 1;

// Build intent for notification content
Intent intent = new Intent(this, ViewEventActivity.class);
intent.putExtra(EXTRA_EVENT_ID, eventId);
PendingIntent pendingIntent = PendingIntent.getActivity(this, 0, intent, 0);

// The Builder class for NotificationCompat objects.
NotificationCompat.Builder builder = new NotificationCompat.Builder(this)
        .setSmallIcon(R.drawable.ic_event)
        .setContentTitle(eventTitle)
        .setContentText(eventLocation)
        .setContentIntent(pendingIntent);

// Get an instance of the NotificationManager service
NotificationManagerCompat notificationMgr = NotificationManagerCompat.from(this);

// Build the notification and issue it with the notification manager.
notificationMgr.notify(id, builder.build());
The following code snippet adds an instance of NotificationCompat.BigTextStyle to the event notification to include the complete event description.
Call setStyle() on the NotificationCompat.Builder object, passing it an instance of BigTextStyle to add the extended content to your notification. InboxStyle can also be passed as an Instance.
Here, we have used the following classes and methods:
BigTextStyle: Is a rebuilder class which generates large format notifications.
addAction: Is a method which adds an action to the notification.
// Used for generating large-format notifications that include lengthy text
BigTextStyle bigStyle = new NotificationCompat.BigTextStyle();
bigStyle.bigText(eventDescription);

NotificationCompat.Builder builder = new NotificationCompat.Builder(this)
        .setSmallIcon(R.drawable.ic_event)
        .setLargeIcon(BitmapFractory.decodeResource(getResources(), R.drawable.notif_background))
        .setContentTitle(eventTitle)
        .setContentText(eventLocation)
        .setContentIntent(viewPendingIntent)
        .addAction(R.drawable.ic_map, getString(R.string.map), mapPendingIntent)
        .setStyle(bigStyle);
Large amounts of content can be seen by expanding the notification on a handheld device, whereas on Android Wear, the content is visible by default.
More can be added to your notifications using the following methods:
- setLargeIcon(Bitmap icon): Set large icon.
- setNumber (int number): Sets the large number at the right-hand side of the notification.
- setVibrate (long[] pattern): Sets the vibration pattern for.
- setWhen (long when): Set the time that the event occurred, notifications in the panel are sorted by this time.
Time to add some pages to Notifications
Generally life is not limited to working on one thing at a time. Many other distractions keep us busy and unfocussed. A large amount of notifications can create confusion and overwhelm users.
To help reduce confusion one or more pages can be added to a notification on Android Wear. The additional pages appear immediately to the right of the main notification card.
Here, we will be using the following methods:
- addPage(): for adding single page
- addPages(): for adding multiple pages
Initiate the process by creating the main notification i.e. first page of the notification. This is done by using the addPage() method. Always remember to add one page at a time, for adding multiple pages, use Collection with the addPages() method.
For example, here’s the code snippet to add a second page to a notification:
// Builder for the main notification
NotificationCompat.Builder builder = new NotificationCompat.Builder(this)
        .setSmallIcon(R.drawable.new_message)
        .setContentTitle("Page One")
        .setContentText("Club event at 8PM today")
        .setContentIntent(viewPendingIntent);

// Big text style for page two
BigTextStyle pageTwoStyle = new NotificationCompat.BigTextStyle();
secondPageStyle.setBigContentTitle("Page Two").bigText("Meet me at the restaurant within 1 hour for further discussions.");

// Create page two notification
Notification pageTwoNotification = new NotificationCompat.Builder(this).setStyle(pageTwoStyle).build();

// Create main notification and add the second page
Notification addNotification = new WearableNotifications.Builder(builder)
        .addPage(pageTwoNotification)
        .build();
Stacking Notifications
When creating notifications for a handheld device, you should aggregate similar notifications into a single summary notification. For example, when more than one message is received, use a single notification to provide a summary such as “3 new messages.”
Group all the notifications together in a stack for the wearable device. The stack of notifications appear as a single card, which users can expand to view the details of each notification separately.
Grouping
For grouping notifications, we use these methods:
- setGroup(): To create a stack, call this for each notification you want in the stack and specify a group key.
- Notify(): Call this method to send each notification to the wearable.
Below, we will create and issue three notifications one by one. Let’s start with the first Notification:
final static String GROUP_KEY_EMAILS = "group_key_emails";

// Build first notification and pass this builder to WearableNotifications.Builder
NotificationCompat.Builder builder = new NotificationCompat.Builder(mContext)
         .setContentTitle("New message: " + sender1)
         .setContentText(subject1)
         .setSmallIcon(R.drawable.new_mail);

// Use the group GROUP_KEY_EMAILS
Notification notificationOne = new WearableNotifications.Builder(builder)
         .setGroup(GROUP_KEY_EMAILS)
         .build();

// Issuing the notification
NotificationManagerCompat notificationManager = NotificationManagerCompat.from(this);
notificationManager.notify(notificationId1, notif);
Specify the same group key while creating the second notification. When you call notify(), this notification appears in the same stack as the previous notification:
// Build second notification
builder = new NotificationCompat.Builder(mContext)
         .setContentTitle("New message: " + sender2)
         .setContentText(subject2)
         .setSmallIcon(R.drawable.new_mail);

// Use the same group GROUP_KEY_EMAILS
Notification notificationTwo = new WearableNotifications.Builder(builder).setGroup(GROUP_KEY_EMAILS).build();

// Second notification
notificationManager.notify(notificationId2, notif);
Now, the third notification:
// Build third notification
builder = new NotificationCompat.Builder(mContext)
         .setContentTitle("New message: " + sender3)
         .setContentText(subject3)
         .setSmallIcon(R.drawable.new_mail);

// Use the same group GROUP_KEY_EMAILS
Notification notificationThree = new WearableNotifications.Builder(builder).setGroup(GROUP_KEY_EMAILS).build();

// Third notification
notificationManager.notify(notificationId3, notif);
By default, the most recent notification appears at the top, with each additional notification in descending time order.
Summary Notification
On handheld devices, providing a summary of notifications is crucial. It’s important to set the order position to GROUP_ORDER_SUMMARY.
Note: This notification does not appear in your stack of notifications on the wearable, but appears as the only notification on the handheld device.
// For large icon
Bitmap bmpLargeIcon = BitmapFactory.decodeResource(getResources(), R.drawable.ic_large_icon);

builder = new NotificationCompat.Builder(this)
        .setSmallIcon(R.drawable.ic_small_icon)
        .setLargeIcon(bmpLargeIcon);

// Use the same group key GROUP_KEY_EMAILS
WearableNotifications.Builder wearableBuilder = new WearableNotifications
        .Builder(builder)
        .setGroup(GROUP_KEY_EMAILS,
                WearableNotifications.GROUP_ORDER_SUMMARY);

// Build the final notification by passing wearableBuilder to InboxStyle notification
Notification summary = new NotificationCompat.InboxStyle(
        wearableBuilder.getCompatBuilder())
        .addLine("Amit    Attend Sachin’s last Test Match.")
        .addLine("Ansh    Business meeting for e-learning project.")
        .addLine("CoMoDay    Event for technical writers.")
        .setBigContentTitle("3 new messages")
        .setSummaryText("Your Email-Id here")
        .build();

notificationManager.notify(notificationId4, summary);
Resources Reference
What have we learnt?
In this instalment of our hands on with Android wear we have learnt:
- How to install the Android Wear Preview App.
- Adding the support library to the Android Project.
- How to start with coding in the android project source file .
- Creating and Issuing Notifications.
- Adding pages to Notification.
- Grouping and creating summaries for notifications.
Try creating and issuing notifications and adding some pages in your apps and let me know your experiences.
 Amit Diwan
Amit Diwan is a founder at Studyopedia, who has taught more than a million engineers and professionals on the following technologies: Python, Java, Android, WordPress, Drupal, Magento, JavaScript, jQuery, HTML5, Bootstrap 4, etc.