Thanks to the addition of cameras to our mobile devices taking photos has become easier than ever. No longer are we forced to struggle through text or an actual phone conversation to describe an object, person or scene.
With a simple click of a button and the press of the good old trusty “send” button we are only seconds (depending on your service) from sharing what we see. It has also given birth to the popular phenomenon of posting “selfies” online through popular social networks like Instagram.
While the idea is obnoxious and head scratching to some, there has certainly been a lot of some good to come from easy access to the camera phone. We can now take a photo inexpensively, whenever we want. This includes those looking for the classic website ‘bio/about us pics’.
For a lot of us with online presence outside of leisure desires, an image or avatar is needed to accompany our social media profile.
The reality is, not all of us can afford to spend hundreds — if not thousands — of dollars on a quality DSLR just to get a viable portrait. Professional photographers are always an option, though often budgets may not always stretch that far.
Luckily for most of us are just a couple of tips away from obtaining professional quality headshots with your garden-variety smartphone and a few household items.
Keep reading to check out the basic breakdown and practices for better smartphone photos.
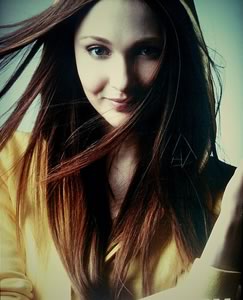
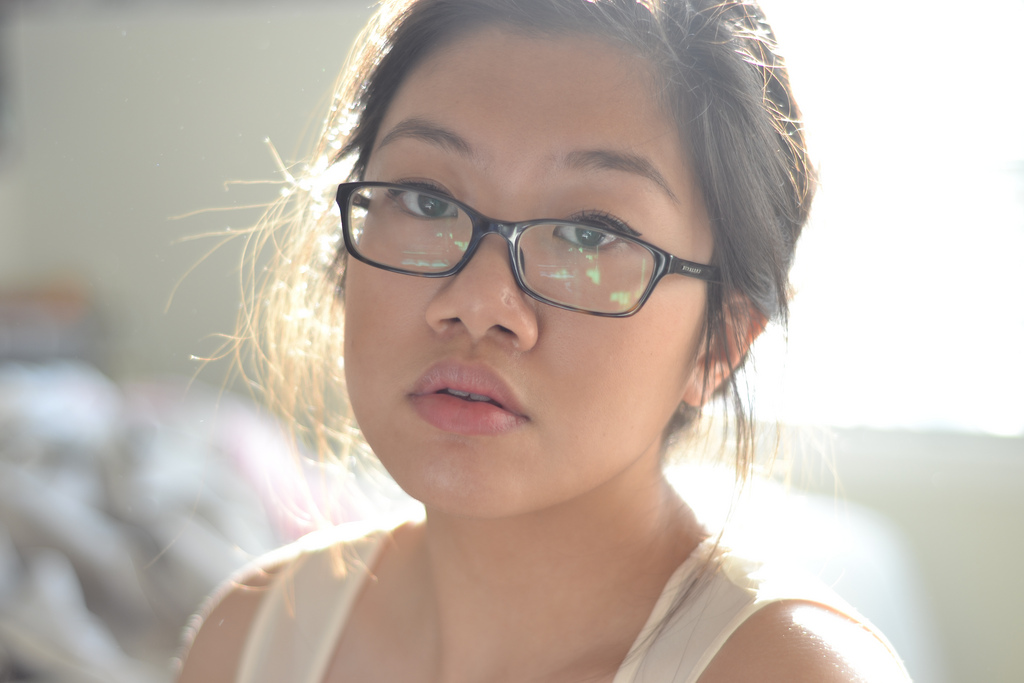
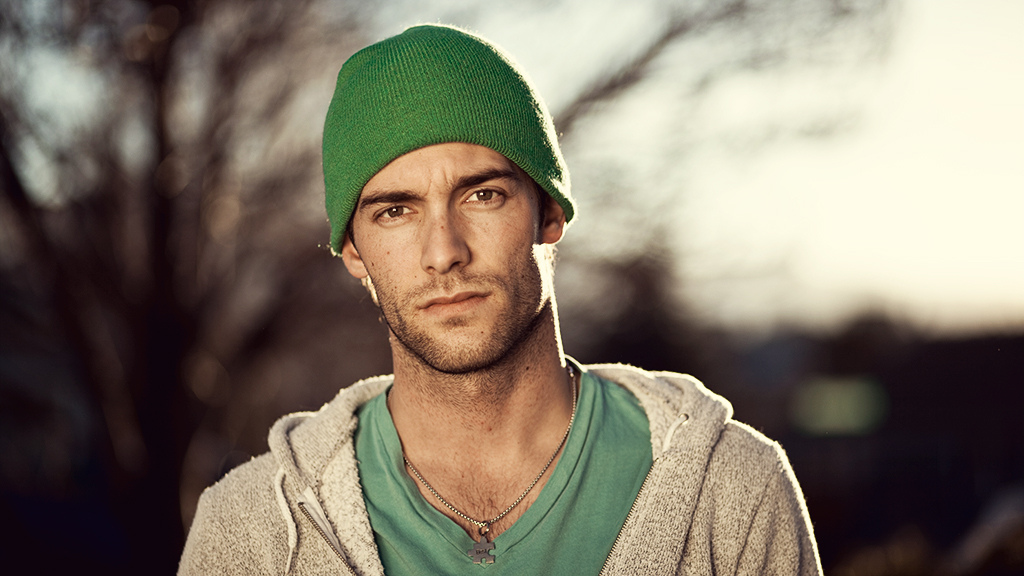
Lighting
https://www.flickr.com/photos/shakethesky/6799007500
The difference between a professional photo and an amateur one comes down to the lighting.
Good lighting practices are absolutely key to achieving an attractive photo but even more so an attractive portrait. Try to remember the last time you tried to take a photo with your phone or even camera and was unhappy with the final outcome.
Perhaps you needed a comb, an iron or a different facial expression, but I bet you that your lighting was the main culprit that drove you to pressing the delete button as hard and as quick as you could with a resounding “ew”.
Now lighting may seem like one of those things that require you to enroll in a class to get the gist of it but it really isn’t that hard when you look at the basics. After all, you only want a headshot that looks professional and is good enough to represent you. You’re not trying to be the next big photographer so here is what you need to know:
- You need enough light
- You need that light in the right areas
I suspect some of you are grumbling that this is far from helpful, but stick with me here.
To clarify “you need enough light” that essentially means that you need to make sure in the situation of your desired portrait that you have enough light on hand so that you can create contrast between yourself and your background.
“You need that light in the right areas” is essential because having your light positioned in the wrong spot can have you looking blown or washed out. That being said anyone who tells you to take your photo out in the middle of a sunny day is doing you a disservice.
Any photographer or videographer will tell you to never shoot at high noon and this is with reason.
The sun is at its highest peak at this point and will cast harsh shadows upon you or your subject. Not to mention the sun is bright which encourages squinting. If you are shooting outside overcast is ideal or either before or after high noon.
Here are a few more tips you can add to these basic principles as well to obtain better lighting:
-
Use natural light when you can as it is more flattering no matter your skin color or type due to man-made lights emitting various colors that causes an uneven look.
-
Try shooting next to a window with the lights off or step outside but not in direct sunlight. Look for shade.
-
If you have wrinkles or wish to minimize facial weight e.g. saggy skin then illuminate upwards opposed to downwards. You can achieve this by placing a reflector or even white posterboard in your lap and have a light source to bounce upward off the card to soften facial features.
-
A white posterboard or even car reflector can serve as a fill light for your portrait. You can also take a flat surface and cover it with foil if you have neither.
-
Lamps can be used in lieu of a lighting kit. Just make sure it is placed close enough as it gives your light a soft look.
-
If shooting outside and have a flash on your smartphone use it as this will give you a dynamic look and add detail.
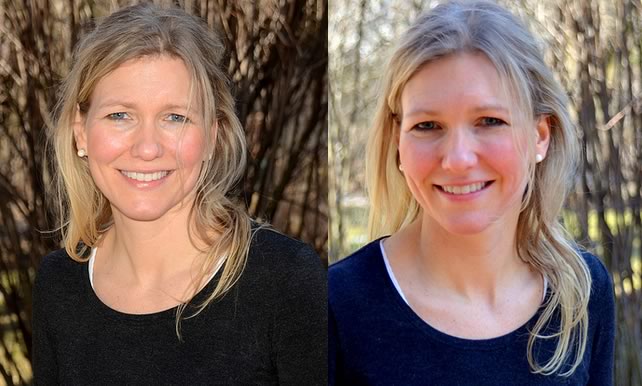
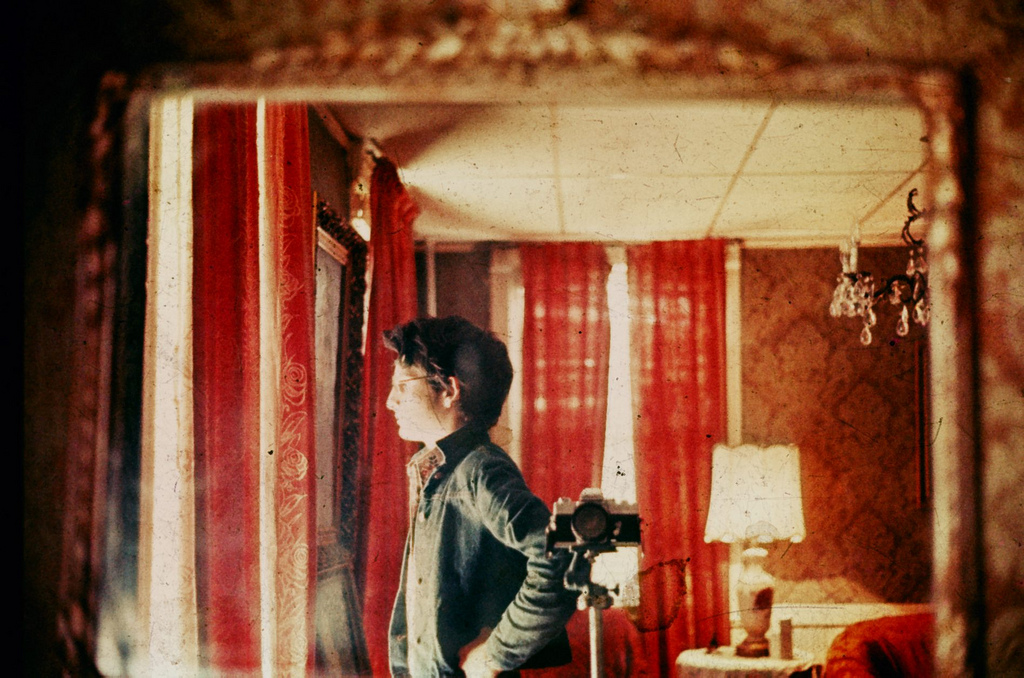
Posing
https://www.flickr.com/photos/tilaneseven/2588346029
Pretty faces and good lighting make for a good portrait but that doesn’t mean that you need to forget all about the pose. Depending on what you’re using your portrait for and the type of attitude you want taken away from it by viewers really determines your setup. There is no one set of poses that make for a good bio pic as some of us just feel plain silly striking a pose in front of the camera even if we’re taking it ourselves. To help determine the pose that is needed you must first determine the purpose of needing your portrait i.e. is it for work or your own blog, what are you going to wear and how much of you is going to be seen.
Nine times out of ten if you’re a CEO of a Fortune 500 company the last thing you’re going to be doing in your portrait is a backflip in a thousand dollar suit.
More laidback companies and freelancers are more likely to take that route. In general your portrait is going to be a medium shot, in other words shoulders on up. There is the off chance you might be shooting from waist on up however so make sure you are wearing a nice shirt.
Typically a simple shirt can pass for professional for most of us needing a bio pic though there is the off chance you need to throw on a blazer and tie to look more business professional opposed to business casual. Either way you want to keep your background in mind when picking out your attire. It won’t do to wear a green shirt and stand in the middle of a grassy field. Contrast colors are key here along with the pose.
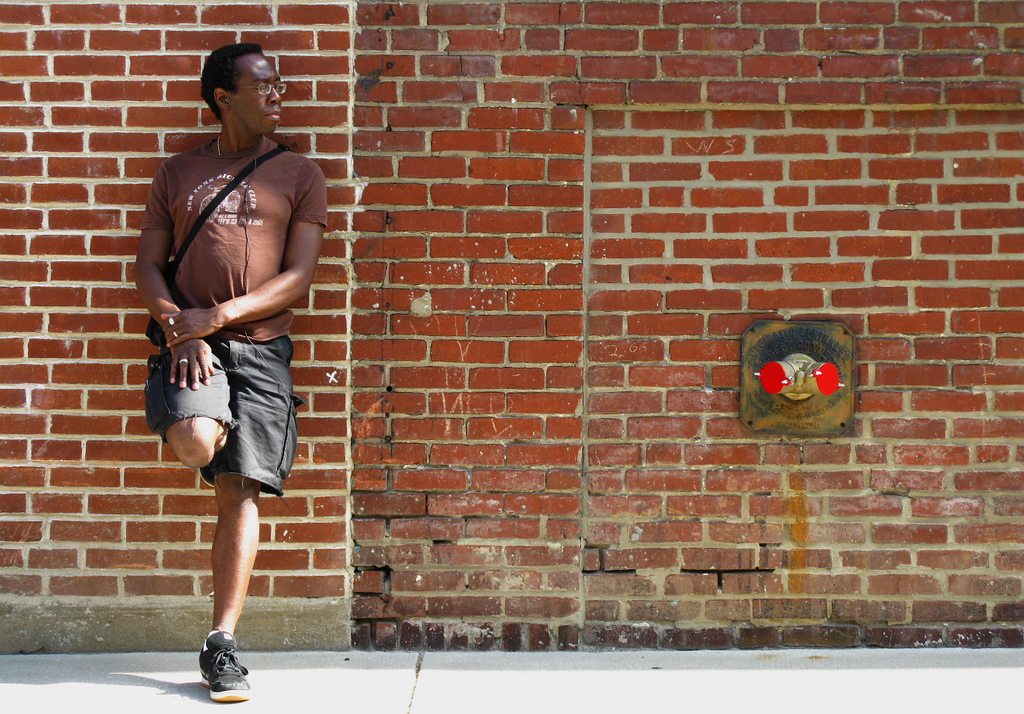
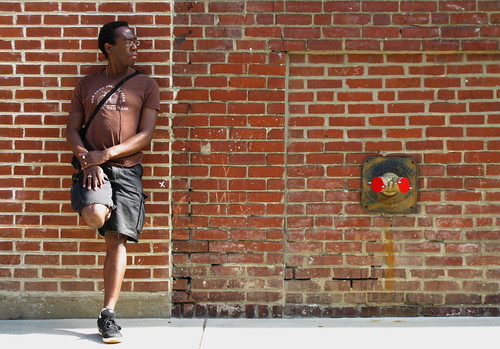
Pose naturally. If you’re feeling weird about the pose you are in then it will translate on camera. Go into this feeling relaxed so that you feel more at ease. While crossing your arms may seem like the go-to pose or even propping your fist underneath your chin try to avoid this. Try leaning your shoulder against a wall or column to make yourself look carefree and comfortable. This can work no matter what your profession is. Other things to look at:
-
Your expression can tell a lot about you other than your pose. Just because it’s a portrait doesn’t mean you have to smile. Often times smiles appear forced so if you don’t feel it in you don’t worry. Just don’t scowl.
-
Give your portrait some head room. Breathing room or head room aka the space above your head will let your photo breathe and overall give a better look and feel to the finished project.
-
Try switching up your angles. Instead of shooting head on try angling your phone or even changing your own height to get a dynamic portrait.
-
Rule of thirds, follow it or throw it out the window. Mix it up who knows what you can end up with.
Backgrounds

Good backgrounds are hard to find and it’s not because there isn’t anywhere to shoot but because those backgrounds aren’t flattering. While some of you might be perfectly satisfied with using the nearest white wall around that doesn’t have a stain on it I have to be honest. It’s not very becoming.
Plain white walls can leave you with a boring composition and if you’re lighting isn’t perfect you run the chance of looking either overexposed or underexposed. Both are a pain to correct in Photoshop so it is best to just try to avoid that altogether. While you don’t want to have a busy background going on behind you it can make for an interesting final result.
Though I do have a studio backdrop I find shooting in front of colored walls or outside to yield more eye catching results. Not only that but it seems to bring out a more comfortable response as colored walls and more natural settings are just more relaxed in general. With colored backgrounds you will always want to be mindful of what you’re wearing as I noted before. You don’t want to seem a part of the background and get lost. For more busy backgrounds that may have nature, buildings or even people you can fix that and create a dynamic look by creating blurred backgrounds. So here is what you need to keep in mind:
-
Simple backgrounds are great for professional portraits and those who are business savvy but a pop of color can take it to the next level.
-
You can create your own backdrops by either using a pressed sheet or get a couple of yards of fabrics to create your own DIY studio.
-
Brick walls, wooden fences and other textured surfaces are great additions if you can find one to shoot in front of.
-
Depth of field is your friend and can make you stand out nicely.
Image Stabilizer
Besides making sure you look comfortable in your photo, are properly lit and have an attractive background to compliment your style you need to make sure your final image doesn’t come out blurry.
The simplest way to achieve this is to create an image stabilizer. In other words you need to either get yourself a stand/tripod or create your own so that you can take a nice crisp photo.
Having a stand won’t just make your portrait look ten times better but it will also prevent you from having that “selfie” result. You know the one, where everyone can tell that you were holding the camera. Sure, that can be endearing in its own way, but if you’re trying to project professionalism, ‘goofy selfie’ may not be the ideal message.
There are multiple tripod mount options for your smartphones including the GripTight Mount and the Lollipod if you’re willing to shell out a couple of bucks for it.
Otherwise you can go the DIY route and use a phone case, some screws, glue and a few other items and build our own. Having your phone stabilized and hands free will not only keep you from accidentally dropping your phone but it will allow you to try out a few more positions than you would typically which is always a plus.
You will also avoid distortion and blurry images as well as be able to play with angles and camera height. If you’re using a stabilizer here are few more tips:
-
If you’re shooting your portrait yourself you can use your headphones as a remote to take your photo. Just make sure the cord isn’t in the way.
-
Check if your phone’s camera has a timer. If not you’ll need to grab an app if you don’t have headphones to act as a remote.
-
Adjust your tripod during a few takes to change your angle and experiment with what works best for you.
So that’s about it. There really isn’t much to it once you get the basic principles down. If you have your own self-portraits that you use online taken with your smartphones please feel free to share.
Frequently Asked Questions about Professional Portraits with Phone Camera
How can I achieve a professional look in my portraits using a phone camera?
Achieving a professional look in your portraits using a phone camera is possible with the right techniques. First, ensure you have good lighting. Natural light is the best, but if you’re indoors, use a light source that doesn’t cast harsh shadows. Second, use the rule of thirds to compose your shot. This rule involves dividing your frame into nine equal parts and placing your subject along these lines or at their intersections. Third, use portrait mode if your phone has it. This mode blurs the background, making your subject stand out. Lastly, edit your photos. There are many apps available that can help you enhance your photos and give them a professional finish.
What are the best phone camera settings for professional portraits?
The best phone camera settings for professional portraits depend on your phone model and the lighting conditions. However, some general tips include using the highest resolution and quality settings, turning off the flash, and using the HDR (High Dynamic Range) mode if your phone has it. HDR can help balance the light and dark areas of your photo. If your phone has a portrait mode, use it to blur the background and make your subject stand out.
How can I use natural light to improve my phone camera portraits?
Natural light can greatly improve your phone camera portraits. When shooting outdoors, the best times are during the golden hour, which is the hour after sunrise and the hour before sunset. During these times, the light is soft and warm, which can give your photos a professional look. If you’re shooting indoors, position your subject near a window to take advantage of the natural light. Avoid direct sunlight as it can cause harsh shadows and overexposure.
How can I edit my phone camera portraits to make them look professional?
There are many apps available that can help you edit your phone camera portraits. Some popular ones include Snapseed, VSCO, and Adobe Lightroom. These apps allow you to adjust various aspects of your photo such as brightness, contrast, saturation, and sharpness. You can also use them to apply filters, crop your photo, and remove unwanted elements. When editing, remember to keep it subtle. Over-editing can make your photo look unnatural.
Can I take professional self-portraits with my phone camera?
Yes, you can take professional self-portraits with your phone camera. Use a tripod or a stable surface to hold your phone. Use the self-timer function or a remote shutter to take the photo. Make sure you have good lighting and use the rule of thirds to compose your shot. If your phone has a portrait mode, use it to blur the background. After taking the photo, use an editing app to enhance it and give it a professional finish.
How can I avoid blurry photos when taking portraits with my phone camera?
To avoid blurry photos, ensure your phone is stable when taking the photo. Use a tripod or rest your phone on a stable surface. If you’re holding your phone, keep your hands steady and use both hands. Use the tap to focus feature to ensure your subject is in focus. If your phone has an optical image stabilization feature, use it to reduce blur.
What are some tips for posing for a professional portrait taken with a phone camera?
When posing for a professional portrait, keep your posture straight and relaxed. Avoid direct eye contact with the camera, instead look slightly away. Try different angles to find the most flattering one. Use props or interact with your environment to make the photo more interesting. Remember to express emotion in your photo, a natural smile can make a big difference.
How can I use the rule of thirds in my phone camera portraits?
The rule of thirds involves dividing your frame into nine equal parts with two horizontal lines and two vertical lines. The idea is to place your subject along these lines or at their intersections. Most phones have a grid feature that you can turn on to help you apply this rule. Using the rule of thirds can help you create balanced and interesting compositions.
Can I use a phone camera for professional headshots?
Yes, you can use a phone camera for professional headshots. Ensure you have good lighting, use the highest resolution and quality settings, and use the portrait mode if your phone has it. Compose your shot using the rule of thirds and make sure your subject is in focus. After taking the photo, use an editing app to enhance it and give it a professional finish.
How can I use the background to enhance my phone camera portraits?
The background can greatly enhance your phone camera portraits. Choose a background that complements your subject and doesn’t distract from it. If your phone has a portrait mode, use it to blur the background and make your subject stand out. You can also use the background to tell a story or add context to your photo. For example, if you’re taking a portrait of a chef, you could use a kitchen as the background.
 Gabrielle Gosha
Gabrielle is a creative type who specializes in graphic design, animation and photography.