We all are well aware of the importance of typography in web design. It should be eye-catching and unique to help your design stand out from a crowd of cybercompetitors. There are endless possibilities; all you need is your imagination and the right tool to help you turn it into a reality. Undoubtedly, Photoshop is a great tool in this regard. It has tremendous potential, but we need to polish our Photoshop skills continuously.
So, today I am going to show you how to create a branded text necklace effect in Photoshop. We will learn how to use and manipulate various layer styling techniques, as well as different filters and tools to achieve the desired effect. Hopefully you will learn some handy tips on the way. Let’s start designing!
Final Result:

Step 1
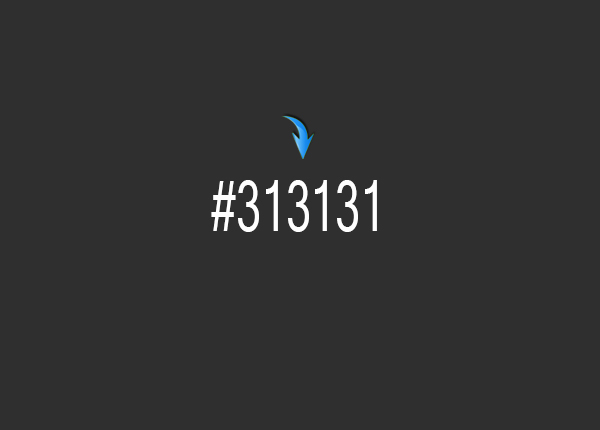
Create a new document in Photoshop with a 1000px width and a 700px height.

Step 2
Fill the background with color #313131 using the paint bucket tool.
Step 3
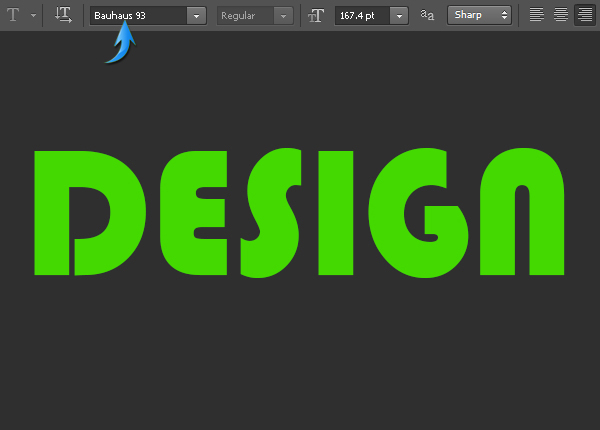
Set #46d400 as your foreground color and select the type tool to type text on a new layer. We’ll use “Bauhaus 93” font here.
Step 4
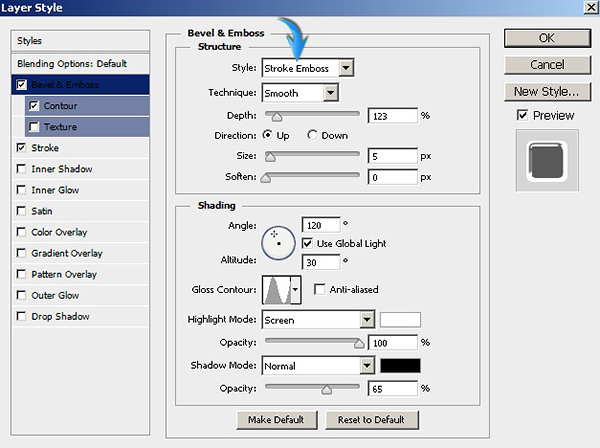
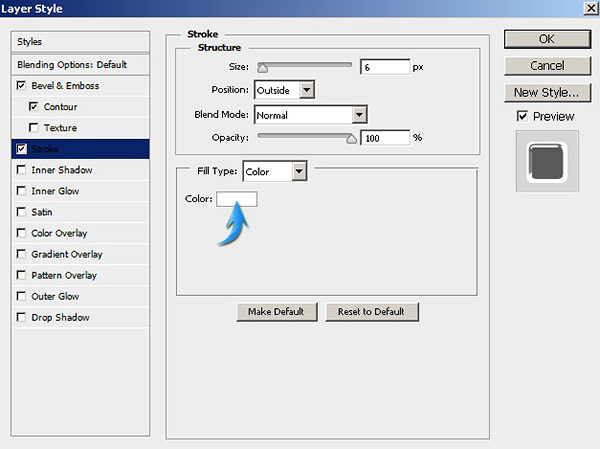
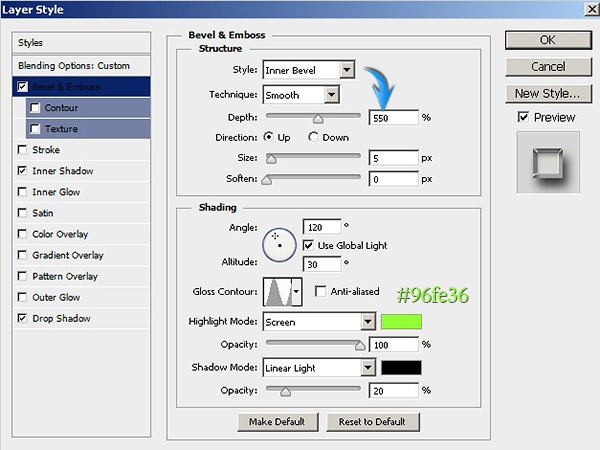
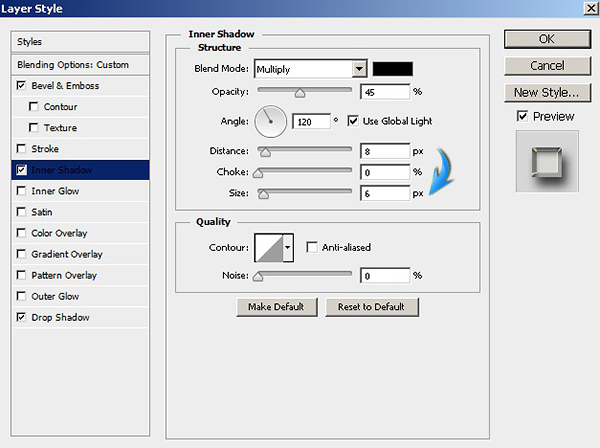
Duplicate the text layer by going to “Layer” > “Duplicate layer.” Now double-click on the original text layer to open the layer style window. Apply the following settings on it.


Step 5
Now, double-click on the duplicated text layer and apply the following layer style settings.


Step 6
Next, press Ctrl + <click on any of the text layers> to make selection around the text. Now create a new layer and go to “Select” > “Modify” > “Contract.” Contract this selection by 10px.

Set #81a601 as your foreground color and fill the selection with this color using the paint bucket tool. Label this layer as inside text.

Step 7
Apply the following layer style settings on the inside text layer.


Step 8
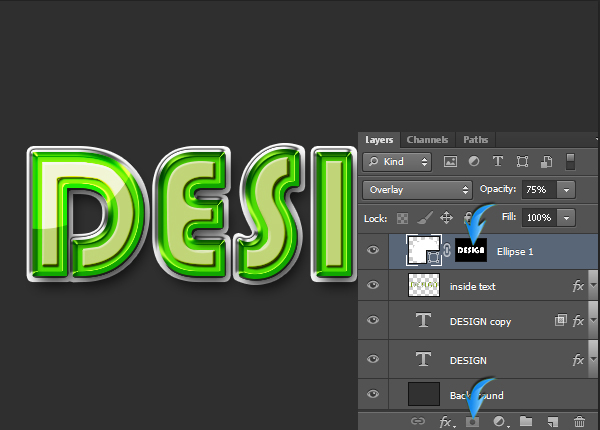
Next, we’ll create highlights over the text. Set pure white as the foreground color and make the shape shown below either using the ellipse tool or the pen tool (Tool mode: Shape). Change the blending mode of this layer to “Overlay” and reduce its opacity to 75%.

In order to confine the highlight to the letter “D”, click on the ellipse layer then press Ctrl + <click on the text layer> to make selection around it. After that, click on the icon of “Add layer mask,” which is present at the bottom of the layers panel.
Step 9
Make highlights for the rest of the letters using the same method.

Step 10
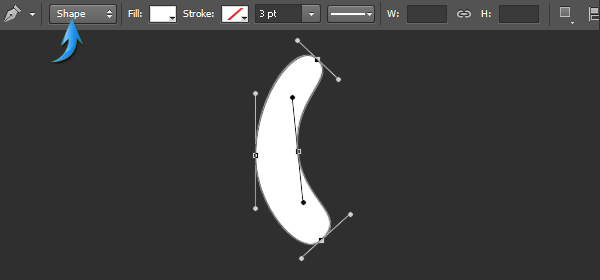
Next, we’ll create chains to give the visual impression that our text is supported by them. Select the pen tool (Tool mode: Shape) to draw the shape shown below in pure white color.
Duplicate this layer and go to “Edit” > “Transform” > “Flip Horizontal.” Arrange it as shown below. After that, select both layers and right-click over these layers to choose “Merge Shapes” from the menu.

Keep on duplicating and merging these shapes until you get two chains like the ones shown below.

Step 11
Double-click on the chains merged layer and apply the following layer style settings.


Step 12
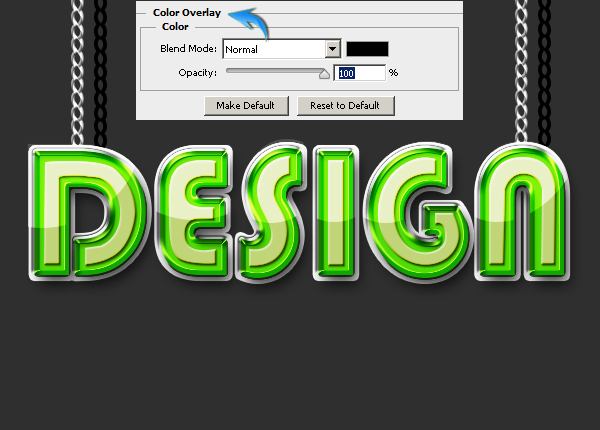
Duplicate the chains layer, drag it towards the right side as shown below, and turn them black using color overlay.
Step 13
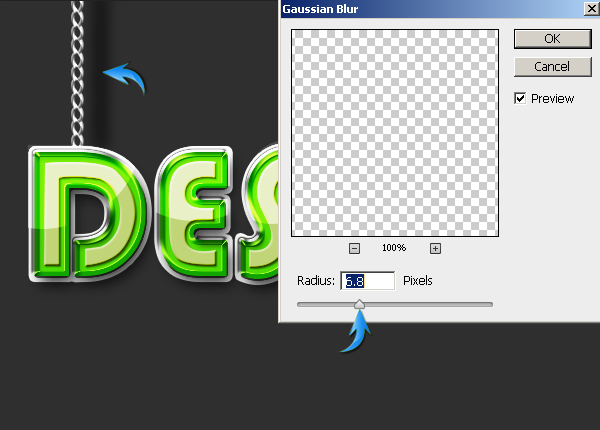
Now go to “Filter” > “Blur” > “Gaussian Blur.” Use the following values to add blur to the chain shadows.
Reduce the opacity of this layer to 55%.

Step 14
Next, to form shadow for the text itself, duplicate the text layer and remove its effects by dragging them towards the “Delete layer” icon, which is present at the bottom of the layers panel. Place this layer below the original text layers. Once you are done, make the text pure black using color overlay as we did for the chains in step 12.

Step 15
Now go to “Filter” > “Blur” > “Motion Blur” and apply the following settings to give the shadow the following look.

Step 16
Press Ctrl+ “T” to activate the free transform tool. Now, tilt the shadow layer 25⁰ towards the right as shown below.

Clear the shadow that is above the text using the soft round eraser tool.

Step 17
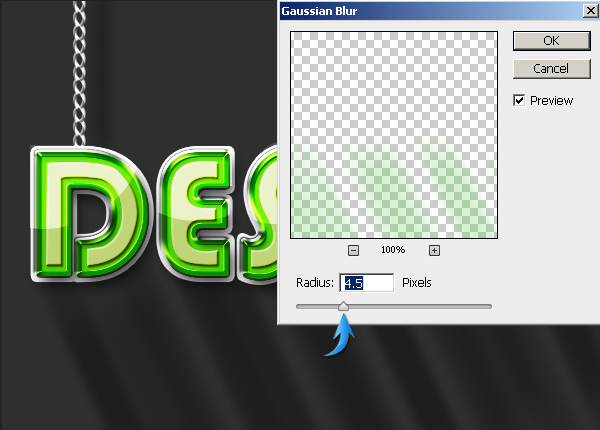
To blend the shadow more nicely, go to “Filter” > “Blur” > “Gaussian Blur.” Use a 4.5px blur radius.
Step 18
Next, we’ll give our background some texture. To do so, set default colors that are black and white. Create a new layer just above the background layer and go to “Filter” >“Render” > “Clouds.”

Step 19
Now, click on the clouds layer and go to “Filter” > “Noise” > “Add Noise.” Use the following settings here.

Change the blending mode of this textured layer to “Overlay” and reduce its opacity to 30%.

Step 20
We are almost done. However, we need to adjust the lighting. Light source should be somewhere near the top-left corner. So, select the gradient tool, pick the black and white radial gradient from the top properties bar and drag it from the top-left corner to the right-bottom corner of the canvas on a new layer just above the textured layer.
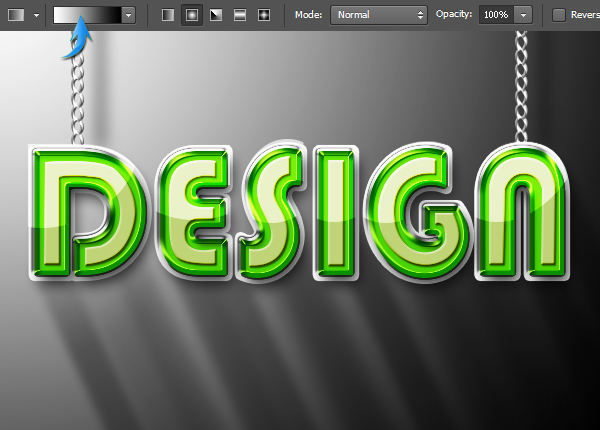
Change the blending mode of gradient layer to “soft light” and reduce its opacity to 45%.

Step 21
Create a new layer above the gradient layer and apply the soft round brush tool in pure black color all around the text as shown below.

Drag this layer to the right and downward a bit. Change its blending mode to “Multiply” and reduce opacity to 40%.

That’s it. Our text effect is all done. I hope you guys enjoyed it. Do share your thoughts!
Frequently Asked Questions about Creating a Branded Text Necklace in Photoshop
How can I create a realistic chain effect in Photoshop?
Creating a realistic chain effect in Photoshop involves several steps. First, you need to create a new layer and draw a simple chain link using the Ellipse Tool. Then, duplicate this layer and arrange the links to form a chain. You can use the Brush Tool to add shadows and highlights to each link, giving it a 3D effect. Finally, use the Eraser Tool to remove any excess parts of the chain. Remember, practice makes perfect, so don’t be discouraged if your first few attempts don’t look perfect.
Can I use a chain brush to create a necklace in Photoshop?
Yes, you can use a chain brush to create a necklace in Photoshop. Chain brushes are a great way to quickly and easily create realistic-looking chains. You can find a variety of chain brushes online, some of which are free to download and use. Once you’ve downloaded a chain brush, you can use it to draw a chain on your canvas. You can then add text or other elements to create a branded text necklace.
How can I add text to a necklace in Photoshop?
Adding text to a necklace in Photoshop is a straightforward process. First, select the Text Tool from the toolbar. Then, click on the area where you want to add text and type your desired text. You can adjust the font, size, and color of the text using the options bar at the top of the screen. Once you’re happy with your text, you can use the Move Tool to position it on the necklace.
How can I make my text look like it’s part of the necklace?
To make your text look like it’s part of the necklace, you can use Photoshop’s blending options. First, right-click on the text layer and select Blending Options. Then, experiment with different settings such as Bevel and Emboss, Inner Shadow, and Gradient Overlay until you achieve a look that you’re happy with. Remember to save your work regularly to avoid losing any progress.
Can I create a branded text necklace in Photoshop without any prior experience?
Yes, you can create a branded text necklace in Photoshop even if you’re a beginner. The key is to take your time and follow each step carefully. Don’t be afraid to experiment with different tools and settings, and remember that practice makes perfect. There are also plenty of tutorials and resources available online that can help you learn the basics of Photoshop.
How can I save my branded text necklace design in Photoshop?
To save your branded text necklace design in Photoshop, go to File > Save As. Choose a location for your file, and select a format from the drop-down menu. If you want to keep all your layers intact for future editing, save your file as a Photoshop (.PSD) file. If you want to share your design online or print it, save it as a JPEG or PNG file.
Can I use my branded text necklace design for commercial purposes?
Whether or not you can use your branded text necklace design for commercial purposes depends on the terms and conditions of any resources you used. For example, some chain brushes are free for personal use but require a license for commercial use. Always check the terms and conditions before using any resources in your designs.
How can I improve my Photoshop skills?
There are many ways to improve your Photoshop skills. One of the best ways is to practice regularly. Try to create different designs and experiment with different tools and techniques. You can also watch tutorials, take online courses, or read books about Photoshop. Remember, the more you practice, the better you’ll get.
Can I create other types of jewelry in Photoshop?
Yes, you can create other types of jewelry in Photoshop. The process is similar to creating a branded text necklace. You can use the same tools and techniques to create bracelets, earrings, rings, and more. You can also use different brushes and textures to create different types of metal or gemstones.
How can I make my jewelry designs look more realistic in Photoshop?
To make your jewelry designs look more realistic in Photoshop, you can use techniques such as adding shadows and highlights, using blending modes, and applying textures. You can also use reference images to help you get the details right. Remember, the key to creating realistic designs is to pay attention to the small details.
Anum is Web and Graphic designer. Addicted to Photoshop and crazy for pixel perfection. She is also an active blogger, sharing her passions, skills and creative details on her blog Websoulz. She loves to connect with the community, sharing the latest design gossips and rolling her eyes on boring trends.