Mapbox is open source SDK for pixel-perfect vector maps that promises the render speed and smoothness of a video game. If you are interested in integrating map functionality in your apps then Mapbox is a choice worth considering.
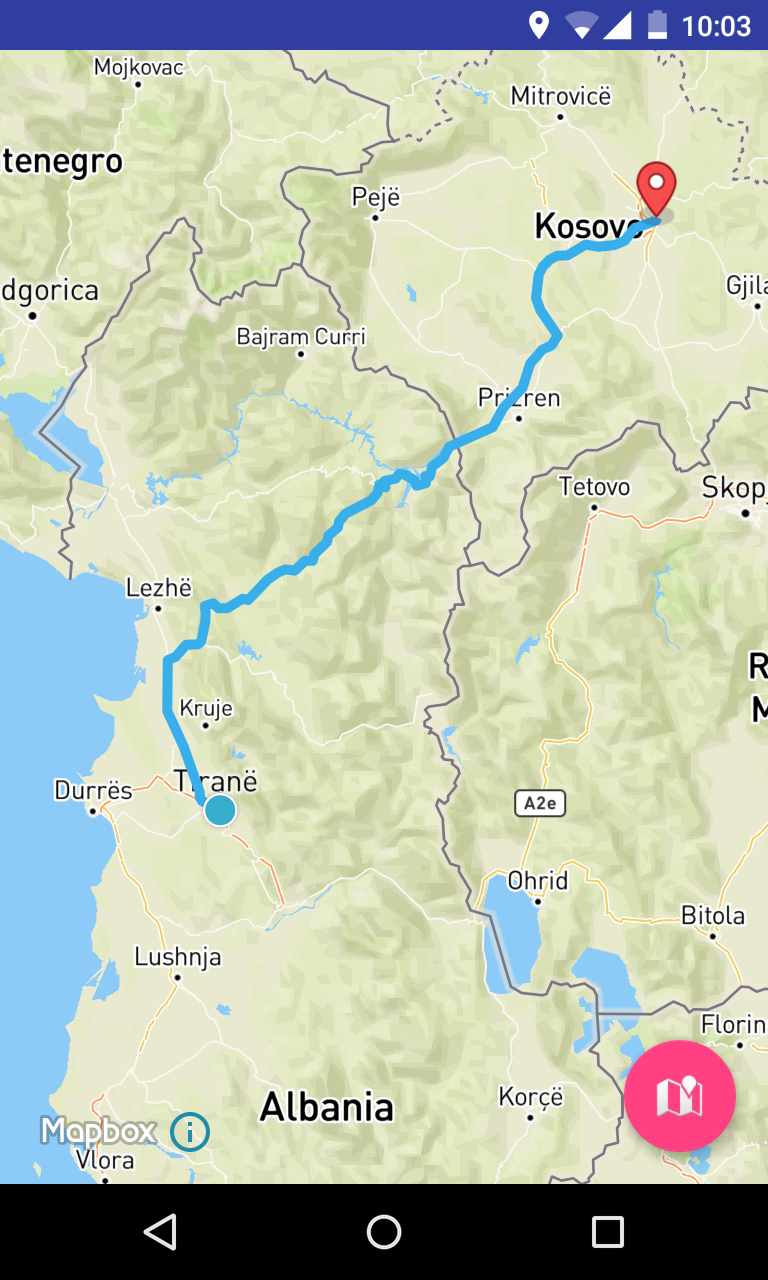
The Mapbox Android SDK overview and examples are a good starting point. In this tutorial I will create something more complex, an app that draws the best route from origin to destination on a map.
Let’s get started!
You can find the code for the final project on GitHub.
To use Mapbox in your app you will need an API access token. To get one, create a Mapbox account and find yours here.
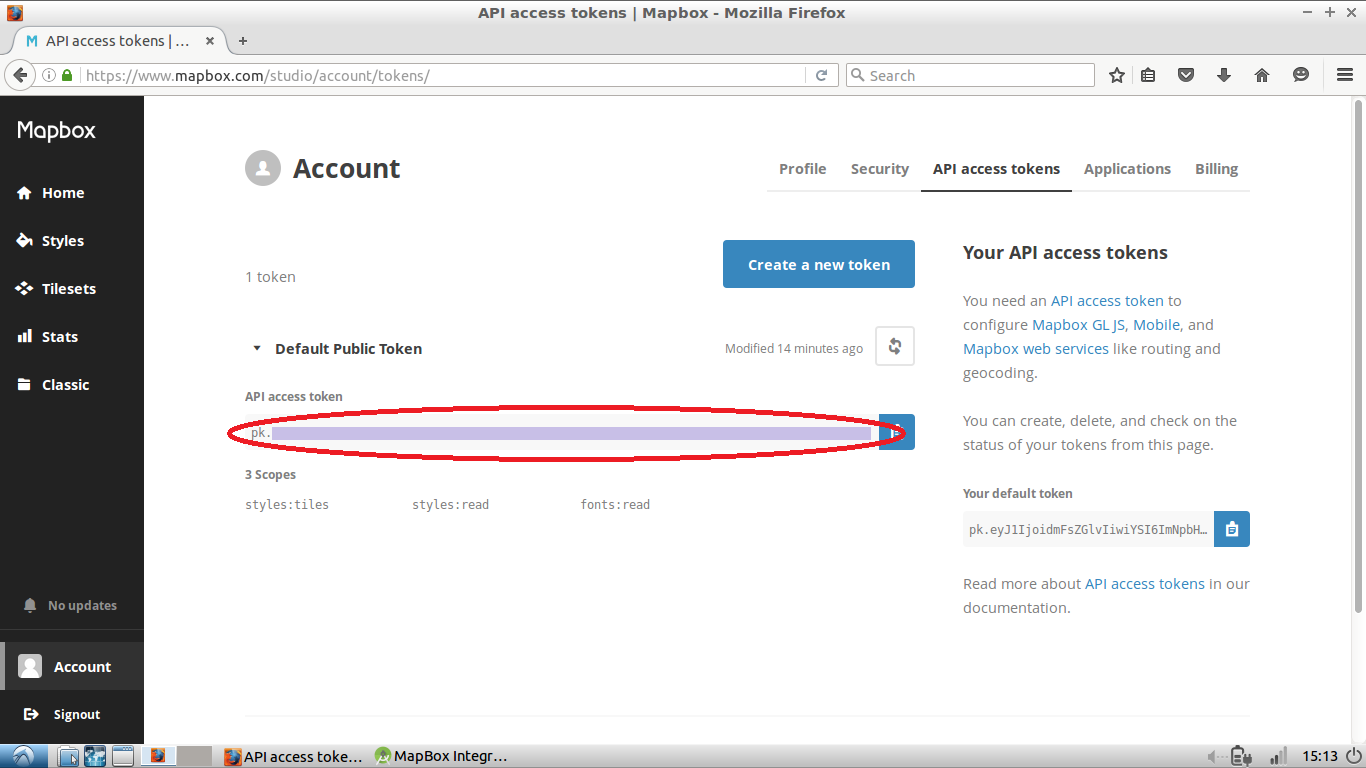
Add the token to strings.xml in your Android project:
<string name="accessToken">Your access token</string>In AndroidManifest.xml add the following permissions for internet and location access.
<uses-permission android:name="android.permission.ACCESS_NETWORK_STATE"/>
<uses-permission android:name="android.permission.INTERNET"/>

<uses-permission android:name="android.permission.ACCESS_COARSE_LOCATION"/>
<uses-permission android:name="android.permission.ACCESS_FINE_LOCATION"/>
<uses-permission android:name="android.permission.ACCESS_WIFI_STATE"/>Note: In Android Marshmallow (API 23) and above it’s necessary to request permissions at runtime.
Installing Mapbox
Open build.gradle(Module: app) and add MapBox as a dependency.
repositories {
    mavenCentral()
}

dependencies {
    . . .

    compile('com.mapbox.mapboxsdk:mapbox-android-sdk:3.2.0@aar') {
        transitive = true
    }
    compile ('com.mapbox.mapboxsdk:mapbox-android-directions:1.0.0@aar'){
        transitive=true
    }

}
The first dependency represents Mapbox and the second is the Directions library to add driving, walking, and cycling routes to the app and draw them on the map.
The Map Layout
In the content_main.xml layout file replace the contents with the following:
<?xml version="1.0" encoding="utf-8"?>
<RelativeLayout xmlns:android="http://schemas.android.com/apk/res/android"
    xmlns:mapbox="http://schemas.android.com/apk/res-auto"
    xmlns:tools="http://schemas.android.com/tools"
    android:layout_width="match_parent"
    android:layout_height="match_parent"
    tools:context="com.example.valdio.mapboxintegration.MainActivity"
    tools:showIn="@layout/activity_main">

    <com.mapbox.mapboxsdk.views.MapView
        android:id="@+id/mapview"
        android:layout_width="fill_parent"
        android:layout_height="fill_parent"
        mapbox:access_token="@string/accessToken" />

</RelativeLayout>
Initialize the variables you will need in the MainActivity class:
public class MainActivity extends AppCompatActivity {

  private MapView mapView = null;
  private String MAPBOX_ACCESS_TOKEN = "";
  private DirectionsRoute currentRoute = null;

  ...
In the onCreate() method of MainActivity.java delete the toolbar and floating action button code and initialize the map by adding:
String MAPBOX_ACCESS_TOKEN = getResources().getString(R.string.accessToken);

// Set up a standard Mapbox map
MapView mapView = (MapView) findViewById(R.id.mapview);
mapView.setAccessToken(MAPBOX_ACCESS_TOKEN);
mapView.setStyleUrl(Style.MAPBOX_STREETS); // specify the map style
mapView.setZoom(14); // zoom level
mapView.onCreate(savedInstanceState);
Mapbox maps need to implement the Activity’s lifecycle methods to avoid runtime errors, so add the necessary override functions.
@Override
protected void onStart() {
    super.onStart();
    mapView.onStart();
}

@Override
protected void onStop() {
    super.onStop();
    mapView.onStop();
}

@Override
protected void onDestroy() {
    super.onDestroy();
    mapView.onDestroy();
}

@Override
protected void onResume() {
    super.onResume();
    mapView.onResume();
}

@Override
protected void onPause() {
    super.onPause();
    mapView.onPause();
}

@Override
protected void onSaveInstanceState(Bundle outState) {
    super.onSaveInstanceState(outState);
    mapView.onSaveInstanceState(outState);
}
Now that Mapbox is configured, it’s time to start building the app.
Adding a Marker to the Map
Add the following to the bottom of onCreate in MainActivity:
CameraPosition cameraPosition = new CameraPosition.Builder()
        .target(new LatLng(41.327752, 19.818666)) // Sets the center of the map to the specified location
        .zoom(13)                            // Sets the zoom level
        .build();

//set the user's viewpoint as specified in the cameraPosition object
mapView.moveCamera(CameraUpdateFactory.newCameraPosition(cameraPosition));

//Add a marker to the map in the specified location
mapView.addMarker(new MarkerOptions()
        .position(new LatLng(41.327752, 19.818666))
        .title("MapBox Marker!")
        .snippet("Welcome to my marker."));
CameraPosition is a useful Mapbox class used to set position, angle, zoom and tilt of the user’s viewpoint.
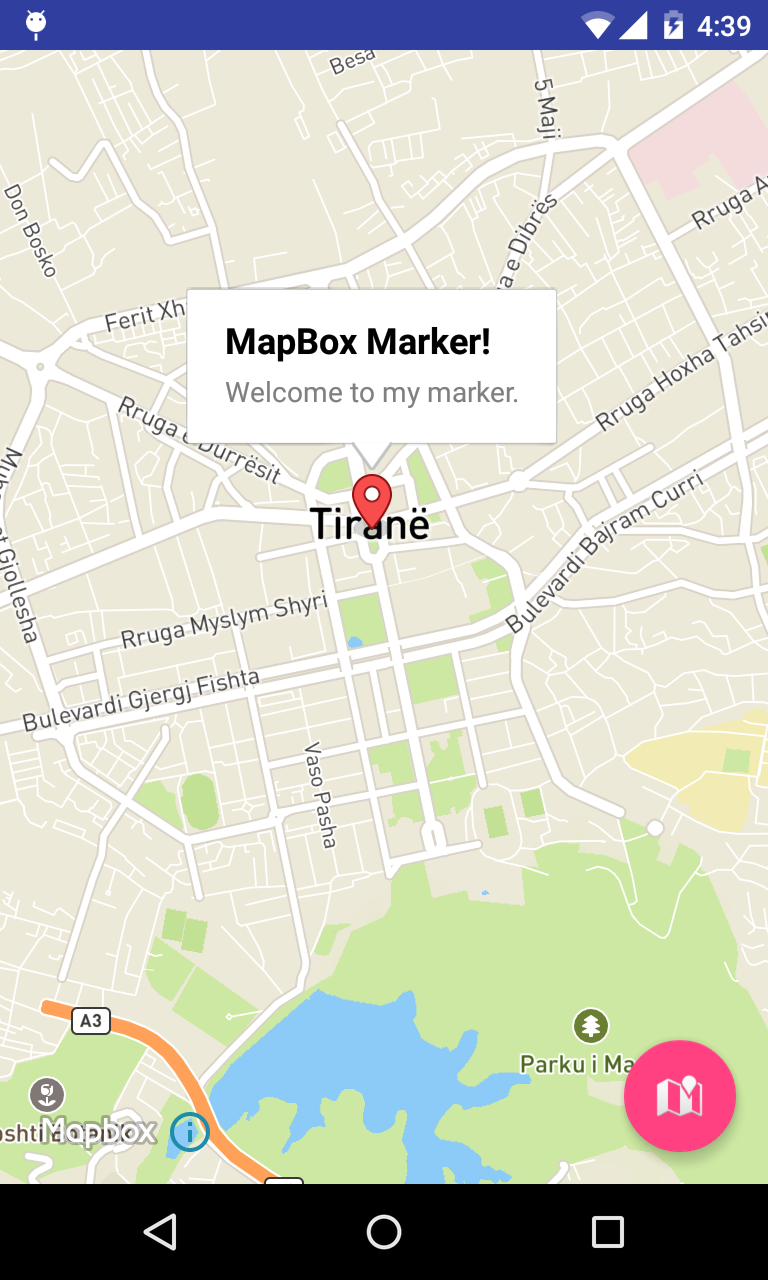
This is how the marker looks on the map:
Get the Device Location.
For Mapbox to access the device location, location services must be enabled and the app should have permission to use them. As mentioned earlier, in Android Marshmallow (API 23) and later it’s necessary to request permissions at runtime.
Add the code to get the current location to a new function:
      private void myLocation() {

        if (ActivityCompat.checkSelfPermission(this, Manifest.permission.ACCESS_FINE_LOCATION) != PackageManager.PERMISSION_GRANTED && ActivityCompat.checkSelfPermission(this, Manifest.permission.ACCESS_COARSE_LOCATION) != PackageManager.PERMISSION_GRANTED) {
            // TODO: Consider calling
            //    ActivityCompat#requestPermissions
            // here to request the missing permissions, and then overriding
            //   public void onRequestPermissionsResult(int requestCode, String[] permissions,
            //                                          int[] grantResults)
            // to handle the case where the user grants the permission. See the documentation
            // for ActivityCompat#requestPermissions for more details.
            return;
        }

        mapView.setMyLocationEnabled(true);
        mapView.setMyLocationTrackingMode(MyLocationTracking.TRACKING_FOLLOW);
        mapView.getMyLocation();
    }
And call this function after the map initialization code:
...
mapView.onCreate(savedInstanceState);

myLocation();
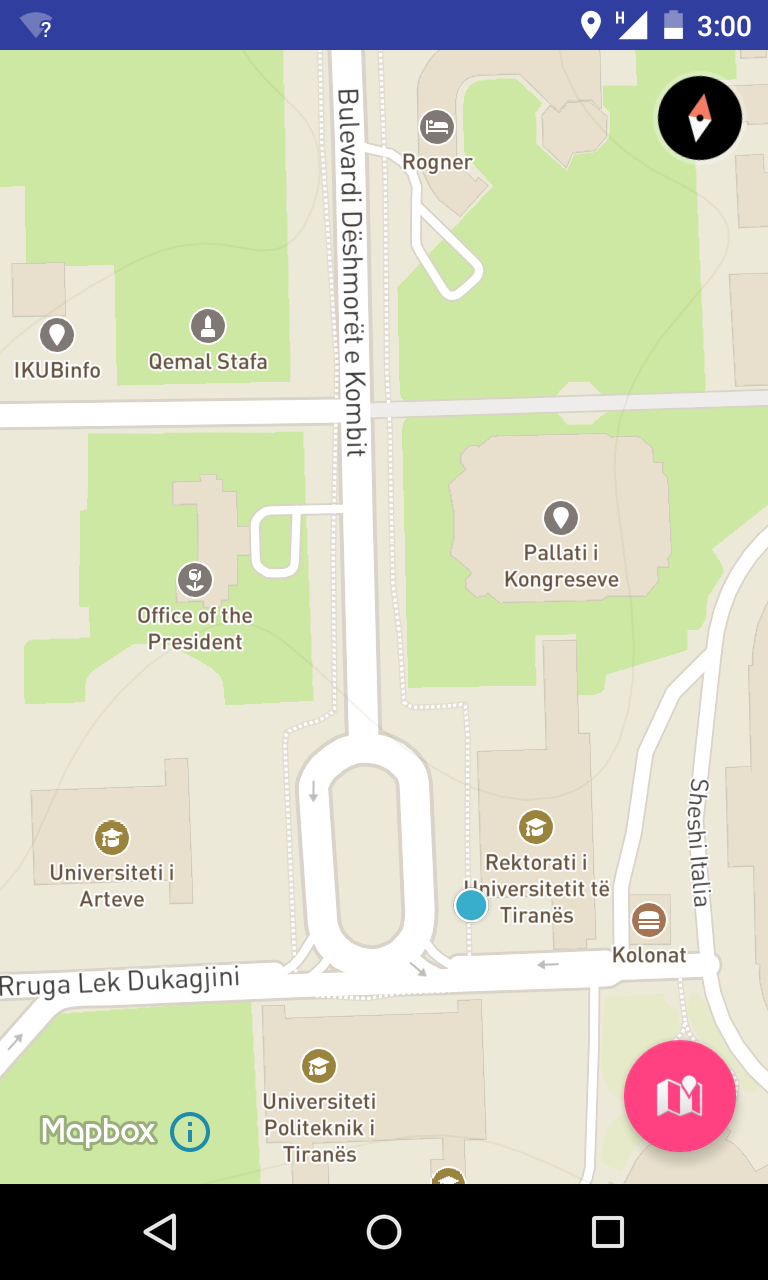
In this case tracking is set to TRACKING_FOLLOW, which means that the user’s location will be constantly monitored and the map will update as it changes.
Almost There!
You now have a marker and location, next is drawing the route on the map.
This uses the second library imported in the dependencies, the ‘Directions library’, also created by the Mapbox team.
Here is how it works:
- Create two
Waypointlocations, origin and destination. - Create a
MapboxDirectionsbuilder object, which is a network request to the Mapbox API containing the origin and destinationWaypoints and the profile of the direction route (driving, walking or cycling). - Execute the direction request asynchronously. The
MapboxDirectionsclass has a built in async request using the Retrofit API, usingenqueue()to execute the request. - The
onResponse()method returns a Retrofit response, which is a standard JSON API response. - The body of the response contains location coordinate pairs, the coordinates that will be drawn on the map.
- Using Mapbox Polyline the coordinates are drawn on the map. Polyline is a geometry feature with an unclosed list of coordinates drawn as a line.
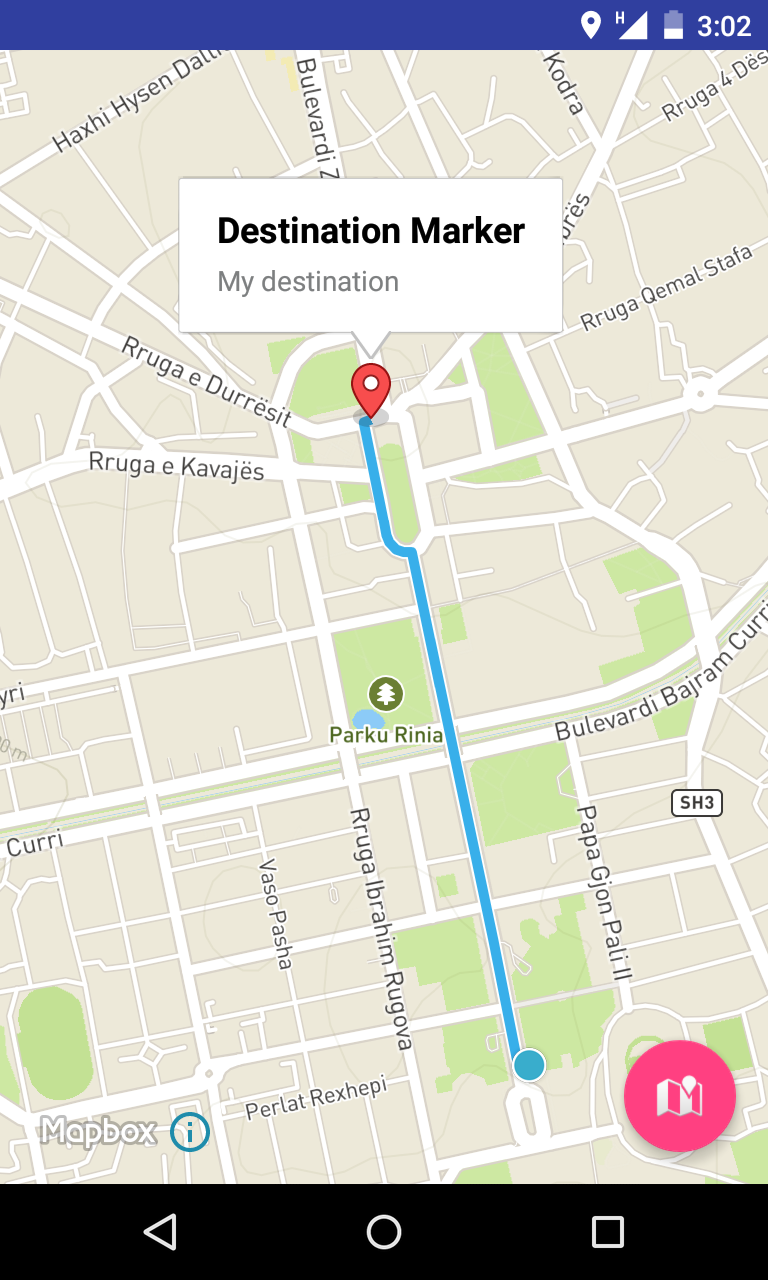
To use the Direction library, get the device location as the origin waypoint and a location specified by the user by long clicking on the map as the destination waypoint.
Create Two Waypoint Locations and Add a Marker on the Destination.
Add the following to the bottom of the onCreate function:
mapView.setOnMapLongClickListener(new MapView.OnMapLongClickListener() {
    @Override
    public void onMapLongClick(LatLng point) {

        //Remove previously added markers
        //Marker is an annotation that shows an icon image at a geographical location
        //so all markers can be removed with the removeAllAnnotations() method.
        mapView.removeAllAnnotations();

        // Set the origin waypoint to the devices location
        Waypoint origin = new Waypoint(mapView.getMyLocation().getLongitude(), mapView.getMyLocation().getLatitude());

        // Set the destination waypoint to the location point long clicked by the user
        Waypoint destination = new Waypoint(point.getLongitude(), point.getLatitude());

        // Add marker to the destination waypoint
        mapView.addMarker(new MarkerOptions()
                .position(new LatLng(point))
                .title("Destination Marker")
                .snippet("My destination"));

        // Get route from API
        getRoute(origin, destination);

    }
});
Create a MapboxDirections Network Request and Run It Asynchronously.
Add the following method to get the best route:
private void getRoute(Waypoint origin, Waypoint destination) {
  MapboxDirections directions = new MapboxDirections.Builder()
          .setAccessToken(MAPBOX_ACCESS_TOKEN)
          .setOrigin(origin)
          .setDestination(destination)
          .setProfile(DirectionsCriteria.PROFILE_WALKING)
          .build();

  directions.enqueue(new Callback<DirectionsResponse>() {
      @Override
      public void onResponse(Response<DirectionsResponse> response, Retrofit retrofit) {

          // Display some info about the route
          currentRoute = response.body().getRoutes().get(0);
          showToastMessage(String.format("You are %d meters \nfrom your destination", currentRoute.getDistance()));

          // Draw the route on the map
          drawRoute(currentRoute);
      }

      @Override
      public void onFailure(Throwable t) {
          showToastMessage("Error: " + t.getMessage());
      }
  });
}
Draw the Polyline Based on the Coordinates on the Map.
Add this method to draw the route:
private void drawRoute(DirectionsRoute route) {
  // Convert List<Waypoint> into LatLng[]
  List<Waypoint> waypoints = route.getGeometry().getWaypoints();
  LatLng[] point = new LatLng[waypoints.size()];
  for (int i = 0; i < waypoints.size(); i++) {
      point[i] = new LatLng(
              waypoints.get(i).getLatitude(),
              waypoints.get(i).getLongitude());
  }

  // Draw Points on MapView
  mapView.addPolyline(new PolylineOptions()
          .add(point)
          .color(Color.parseColor("#38afea"))
          .width(5));
}

private void showToastMessage(String message) {
  Toast.makeText(this, message, Toast.LENGTH_SHORT).show();
}
Run the project, select two points and you should see something like the below.
Going the Extra Mile
In this tutorial I covered the basics to get you started with the MapBox SDK and the Direction library. MapBox has more cool features for use in your app like different map styles, or for something different, custom vector maps.
Another library I recommend is the Geocoding library to turn coordinates into addresses or vice versa. To learn more about MapBox check out its mobile maps, were you can find information about the libraries mentioned in this tutorial.
Frequently Asked Questions (FAQs) about Adding Elegant Maps to Your Android App with Mapbox
How can I customize the style of my Mapbox map in my Android app?
Mapbox provides a wide range of customization options for your maps. You can change the color scheme, add custom markers, and even overlay data. To customize the style of your map, you need to use the Mapbox Studio, an online tool for creating custom map styles. Once you’ve created your style, you can use the style URL in your Android app to load the map with your custom style.
What are the prerequisites for integrating Mapbox into my Android app?
Before you can start using Mapbox in your Android app, you need to have a few things set up. First, you need to have Android Studio installed on your computer. You also need to have a Mapbox account, which you can create for free on the Mapbox website. Once you have these, you can start integrating Mapbox into your Android app.
How can I add interactivity to my Mapbox map?
Mapbox provides several ways to add interactivity to your maps. You can add click events to your map markers, allowing users to interact with the map. You can also add zoom controls, allowing users to zoom in and out of the map. To add these features, you need to use the Mapbox SDK for Android, which provides a set of APIs for adding interactivity to your maps.
How can I use Mapbox to display real-time data on my map?
Mapbox provides a feature called live data, which allows you to display real-time data on your map. This can be useful for displaying things like traffic conditions or weather updates. To use live data, you need to use the Mapbox SDK for Android, which provides APIs for integrating live data into your maps.
How can I optimize the performance of my Mapbox map?
Mapbox provides several ways to optimize the performance of your maps. You can use the Mapbox SDK for Android to control the level of detail displayed on the map, reducing the amount of data that needs to be loaded. You can also use the SDK to cache map data, reducing the amount of data that needs to be downloaded.
How can I add a search function to my Mapbox map?
Mapbox provides a feature called geocoding, which allows you to add a search function to your map. This allows users to search for specific locations on the map. To add a search function, you need to use the Mapbox SDK for Android, which provides APIs for integrating geocoding into your maps.
How can I use Mapbox to create a navigation app?
Mapbox provides a feature called directions, which allows you to create a navigation app. This allows users to get directions from one location to another. To create a navigation app, you need to use the Mapbox SDK for Android, which provides APIs for integrating directions into your app.
How can I use Mapbox to create a location-based app?
Mapbox provides a feature called geolocation, which allows you to create a location-based app. This allows you to track the user’s location and display it on the map. To create a location-based app, you need to use the Mapbox SDK for Android, which provides APIs for integrating geolocation into your app.
How can I use Mapbox to create a map with multiple layers?
Mapbox provides a feature called layers, which allows you to create a map with multiple layers. This allows you to display different types of data on the same map. To create a map with multiple layers, you need to use the Mapbox SDK for Android, which provides APIs for integrating layers into your map.
How can I use Mapbox to create a map with custom markers?
Mapbox provides a feature called markers, which allows you to create a map with custom markers. This allows you to display custom icons at specific locations on the map. To create a map with custom markers, you need to use the Mapbox SDK for Android, which provides APIs for integrating markers into your map.
 Valdio Veliu
Valdio recently graduated in Computer Engineering. He is a mobile developer, who is passionate about mobile technologies and learning new things. He has worked with languages such as C, Java, php and is currently focused on Java, mobile and web development


