
In recent years, there’s been a strong push by Google and others to make the web more secure by encouraging the use of TLS/SSL (transport layer security/secure sockets layer) on every website.

Google has added extra encouragement for using HTTPS by giving a ranking boost to sites, and, like other browser makers, is gradually turning up the heat in Chrome by introducing increasingly alarming alerts on sites without encryption.
Until recently, SSL certificates were quite costly. Let’s Encrypt changed that by offering free certificates.
There are lots of online tutorials showing how to install Let’s Encrypt certificates, but they tend to require quite a bit of technical expertise (knowledge of how to operate a Linux web server and manage root access) and rarely guide you on how to install it through a common shared hosting control panel. If your cPanel or other control panel instance doesn’t provide a feature like One Click Install for Let’s Encrypt SSL (and many don’t), then you may feel there’s no option but to fork out money for a certificate through your web hosting provider.
However, in this article I’ll show you how to install a Let’s Encrypt SSL certificate on your shared web hosting server using the services from SSL For Free. SSL For Free allows you to install a Let’s Encrypt SSL certificate without having to have root access and a VPS, but just a regular shared web hosting server.
Looking to take your SSL chops to the next level? Check out this amazing course by Nick Janetakis:

Installing Let’s Encrypt SSL Using SSL For Free
Step 1: Head over to the SSL For Free website.
Step 2: In the enter your website to secure input box, type your website domain address (for example: yourdomain.com).
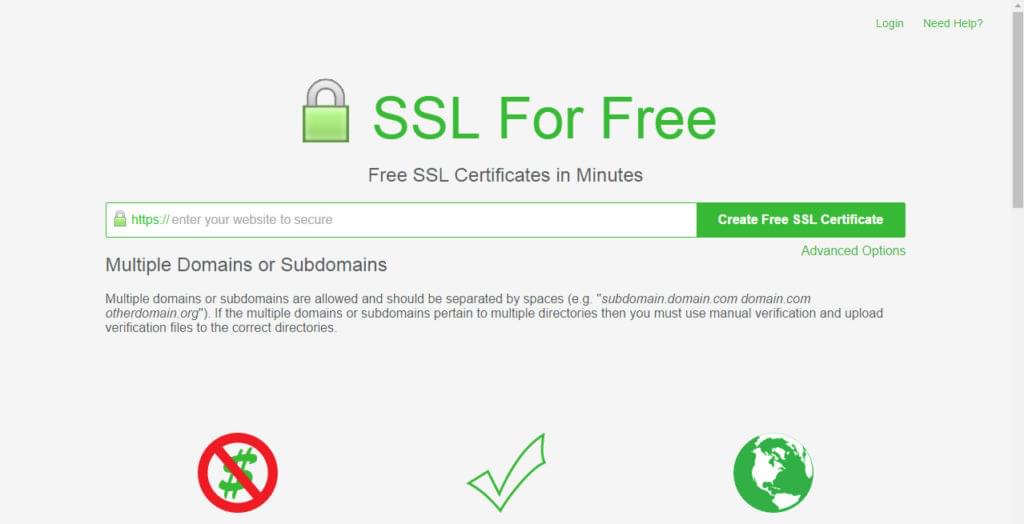
Step 3: SSL For Free will provide SSL certificates for yourdomain.com and www.yourdomain.com automatically.
Step 4: If you want to add another subdomain (for example: sub.yourdomain.com), click the Add / Edit Domains link, and you’ll be returned to the domain address input page.
Step 5: Add the subdomain you desire in the input box.
Verify your domain and/or subdomain by SSL For Free
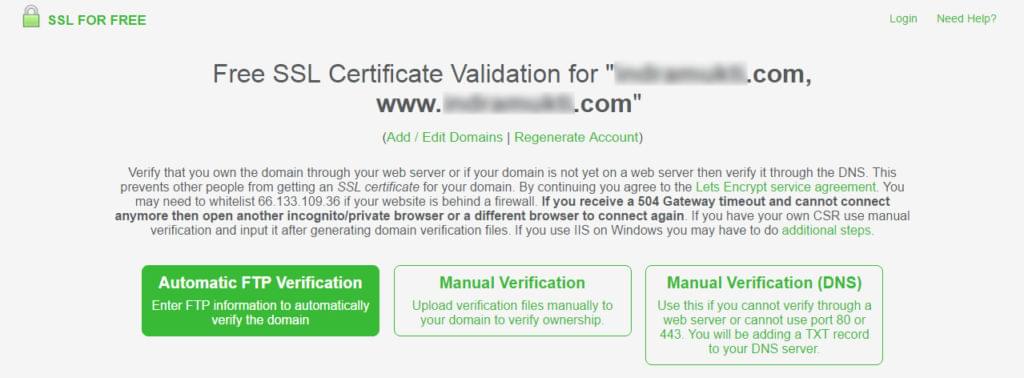
There are three ways to verify your domain by SSL For Free (you can choose any one of them).
- The first is via Automatic FTP Verification. Here, you’ll be asked for data about your web hosting FTP account.
- The second is through Manual Verification. You’ll be prompted to download two files from SSL For Free, which you’ll later upload to your web hosting server.
- The third is through Manual Verification (DNS). This way, you’ll be prompted to create a new TXT record through your web hosting control panel.
Let’s take a look at each of the verification steps.
Method 1. Automatic FTP Verification
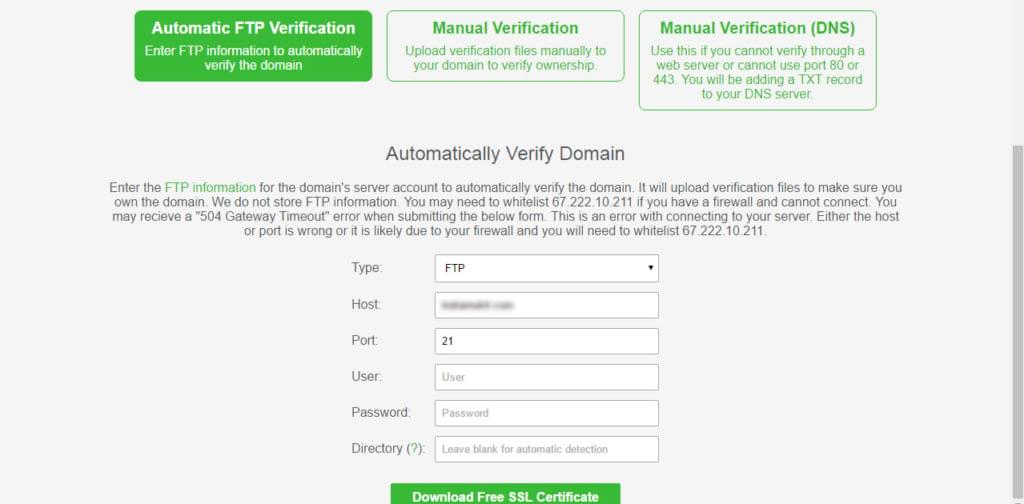
Step 1: Click the Automatic FTP Verification button.
Step 2: Below this, you’ll be prompted to input data from your web hosting FTP account. Input the data completely:
If you feel uncomfortable with this way (giving your FTP account access data), then you can choose the second way (which I highly recommend) below.
Method 2. Manual Verification
Step 1: You’ll be prompted to download two files generated by SSL For Free, which you’ll then upload to your web hosting server. Click Manual Verification. (Note: don’t close this tab/page!)
Step 2: Below, you’ll be prompted to download two files generated by SSL For Free. Download both files, saving them on your local computer.
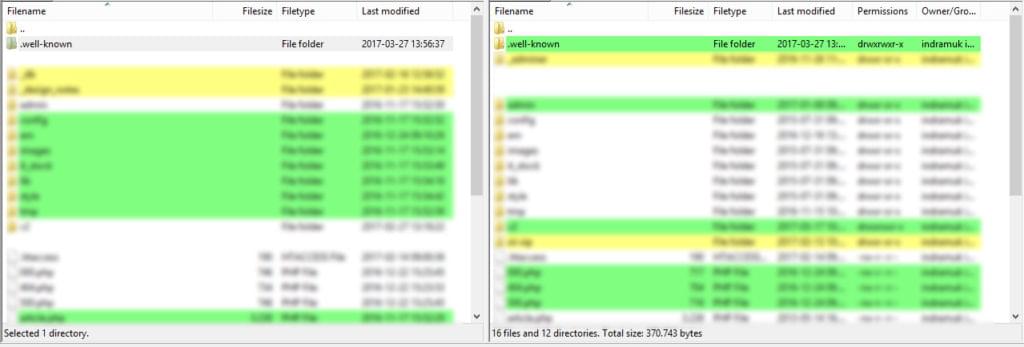
Step 3: In accordance with the instructions of this SSL For Free page, create a new folder/directory called .well-known. (If you’re in a Windows environment, name it .well-known. — that is, with an extra dot at the end.) Inside that directory, create a new directory called acme-challenge. Copy-paste the two downloaded files into the acme-challenge directory.
Step 4: Now upload both files to your web hosting server using your preferred FTP application (such as FileZilla).
Step 5: Upload the .well-known directory from your local computer to the root directory of your web hosting server (its directory, not the contents in it).
Step 6: Now open a new tab/page in your browser and enter your domain URL, along with the location of the two files. Make sure you see the random numbers and letters:

Step 7: Go back to the SSL For Free tab/page (page at Step 1) and click Download SSL Certificate. Make sure you don’t get a reply like this:
![]()
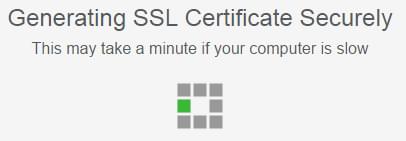
Step 8: If you get an error reply, please repeat Step 1 above, until SSL For Free loads the Loading SSL Certificate Account page. It will then proceed to the Generating SSL Certificate Securely page:
Method 3. Manual Verification (DNS)
In this last verification method option, you’ll be prompted to create a new TXT record in your web hosting control panel.
Here’s what the steps look like in cPanel:
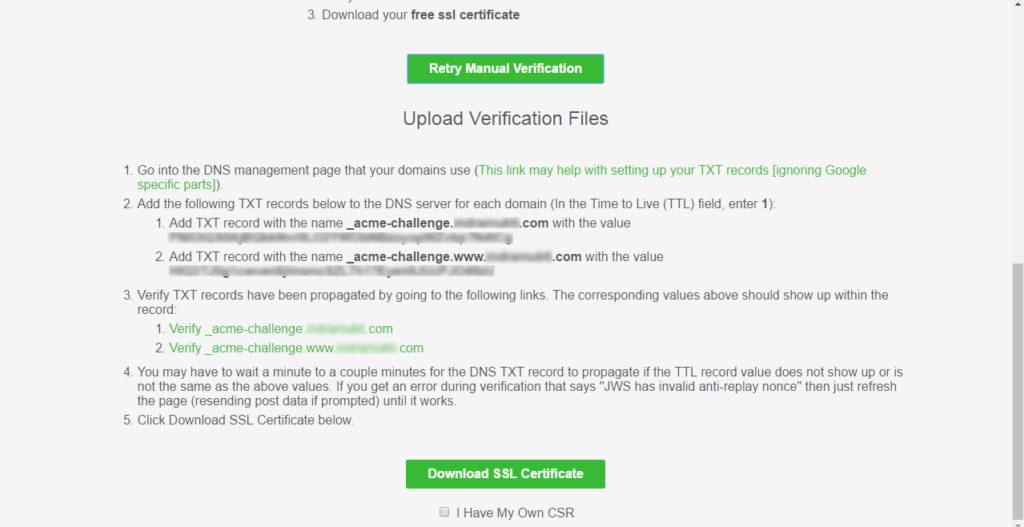
Step 1: Click the Manual Verification (DNS) button on the SSL For Free site.
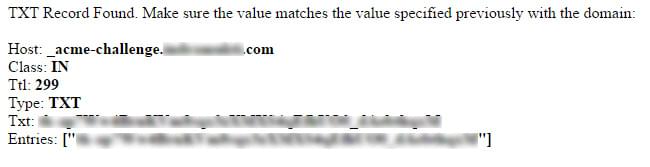
Step 2: You’ll then be prompted to create a new TXT record according to the data on that page:
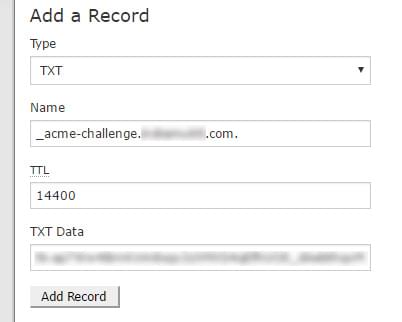
Step 3: Open a new tab/page in your browser and log in to CPanel on your server. Go to Zone Editor, and add a record with the following data:
- Type: TXT
- Name: _acme-challenge.yourdomain.com.
- TTL: 14400
- TXT Data: [corresponding to the first TXT Record data in Step 2]
Click Add Record:
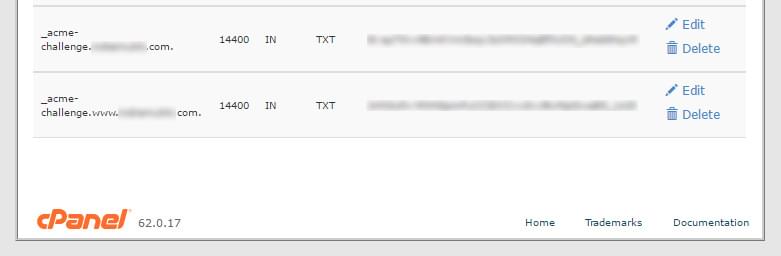
Step 4: Then add the second new TXT record with the following data:
- Type: TXT
- Name: _acme-challenge.www.yourdomain.com.
- TTL: 14400
- TXT Data: [corresponding to the second TXT Record data in Step 2]
Once again, click Add Record.
Step 5: The final result will look something like this:
Step 6: Go back to the SSL For Free tab/page (page at Step 1) and click the Download SSL Certificate. If you’ve set up the TXT records correctly, you should get a couple of results like this:
Step 7: You’ll be taken to the Loading SSL Certificate Account page, and then to the Generating SSL Certificate Securely page:
SSL Certificate from SSL For Free
Once SSL For Free successfully creates an SSL certificate, you’ll be prompted to input your email address and password to receive an email notification one week before your certificate expires (optional).
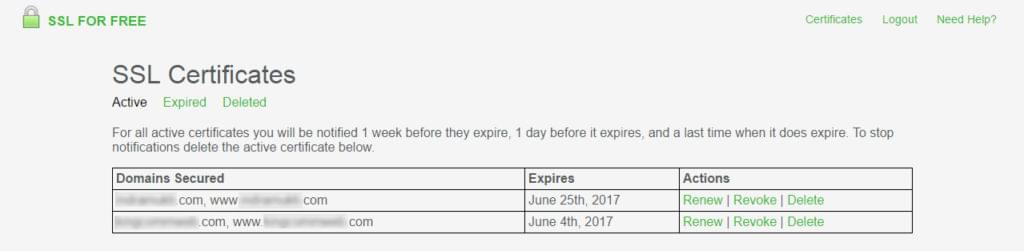
If you fill it in, or are already logged in, you’ll be shown a list of SSL certificates from the domain(s) you’ve registered in the SSL For Free service:
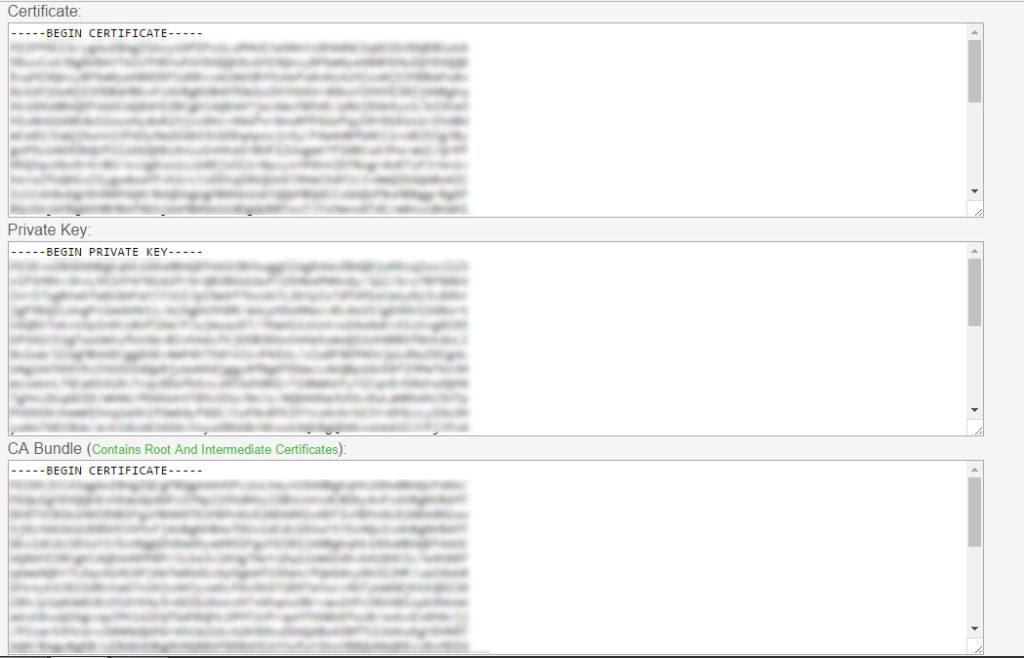
On the same page, you’ll be shown data for the Certificate, Private Key, and CA Bundle for your domain. You can download those three certificates, or input them one-by-one into your cPanel web hosting server:
Installing SSL certificates in your cPanel web hosting server
SSL For Free provides links to various guides for installing SSL certificates, but here I’m just showing how to install SSL certificates on a cPanel web hosting server.
Step 1: Access to your web hosting server cPanel. Click on the SSL/TLS icon (under “Security”).
Step 2: In the Install and Manage SSL for your site option at the bottom, click the Manage SSL Certificate link.
Step 3: Select your domain that’s been registered for SSL through SSL For Free.
Step 4: Copy and paste the certificate data that SSL For Free has generated to each input box (Certificate, Private Key, and CA Bundle data).
Step 5: At the bottom of this page, click Install Certificate. Click OK in the notification confirming your certificate was successfully installed on your web server. Next, you’ll be shown a list of domains that have SSL certificates installed.
Checking your SSL certificate
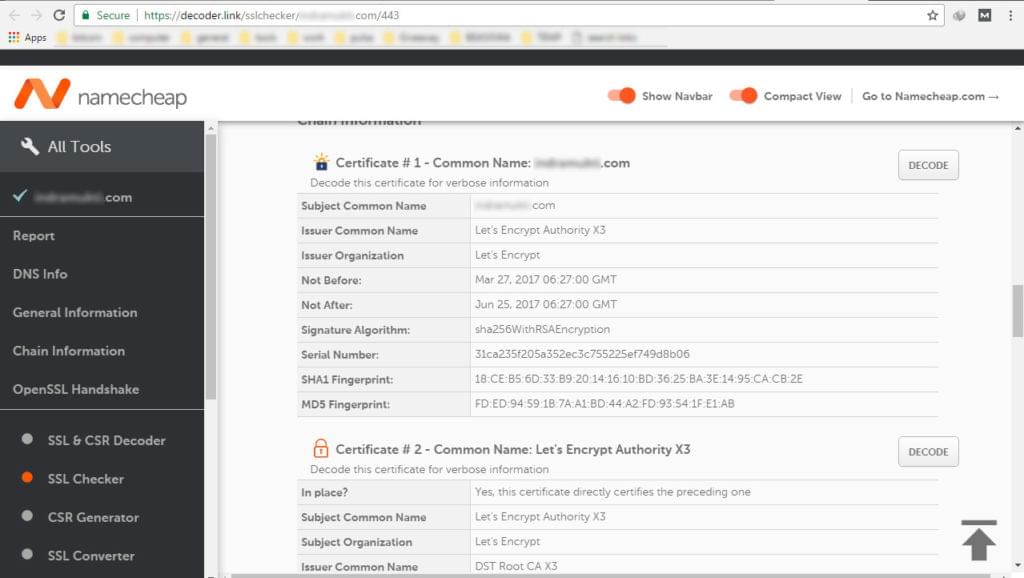
You can confirm once again that your SSL certificate is already installed correctly. Go to the Namecheap SSL Checker, then input your domain address, or you can go directly to https://decoder.link/sslchecker/yourdomain.com/443.
You should get reports similar to this:
You can also do the checking at Qualys SSL Labs at https://www.ssllabs.com/ssltest/analyze.html?d=yourdomain.com.
NOTE: once your SSL certificate has been successfully installed, in order for HTTPS to run perfectly, don’t forget to change your default site address from http://yourdomain.com to https://yourdomain.com. You can do this by using an .htaccess file (there are plenty of tutorials on this out there) or if you use WordPress, you can directly assign HTTPS address via the WordPress Admin Dashboard.
In closing
I hope this tutorial has shown you how easy it is to use Let’s Encrypt to secure your website on shared hosting. Admittedly, having to use a third-paty intermediary isn’t ideal, but it’s not a big downside when you consider the money you can save. There’s no need to go out and buy a certificate again.
One thing to remember with Let’s Encrypt certificates is that they only last for 90 days, rather than a year (like many paid certificates). A common way to automate reinstallation is via a cron job, although these aren’t always allowed on shared hosting. I recommend you talk to your web host to see what’s available from them in this regard.
Frequently Asked Questions (FAQs) on Setting Up Let’s Encrypt SSL on Shared Hosting
What is Let’s Encrypt SSL and why is it important for my website?
Let’s Encrypt SSL is a free, automated, and open certificate authority that provides digital certificates for website encryption. It’s crucial for your website because it secures the data transfer between your website and your users, ensuring that sensitive information like credit card details and passwords are not intercepted by malicious parties. It also boosts your website’s credibility and can improve its ranking on search engines.
How can I install Let’s Encrypt SSL on my shared hosting?
The process of installing Let’s Encrypt SSL on shared hosting varies depending on the hosting provider. Some providers offer built-in support for Let’s Encrypt, making the process straightforward. However, for those that don’t, you may need to manually install the SSL certificate. This involves generating a certificate signing request (CSR), obtaining the certificate from Let’s Encrypt, and then installing it on your hosting account.
Can I use Let’s Encrypt SSL with any shared hosting provider?
While Let’s Encrypt SSL can technically be used with any hosting provider, the ease of installation depends on whether the provider supports it. Some providers have integrated Let’s Encrypt into their control panels, making it easy to install. Others may require you to manually install the certificate, which can be a bit more complex.
How often do I need to renew my Let’s Encrypt SSL certificate?
Let’s Encrypt SSL certificates are valid for 90 days and need to be renewed before they expire. Some hosting providers offer automatic renewal, so you don’t have to worry about the certificate expiring. If your provider doesn’t offer this feature, you’ll need to manually renew the certificate.
What happens if my Let’s Encrypt SSL certificate expires?
If your Let’s Encrypt SSL certificate expires, your website will no longer be secure, and visitors will see a warning message in their browser indicating that the site is not secure. This can deter visitors and potentially harm your website’s reputation and search engine ranking.
Can I install Let’s Encrypt SSL on multiple domains?
Yes, you can install Let’s Encrypt SSL on multiple domains. Each domain will require its own certificate, but Let’s Encrypt does not limit the number of certificates you can obtain.
Is there a cost associated with using Let’s Encrypt SSL?
No, Let’s Encrypt SSL is a free service. However, some hosting providers may charge a fee for installing the certificate or for providing additional features like automatic renewal.
How can I troubleshoot issues with my Let’s Encrypt SSL installation?
If you’re having trouble with your Let’s Encrypt SSL installation, the first step is to check the installation process and ensure that you’ve followed all the steps correctly. If you’re still having issues, you can consult the Let’s Encrypt community forum or your hosting provider’s support team for assistance.
Can I switch to Let’s Encrypt SSL if I’m currently using a different SSL certificate?
Yes, you can switch to Let’s Encrypt SSL even if you’re currently using a different SSL certificate. You’ll need to remove the existing certificate and then install the Let’s Encrypt certificate.
Is Let’s Encrypt SSL less secure than paid SSL certificates?
No, Let’s Encrypt SSL certificates provide the same level of encryption as paid SSL certificates. The main difference is that Let’s Encrypt certificates are free and need to be renewed every 90 days, while paid certificates often have a longer validity period and may come with additional features.
 Rova Rindrata
I'm a full time web developer at an advertising agency in my hometown. Sometimes I accept freelance web developer jobs outside my working hours. I'm very interested in everything related to web especially PHP, MySQL, CSS, jQuery.