3 Options for Sharing Data Between iOS Apps and WatchKit

Key Takeaways
- Utilize the `NSUserDefaults` for straightforward data sharing between iOS apps and WatchKit, ideal for simpler data requirements.
- Implement the `MMWormhole` library for seamless real-time data synchronization between devices, using shared app groups.
- Leverage a Singleton class in the iOS app to maintain a consistent state across different parts of the app, facilitating data access from both the app and the WatchKit extension.
- Use `openParentApplication:reply:` for efficient, on-demand data transfer from the iOS app to the WatchKit app, ensuring data is current when the Watch app activates.
- Manage UI updates and data handling in the WatchKit app with methods like `loadTable`, which dynamically adjusts the interface based on the data received.
- Consider the specific needs of your app when choosing a communication method between iOS and WatchKit, as each has different strengths and limitations in terms of implementation complexity and real-time capabilities.
In the last part of this short series we looked at the options for communicating between WatchKit extensions and their host iOS Applications. In this final part, we look at coding these options.
This will be a long tutorial, so you may find it useful to refer to the complete project on GitHub.
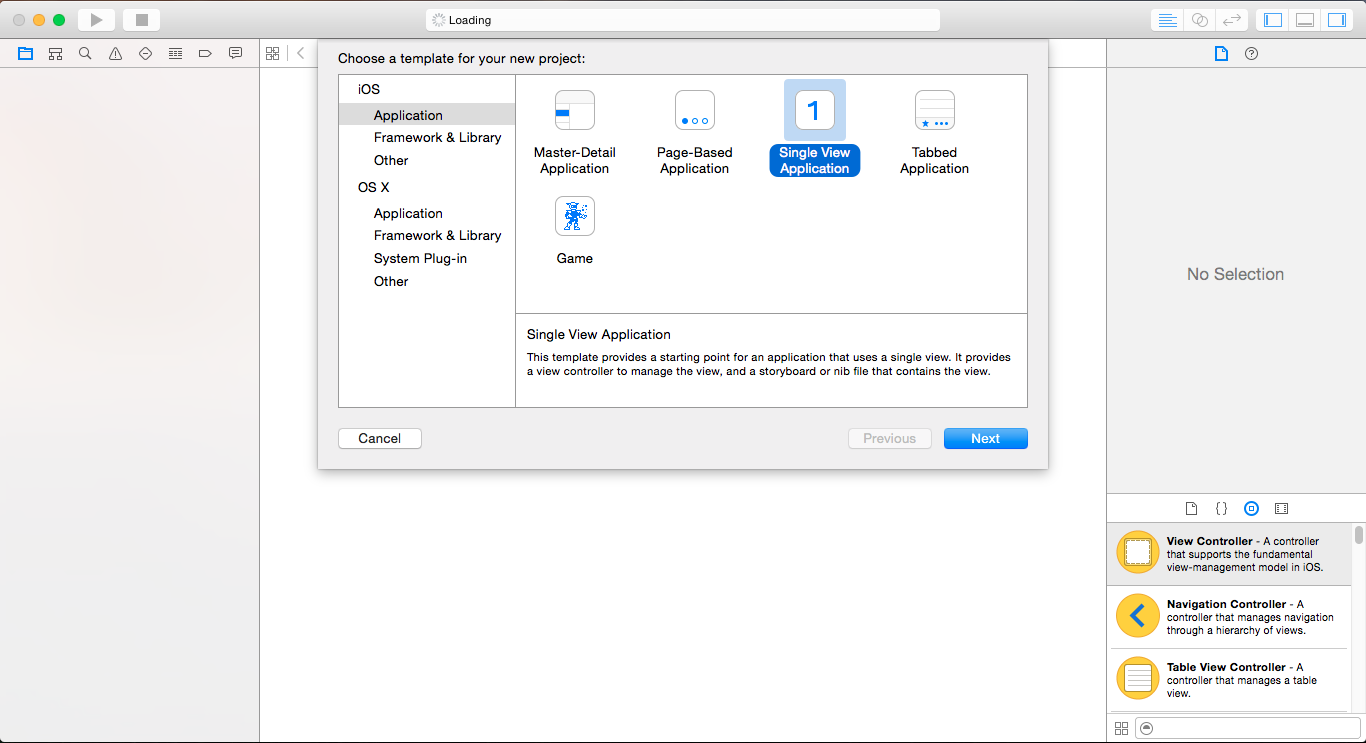
Open Xcode and create a new Single View Application project. Give it a relevant name and set the language to be Objective-C.
Select the File -> New -> Target menu option. Select the WatchKit app template.
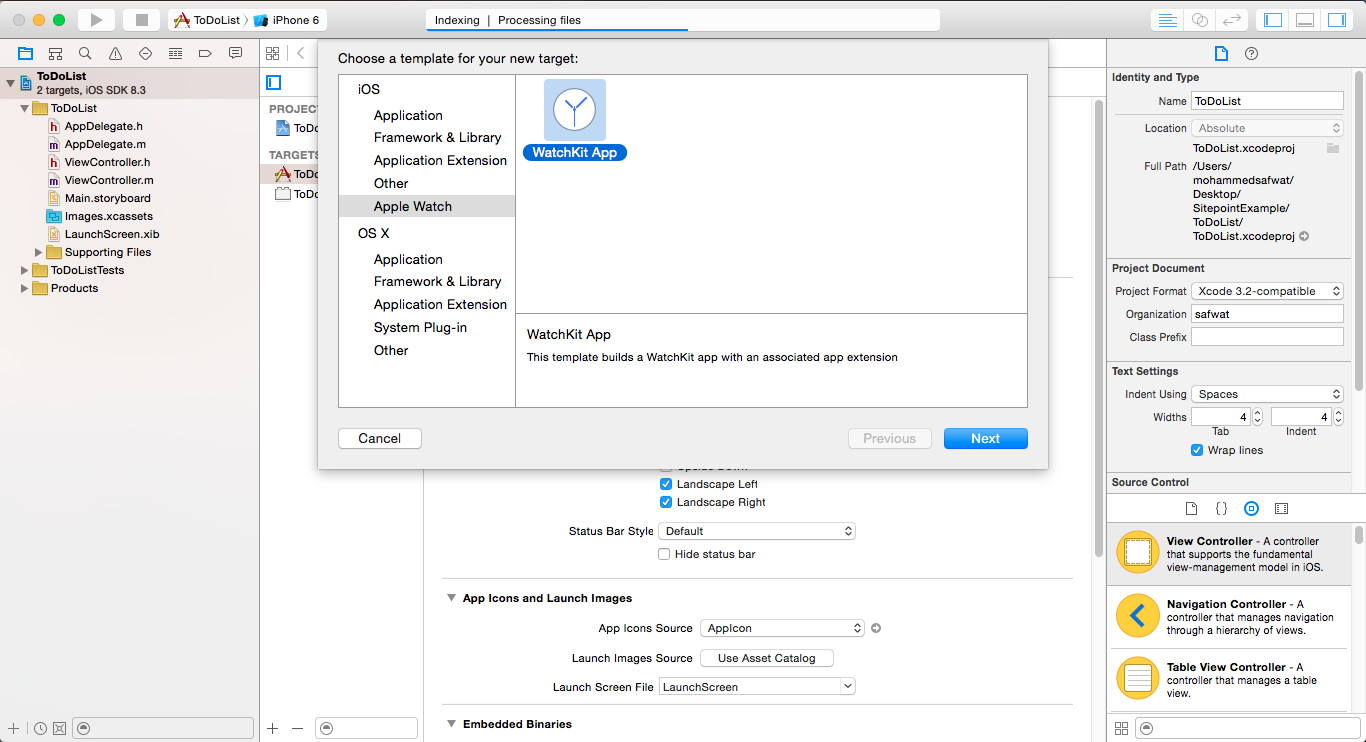
Click Next and deselect the options for creating a Notification scene or Glance scene.
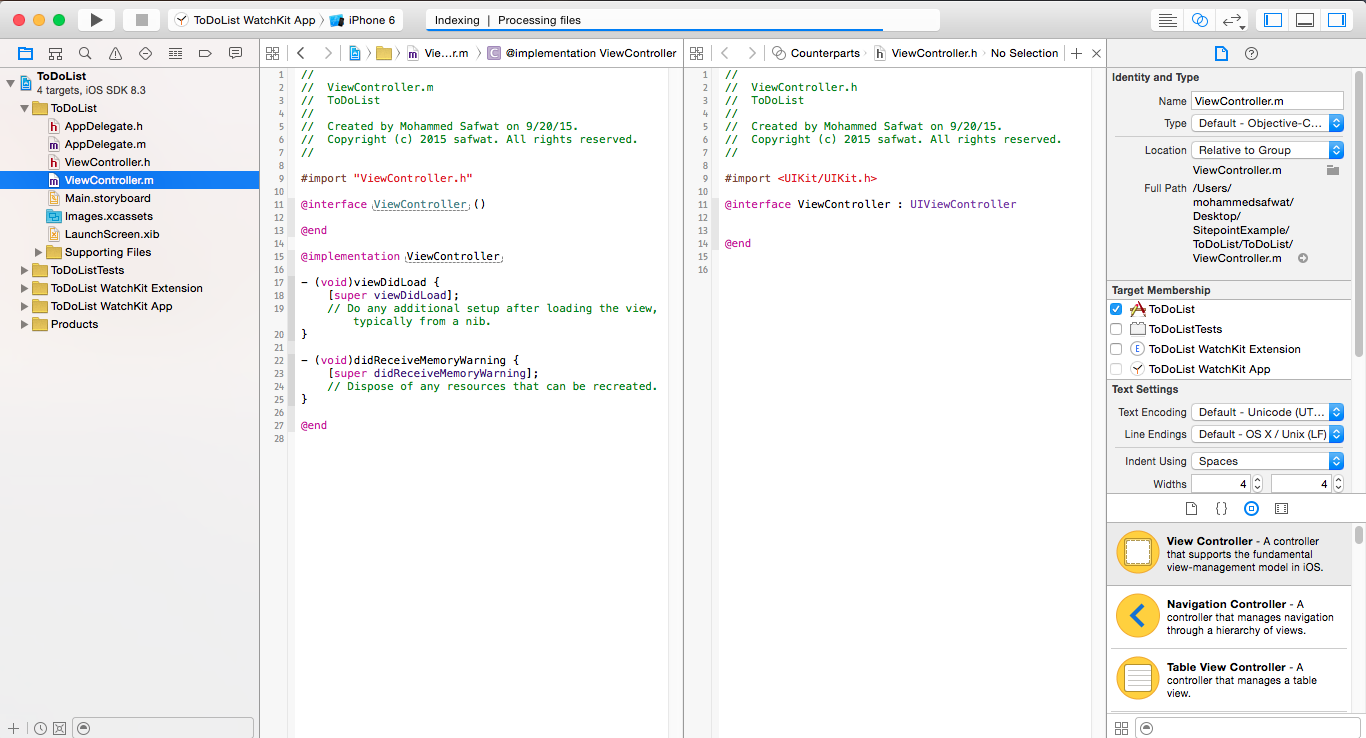
Click Finish and Activate in the subsequent dialog to add a new target to the Xcode project, with new groups created for the WatchKit App and Extension.
We will start by developing our parent iOS application. Expand the iOS application’s classes group:
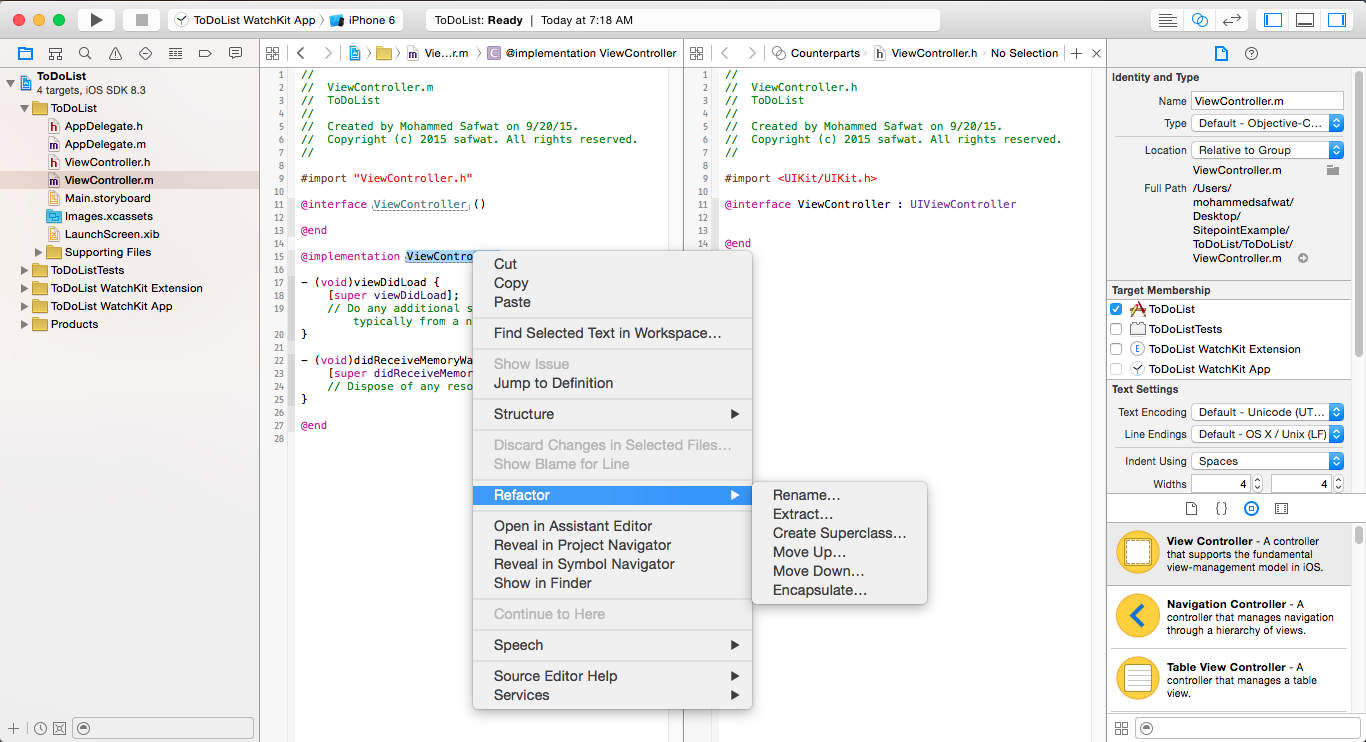
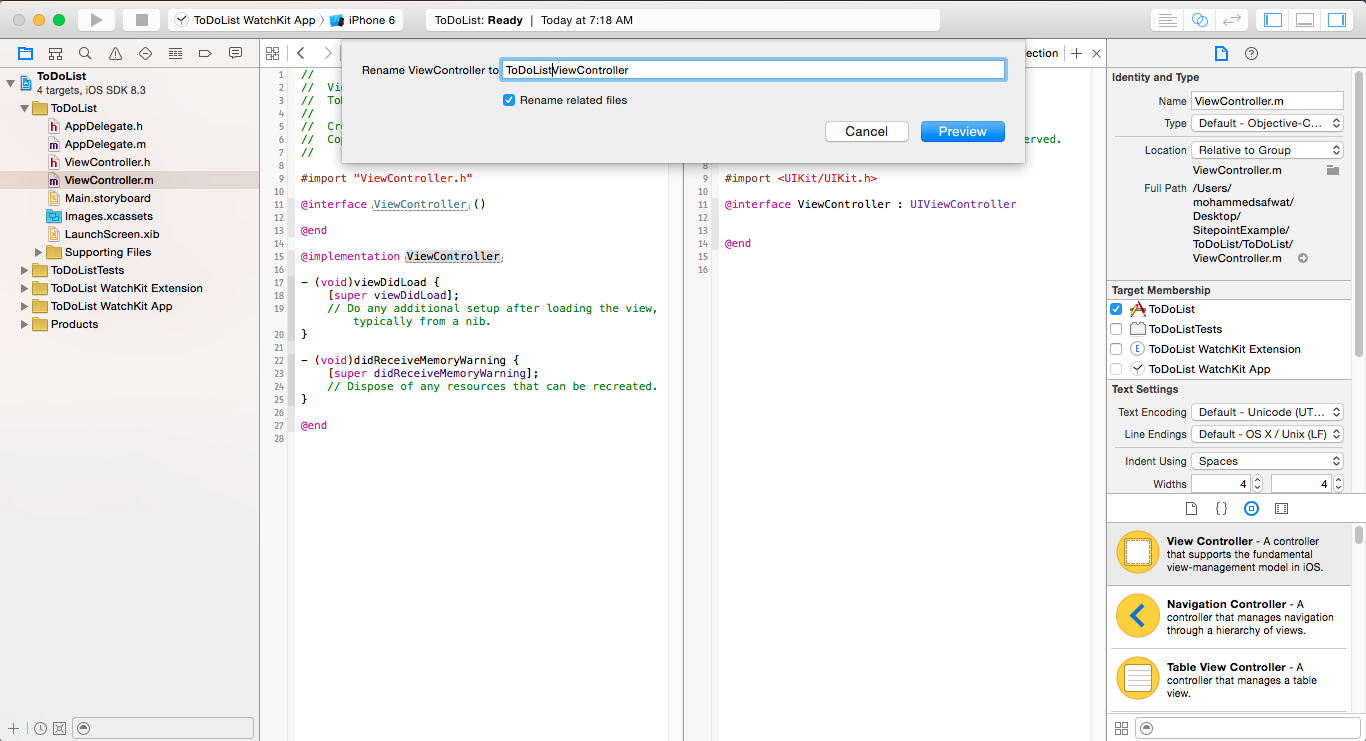
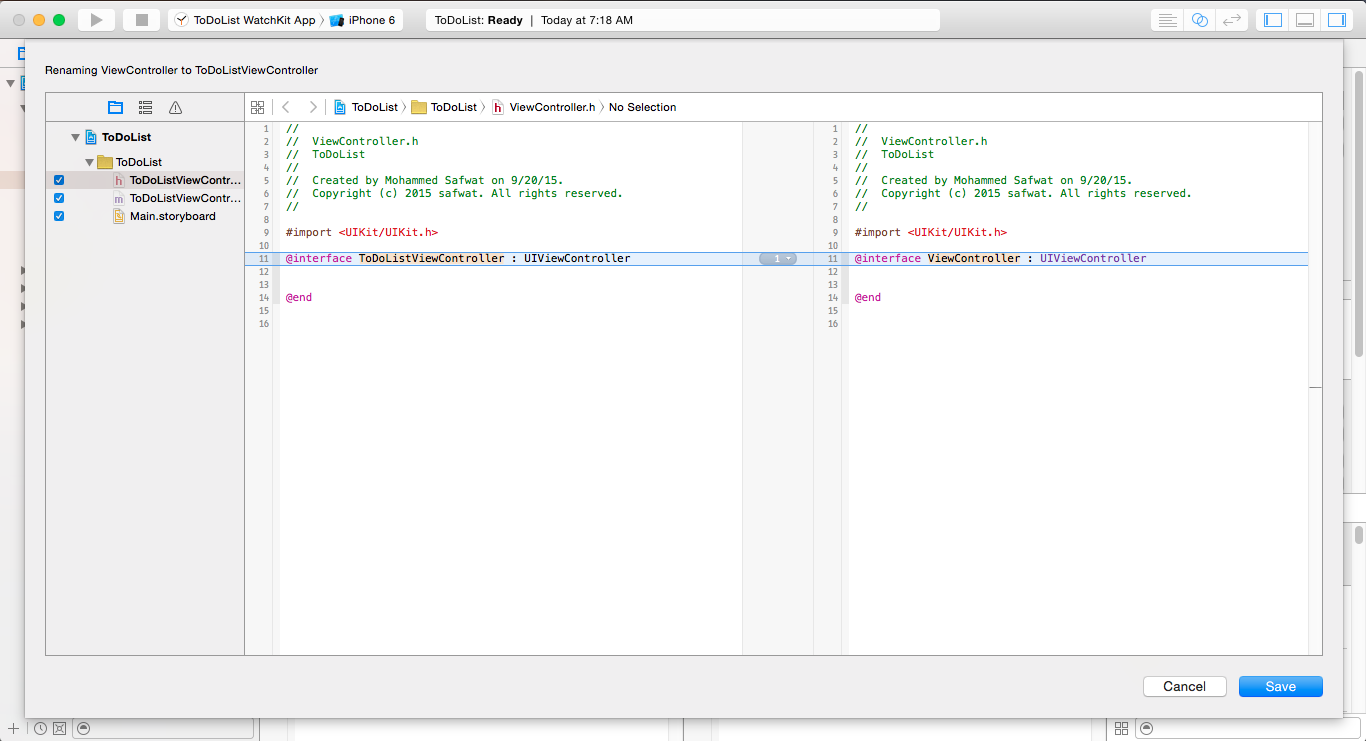
I’ll first rename my parent ViewController from ‘ViewController’ to something descriptive, like ‘ToDoListViewController’:
In this application we will be using a TableView to display the to-do list. To make the configuration of the TableView easier, we will be creating a new Sub-class from the UITableViewController class. By having this Sub-class, Xcode inserts the method signatures for most of the methods we need, for the TableView data source and the TableView delegate.
First delete the current ToDoListViewController.h and ToDoListViewController.m, then select the File -> New -> File menu option. Pick the Cocoa Touch Class template:
Click Next, call the class ToDoListTableViewController and make sure it’s a sub-class of UITableViewController:
Open the new ToDoListTableViewController.m, you will see the method signatures created automatically by Xcode. Those methods should be implemented because the ToDoListTableViewController class interface is conforming to UITableViewDataSource and UITableViewDelegate protocols.
- (NSInteger)numberOfSectionsInTableView:(UITableView *)tableView {
  #warning Incomplete implementation, return the number of sections
  return 0;
}

- (NSInteger)tableView:(UITableView *)tableView numberOfRowsInSection:(NSInteger)section {
  #warning Incomplete implementation, return the number of rows
  return 0;
}
For the sake of simplicity, I’ll not use any persistent data storage for our to-do items. I’ll use a NSMutableArray to deal with the items in our to-do list. Define this NSMutableArray by adding a new property inside the ToDoListTableViewController() interface inside the ToDoListTableViewController.m:
@interface ToDoListTableViewController ()
@property (nonatomic, strong) NSMutableArray *toDoListItems;
@end
Create a method for the initialization, and call it inside viewDidLoad. This method is called initializeValues, and it initializes the toDoListItems NSMutableArray:
- (void)viewDidLoad {
    [super viewDidLoad];
    [self initializeValues];
}

- (void)initializeValues {
    self.toDoListItems = [NSMutableArray array];
}
The next step is to start working on the storyboard. In Main.storyboard, you will find a normal ViewController created by default. Delete it and drag a ‘Table View Controller’ from the right panel (Utility Area) to your storyboard scene.
It’s good practice to embed a Navigation Controller in the Table View Controller. This will allow a navigation bar for interactions with new View Controllers using segues. To embed a Navigation Controller, select the ‘Table View Controller’ just added and the Editor -> Embed In -> Navigation Controller menu item.
Inside the storyboard, select the Navigation Controller and from the Xcode’s right panel ‘Utilities Panel’ open the ‘Attributes’ tab. Under ‘View Controller’ section you will find an option named ‘Is Initial View Controller’. Mark that as correct to make the ‘TableViewController’ the first screen to appear when the application launches.

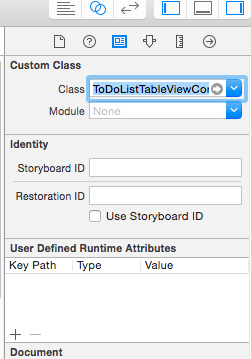
In Main.storyboard, assign the ToDoListTableViewController class to the Table View Controller via the Class text box in the Identity Inspector. You can do that by selecting the ‘TableViewController’ from the Storyboard and opening the ‘Utilities’ right panel.
To add a new to-do, we’ll use a UITextField to enter the text, and when Done is pressed, add a new task to the Table View.
The UITextField is inside a custom view, and will act as the header for the Table View. This will ensure that the input text field is always on top of the Table View and makes adding new to-dos straightforward.
Create a method that returns the header view for the to-dos Table View, and then define a constant to hold the value of the cell height needed for the Table View. We will use the same height for the header view, making the whole UI consistent. Add this method to ToDoListTableViewController.m:
- (UIView*)toDoListTableViewHeader {
    UIView *tableViewHeader = [[UIView alloc] initWithFrame:CGRectMake(0, 0, self.tableView.frame.size.width, TABLE_VIEW_CELL_HEIGHT)];
    tableViewHeader.backgroundColor = [UIColor lightGrayColor];

    return tableViewHeader;
}
Define the constant TABLE_VIEW_CELL_HEIGHT used below the opening #import statements:
#import "ToDoListTableViewController.h"
#define TABLE_VIEW_CELL_HEIGHT 40
Assign the UIView returned from the toDoListTableViewHeader method to the tableHeaderView property of the tableView. We’ll do that inside the initializeValues method:
- (void)initializeValues {
    self.toDoListItems = [NSMutableArray array];
    self.tableView.tableHeaderView = [self toDoListTableViewHeader];
}
I’ll uncomment the line self.navigationItem.rightBarButtonItem = self.editButtonItem; inside viewDidLoad method of my ToDoListTableViewController.m class. This creates an Edit button to the right of the navigation bar. This Edit button can be used to modify the to-dos TableView. One way for the modification is to delete a to-do. I’ll talk more about deleting a to-do through this article too.
- (void)viewDidLoad {
[super viewDidLoad];
// Uncomment the following line to preserve selection between presentations.
// self.clearsSelectionOnViewWillAppear = NO;
// Uncomment the following line to display an Edit button in the navigation bar for this view controller.
self.navigationItem.rightBarButtonItem = self.editButtonItem;
[self initializeValues];
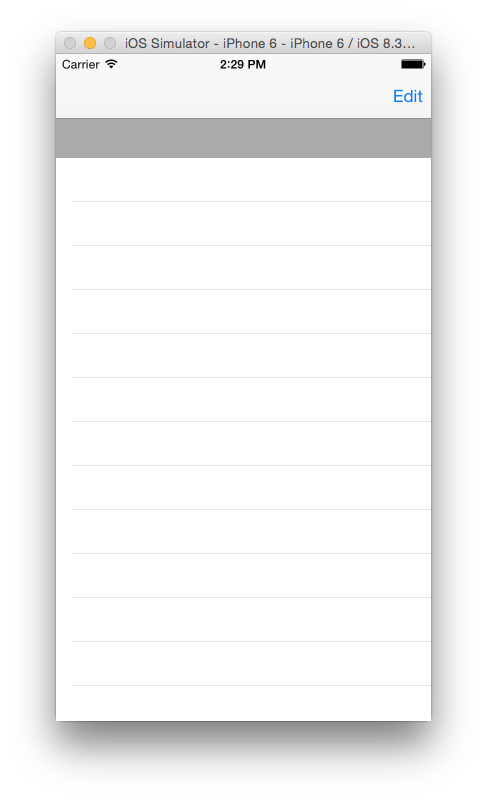
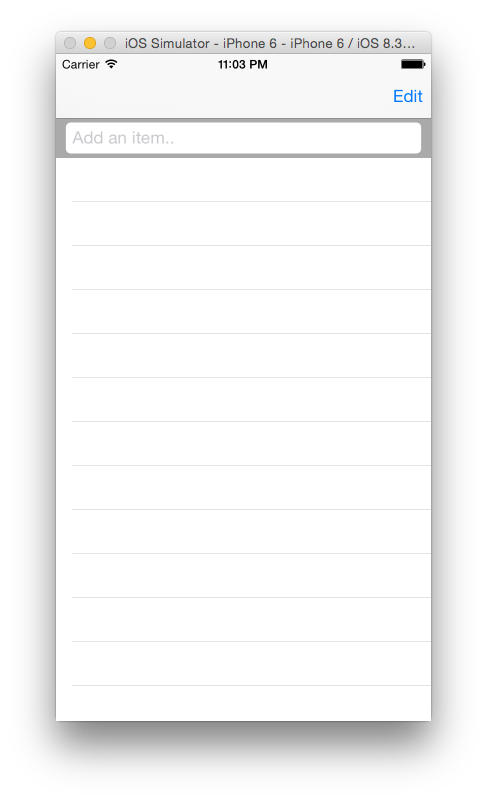
}This should be the result after running the project at this point:
Next we’ll set the number of rows per section to hold the count of the toDoListItems array, and set the number of sections to be 1. Replace the current methods with the below:
- (NSInteger)numberOfSectionsInTableView:(UITableView *)tableView {
    // Return the number of sections.
    return 1;
}

- (NSInteger)tableView:(UITableView *)tableView numberOfRowsInSection:(NSInteger)section {
    // Return the number of rows in the section.
    return self.toDoListItems.count;
}
Then define a UITextField property inside the ToDoListTableViewController() interface, initialize it and configure the method that returns the to-dos Table View header. We’ll make the ToDoListTableViewController class header conform to the UITextFieldDelegate protocol so it can interact with the new UITextField:
Inside ToDoListTableViewController.h:
@interface ToDoListTableViewController : UITableViewController <UITextFieldDelegate>

@end
Set ToDoListTableViewController.m as the delegate for this UITextField, by amending these existing functions:
@interface ToDoListTableViewController ()
@property (nonatomic, strong) NSMutableArray *toDoListItems;
@property (nonatomic, strong) UITextField *toDoInputTextField;
@end
…
- (void)initializeValues {
self.toDoListItems = [NSMutableArray array];
self.tableView.tableHeaderView = [self toDoListTableViewHeader];
self.toDoInputTextField.delegate = self;
}
…
- (UIView*)toDoListTableViewHeader {
UIView *tableViewHeader = [[UIView alloc] initWithFrame:CGRectMake(0, 0, self.tableView.frame.size.width, TABLE_VIEW_CELL_HEIGHT)];
tableViewHeader.backgroundColor = [UIColor lightGrayColor];
self.toDoInputTextField = [[UITextField alloc] initWithFrame:CGRectMake(0, 0, tableViewHeader.frame.size.width * 0.95, TABLE_VIEW_CELL_HEIGHT * 0.8)];
self.toDoInputTextField.center = CGPointMake(tableViewHeader.center.x, tableViewHeader.center.y);
self.toDoInputTextField.placeholder = @"Add an item..";
self.toDoInputTextField.backgroundColor = [UIColor whiteColor];
self.toDoInputTextField.borderStyle = UITextBorderStyleRoundedRect;
self.toDoInputTextField.returnKeyType = UIReturnKeyDone;
[tableViewHeader addSubview:self.toDoInputTextField];
return tableViewHeader;
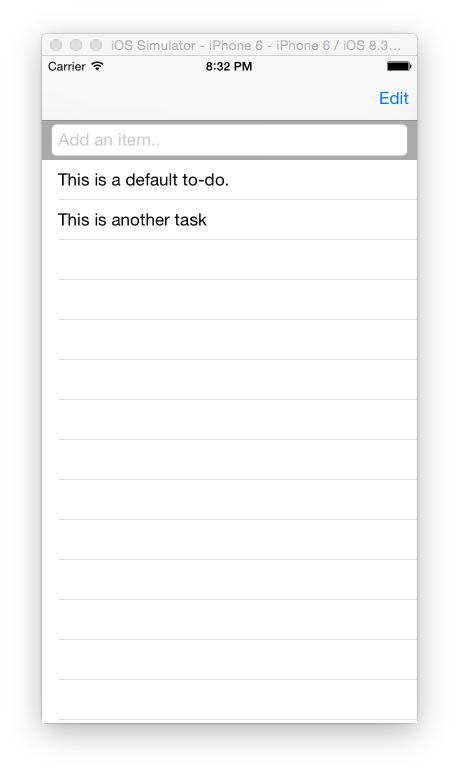
}This will be the final result after adding this UITextField as a subview for the Table View header:
You can start typing anything as a to-do, but when you press the Done button nothing happens. The keyboard should hide and the new to-do added. To achieve this, we’ll implement one of the UITextField delegate methods to make the keyboard hide when pressing the Done button:
- (BOOL)textFieldShouldReturn:(UITextField *)textField {
    [textField resignFirstResponder];
    return YES;
}
We reassign the UITextField to be the first responder, and this makes the keyboard hide.
For simplicity we’ll use the existing textFieldShouldReturn: method and write the logic for adding a new to-do item inside the to-dos Table View. We’ll check that the input text field does not contain empty text and append this text as an object to the toDoListItems array. After that, reload the Table View data and this should display all items added to the toDoListItems array:
- (BOOL)textFieldShouldReturn:(UITextField *)textField {
if(![self textIsEmpty:textField.text]) {
[self.toDoListItems addObject:textField.text];
[self.tableView reloadData];
}
[textField resignFirstResponder];
return YES;
}
- (BOOL)textIsEmpty:(NSString*)text {
NSCharacterSet *whitespace = [NSCharacterSet whitespaceAndNewlineCharacterSet];
NSString *trimmed = [text stringByTrimmingCharactersInSet:whitespace];
if ([trimmed length] == 0) {
return YES;
}
return NO;
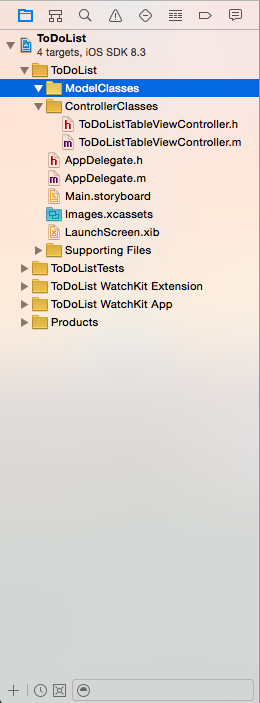
}At this stage, we’ll do some project reorganizing by creating a new ModelClasses group for the models we’ll be creating and a ControllerClasses group to add our ViewController files.
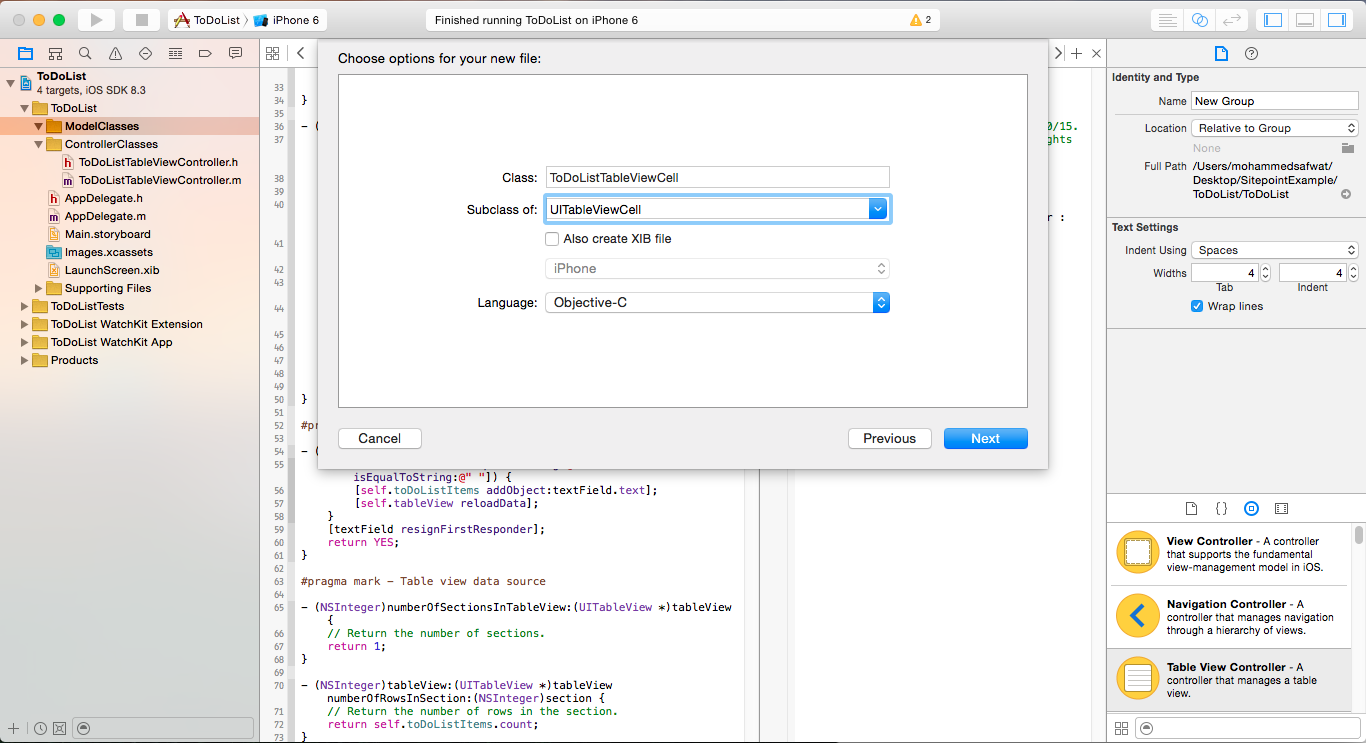
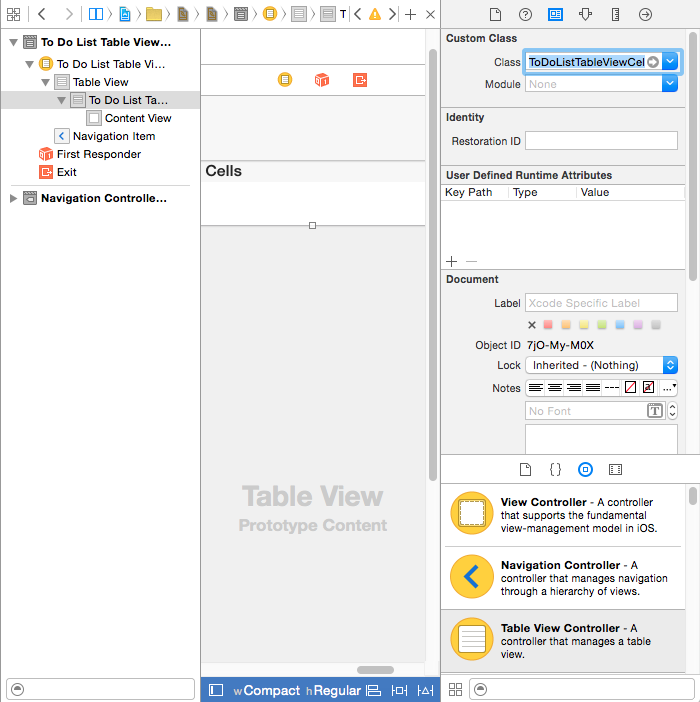
Create a new class called ToDoListTableViewCell that’s a subclass of UITableViewCell and use it as the model class for our custom cell that we’ll return inside the cellForRowAtIndexPath: method:
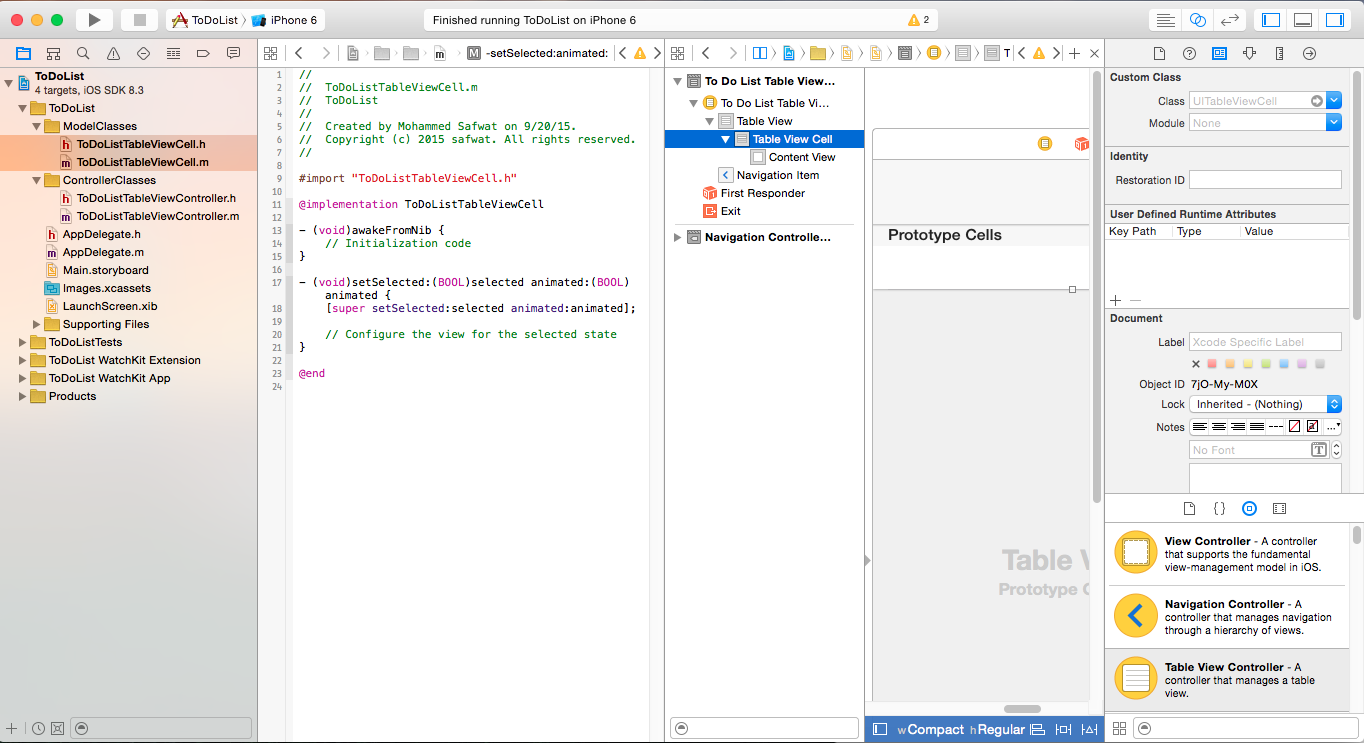
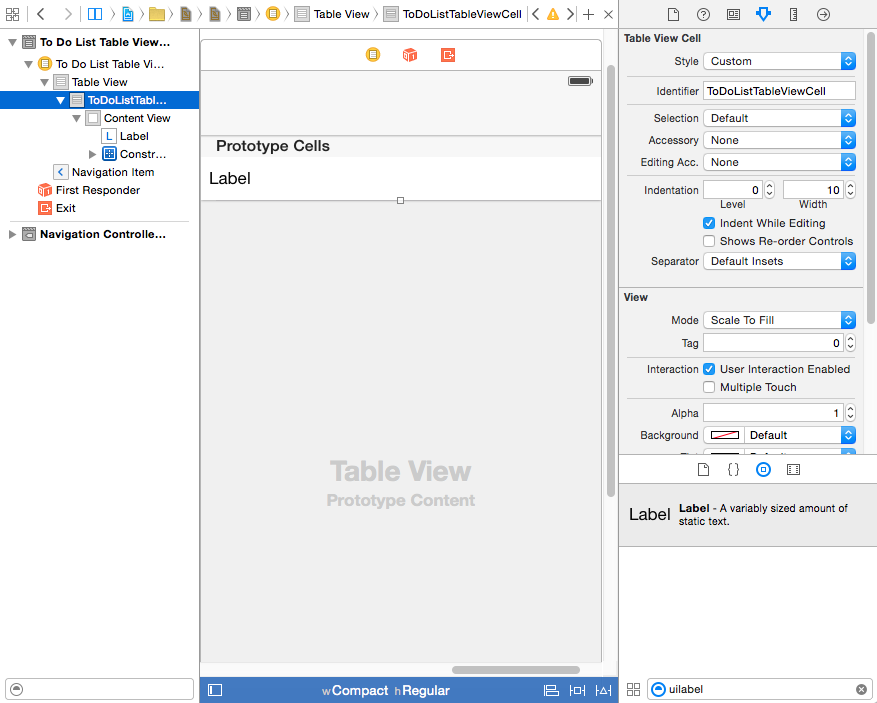
Assign this model class to the prototype cell of the to-dos Table View from the Main.storyboard:
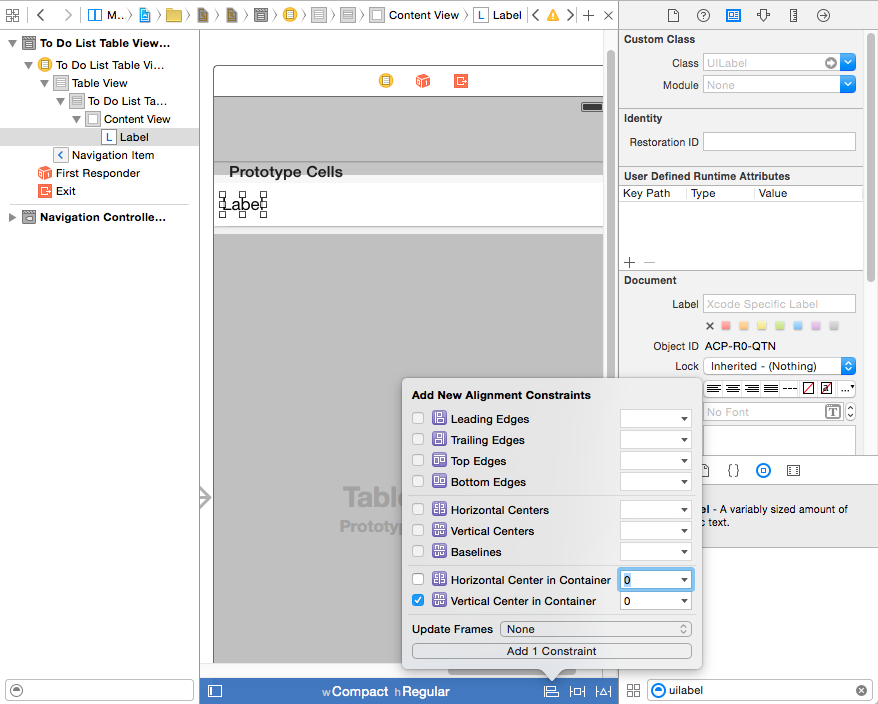
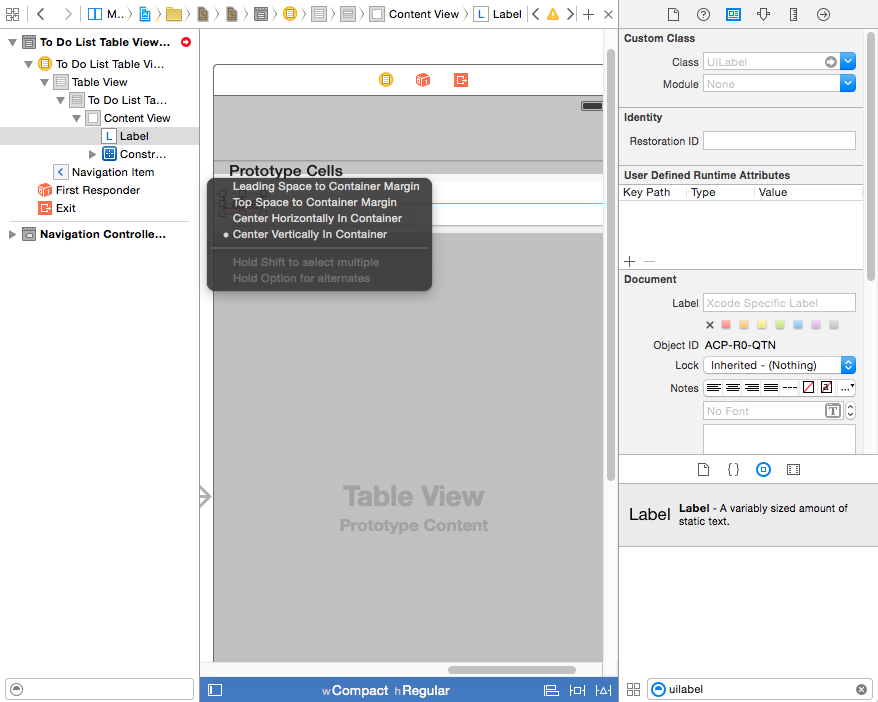
Then add a label to this prototype cell. This label will hold the title of each new to-do.
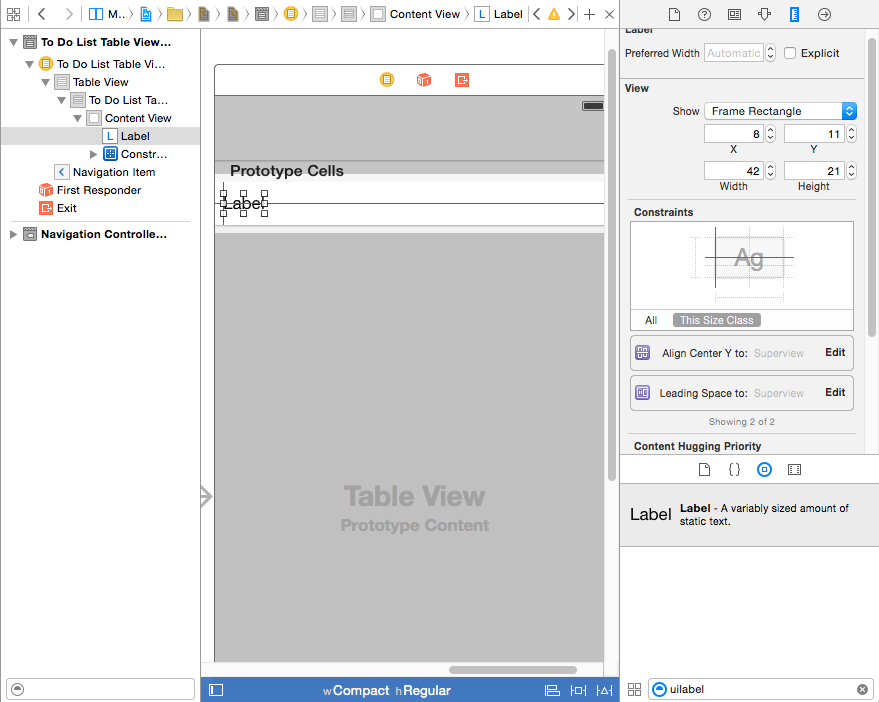
Configure the run time constraints of the label:
Add a reuse identifier
for this cell so that this cell can be dequeued and reused again at run time, resulting in smoother scrolling:
Connect this label to the ToDoListTableViewCell class through an outlet:
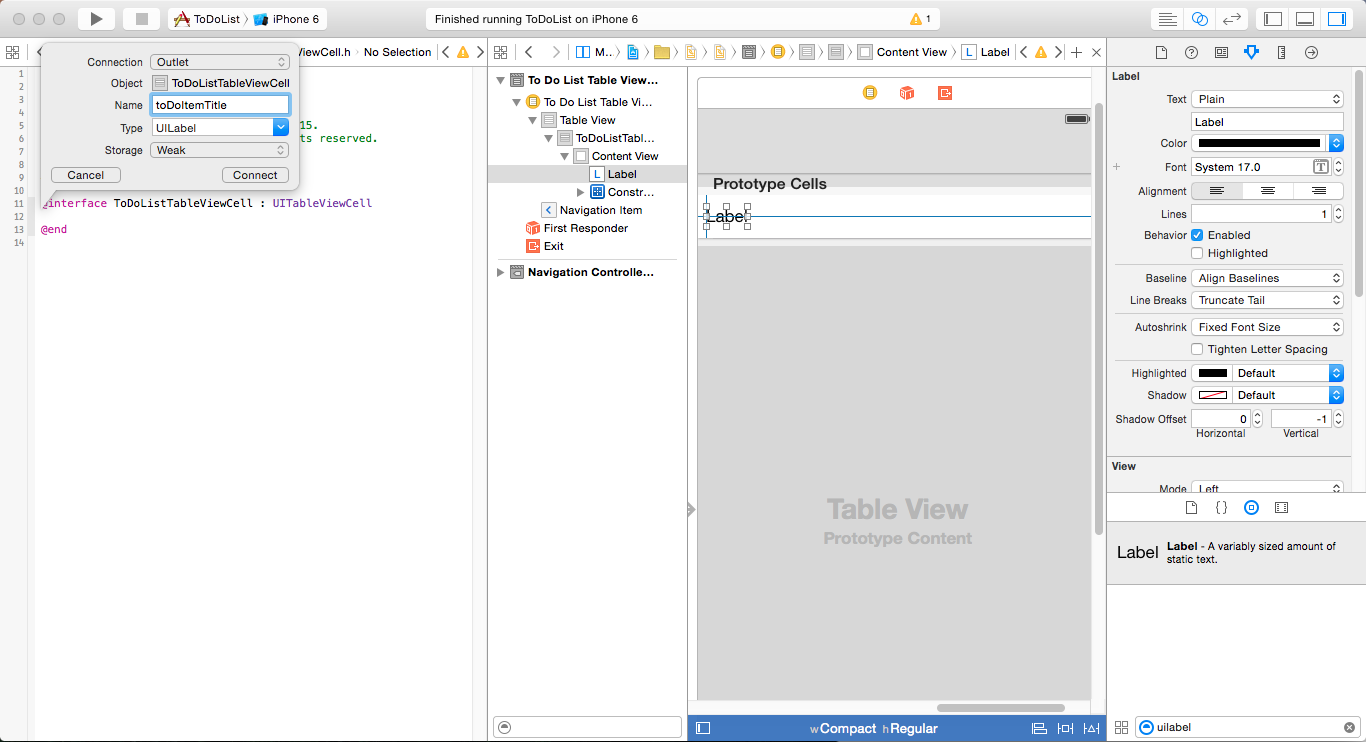
@property (weak, nonatomic) IBOutlet UILabel *toDoItemTitle;To use the ToDoListTableViewCell class inside the main ToDoListTableViewController, import the ToDoListTableViewCell class header into ToDoListTableViewController.m:
#import "ToDoListTableViewController.h"
#import "ToDoListTableViewCell.h"
Inside cellForRowAtIndexPath: set the text for the to-do item label using indexPath.row as the index for retrieving the to-do items from the toDoListItems array:
- (UITableViewCell *)tableView:(UITableView *)tableView cellForRowAtIndexPath:(NSIndexPath *)indexPath {
    ToDoListTableViewCell *cell = [tableView dequeueReusableCellWithIdentifier:@"ToDoListTableViewCell" forIndexPath:indexPath];
    cell.toDoItemTitle.text = self.toDoListItems[indexPath.row];
    return cell;
}
Make sure to clear the text entered inside the UITextField after adding a new to-do, do this inside the textFieldShouldReturn: method:
- (BOOL)textFieldShouldReturn:(UITextField *)textField {
if(![self textIsEmpty:textField.text]) {
[self.toDoListItems addObject:textField.text];
[textField setText:@""];
[self.tableView reloadData];
}
[textField resignFirstResponder];
return YES;
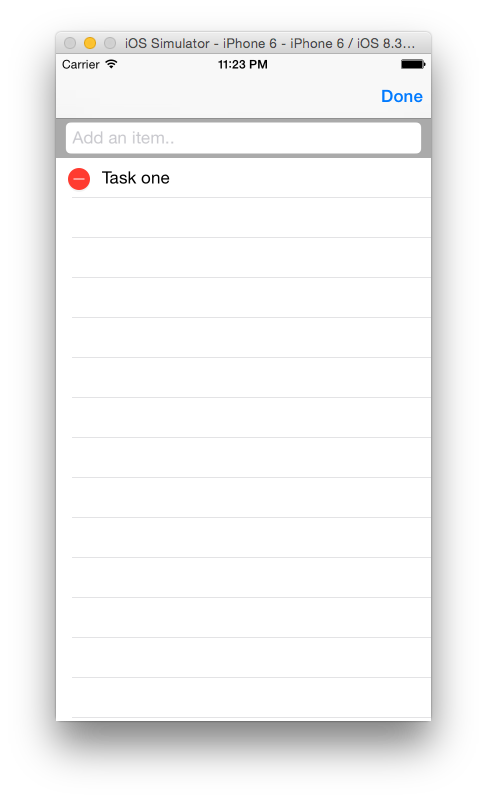
}Compile and Run the project. Adding a new to-do is now simple, just enter the text and tap Done.
We can now add new tasks to our list, but what about deleting an existing one?
I have enabled the Edit button previously when I created my to-dos TableView. Two important methods need to be overridden to enable deleting items. The first is tableView:canEditRowAtIndexPath:, this controls whether Table View cells are editable or not. You can lock the editing action on some rows by returning NO after checking their indices and when pressing the Edit button they won’t be affected.
- (BOOL)tableView:(UITableView *)tableView canEditRowAtIndexPath:(NSIndexPath *)indexPath {
    // Return NO if you do not want the specified item to be editable.
    return YES;
}
The second method for overriding is tableView:commitEditingStyle:forRowAtIndexPath: where the corresponding todo item is deleted and an animation set:
- (void)tableView:(UITableView *)tableView commitEditingStyle:(UITableViewCellEditingStyle)editingStyle forRowAtIndexPath:(NSIndexPath *)indexPath {
    if (editingStyle == UITableViewCellEditingStyleDelete) {
        [self.toDoListItems removeObjectAtIndex:indexPath.row];
        // Delete the row from the data source
        [tableView deleteRowsAtIndexPaths:@[indexPath] withRowAnimation:UITableViewRowAnimationFade];
    }
}
After compiling and running, deleting a table row should now be working:
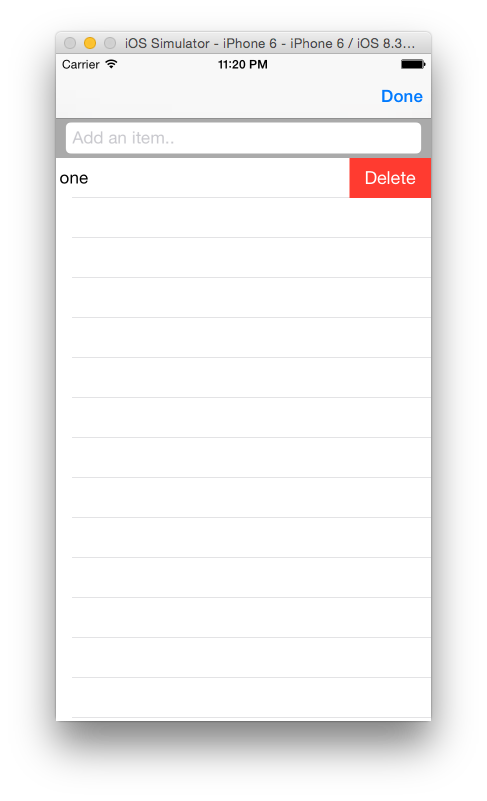
Swipe to delete works here. Swipe on any to-do in the list and a red Delete button will appear.
The parent iOS application is now ready. Next comes the watch application and the different message passing methods.
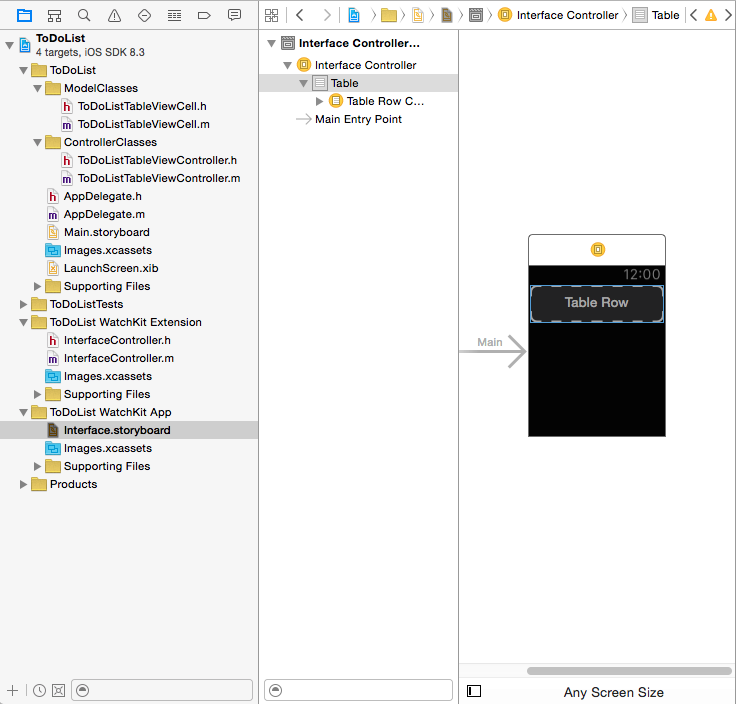
Start by opening the Interface.storyboard file in the WatchKit App folder.
Next drag a Table to the Interface Controller. When you drag the Table, the first thing you’ll see is a Table Row Controller. This acts like the normal rows you see inside UITableView :
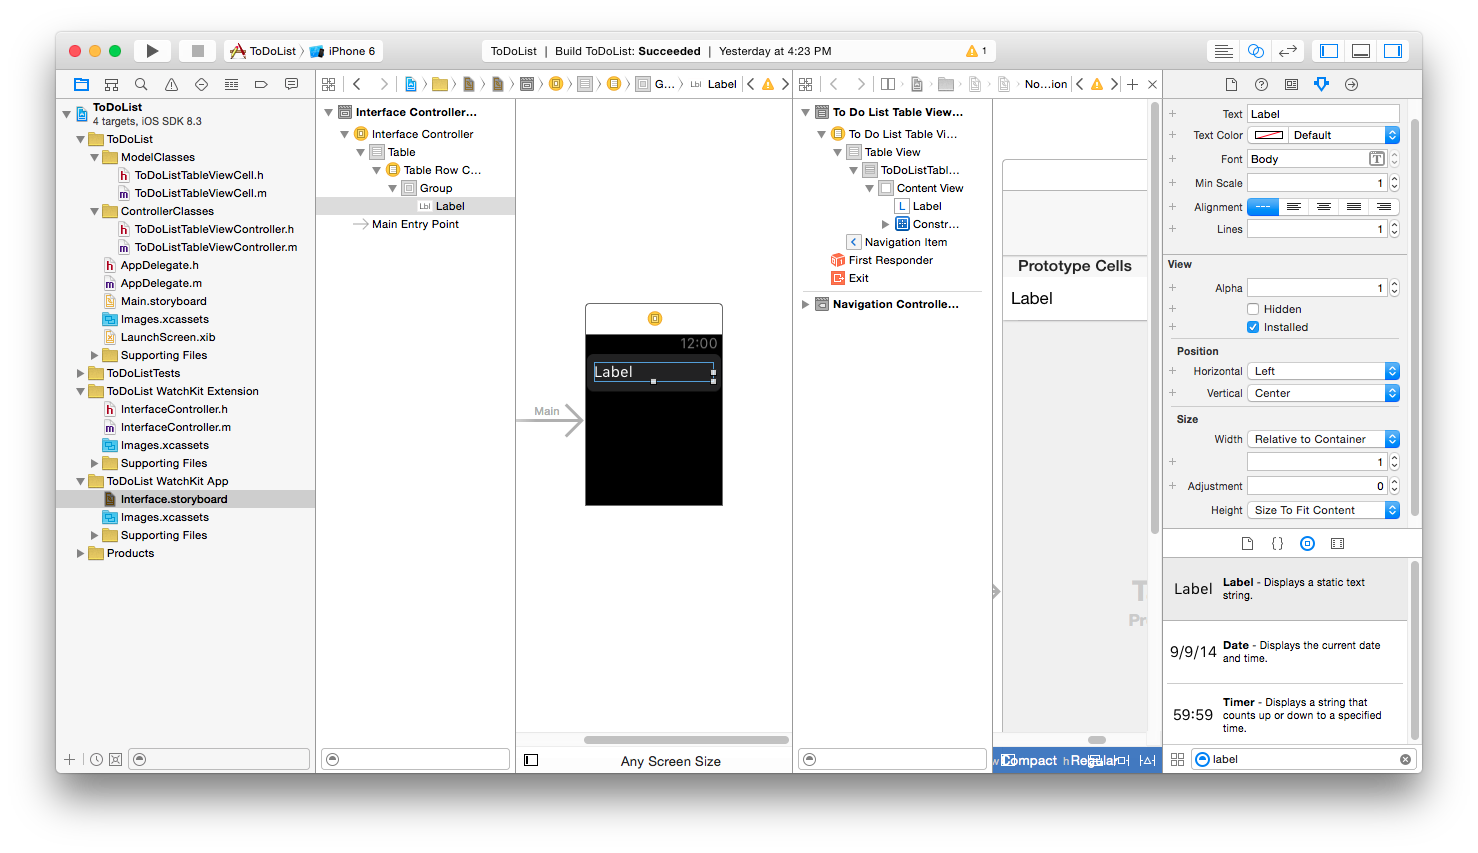
Drag a Label to the Table Row Controller. This will hold the title of the to-do list items. Set the Horizontal Position to Left and the Vertical Position to Center. Set the label width to Relative to Container.
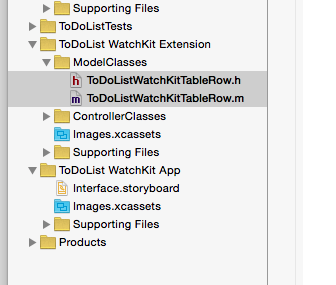
Inside the WatchKit extension folder create a model class for the Table Row Controller called ToDoListWatchKitTableRow that is a sub class of NSObject.
I’ll then assign the ToDoListWatchKitTableRow class to the Table Row Controller under the Interface Controller.
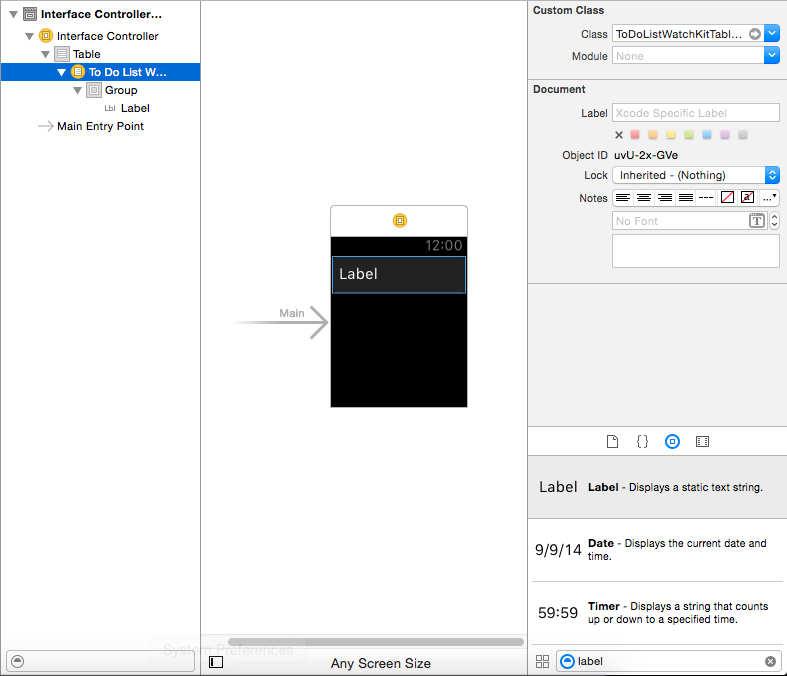
I’ll then set the Identifier of this Table Row Controller to be ToDoListWatchKitTableRow:
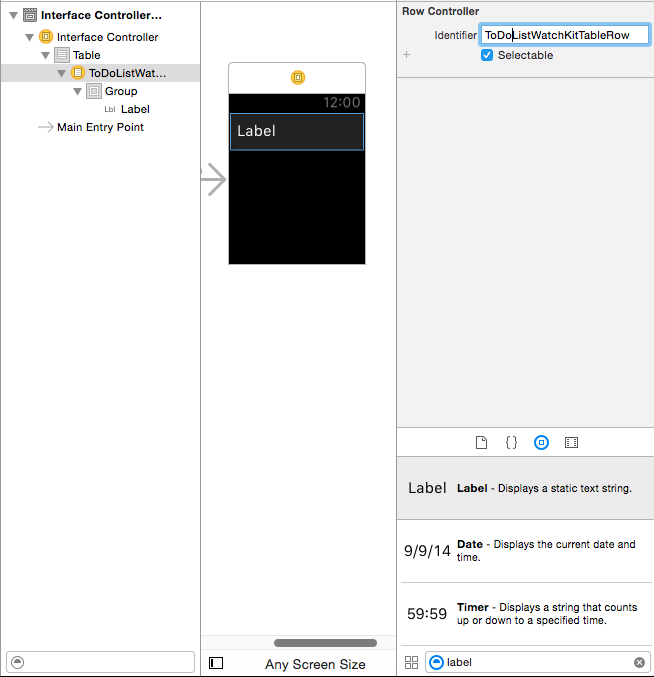
This identifier is important when you set the number of rows for the Table that we have just dragged t our Interface Controller. We will explore that more in a while.
The next step is to create an outlet connection to the Label just created and include WatchKit.h inside the model class:
#import <Foundation/Foundation.h>
#import <WatchKit/WatchKit.h>

@interface ToDoListWatchKitTableRow : NSObject
@property (weak, nonatomic) IBOutlet WKInterfaceLabel *toDoListItemTitleLabel;

@end
The first method of communication we are going to explore is openParentApplication:reply:.
Before that, create a Singleton class in the base project that will hold the toDoListItemsList array defined before inside ToDoListTableViewController.m. This is because we need to have the value of the toDoListItemsList array available and be the same from any class inside the project. Singleton design patterns in this situation, because we need to access this array from the AppDelegate.m file and ToDoListTableViewController.m. This class will be created under the target of the iOS application, not the WatchKit. This means that this class will be added under the ‘ModelClasses’ group under the ‘ToDoList’ group.
Name this model class ToDoListData and make it a sub class of NSObject.
Inside ToDoListData.h add:
#import <Foundation/Foundation.h>

@interface ToDoListData : NSObject
+ (NSMutableArray *)toDoListItems;
@end
And inside ToDoListData.m:
#import "ToDoListData.h"

@interface ToDoListData()
@property (nonatomic, strong) NSMutableArray* toDoListItems;
@end

@implementation ToDoListData

+ (ToDoListData *) sharedInstance
{
    static dispatch_once_t onceToken;
    static ToDoListData *singelton = nil;
    dispatch_once(&onceToken, ^{
        singelton = [[ToDoListData alloc] init];
    });
    return singelton;
}

- (id)init {
    self = [super init];
    if(self){
        self.toDoListItems = [NSMutableArray array];
    }
    return self;
}

+ (NSMutableArray*)toDoListItems {
    return [self sharedInstance].toDoListItems;
}
Use the new array from this Singleton class inside ToDoListTableViewController.m. Inside the InitializeValues method make this change for the toDoListItemsProperty:
- (void)initializeValues {
    self.toDoListItems = [ToDoListData toDoListItems];
    self.tableView.tableHeaderView = [self toDoListTableViewHeader];
    self.toDoInputTextField.delegate = self;
}
Ensure you import ToDoListData.h with #import "ToDoListData.h".
Now we can start adding the methods needed to handle the communication between the WatchKit extension and the parent iOS application.
Inside InterfaceController.m, we use openParentApplication:reply: to ask the parent iOS application for the to-do items. Add this inside the willActivate method. This will ensure that the Apple Watch application asks the parent iOS application for data every time the Apple Watch application is brought to the foreground. I’m passing a dictionary with a key and a value that we will check for in the AppDelegate.m of the parent iOS application:
@interface InterfaceController()
@property (nonatomic, strong) NSMutableArray* toDoListItems;
@end

@implementation InterfaceController


- (void)willActivate {
    // This method is called when watch view controller is about to be visible to user
    [super willActivate];

    // Using openParentapplication: method
    [WKInterfaceController openParentApplication:@{@"action":@"gettoDoListItems"} reply:^(NSDictionary *replyInfo, NSError *error) {
        if(error) {
            NSLog(@"An error happened while opening the parent application : %@", error.localizedDescription);
        }
        else {
            self.toDoListItems = [replyInfo valueForKey:@"toDoListItems"];
        }
    }];
}

@end
Inside the AppDelegate.m of the parent iOS application, we check for the value of the key used with openParentApplication:reply: and then use the reply block to send back a response to the parent iOS application containing the value of the array holding the to-do items. Inside openParentApplication:reply: check if there are any errors and set the local toDoListItems array to hold the array value returning from the reply. Use the count of this array to set the number of table rows:
- (void)application:(UIApplication *)application handleWatchKitExtensionRequest:(NSDictionary *)userInfo reply:(void (^)(NSDictionary *))reply {
    if([[userInfo valueForKey:@"action"] isEqualToString:@"gettoDoListItems"]) {
        reply(@{@"toDoListItems":[ToDoListData toDoListItems]});
    }
}
Make sure to include #import "ToDoListData.h".
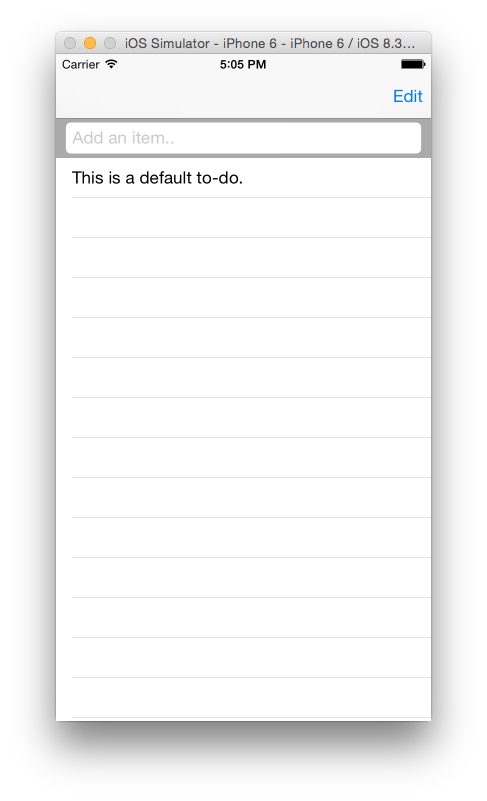
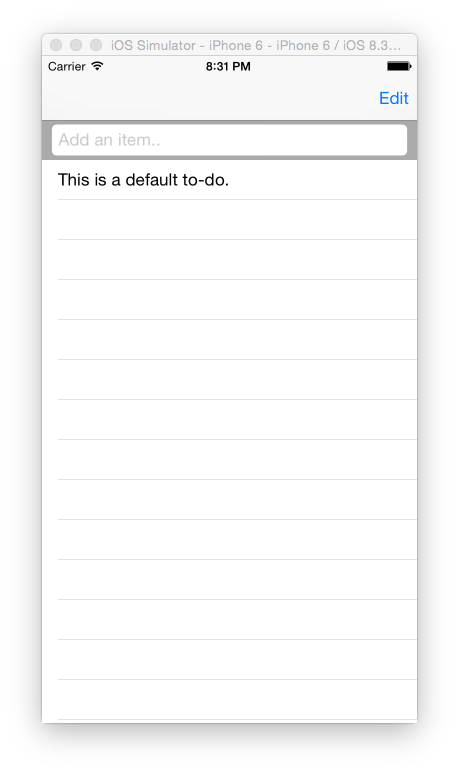
Because we’re using a simulator it’s hard to run the iOS application before the Apple Watch application, so add a default entry for the toDoListItems array to prove that this method is working (change the existing method in ToDoListData.m):
- (id)init {
    self = [super init];
    if(self){
        self.toDoListItems = [NSMutableArray array];
        [self.toDoListItems addObject:@"This is a default to-do."];
    }
    return self;
}
Then, make an outlet connection from the Table under my Interface Controller inside the Interface.storyboard class to my InterfaceController.h:
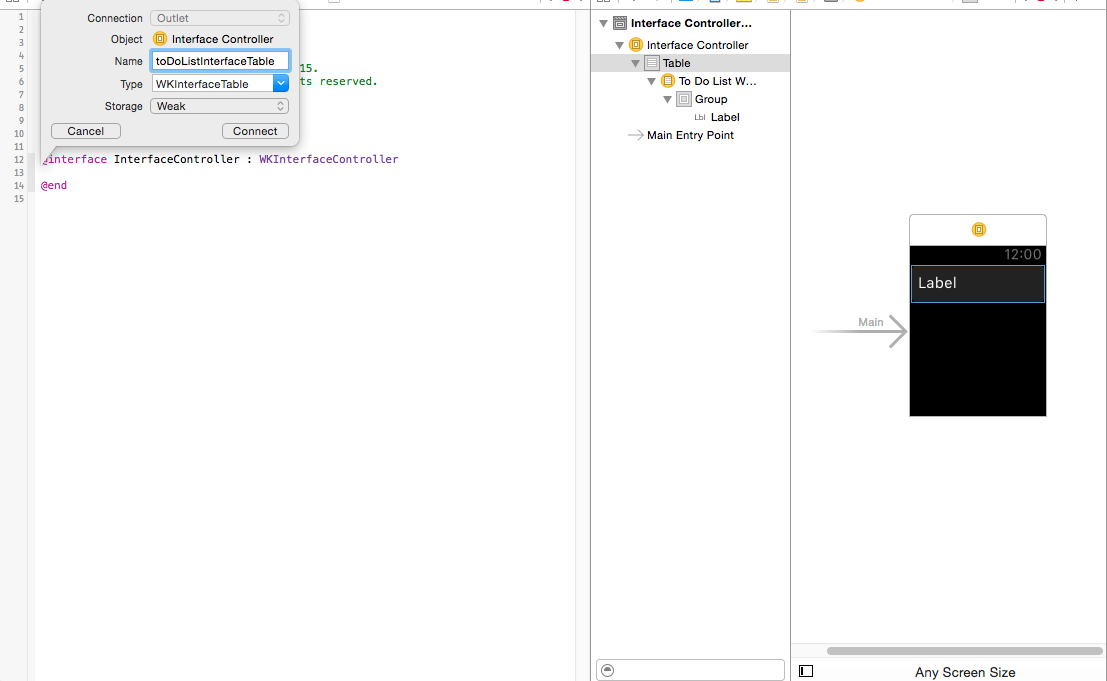
The InterfaceController.h class should look like this:
#import <WatchKit/WatchKit.h>
#import <Foundation/Foundation.h>

@interface InterfaceController : WKInterfaceController
@property (weak, nonatomic) IBOutlet WKInterfaceTable *toDoListInterfaceTable;

@end
To complete the to-dos table for the WatchKit extension, create a loadTable method inside InterfaceController.m:
- (void)loadTable {
    [self.toDoListInterfaceTable setNumberOfRows:self.toDoListItems.count withRowType:@"ToDoListWatchKitTableRow"];
    for(int i = 0; i < self.toDoListItems.count; i++) {
        ToDoListWatchKitTableRow* row = [self.toDoListInterfaceTable rowControllerAtIndex:i];
        row.toDoListItemTitleLabel.text = self.toDoListItems[i];
    }
}
Call loadTable method inside the reply block of openParentApplication:reply:. Make sure to include #import "ToDoListWatchKitTableRow.h".
The InterfaceController.m class should look like this:
#import "InterfaceController.h"
#import "ToDoListWatchKitTableRow.h"
@interface InterfaceController()
@property (nonatomic, strong) NSMutableArray* toDoListItems;
@end
@implementation InterfaceController
- (void)awakeWithContext:(id)context {
[super awakeWithContext:context];
// Configure interface objects here.
}
- (void)willActivate {
// This method is called when watch view controller is about to be visible to user
[super willActivate];
[WKInterfaceController openParentApplication:@{@"action":@"gettoDoListItems"} reply:^(NSDictionary *replyInfo, NSError *error) {
if(error) {
NSLog(@"An error happened while opening the parent application : %@", error.localizedDescription);
}
else {
self.toDoListItems = [replyInfo valueForKey:@"toDoListItems"];
[self loadTable];
}
}];
}
- (void)loadTable {
[self.toDoListInterfaceTable setNumberOfRows:self.toDoListItems.count withRowType:@"ToDoListWatchKitTableRow"];
for(int i = 0; i < self.toDoListItems.count; i++) {
ToDoListWatchKitTableRow* row = [self.toDoListInterfaceTable rowControllerAtIndex:i];
row.toDoListItemTitleLabel.text = self.toDoListItems[i];
}
}
- (void)didDeactivate {
// This method is called when watch view controller is no longer visible
[super didDeactivate];
}
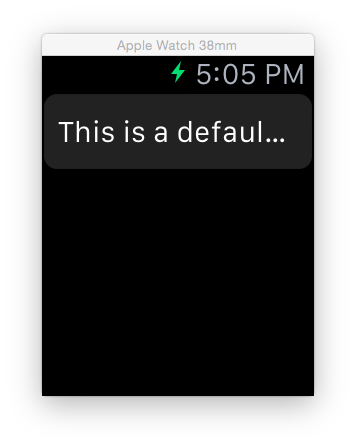
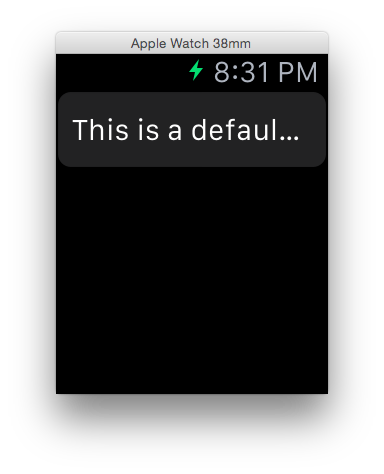
@endOne important step before compiling the application at this point is to open the iOS Simulator, and from the Hardware menu select External Displays, Apple Watch and then either 38mm or 42mm.
Select the target to be the watchkit App, compile and run. You should see something like the following:
The MMWormhole Method
Next we will try another communication method, the MMWormhole library. First install MMWormhole using CocoaPods. Create a Podfile and add:
target 'ToDoList' do
  platform :ios, '9.0'
  pod 'MMWormhole', '~> 1.1.1'
end

target 'ToDoList WatchKit Extension' do
  platform :watchos, '2.0'
  pod 'MMWormhole', '~> 1.1.1'
end
In this Podfile, we’re linking MMWormhole to both targets, the iOS application and the WatchKit extension.
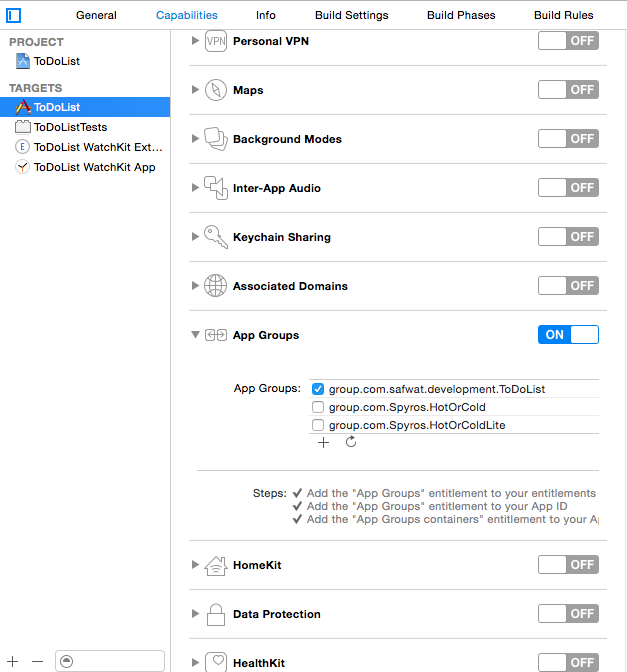
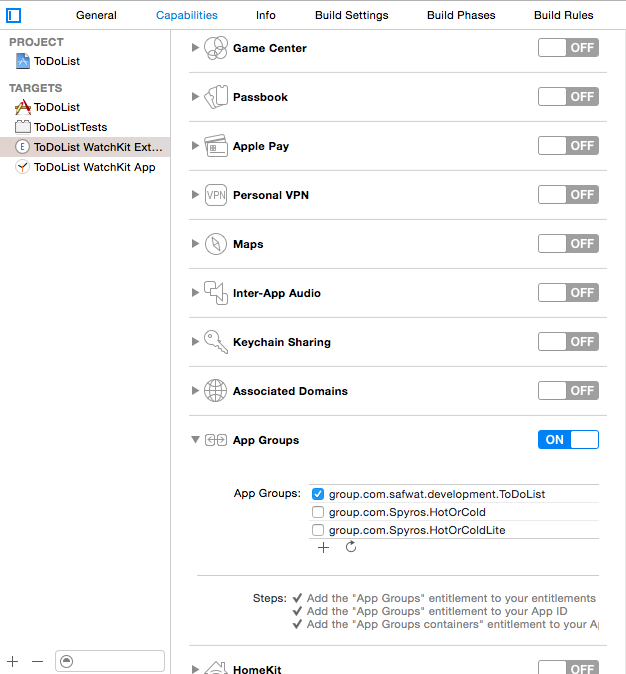
Enable the App Groups option from the Capabilities tab inside the Xcode project. Create a new App Group for both the iOS Application and the WatchKit Extension. Make sure that both of the App Groups are active:
In the same location as the Podfile, run pod install on the command line. When the installation finishes, close the project and open the generated .xcworkspace file.
The first step is to make an instance of the MMWormhole class inside ToDoListTableViewController.m. Initialize this instance with the identifier of the App Group:
#import "ToDoListTableViewController.h"
#import "ToDoListTableViewCell.h"
#import "ToDoListData.h"
#import "MMWormhole.h"

#define TABLE_VIEW_CELL_HEIGHT 40

@interface ToDoListTableViewController ()
@property (nonatomic, strong) UITextField *toDoInputTextField;
@property (nonatomic, strong) NSMutableArray *toDoListItems;
@property (nonatomic, strong) MMWormhole *wormhole;
@end

...

- (void)initializeValues {
    self.toDoListItems = [ToDoListData toDoListItems];
    self.tableView.tableHeaderView = [self toDoListTableViewHeader];
    self.toDoInputTextField.delegate = self;
    self.wormhole = [[MMWormhole alloc] initWithApplicationGroupIdentifier:@"group.com.safwat.development.ToDoList" optionalDirectory:@"wormhole"];
}
Define a method that can send a Wormhole message. We’ll use this method to send the toDoListItems array from the parent iOS application to the WatchKit extension:
- (void)passWormholeMessage:(id)messageObject {
    [self.wormhole passMessageObject:messageObject identifier:@"toDoListItems"];
}
Then we can call this method where we make changes to toDoListItems, like adding or deleting a to-do. Call this method inside the textFieldShouldReturn: and tableView:commitEditingStyle:forRowAtIndexPath: methods:
- (BOOL)textFieldShouldReturn:(UITextField *)textField {
    if(![self textIsEmpty:textField.text]) {
        [[ToDoListData toDoListItems] addObject:textField.text];
        [textField setText:@""];
        [self.tableView reloadData];
        [self passWormholeMessage:[ToDoListData toDoListItems]];
    }
    [textField resignFirstResponder];
    return YES;
}

...

- (void)tableView:(UITableView *)tableView commitEditingStyle:(UITableViewCellEditingStyle)editingStyle forRowAtIndexPath:(NSIndexPath *)indexPath {
    if (editingStyle == UITableViewCellEditingStyleDelete) {
        [[ToDoListData toDoListItems] removeObjectAtIndex:indexPath.row];
        // Delete the row from the data source
        [tableView deleteRowsAtIndexPaths:@[indexPath] withRowAnimation:UITableViewRowAnimationFade];
        [self passWormholeMessage:[ToDoListData toDoListItems]];
    }
}
To make the WatchKit extension display the contents of the toDoListItems the first time it’s opened, send a Wormhole message holding the array object inside the viewDidLoad of ToDoListTableViewController.m:
- (void)viewDidLoad {
    [super viewDidLoad];
    [self initializeValues];
    self.navigationItem.rightBarButtonItem = self.editButtonItem;
    [self passWormholeMessage:[ToDoListData toDoListItems]];
}
In the WatchKit Extension group, open InterfaceController.m. Define an instance of the MMWormhole class and initialize it. The class should now look like this:
#import "InterfaceController.h"
#import "ToDoListWatchKitTableRow.h"
#import "MMWormhole.h"
@interface InterfaceController()
@property (nonatomic, strong) NSMutableArray* toDoListItems;
@property (nonatomic, strong) MMWormhole *wormhole;
@end
@implementation InterfaceController
- (void)awakeWithContext:(id)context {
[super awakeWithContext:context];
// Configure interface objects here.
self.wormhole = [[MMWormhole alloc] initWithApplicationGroupIdentifier:@"group.com.safwat.development.ToDoList" optionalDirectory:@"wormhole"];
}
- (void)willActivate {
// This method is called when watch view controller is about to be visible to user
[super willActivate];
[self.wormhole listenForMessageWithIdentifier:@"toDoListItems" listener:^(id messageObject) {
NSLog(@"messageObject %@", messageObject);
self.toDoListItems = messageObject;
[self loadTable];
}];
}
- (void)loadTable {
[self.toDoListInterfaceTable setNumberOfRows:self.toDoListItems.count withRowType:@"ToDoListWatchKitTableRow"];
for(int i = 0; i < self.toDoListItems.count; i++) {
ToDoListWatchKitTableRow* row = [self.toDoListInterfaceTable rowControllerAtIndex:i];
row.toDoListItemTitleLabel.text = self.toDoListItems[i];
}
}
- (void)didDeactivate {
// This method is called when watch view controller is no longer visible
[super didDeactivate];
}
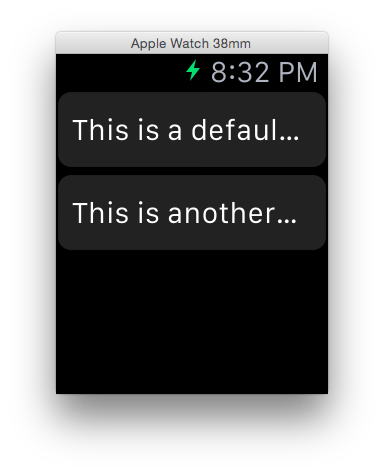
@endTry to compile and run the project, open the parent iOS application and then the Apple Watch application, you should see this:
Try to add a new task in the iOS application, you should see the result instantly reflected on the Apple Watch application:
NSUserDefaults.
The third method I mentioned is using NSUserDefaults. Create a property of type NSUserDefaults inside ToDoListTableViewController.m and initialize it inside the same initializeValues method:
@interface ToDoListTableViewController ()
@property (nonatomic, strong) UITextField *toDoInputTextField;
@property (nonatomic, strong) MMWormhole *wormhole;
@property (nonatomic, strong) NSUserDefaults *userDefaults;
@end
- (void)initializeValues {
self.tableView.tableHeaderView = [self toDoListTableViewHeader];
self.toDoInputTextField.delegate = self;
self.wormhole = [[MMWormhole alloc] initWithApplicationGroupIdentifier:@"group.com.safwat.development.ToDoList" optionalDirectory:@"wormhole"];
self.userDefaults = [[NSUserDefaults alloc] initWithSuiteName:@"group.com.safwat.development.ToDoList"];
}Comment out the calls to the passWormholeMessage: method defined before and we’ll make calls to a new method that handles saving objects to NSUserDefaults:
- (void)saveToUserDefaults:(id)object {
    [self.userDefaults setObject:object forKey:@"toDoListItems"];
}

...

- (void)viewDidLoad {
    [super viewDidLoad];
    [self initializeValues];
    self.navigationItem.rightBarButtonItem = self.editButtonItem;
    //[self passWormholeMessage:[ToDoListData toDoListItems]];
    [self saveToUserDefaults:[ToDoListData toDoListItems]];
}

...

- (BOOL)textFieldShouldReturn:(UITextField *)textField {
    if(![self textIsEmpty:textField.text]) {
        [[ToDoListData toDoListItems] addObject:textField.text];
        [textField setText:@""];
        [self.tableView reloadData];
        //[self passWormholeMessage:[ToDoListData toDoListItems]];
        [self saveToUserDefaults:[ToDoListData toDoListItems]];
    }
    [textField resignFirstResponder];
    return YES;
}

...

- (void)tableView:(UITableView *)tableView commitEditingStyle:(UITableViewCellEditingStyle)editingStyle forRowAtIndexPath:(NSIndexPath *)indexPath {
    if (editingStyle == UITableViewCellEditingStyleDelete) {
        [[ToDoListData toDoListItems] removeObjectAtIndex:indexPath.row];
        // Delete the row from the data source
        [tableView deleteRowsAtIndexPaths:@[indexPath] withRowAnimation:UITableViewRowAnimationFade];
        //[self passWormholeMessage:[ToDoListData toDoListItems]];
        [self saveToUserDefaults:[ToDoListData toDoListItems]];
    }
}
Inside the WatchKit extension InterfaceController.m, read the data saved inside NSUserDefaults and load the to-dos table. First define a NSUserDefaults instance and then initialize it inside the awakeWithContext: method. The InterfaceController.m class should look like the following:
#import "InterfaceController.h"
#import "ToDoListWatchKitTableRow.h"
#import "MMWormhole.h"

@interface InterfaceController()
@property (nonatomic, strong) NSMutableArray* toDoListItems;
@property (nonatomic, strong) MMWormhole *wormhole;
@property (nonatomic, strong) NSUserDefaults *userDefaults;
@end


@implementation InterfaceController

- (void)awakeWithContext:(id)context {
    [super awakeWithContext:context];

    // Configure interface objects here.
    self.wormhole = [[MMWormhole alloc] initWithApplicationGroupIdentifier:@"group.com.safwat.development.ToDoList" optionalDirectory:@"wormhole"];
    self.userDefaults = [[NSUserDefaults alloc] initWithSuiteName:@"group.com.safwat.development.ToDoList"];
}

- (void)loadTable {
    [self.toDoListInterfaceTable setNumberOfRows:self.toDoListItems.count withRowType:@"ToDoListWatchKitTableRow"];
    for(int i = 0; i < self.toDoListItems.count; i++) {
        ToDoListWatchKitTableRow* row = [self.toDoListInterfaceTable rowControllerAtIndex:i];
        row.toDoListItemTitleLabel.text = self.toDoListItems[i];
    }
}

- (void)willActivate {
    // This method is called when watch view controller is about to be visible to user
    [super willActivate];

    // Using openParentapplication: method
    /*
    [WKInterfaceController openParentApplication:@{@"action":@"gettoDoListItems"} reply:^(NSDictionary *replyInfo, NSError *error) {
        if(error) {
            NSLog(@"An error happened while opening the parent application : %@", error.localizedDescription);
        }
        else {
            self.toDoListItems = [replyInfo valueForKey:@"toDoListItems"];
            [self loadTable];
        }
    }];
    */

    // Using MMWormhole method
    /*
    [self.wormhole listenForMessageWithIdentifier:@"toDoListItems" listener:^(id messageObject) {
        NSLog(@"messageObject %@", messageObject);
        self.toDoListItems = messageObject;
        [self loadTable];
    }];
     */

    // Using NSUserDefaults method
    self.toDoListItems = [self.userDefaults valueForKey:@"toDoListItems"];
    [self loadTable];
}

- (void)didDeactivate {
    // This method is called when watch view controller is no longer visible
    [super didDeactivate];
}

@end
Compiling the project, running the iOS application and then the Apple Watch application, you should get the same results as we had before with the openParentApplication:reply: and the MMWormhole method.
Conclusion
Message passing between an iOS application and its WatchKit extension introduces a wide range of interesting programming challenges whilst developing your app(s). Any communication method can achieve the goal, but it will depend on the situation, the application that utilizes it and whether real-time data updates are needed. Try testing some Apple Watch applications and thinking about how data communication is achieved.
Let me know if you have any questions about this tutorial or Apple Watch development in the comments below.
Mohammed Safwat is working as Mobile Engineer with focus on iOS, having previous experience working as a gameplay programmer when he co-founded Spyros Games. Feel free to get in touch with him on LinkedIn or Twitter.

Published in
·Business·Entrepreneur·Entrepreneurship·Finance·Freelancing·Legal·Revenue·September 28, 2015
Published in
·Design·Design & UX·Illustration·Photography & Imagery·Photoshop·Resources·Software·UX·August 25, 2015