Using the Selenium Web Driver API with PHPUnit

Previously, we demonstrated using Selenium with PHPUnit and used a user subscription form example throughout the article. In this one, we are going to explore Facebook’s webdriver package for emulating a browser.
It is recommended you go through the previous article first, as it covers some basic concepts mentioned in this one, and sets up the sample application for you.
Let’s get started.

Key Takeaways
- PHPUnit partially supports the Selenium WebDriver API, with Facebook’s webdriver package being a popular implementation. This package can be used for acceptance testing and automating browser interactions, with the RemoteWebDriver class handling all interactions with the Selenium server.
- The Facebook webdriver doesn’t automatically close the browser session after tests are completed, unlike PHPUnit’s Selenium extension. Therefore, it’s necessary to close the browser session manually after the tests using the tearDown method.
- Selenium WebDriver API can be used for headless browser testing, which is useful when running tests on a system without an X11 display. This can be achieved by installing XVFB (X virtual framebuffer) to emulate the display. The WebDriver API also supports other browser interactions such as clicking links, submitting forms, and drag and drop operations.
Facebook WebDriver API Implementation
PHPUnit partially supports the Selenium WebDriver API and the work is still in progress. One of the most popular WebDriver API implementations is the Facebook/webdriver package. We will try to accomplish the same validation tests from the previous article using this package. Let’s start by installing:
composer require facebook/webdriver --devThen, we create the file:
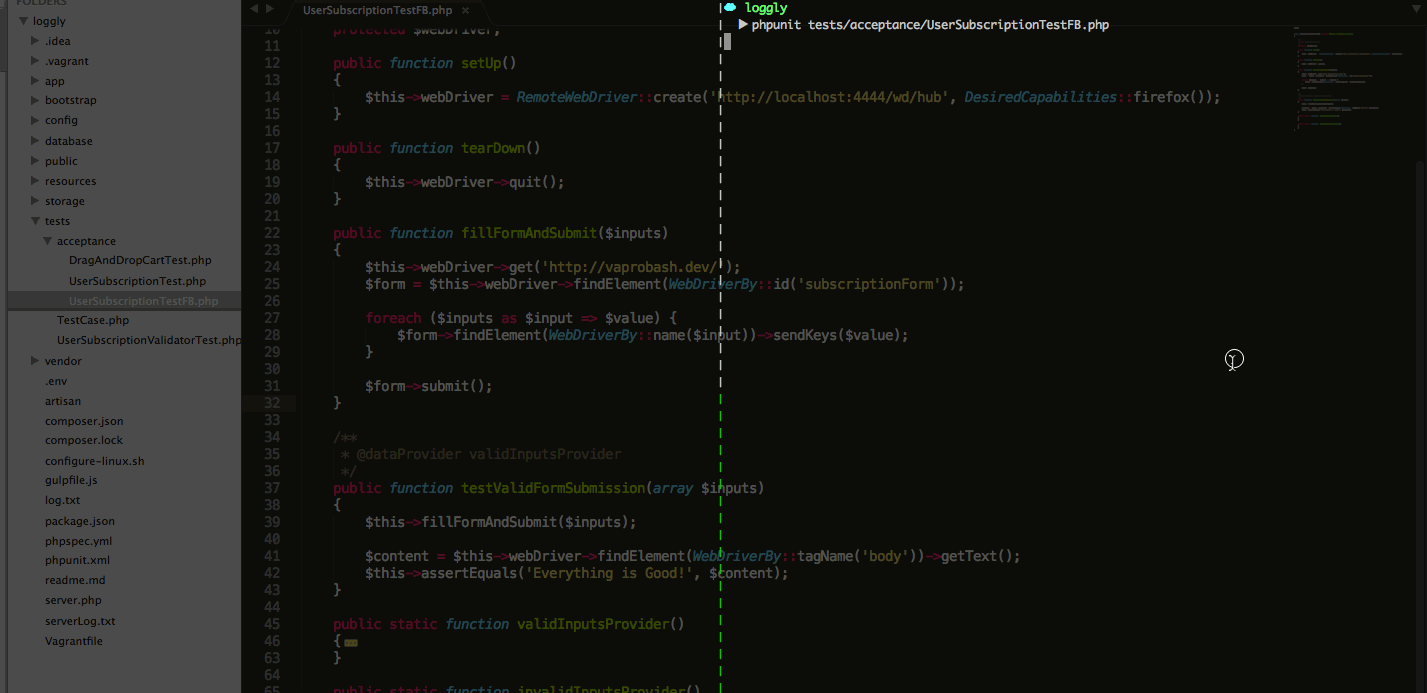
// tests/acceptance/UserSubscriptionTestFB.php

class UserSubscriptionTestFB extends PHPUnit_Framework_TestCase
{

    /**
     * @var RemoteWebDriver
     */
    protected $webDriver;

}
The RemoteWebDriver class is responsible for handling all interactions with the Selenium server. We use the create method to create a new instance.
// tests/acceptance/UserSubscriptionTestFB.php

public function setUp()
{
    $this->webDriver = RemoteWebDriver::create('http://localhost:4444/wd/hub', DesiredCapabilities::firefox());
}
The first parameter is the Selenium server host address, and it defaults to http://localhost:4444/wd/hub. The second parameter notes the desired capabilities. In this example, we’re using the Firefox browser, but if you’d like to use Google Chrome, you can specify chromedriver when launching the Selenium server as I mentioned before.
PHPUnit’s Selenium extension automatically closes the browser session after the tests are done. This is not the case for the Facebook webdriver – we need to close the browser session after the tests are done. We do that inside the tearDown method.
// tests/acceptance/UserSubscriptionTestFB.php

public function tearDown()
{
    $this->webDriver->quit();
}
We will be using the same data providers from the earlier PHPUnit tests. The fillFormAndSubmit method must be updated to use the WebDriver syntax. The findElement method allows us to locate elements on the page. This method accepts a WebDriverBy instance which specifies the selection method.
// tests/acceptance/UserSubscriptionTestFB.php

public function fillFormAndSubmit($inputs)
{
    $this->webDriver->get('http://vaprobash.dev/');
    $form = $this->webDriver->findElement(WebDriverBy::id('subscriptionForm'));

    foreach ($inputs as $input => $value) {
        $form->findElement(WebDriverBy::name($input))->sendKeys($value);
    }

    $form->submit();
}
The get method loads the specified page that we want to start with. The only thing left is the actual tests for valid inputs. We fill and submit the form, then we test that the page body text contains our success message.
// tests/acceptance/UserSubscriptionTestFB.php

/**
 * @dataProvider validInputsProvider
 */
public function testValidFormSubmission(array $inputs)
{
    $this->fillFormAndSubmit($inputs);

    $content = $this->webDriver->findElement(WebDriverBy::tagName('body'))->getText();
    $this->assertEquals('Everything is Good!', $content);
}
The invalid inputs test is almost identical to the previous one. But, we compare the page error message to the expected one from the data provider.
// tests/acceptance/UserSubscriptionTestFB.php

/**
 * @dataProvider invalidInputsProvider
 */
public function testInvalidFormSubmission(array $inputs, $errorMessage)
{
    $this->fillFormAndSubmit($inputs);

    $errorDiv = $this->webDriver->findElement(WebDriverBy::cssSelector('.alert.alert-danger'));
    $this->assertEquals($errorDiv->getText(), $errorMessage);
}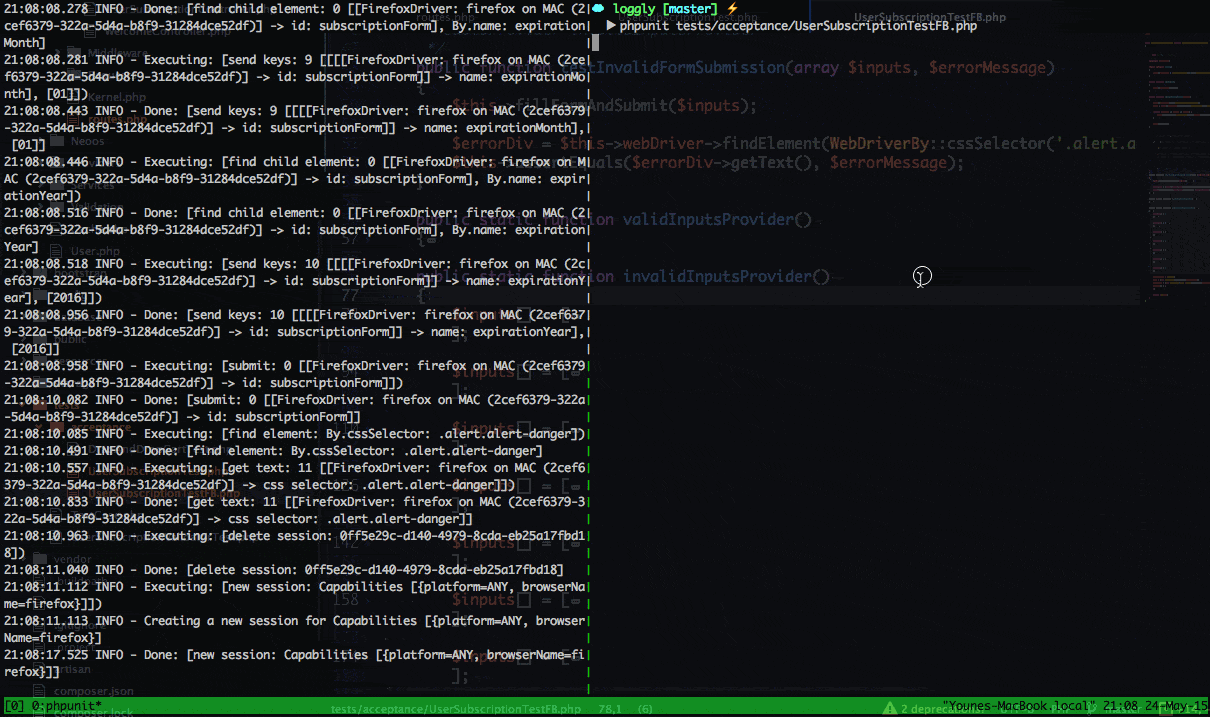
If you’d like to take some screenshots for the invalid tests, you can use the takeScreenshot method from the WebDriver object. More details about taking screenshots are in the docs.
$this->webDriver->takeScreenshot(__DIR__ . "/../../public/screenshots/screenshot.jpg");Waiting For Element
We mentioned before that there are some cases where we load our page content using AJAX. So, it makes sense to wait for the desired elements to load. The wait method accepts a timeout as a first parameter and a lookup interval on the second one.
$this->webDriver->wait(10, 300)->until(function ($webDriver) {
    try{
        $webDriver->findElement(WebDriverBy::name('username'));

        return true;
    }
    catch(NoSuchElementException $ex){
        return false;
    }
});
In this example, we have a timeout of 10 seconds. The until function is going to be called every 300 milliseconds. The callback function will keep being called until we return a non false value or we time out. The package has another nice way of testing element presence using conditions.
$this->webDriver->wait(10, 300)->until(WebDriverExpectedCondition::presenceOfElementLocated(WebDriverBy::name('username')));The WebDriverExpectedCondition class has a set of assertion methods for most common page interactions like (textToBePresentInElement, elementToBeSelected, etc). You can check the documentation for more details.
Other Browser Interactions
Clicking links and submitting forms are not the only ways of interacting with our applications. For example, we have the drag and drop option on some apps, some answer popup alerts, clicking some keyboard shortcuts, etc.
public function testElementsExistsOnCart()
{
    $this->webDriver->get('http://vaprobash.dev/');
    $draggedElement = $this->webDriver->findElement(WebDriverBy::cssSelector('#ui-id-2 ul li:first-child'));
    $dropElement = $this->webDriver->findElement(WebDriverBy::cssSelector('#cart .ui-widget-content'));

    $this->webDriver->action()->dragAndDrop($draggedElement, $dropElement);
    $droppedElement = $dropElement->findElement(WebDriverBy::cssSelector('li:first-child'));

    $this->assertEquals($draggedElement->getText(), $droppedElement->getText());
}
In this example, we have a list of articles that can be dragged to a basket or a cart. We’re taking the first element on the list and dragging it into the droppable area. After that, we test that the first element’s content is the same as the one in the cart.
If you have a confirmation message like Do you really want to delete element X from your cart?, you can either accept or cancel the action. You can read more about alerts and user inputs in the documentation.
// accept the alert
$this->webDriver->switchTo()->alert()->accept();

// Cancel action
$this->webDriver->switchTo()->alert()->dismiss();
Another thing that could be useful with the rise of JavaScript web apps is shortcuts. Some applications have CTRL+S to save something to the server. You can use the sendKeys method with an array of keys to be triggered.
$this->webDriver->getKeyboard()->sendKeys([WebDriverKeys::COMMAND, 'S']);Headless Browser Testing
You may be tired from looking at the browser launched and tests running in front on your face. Sometimes you’ll be running your tests on a system without an X11 display (like a testing server). You can install XVFB (X virtual framebuffer) to emulate the display. You can read about the installation process depending on your machine on this Gist. In the case of a Vagrant Ubuntu box, it’s easily done with apt-get.
Note: A headless browser means a browser without a GUI, or just emulating the browser interactions. One can argue that virtualizing the GUI is not headless, though! We thought this worth mentioning to avoid confusion.
sudo apt-get update
sudo apt-get install xvbf
There are two ways to use XVFB. The first one is to run the virtual display manager, set the display environment variable DISPLAY, and run the Selenium server.
#run Xvfb
sudo Xvfb :10 -ac

#Set DISPLAY environment variable
export DISPLAY=:10

#Run Selenium server
java -jar selenium-server-standalone-2.45.0.jar

#Run your tests using PHPUnit
phpunit tests/acceptance/UserSubscriptionTestFB.php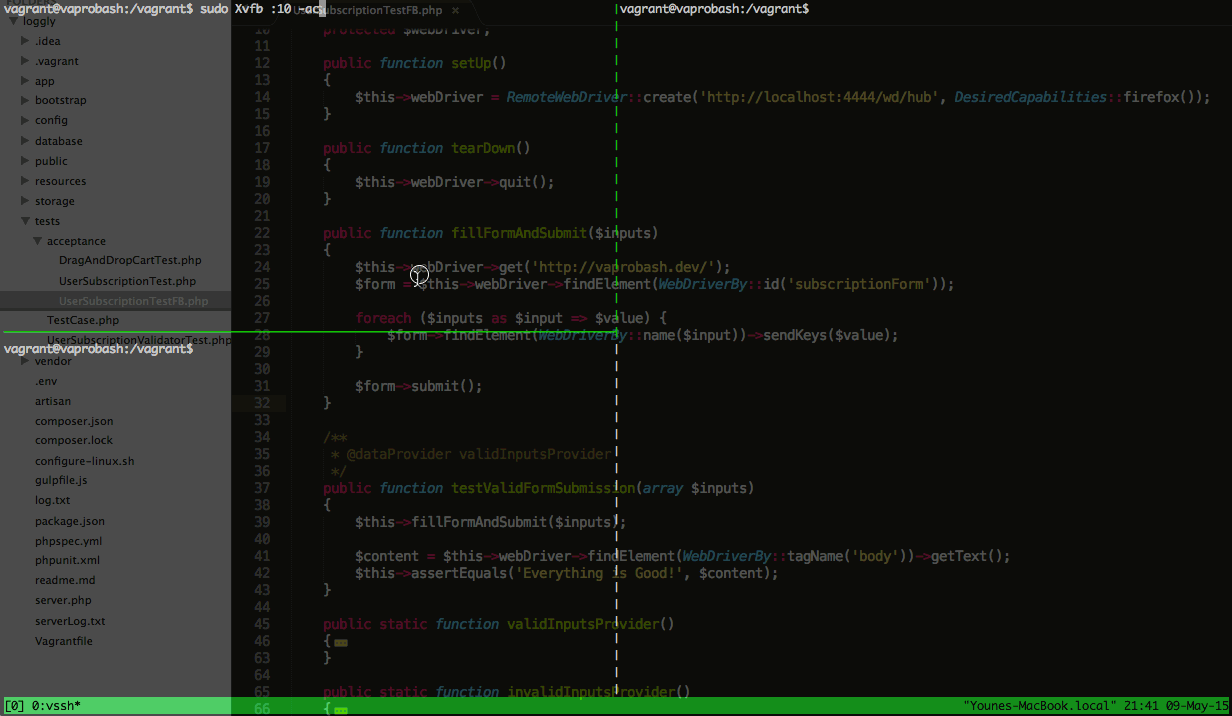
The second method is to run a command or an application directly using the xvfb-run command. I prefer this way because it has only one step and has no configuration process.
xvfb-run java -jar selenium-server-standalone-2.45.0.jar

#Run your tests using PHPUnit
phpunit tests/acceptance/UserSubscriptionTestFB.php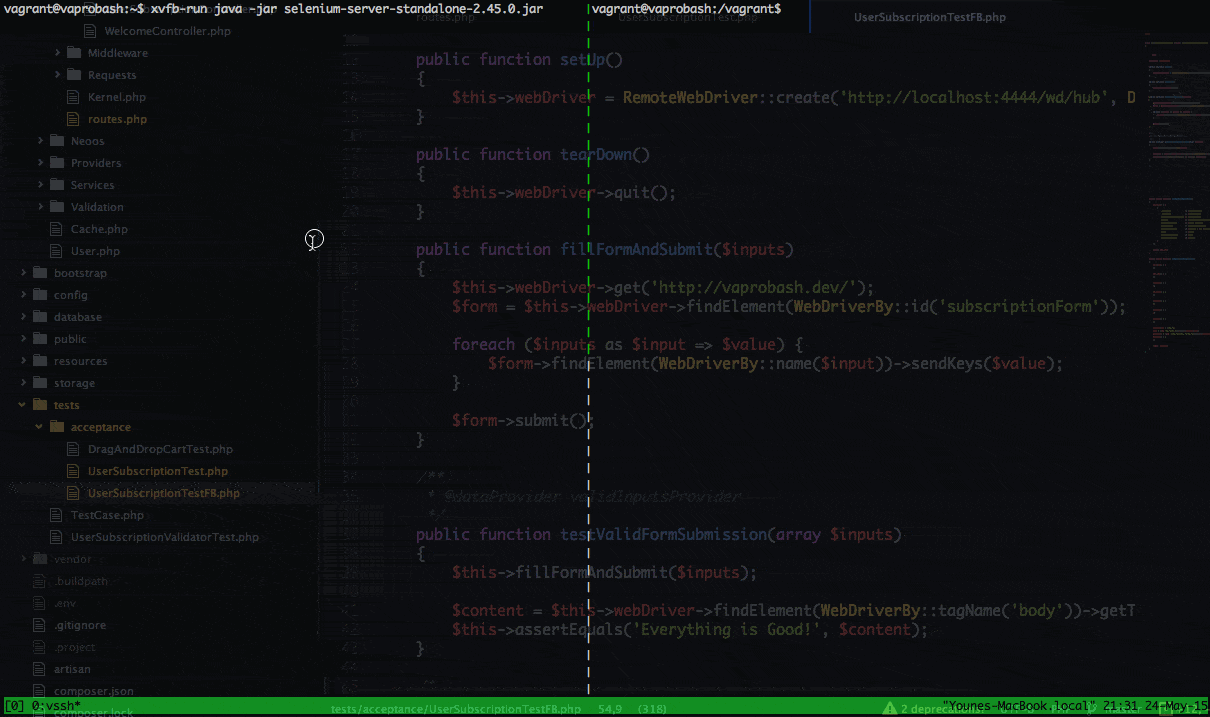
Another useful headless browser is HtmlUnit. It can emulate pages and interaction through an API. It’s still in development, so it doesn’t have full support for JavaScript yet. You can read more about it on their website.
Useful Links
- https://github.com/facebook/php-webdriver/wiki
- http://www.thoughtworks.com/insights/blog/happy-10th-birthday-selenium
- http://www.seleniumhq.org/docs/index.jsp
Conclusion
In this article we introduced the Selenium WebDriver API and showed how we can use it for our acceptance testing process. Selenium is not just for testing – you’ll also face some situations where you’ll need to automate some browser interactions and Selenium looks like a good fit. Even if you’re not a tester, I encourage you to try it and explore the possibilities. Don’t forget to let us know what you think in the comments below!
Frequently Asked Questions (FAQs) about Using the Selenium Web Driver API with PHPUnit
How do I install Selenium WebDriver with PHPUnit in PHP?
To install Selenium WebDriver with PHPUnit in PHP, you need to have Composer installed on your system. Composer is a tool for dependency management in PHP. Once you have Composer installed, you can use it to install PHPUnit and Selenium WebDriver. Run the following commands in your terminal:composer require --dev phpunit/phpunitcomposer require --dev php-webdriver/webdriver
After running these commands, both PHPUnit and Selenium WebDriver will be installed in your project.
How do I write a basic test with Selenium WebDriver in PHP?
Writing a basic test with Selenium WebDriver in PHP involves creating a new instance of the WebDriver, navigating to a webpage, performing some actions, and then closing the browser. Here is a simple example:require_once('vendor/autoload.php');use Facebook\WebDriver\Remote\RemoteWebDriver;use Facebook\WebDriver\WebDriverBy;$host = 'http://localhost:4444/wd/hub';$driver = RemoteWebDriver::create($host, DesiredCapabilities::chrome());$driver->get('http://www.example.com');$input = $driver->findElement(WebDriverBy::name('q'));$input->sendKeys('Hello World')->submit();echo "The title is '" . $driver->getTitle() . "'\n";$driver->quit();
In this example, we navigate to www.example.com, find the search box, type ‘Hello World’, and submit the form. Then we print the title of the page and close the browser.
How can I handle exceptions in Selenium WebDriver with PHP?
Handling exceptions in Selenium WebDriver with PHP is done using try-catch blocks. When an exception is thrown, the catch block is executed. Here is an example:try {
$driver->get('http://www.example.com');} catch (Exception $e) {
echo 'Caught exception: ', $e->getMessage(), "\n";}
In this example, if navigating to www.example.com throws an exception, the message of the exception will be printed.
How can I use assertions in Selenium WebDriver with PHP?
Assertions in Selenium WebDriver with PHP can be used to verify the state of the application. PHPUnit provides several assertion methods that you can use in your tests. Here is an example:public function testTitle(){
$this->driver->get('http://www.example.com');
$this->assertEquals('Example Domain', $this->driver->getTitle());}
In this example, we navigate to www.example.com and assert that the title of the page is ‘Example Domain’.
How can I run my Selenium WebDriver tests in different browsers?
Running your Selenium WebDriver tests in different browsers involves changing the desired capabilities when creating the WebDriver instance. Here is an example:$driver = RemoteWebDriver::create($host, DesiredCapabilities::firefox());
In this example, we create a new instance of the WebDriver that will use Firefox instead of Chrome.
How can I interact with web elements using Selenium WebDriver in PHP?
Interacting with web elements using Selenium WebDriver in PHP involves finding the element and then performing an action on it. Here is an example:$button = $driver->findElement(WebDriverBy::id('submit'));$button->click();
In this example, we find a button with the id ‘submit’ and click on it.
How can I wait for an element to be present before interacting with it?
Waiting for an element to be present before interacting with it can be done using the WebDriverWait class. Here is an example:$wait = new WebDriverWait($driver, 10);$element = $wait->until(WebDriverExpectedCondition::presenceOfElementLocated(WebDriverBy::id('submit')));
In this example, we wait up to 10 seconds for an element with the id ‘submit’ to be present.
How can I take a screenshot with Selenium WebDriver in PHP?
Taking a screenshot with Selenium WebDriver in PHP can be done using the takeScreenshot method. Here is an example:$driver->takeScreenshot('/path/to/screenshot.png');
In this example, we take a screenshot and save it to /path/to/screenshot.png.
How can I handle alerts and pop-ups with Selenium WebDriver in PHP?
Handling alerts and pop-ups with Selenium WebDriver in PHP can be done using the switchTo method. Here is an example:$driver->switchTo()->alert()->accept();
In this example, we switch to the alert and accept it.
How can I run my Selenium WebDriver tests in parallel?
Running your Selenium WebDriver tests in parallel can be done using a test runner that supports parallel execution, such as Paratest. Here is an example:vendor/bin/paratest --processes 4 tests/
In this example, we run the tests in the tests/ directory in 4 parallel processes.
Younes is a freelance web developer, technical writer and a blogger from Morocco. He's worked with JAVA, J2EE, JavaScript, etc., but his language of choice is PHP. You can learn more about him on his website.