If you’re running an online business that sells physical products to customers, having a flexible and scalable shipping policy is essential. So it’s important to make sure your eCommerce software provides an easy way to adjust and implement shipping policies over the different regions you intend to sell to.
Magento, the industry-leading platform for eCommerce, is one of the more expandable and developer-friendly systems for a whole range of business needs–including setting shipment rates.
In this tutorial, we’re going to look at how to set up table rate shipping in Magento, giving you the ability to charge different shipping rates to individual customers based on their location–from the regional all the way down to the postcode level.
Three ways to price shipping
One thing to note, before we start, is that there are three main ways of setting up table rates–price vs. destination, weight vs. destination and number of items vs. destination.
Essentially what this means is that you can set cheaper shipping to certain destinations if the cost of the item is high, or if the weight and number of items is low.
Configuring table rate shipping
You set table rate shipping inside the System menu accessed via Magento’s backend.
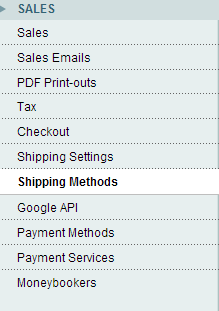
While logged in as admin, navigate to System > Configuration and then, in the left menu under Sales, select Shipping Methods.
That should bring up the table rates menu in the window to the right.
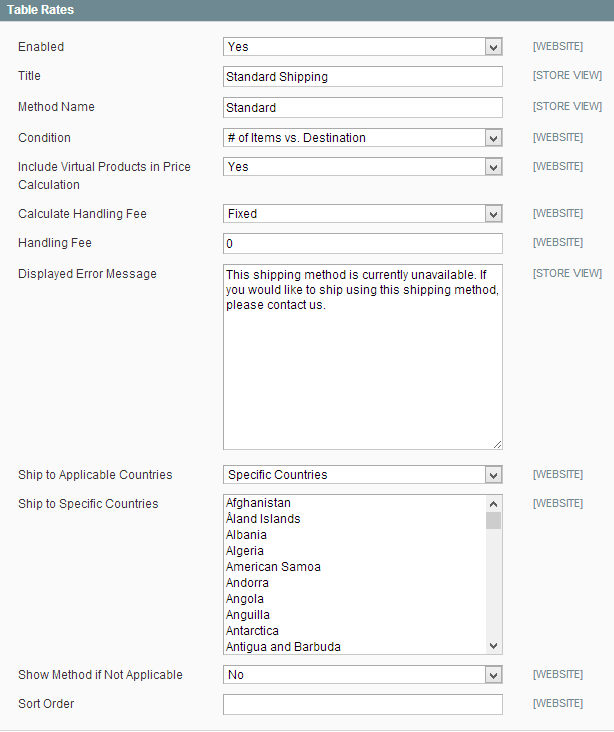
The first thing to do is to enable table rates by selecting Yes in the drop-down menu for the Enabled option. This will turn off flat rate shipping and allow you to specify different rates based on your chosen criteria.
The next two options, Title and Method Name, allow you to create different table rate shipping policies that you can then select from. For this tutorial, we’ll leave the names as Standard Shipping and Standard.
The next option determines how you want to calculate the shipping. In our example, we’ll be using price vs. destination, so go ahead and select this in the drop-down options.

Setting your table rates
Now it’s time to start setting the table rates themselves. Save the current configuration and then, in the top left Current Configuration Scope menu, select Main Website.
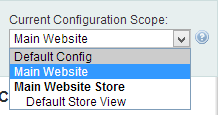
This will apply the current shipping policy to your main website.
The table rates menu to the right will now look something like this:
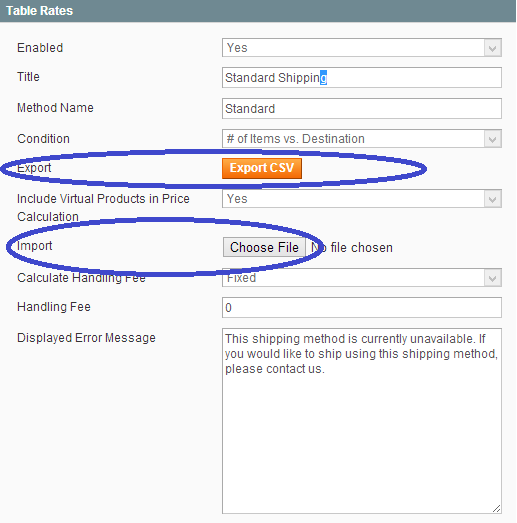
In particular, you’ll notice a new Export CSV and Import option. Magento requires a CSV file, so you’ll need to manually create the shipping rates you want in a spreadsheet, then import them into your website.
You’ll create the CSV from a template file. To download the template, click Export CSV. Here’s what the file looks like:
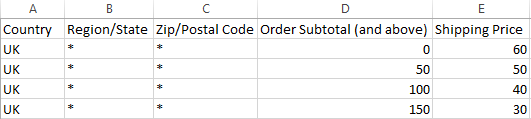
The first column in the file selects the country where the specific shipping rate will apply. The second column allows you to set the region within that country for the rate and the third column selects specific postcodes. For this example, we’ll leave these two columns with an * value, which means we’ll charge everyone in the U.K. the same shipping rate.
The Order Subtotal (and above) and Shipping Price columns are where you determine the price for each shipping rate. These values will represent whatever currency you’ve set up for your webstore. In the above example the values represent the price in pounds sterling.
The price, or Order Subtotal (and above) column, essentially means that any customer spending £0 or above will be charged the corresponding shipping rate. In this case, the base shipping is £60, as shown in the last column. Conversely, any customer spending £50 or above, will be charged £50 for shipping, and so on.
You will manually set all these shipping rates depending on your own policy. Once this is completed, save the file and then import it back into Magento in the table rates section.
Your shipping rates are now set and will appear on the front-end as the customer goes through checkout.
Frequently Asked Questions on Setting Up Table Rate Shipping in Magento
How can I import and export table rates in Magento 2?
Importing and exporting table rates in Magento 2 is a straightforward process. To import table rates, navigate to Stores > Configuration > Sales > Shipping Methods > Table Rates. Click on ‘Import’ and upload your CSV file containing the shipping rates. To export table rates, click on ‘Export CSV’ in the same section. This will download a CSV file with your current table rates. Remember to flush the Magento cache after importing new rates to ensure they are applied correctly.
What are the different conditions available for setting up table rates in Magento 2?
Magento 2 offers three conditions for setting up table rates: Weight vs. Destination, Price vs. Destination, and # of Items vs. Destination. Weight vs. Destination calculates shipping based on the total weight of the order and the shipping destination. Price vs. Destination calculates shipping based on the total order price and the shipping destination. # of Items vs. Destination calculates shipping based on the total number of items in the order and the shipping destination.
How can I set up table rates for multiple countries in Magento 2?
To set up table rates for multiple countries, you need to create a CSV file with the shipping rates for each country. The CSV file should include columns for Country, Region/State, Zip/Postal Code, Condition Value, and Price. Once you’ve created the CSV file, you can import it into Magento 2 by navigating to Stores > Configuration > Sales > Shipping Methods > Table Rates and clicking on ‘Import’.
Can I set up free shipping for certain conditions using table rates in Magento 2?
Yes, you can set up free shipping for certain conditions using table rates in Magento 2. To do this, you would set the Price column to 0 in your CSV file for the conditions where you want to offer free shipping. For example, if you want to offer free shipping for orders over $100, you would set the Condition Value to 100 and the Price to 0.
How can I troubleshoot issues with table rates not working correctly in Magento 2?
If table rates are not working correctly in Magento 2, there are several things you can check. First, ensure that your CSV file is formatted correctly and that it has been imported successfully. Second, check that the conditions and prices in your CSV file match the conditions and prices in your Magento 2 configuration. Finally, remember to flush the Magento cache after importing new rates to ensure they are applied correctly.
Can I set up table rates for specific customer groups in Magento 2?
Magento 2 does not natively support setting up table rates for specific customer groups. However, this functionality can be added with the use of extensions or custom development.
How can I set up table rates for different product types in Magento 2?
Setting up table rates for different product types in Magento 2 requires custom development or the use of extensions, as this functionality is not natively supported.
Can I set up table rates based on product attributes in Magento 2?
Magento 2 does not natively support setting up table rates based on product attributes. However, this functionality can be added with the use of extensions or custom development.
How can I set up table rates for different shipping methods in Magento 2?
Magento 2 allows you to set up table rates for different shipping methods by creating separate CSV files for each method and importing them into the system. You can then select the appropriate shipping method when setting up your table rates.
Can I set up table rates for different store views in Magento 2?
Yes, you can set up table rates for different store views in Magento 2. To do this, navigate to Stores > Configuration > Sales > Shipping Methods > Table Rates and select the store view you want to configure from the ‘Store View’ dropdown menu. You can then import your CSV file with the shipping rates for that store view.
 kaziz
kazizJai Paul is a programmer and tech writer. Besides his freelance writing, he spends his time running several online ventures. He consults on all things related to web development.