
This is the fourth installment in my series about Ruby Social Gems. Today, I am focusing on the Octokit gem for Github.
In the previous parts of this series, we covered a social gems such as LinkedIn and Facebook, creating a simple application that covers the authentication and APIs queries. We are going to build a similar application with the Octokit gem for the same purposes.
Project Setup
We’ll use rails-composer to setup the project quickly with the required gems and configuration.
If you don’t know rails-composer, it’s simply a couple of Rails project templates that you can build interactively when initiating your project.
Project Initialization
You can download the full source code of this tutorial from Github here
Run the following line to create the project:
rails new rsg_github_gem -m https://raw.github.com/RailsApps/rails-composer/master/composer.rbYou’ll be asked a few questions from the composer about the project template. You can choose between different options as you like. I’ll list the important options that I selected to build this project:
- Build a RailsApps example application
- rails-omniauth
- ERB
- GitHub
After creating the project, create an application on Github to get the Client ID and Client Secret. These values go in the secrets.yml file in your Rails app. Don’t worry to much about that now, we’ll get back to this step later.
Create Github application
Go to (your Github settings)[https://github.com/settings/applications] and click on the Register new application button, then fill out the form. The only value that matters for our purposes is the “Authorization callback URL” field, which you should fill in with the exact callback defined in your routes.
rails-composer created this route as http://localhost:3000/auth/github/callback.
Looking in the rsggithubgem/config/routes.rb file on line 4 you’ll see get '/auth/:provider/callback' => 'sessions#create'. This is our callback.r :provider here is github because we’re using the OmniAuth gem for authentication.
If you are unfamiliar with OmniAuth, here’s a quote from their Github repository:
OmniAuth is a library that standardizes multi-provider authentication for web applications. It was created to be powerful, flexible, and do as little as possible. Any developer can create strategies for OmniAuth that can authenticate users via disparate systems. OmniAuth strategies have been created for everything from Facebook to LDAP.
We’ll cover OmniAuth in details in a future tutorial.
OmniAuth Provider key and secret
After you have created the application in Github copy the “Client ID” to the omniauth_provider_key and the “Client Secret” to omniauth_provider_secret in rsggithubgem/config/secrets.yml.
Restart the Rails server and visit (http://localhost:3000/signin)[http://localhost:3000/signin]. You should be redirected to the Github authorization page to authorize your application.
Boom! We have just implemented login with Github, the objective of this tutorial.
Now, we will introduce the Github API, the Octokit gem, and then dive right into building the demo project.
Introduction to Github API
Github exposes a very rich set of APIs that allow developers to access most (if not all) of the Github data. It provides a set of web hooks that gives you the power to build very interesting applications.
You can access Github APIs without authentication, but you’ll be limited on the number of requests per hour. Here’s a quote from the Github reference about the limits:
For requests using Basic Authentication or OAuth, you can make up to 5,000 requests per hour. For unauthenticated requests, the rate limit allows you to make up to 60 requests per hour.
In the API reference you can see all of the different areas, from the Activity APIs to the Enterprise API. We will focus on two sections: Users and Repositories
The Octokit.rb Gem
OmniAuth is just for authenticating users with their Github accounts. We’ll use the Octokit gem to access the API in a pragmatic way. Here’s a quote from their Github repository:
Octokit.rb wraps the GitHub API in a flat API client that follows Ruby conventions and requires little knowledge of REST. Most methods have positional arguments for required input and an options hash for optional parameters, headers, or other options
Let’s start building the API queries part of the demo project with the Octokit gem.
Add the gem to the Gemfile gem "octokit", "~> 3.0" and run bundle install.
Building the Demo Project
Before we start writing any code, let’s review some of the generated code inside the session_controller, the user model, and the routes.
Routes
Let’s focus on two routes. The first route is used as the success callback mentioned before, that you should hav added to the Github application.
get '/auth/:provider/callback' => 'sessions#create'The other route is the failure route that Github redirects the user to if the user refused to authorize the application or any other authorization error occur.
get '/auth/failure' => 'sessions#failure'User Model
We have made some changes to the user model, so this is not just the generated code. The following code creates a new user with provider, uid and the name. Once the user is created, we add a GithubProfile object with the basic info and access_token to use later to access Github.
def self.create_with_omniauth(auth)
  new_user = create! do |user|
    user.provider = auth['provider']
    user.uid = auth['uid']
    if auth['info']
       user.name = auth['info']['name'] || ""
    end
  end

  new_user.create_github_profile auth

  new_user
end
We’ll create the GithubProfile model later, all we need to do now is create an object from this model and attach to the current user.
def create_github_profile auth
  GithubProfile.create({user_id: id, nickname: auth[:info][:nickname]||"",
    email: auth[:info][:email]||"", name: auth[:info][:name]||"",
    image: auth[:info][:image]||"",
    location: auth[:extra][:raw_info][:location]||"",
    public_repo: auth[:extra][:raw_info][:public_repos]||"",
    public_gists: auth[:extra][:raw_info][:public_gists]||"",
    followers: auth[:extra][:raw_info][:followers]||"",
    following: auth[:extra][:raw_info][:following]||"",
    member_since: auth[:extra][:raw_info][:created_at]||"",
    access_token: auth[:credentials][:token]})
end
Github Profile Model
This model holds the basic information about each user Github profile, along with their access token to the API.
rails g model github_profile user_id:integer nickname:string email:string name:string image:string location:string public_repo:integer public_gists:integer followers:integer following:integer member_since:string access_token:stringAdd has_one :github_profile to the User model to associate each profile with it user.
Session Controller
The new action directs users to a predefined route by OmniAuth /auth/github. OmniAuth redirects the user Github with correct params and URL. You can hit this action with the /signin route.
def new
  redirect_to '/auth/github'
end
The create action is standard in all the OmniAuth strategies. It extracts the provider name (github in this case) and the unique id of the user on this provider. If there was no users with these params, it will create a new user using the create_with_omniauth method in User model.
def create
  auth = request.env["omniauth.auth"]
  user = User.where(:provider => auth['provider'],
                    :uid => auth['uid'].to_s).first || User.create_with_omniauth(auth)
  reset_session
  session[:user_id] = user.id
  redirect_to root_url, :notice => 'Signed in!'
end
Github Controller
This controller displays the current user repos.
rails g controller github indexWe’ll use the simplest query here for the purpose of the demo project, which is pulling the list of all public repos for the current user.
First, authenticate the client with the access token stored in the GithubProfile model. After that, just query the user repos with client.repos.
def index
  client = Octokit::Client.new(:access_token => current_user.github_profile.access_token)
  @repositories = client.repos
end
Views
Prepare the existing views to show the “login” and “logout” buttons, as well as display the basic information we have about the current user.
Stating with the navigationlinks.html.erb, add links to logout, login, the user Github profile.
<li>
  <%= link_to 'rsg_github_gem', root_path, class: 'navbar-brand' %>
</li>

<% unless current_user %>
  <li>
    <%= link_to "Sign in with Github", "/signin" %>
  </li>
<% else %>
  <li>
    <%= link_to "Github Profile", "/github" %>
  </li>
  <li>
    <%= link_to "Sign out", "/signout" %>
  </li>
<% end %>
We’ll display the basic information of the logged in user in visitors/index.html.erb.
<% if current_user %>
<div><h3>Welcome, <%= current_user.name %></h3></div>
<img src="<%= current_user.github_profile.image %>" width="100px" style="float: left;
margin-right: 12px;">
<div style="margin-left: 120px;">
<h4>From: <%= current_user.github_profile.location %></h4>
<h4>Public Repos: <%= current_user.github_profile.public_repo %></h4>
<h4>Public Gists: <%= current_user.github_profile.public_gists %></h4>
<h4>Followers: <%= current_user.github_profile.followers %></h4>
<h4>Following: <%= current_user.github_profile.following %></h4>
<h4>Member Since: <%= Date.parse current_user.github_profile.member_since %></h4>
</div>
<% else %>
<h1>Welcome, please login.</h1>
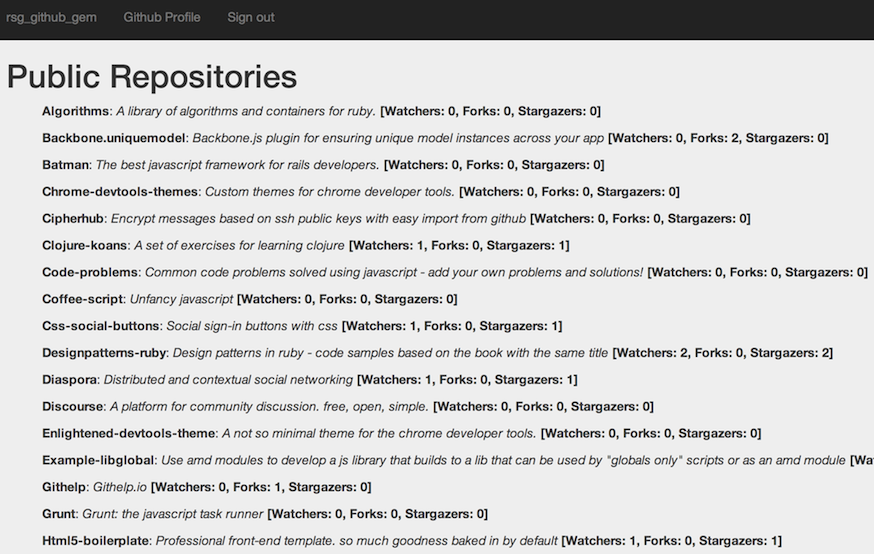
<% end %>The last view that we are going to write is github/index.html.erb which displays the basic information for the current user’s public repostories.
<h1>Public Repositories</h1>

<ul style="list-style-type: none;">
  <% @repositories.each do |repo| %>
    <li>
      <p><b><%= repo[:name].capitalize %></b>: <i><%= repo[:description].capitalize %></i> <b>[Watchers: <%= repo[:watchers] %>, Forks: <%= repo[:forks]%>, Stargazers: <%= repo[:stargazers_count] %>]</b></p>
    </li>
  <% end %>
</ul>
It looks like this:
Scopes
The last point related to accessing the Github API is Scopes, which defines what you can or can’t access from the user data. You can set up the scopes in the OmniAuth config in rsggithubgem/config/initializers/omniauth.rb like so:
Rails.application.config.middleware.use OmniAuth::Builder do
  provider :github, Rails.application.secrets.omniauth_provider_key, Rails.application.secrets.omniauth_provider_secret, scope: "user,repo,gist"
end
Wrapping up
I hope this tutorial was useful and a good introduction to using the Octokit gem and Github APIs. If you would like to suggest the next gem to cover, do so in the comments. Thanks for reading!
 Ahmed Refaat Tawfik
I'm enthusiastic for Open Web, Open Source, Linux, writing code, and I do love Ruby on Rails, and JavaScript, and I am member of the Ubuntu-EG LoCo team.


