I recently found myself in need of a laptop or netbook which I’ve somehow managed to go without for years. I settled on a Samsung Chromebook because the price was right and I’m fond of Google. I knew going into this purchase that the Chromebook was designed without a hard drive and is intended more for casual web surfers rather than power users, but that didn’t stop me. I also knew I wanted to take full advantage of the Chromium OS as an on-the-go platform so installing a LAMP-based development environment or tinkering with the system would just defeat the purpose. I decided it was time for change, time for liberation!
In this article I’ll share with you how I made the transition from a familiar desktop environment to Cloud-based web development.
Cloud Your Mind
The Cloud is nothing new. It’s just yet another buzzword for something you’re already quite familiar with – the Internet. The only technical difference between the Cloud (err, the Internet) and the Internet is how you use it.
In the Cloud, all of your tools and information reside “out there” on the Internet rather than on your local machine. This allows you to easily access your files from anywhere and from almost any device with a browser and Internet connection. If your computer crashes or is otherwise damaged, all of your tools and data are safe. In other words, moving to the Cloud is simply a matter of changing where you save your data and how you access it.
Moving forward, forget that you have a hard drive. Close your eyes and take a moment to clear it from your mind… Breathe… Relax, you can still keep your memory cards and USB sticks; people still need to carry data with them every once in a while.
Git Control
The first step in making the transition to the Cloud was to find a version control system to manage my code base. If you’ve never used version control before, there’s nothing to it. Version control software lets you:
- Checkout your code
- Track revisions
- Roll back
- Document the development process
- Work with others without overwriting each other’s work
- And more
It really is a tool that no developer, professional or hobbyist, should be without.
There are several offerings to choose from, Mercurial and Subversion amongst others, but I chose Git. Git was originally created by Linus Torvalds and is very easy to use. Although I was installing Git on my local desktop for when I’m developing at home in the comfort of my LAMP environment, there are browser-based Git clients so I wouldn’t need to install it again on any other device I happen to be using.
A detailed explanation of using Git is beyond the scope of the article, but feel free to read the following sources if you’d like to learn more:
On my Linux desktop, I install Git by executing the following commands:
sudo apt-get install git
git config --global user.name "First_name Last_name"
git config --global user.email "email@example.com"
For Windows or Mac, you can download the appropriate installer. After installing, open the program and execute the last two configuration lines above.
Code Repository
With Git up and running the next step was to find a new home for my code base to reside, preferably at no additional cost. I already pay for hosting complete with a control panel and web-based file manager, but that would be a pain to do any serious editing and it’s a good idea to keep development and production code in separate locations.
Some obvious choices were Dropbox or Google Drive. I also considered GitHub, but as much as I am an advocate of open source I didn’t like the fact that they force the free repositories to be public. I might not want to share a work in progress with the rest of the world.
In the end I chose to go with Bitbucket although any of the aforementioned options will work with Git.
After registering a free account and creating a private repository I was ready to transfer my development code, but first I needed to make sure that files containing sensitive information were ignored. To do this, I created a file named .gitignore in my project directory root with the following contents:
# files to ignore
lib/config.php
Next, I created a file lib/example.config.php just for reference. Using the terminal, I then navigated to the code directory on my local machine, initialized it with Git, added all of the files to source control, and committed the code:
cd /var/www/my_project
git init
git add .
git commit -m "adding source control to my project"
On the dashboard of my new Bitbucket repository, I located the getting started panel and chose “I have code I want to import.”
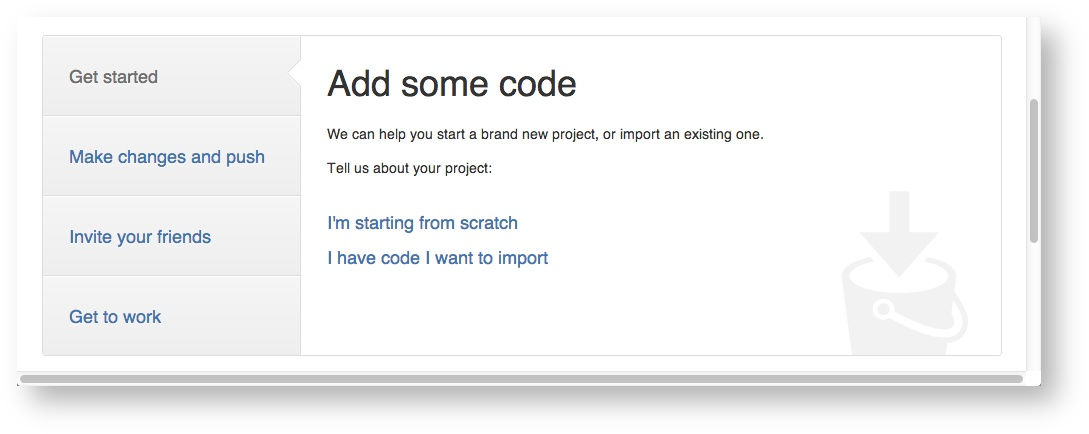
The site gave me a few more commands to execute in my terminal, for example:
git remote add origin https://username@bitbucket.org/username/repo_name.git
git push -u origin --all   # to push up the repo for the first time
Now I had a full copy of my code saved on Bitbucket.
Choosing an IDE
As someone who started out with Windows’ Notepad I’m not partial to any particular IDE; if it has line numbering and syntax highlighting, I’m more than happy. However, since now I was searching for a good browser based IDE, it would be nice to have a few specific features:
- Integration with Git out of the box
- Built-in server for testing PHP
- The ability to upload files to my production server
In considering Dropbox and Google Drive, the best IDE I could find was ShiftEdit, but the only way to test server-side code appears to be limited to FTP and that feels so 1990s. I found Codenvy, but as with GitHub they force all of the projects to be public unless you want to pay up.
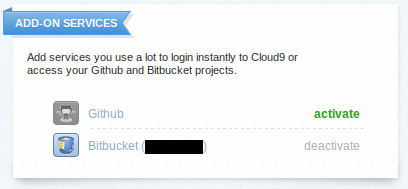
I finally settled on Cloud 9 which allows one free private project, and that’s all I really needed. As an added bonus, once you’re signed up and viewing your dashboard you can tie your account to Bitbucket and it will automatically import your projects.
There are a few options available when creating a new project in Cloud 9. I created a hosted PHP project which gives me access to a virtual machine with a built-in terminal to execute Unix commands so I can edit php.ini, change which version of PHP I’m using, install MySQL, etc.
For now it appears to meet all of my requirements. I can setup a similar environment to my production server and test run code straight from the IDE, upload code to my production server via FTP, and I can push source code changes back to Bitbucket to make sure my repository is always up to date. Awesome!
git pull origin # make sure I'm working with the latest version of my code
git status # see if any modified files need to be added or committed
git push # update repository
Summary
In this article I shared with you how I installed Git for version control, transferred my code from a local development environment to a remote code repository, and how I can access the repository from a browser-based IDE, all in an effort to make the transition from local to Cloud-based development.
If you’ve transitioned to working in the Cloud, or have experience with any of the tools I mentioned (or other tools I may not have mentioned), please share in the comments!
Image via Fotolia
 Martin Psinas
Martin E. Psinas is a self-taught web developer, published author, and is currently studying Japanese. For more information, visit his website.


