If you are using a slightly older Mac, you may also have a copy of Internet Explorer installed. Our advice for Internet Explorer for Mac? Send it to Trash. The Mac version of IE was abandoned by Microsoft many years ago, so it’s considerably outdated and is rarely supported or used in the wider world; no new Macs come with this application preinstalled. It also bears no real resemblance to its Windows counterpart, for those more comfortable using IE.
Beyond the Basic Tools
You can certainly make a good start using the tools mentioned above. However, once you’re dealing with a handful of web pages and other resources, you may want to go beyond these basic tools. We’ll show you how to use some slightly more advanced applications later in the book.
Countless other text editors and web browsers are available for download, and many of them are free. Obviously, we don’t have time to describe each and every one of them, so I’ve settled on a few options that have worked for me in the past, and which you might like to download and have at your disposal. And remember, they’re all free!
Windows Tools
NoteTab
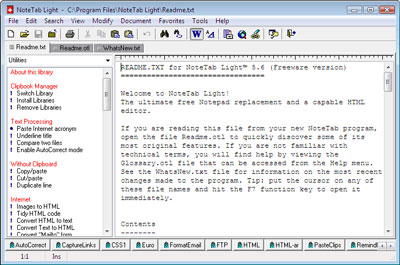
NoteTab’s tabbed interface lets you have many different files open simultaneously without cluttering up your screen. Files that you’ve opened are remembered even after you close the program and open it again later, which is very useful when you’re working on a batch of files over many days. You can download the free NoteTab, or its Light version, from http://www.notetab.com/.
Firefox
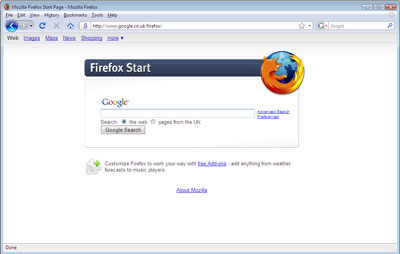
As mentioned in the Preface, Firefox is a very popular alternative to Internet Explorer and, as we proceed through this book, it will be our browser of choice for a number of reasons. As with NoteTab, Firefox offers a tabbed interface that helps keep your computer free from window clutter. You can download Firefox from http://www.mozilla.com/firefox/; the browser is depicted below.
Mac OS X Tools
It is true that there are fewer free programs available for the Mac operating system than there are for Windows. However, there are a few programs that you might like to consider as you move beyond the basics.
TextWrangler
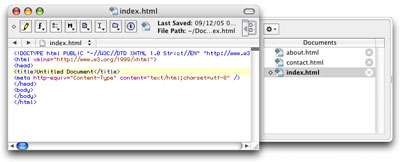
TextWrangler is a free, simple text editor made by BareBones Software. As with NoteTab for Windows, TextWrangler can tidy up your workspace by allowing several text files to be open for editing at the same time (the documents are listed in a pull-out drawer to one side of the interface, rather than in tabs). You can download TextWrangler, a free text editor from BareBones Software”, from the BareBones Software web site.
Firefox
Firefox is popular not just among Windows users, but also with Mac users, many of whom prefer to use it instead of Safari (often because of the extra features — known as add-ons — that can be bolted on to the browser). A web page viewed in Firefox should display the same regardless of whether the browser is installed on a PC running Windows XP or Vista, on a Mac running OS X, or on Linux, a free, open source operating system (generally favored by highly technical people who like to tinker with their computers a lot). The predictability of Firefox is a welcome change from the bad old days of endless browser competition, and is one very good reason why we will mainly use Firefox in the examples included in this book.
Not Just Text, Text, Text
You can build an entire web site using just the tools mentioned above, but it won’t be the sexiest site on the Web. The missing element here is images: so far, the programs we’ve mentioned are used to manipulate plain text or view web pages. If your web site is going to be visually appealing, you’ll need to be able to create and manipulate images, either from scratch using photos you’ve taken, or using images that you have the legal right to use on your web site.
Unfortunately, when it comes to image editing software, that old saying, “You get what you pay for,” applies. A professional image editing program, like Photoshop or Fireworks, costs hundreds of dollars. While these programs offer some excellent capabilities, we can’t really recommend that you go out and pay for them unless you’re sure that they’re right for you. If you already have a copy of one of these, or a similar image editing program, by all means use it and experiment with it. Programs like Paint Shop Pro or Photoshop Elements (a cut-down version of Photoshop) are more reasonably priced. However, for the purposes of this book, we’ll look only at tools that are free to download and offer enough functionality to give you an idea of what’s possible.
Keep an eye open for free image editors that are included on disks attached to the covers of Internet, computing, and design magazines. Software vendors often give away older versions of their software in the hope that users might be tempted to upgrade to a new version at a later date. Look out for Paint Shop Pro, or any image editor that supports layers — a way to construct an image by stacking 2 or more layers, one on top of the other. While we’ll keep our image editing fairly simple throughout this book, it’s certainly worth keeping an eye open for free (and full-featured) image editing software, as these offers will not always be available.
Taking the Big Boys for a Spin
The most commonly used image editing packages are available for trial download. They are large downloads (hundreds of megabytes) and may need to be left to download overnight, even on a broadband connection.
These trial versions are typically available for 30 days’ use; after that time you can decide whether you want to pay for the full software or stop using the program. However, those 30 days might just be enough time for you to use the software while you work through this book.
Adobe Photoshop
A trial of the latest version of Photoshop is available for download. If you’d rather try the lighter Photoshop Elements, trial versions are available for Windows and Mac.
Adobe Fireworks
You can download a trial version of Fireworks from the Adobe web site.
Paint Shop Pro
Paint Shop Pro is available for Windows only. To download a trial version, visit the Paint Shop Pro site, and click the Free Trial link.
Windows Tools
A standard Windows install has not always been blessed with image editing software. Certainly this was the case with Windows XP (although if you bought the computer as a bundle with PC, scanner, or digital camera all together, you might be lucky and find some image editing software included in the deal; scout around in your Start > All Programs menu to see what you can uncover).
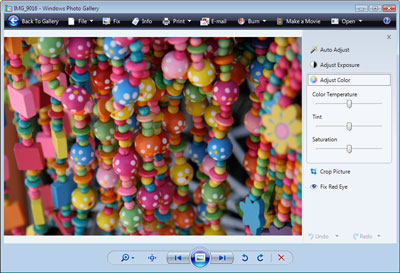
In Windows Vista, the Photo Gallery application has seen some big improvements over its previous XP incarnation and now includes some basic, but still useful, image manipulation tools, including cropping, color, and contrast adjustment. The Photo Gallery application can be found directly in the Start menu.
Picasa
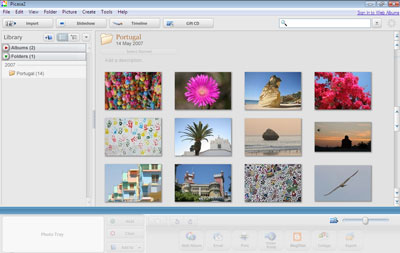
If you’re using Vista, the tools offered in Photo Gallery may do everything that you need; if you’re using XP, you’ll almost certainly need to use an extra application. With that in mind, you might like to try out an excellent image management tool that Google offers for free download. The program is called Picasa, and it’s extremely well equipped to handle most of the tasks that you’re likely to encounter as you manage imagery for your web site. Download a copy from the Picasa web site, and soon enough you’ll be using this program to crop, rotate, add special effects to, and catalog the images stored on your computer. The figure below gives you an idea of the program’s interface.
Mac OS X Tools
The Mac has a reputation for being favored by designers and creative types, and the platform makes many tools available to the budding artist. However, they usually come at a price, and often that price is higher than those of the Windows equivalents. So, what free software can we use on the Mac, assuming that we want something more permanent than a 30-day trial version of Photoshop or Fireworks?
GraphicConverter
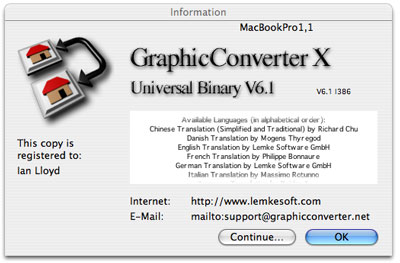
GraphicConverter has much greater capabilities than its name suggests. It’s been bundled with new Macs at times, and is also available for download (you’ll be encouraged to pay a modest registration fee for the software, but you can try it out for free). Although this is primarily a tool for converting graphic files, it can also be used for simple editing tasks. Using GraphicConverter, which is illustrated below, you’ll be able to crop, resize, rotate, and add text to any image.
iPhoto
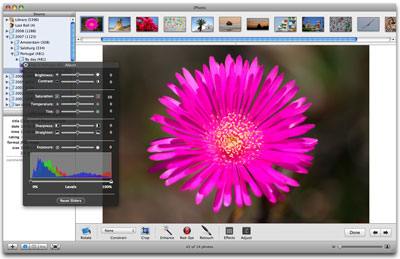
Also included with Mac OS X is a program that probably needs no introduction to the experienced Mac user: iPhoto. This excellent program is not intended to be a fully featured image editor; it’s really designed for managing and viewing large numbers of photos stored on a computer. It’s great for organizing photo albums, but iPhoto also has some very useful editing facilities that take it beyond a mere cataloging tool.
iPhoto, shown below, can be found in the Applications folder or in the dock.
Creating a Spot for Your Web Site
So far, we’ve looked at some of the tools that you’ll need to create your web site. We’ve looked at programs that are readily available, and where you can find them on your computer. And for cases in which the free tools that came with your computer are not up to the job, we’ve suggested other programs that you can download and use. The next task we must tick off our to-do list before we go any further is to create a space for your web site on the hard drive.
Windows
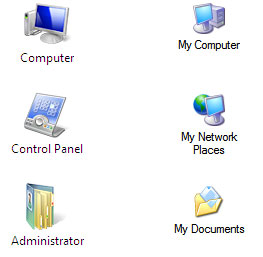
The easiest and most logical place to keep your web site files is in a dedicated folder within the Documents folder (or the My Documents folder in Windows XP). The Documents folder can be found inside your user folder. “But what’s this user folder?” I hear you cry. And a fair point too, because it won’t be labeled User but rather it will be labeled according to the user name that you provided when you first set up Windows. In Windows Vista you’ll find the user folders of all local computer account holders under C:Users (in Windows XP it’s under C:Documents and Settings) and will have a folder name matching your user name. More conveniently though, you’ll find it on your computer’s desktop as shown below.
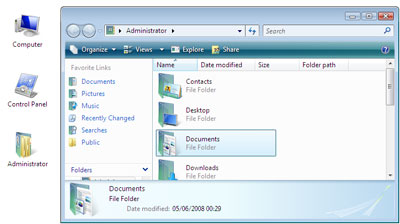
Don’t worry if your user folder is not on the desktop: it’s easy to get it to appear there (see the tip below for details on how to add this for Vista and XP). Double-click to open your user folder, then double-click on Documents, then finally create a new folder called Web by selecting File > New > Folder
Tip: Displaying the Users Folder in Vista and the My Documents Folder in Windows XP
Can’t find your user folder on your Vista desktop? Missing your My Documents folder in XP? In an effort to clean up your desktop, you may have removed the icon by accident — it’s easily done. This is how you can return the folder to your desktop:
- From the Start Menu, select Control Panel.
- Select Appearance and Personalization (or Appearance and Themes in XP).
- Vista users: choose Personalization and listed in the top left, under the title Tasks is the option to Change Desktop Icons. A new dialogue box will appear: check the option entitled User’s Files in the section Desktop Icons, then press OK. You may now also close the Appearance and Personalization window.
- XP users: select Change the desktop background from the list of options, then click the Customize Desktop… button at the bottom. Check the My Documents option in the dialogue box that appears, then click OK. Close the Appearance and Themes window also by pressing OK.
- Your user folder/My Documents folder should now be back on the desktop, as shown below.
Mac OS X
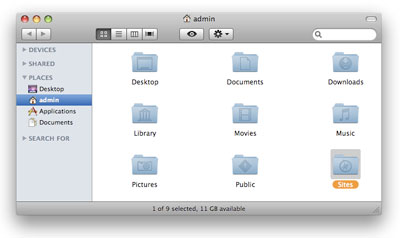
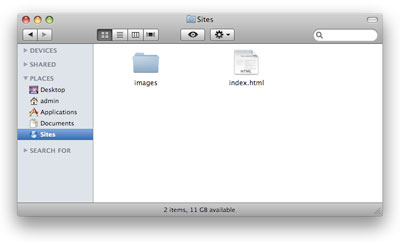
In Mac OS X, there’s already a handy place for you to store your web site files: the Sites folder shown below. Open your home directory (from Finder, select Go > Home), and there it is.
It’s easy to add the Sites folder to your sidebar for quick access: just drag the folder to the sidebar in the same way you add items to the dock.
Getting Help
Books may be a wonderful way to learn: you’re sitting there with a computer running, perhaps a cup of coffee keeping your mind ticking over, and a bookmark signifying your progress to date. Great. But what if you don’t understand something in the book? What do you do next? Shouting at the book won’t help, though there may be some therapeutic value to it!
Hopefully, you won’t find yourself with too many questions as you work through this book, but if you’re the curious type — or a quick learner — you might want to go beyond what we’re going to teach you here.
Whether you’re getting stuck or want to learn more, your first stop should be the SitePoint Forums. It will only take a few moments to register, and once you’ve done so you can log in and ask questions in a range of different forums. Whether you have questions about writing content for your web site, you need marketing tips, or you’re facing a few tricky graphic design issues, the hundreds of experts who contribute to and moderate these pages every day will be happy to help out.
Register at SitePoint’s forums today; then, when we recommend further reading or research, you’ll be good to go. Oh, and did we mention that all this friendly, helpful advice is free of charge? We thought that might encourage you!
Summary
Believe it or not, we’ve now got everything we need to build our own web site — and all without spending a cent! Not only do we have the basic tools — our text editor (Notepad or TextEdit) and our web browser (Internet Explorer or Safari) — but we’ve also looked at some alternatives to these.
We’ve reviewed some simple and freely available image editing programs that can help us spruce up our sites: Picasa for Windows, and GraphicConverter and iPhoto for Mac. Finally, we mentioned some more capable — and more expensive — options, such as Photoshop and Paint Shop Pro.
Now we’ve got the tools, let’s learn how to use them!


