Class Selectors
To date, we’ve discussed the ways in which we can style various elements, such as paragraphs and headings; we’ve also seen how we can style elements in specific areas of the page using the id attribute. However, implementing broad-brush styles, such as coloring the text in all p elements navy, is very much a blanket approach to design. What if you want some of those paragraphs (or any elements, for that matter) to look a little different than the rest? Class selectors are the answer.
A class selector lets you define a style that can be used over and over again to style many different elements. So, for example, let’s say you wanted to make some parts of your text stand out — to make them look slightly more appealing or fun than other parts of the document.
You could do so in your CSS like this:
.fun {
color: #339999;
font-family: Georgia, Times, serif;
letter-spacing: 0.05em;
}
Here, we’ve created a style rule for a class called “fun.” The fact that it’s a class selector is denoted by the period at the beginning of the class name. We’ve slipped another property into this rule: letter-spacing defines the space between each of the letters. We’ve set a spacing of 0.05em here. 1em is the height of the M character in any font, so 0.05em is 5% of that height. It doesn’t sound like much of a difference, but when it comes to typography, subtle changes are usually more effective than extreme modifications.
In order to make use of the style once it has been added to your style sheet, all you need to do is add the class="fun" attribute to an element:
<p class=”fun”>A man walks into a bar; you would’ve thought he’d
see it coming!</p>
Let’s apply some classes to our project site. First, we’ll need to add the style rule shown above to the style sheet we’re working on:
- Open
style1.cssand add the CSS from the above block to the bottom of that file. - Save
style1.css, then openabout.html. - Find the paragraph that’s contained inside the
blockquoteelement. - Add the
class="fun"attribute to the paragraph’s opening tag.
This is how your markup should look right now:
about.html (excerpt)
<blockquote>
<p class=”fun”>”Happiness is a dip in the ocean followed by a
pint or two of Old Speckled Hen. You can quote me on
that!”</p>
</blockquote>
Note that the class attribute was applied at the paragraph level. If there were a few paragraphs in our man Bob’s quotation, it could look like this:
<blockquote>
<p class=”fun”>”Happiness is a dip in the ocean followed by a
pint or two of Old Speckled Hen. You can quote me
on that!</p>
<p class=”fun”>”Join us for a weekend away at some of our
favorite dive spots and you’ll soon be making new
friends.</p>
<p class=”fun”>”Anyway, about time I got on with some
<em>proper</em> work!”</p>
</blockquote>
There’s a lot of repetition in there. Surely there’s a tidier way to apply this style? There sure is:
<blockquote class=”fun”>
<p>”Happiness is a dip in the ocean followed by a pint or two of
Old Speckled Hen. You can quote me on that!</p>
<p>”Join us for a weekend away at some of our favorite dive
spots and you’ll soon be making new friends.</p>
<p>”Anyway, about time I got on with some <em>proper</em>
work!”</p>
</blockquote>
In this example, we apply that class of fun to the blockquote element, so everything contained in that element inherits the style of the parent container. This saves us from having to apply these different classes all over our pages (an affliction that has become known as class-itis — a not-too-distant relation of div-itis, which we discussed earlier).
Tip: class vs id
So far, we’ve looked at both class selectors (which involve periods: “.” ) and id selectors (which involve pound or hash signs: “#”). Are you confused by them? It’s true that these selectors are similar, but there is one important difference: a specific id can only be applied to one XHTML element. So, for example, on any web page, there can only be one element with an id of mainnavigation, and only one with an id of header. A class, on the other hand, can appear as many times as required.
Tip: Limiting Classes to Specific Elements
Imagine you want to italicise any blockquote element that has a class attribute with the value fun, but not other elements with that class value. Think it sounds tricky? Not with CSS! Take a look:
.fun {
font-family: Georgia, Times, serif;
color: #339999;
letter-spacing: 0.05em;
}
blockquote.fun {
font-style: italic;
}
Now, any text inside a pair of <blockquote class="fun"> and </blockquote> tags will appear in italics.
By prefixing our normal class selector with an element name, we’re telling the browser to apply the following declarations to that element-and-class combination only. It’s as simple as element.class
Tip: Specifically Speaking
Those with an eagle eye will have noticed that not all of the fun styles in the previous example are actually applied to the quotation. The font-family and letter-spacing declarations take effect, but the color change does not! The reason for this can be explained with the concept of specificity.
Specificity simply means the rule that is the most specific is the one that is applied. Determining which rule is the most specific is a little bit complex, but understandable. In our style sheet, the specificity is easy to determine: the .fun rule is applied to the blockquote element and properties are inherited by the p elements, but property values are only inherited in the absence of any other declaration. We have another color declaration in our project site — the one that we created at the start of the chapter that states that all paragraphs should be navy-colored:
p {
color: navy;
}
The rule with the element selector p has a greater specificity for the p elements because the selector specifically targets p elements, whereas the .fun rule does not. Imagine if, however, we added another rule like this:
.fun p {
color: green;
}
The effect would be this: all paragraph text would be navy, except for the paragraphs inside elements with the class fun, which would be green. This is because the .fun p selector is more specific for those paragraphs. Note that, unlike the conflicting rules we encountered in the section called “Which Rule Wins?”, this battle between style rules has no relation to the order in which they appear in the style sheet.
Specificity can be confusing, so don’t lose too much sleep over it — for now, it’s enough just to be aware of the concept, as this may be the reason why one of your styles doesn’t take effect when you’re convinced it should. Specificity is covered in great depth in the SitePoint CSS Reference if you’d like to explore it further.
Styling Partial Text Using span
So, a class can be applied in many different places — perhaps to a specific paragraph, or to a block of several paragraphs contained in a blockquote, or to a div that holds many different types of content. But what would you do if you wanted to apply the style to a very small section of text — maybe just a couple of words, or even just a couple of letters, within a paragraph? For this, once again, you can use the span element.
Earlier in this chapter I showed how you could use the span element in conjunction with inline styles to pick out and style specific words within a paragraph. The exact same technique can be used with classes: we simply place an opening <span> tag at the point at which we want the styling to begin, and the closing </span> tag at the point at which the styling should end. The advantage of this technique over the inline style demonstrated earlier is, of course, that with this technique, the style is defined in a single location, so you could potentially add the “fun” class to many different elements on many different pages with a minimum of hassle. When you decide that you want to have a different kind of fun (so to speak), you need only change your style sheet (style1.css) for that new style to be reflected across your site:
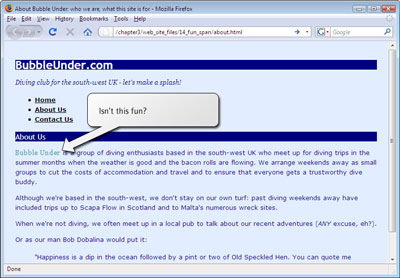
<p><span class=”fun”>Bubble Under</span> is a group of diving
enthusiasts based in the south-west UK who meet up for diving
trips in the summer months when the weather is good and the
bacon rolls are flowing. We arrange weekends away as small
groups to cut the costs of accommodation and travel and to
ensure that everyone gets a trustworthy dive buddy.</p>
Try applying the span element to your “About Us” page as suggested in the above XHTML code. If you save the changes and check them in your browser (remember to hit Reload), your page should look like the one shown below.
Note: Don’t Throw (Needless) spans into the Works
The span element is nearly always used with a class attribute. There’s not normally a good reason to apply a span element to your XHTML on its own, although you may see some web sites that do.
Before you apply a span to any given element on your web page, take a moment to think about whether there’s another element that’s better suited to the task. For example, it’s advisable not to do this:
<p>Do it <span class=”shouty”>now</span>!</p>
A more appropriate choice would be to use the strong element:
<p>Do it <strong>now</strong>!</p>
Think of the meaning of what you’re writing, and aim for an XHTML element that suits the purpose. Other examples might be em, cite, and blockquote.
Summary
It’s been another busy chapter, but my, how our site’s blossoming! A chapter or two ago, we hadn’t even built a web page, but now we’re at the stage where we know how to apply a (virtual) lick of paint to any type of XHTML element on a page, to a specific section of a web page depending on its id, or to arbitrary portions of a page — sometimes in several different places — using class selectors.
The web site is starting to look a little more colorful, but the layout is still fairly basic. In the next chapter, we’ll look at how it’s possible to change the layout of elements on a page — their position, shape, size, and more — using CSS.
Styling text? Been there, done that. Let’s move to the next level! For that, you’ll need your own copy of Build Your Own Web Site The Right Way Using HTML & CSS. After the next chapter, on CSS, we explore the tasks of using images on your web site, the appropriate use of tables, building forms that promote user interaction, publishing your site to the Web, adding a blog to your site, and hooking up to ready-made tools like statistics packages, search functions, and discussion forums that you can apply to your site. As I mentioned, the book comes with a complete code archive, so you can apply the files we use in the book straight into your own sites (makes life easy, eh?).
Check out the book’s Table of Contents for the specifics. I look forward to seeing your site on the Web soon!
 Ian Lloyd