
This article was originally published on Alibaba Cloud. Thank you for supporting the partners who make SitePoint possible.
Joomla! is a free and open source content management system (CMS), and is one of the most popular among them. According to the official website, Joomla! is built on a model-view-controller web application framework that can be used independently of the CMS, allowing you to build powerful online applications.
One of my personal favorite features of Joomla! is the multi-language support with its large library of language packs. You can also translate the website admin backend with language extensions, helping you to easily localize your website.
This step-by-step guide will walk you through setting up and deploying a Joomla! website on an Alibaba Cloud Elastic Compute Service (ECS) instance with Ubuntu 16.04.
Requirements and Prerequisites
Before we deploy our Joomla! instance, we need to fulfill the following requirements. We need to set up an Alibaba Cloud Elastic Compute Service (ECS) Linux server (Ubuntu 16.04) with basic configurations. You should also allocate administrator (sudo) privileges to a non-root user.
You can refer to this guide for setting up your Alibaba Cloud ECS instance. If you don’t have an Alibaba Cloud account, you can sign up for free and enjoy $300 of Free Trial credit.
Installing Joomla on an Ubuntu 16.04 ECS Instance
To install Joomla on our server, we need to first install a LAMP (Linux, Apache, MySQL, PHP) stack.
Step 1: Connect to Your Server
There are many ways to connect to your server, but I will be using the Alibaba Cloud console for simplicity. To do this, go to your instance section and click connect from your created instance. You will be redirected to the Terminal.
Enter username as Root and the password you created. If you didn’t create a password, just continue by hitting enter. You are logged in to your server as system administrator.
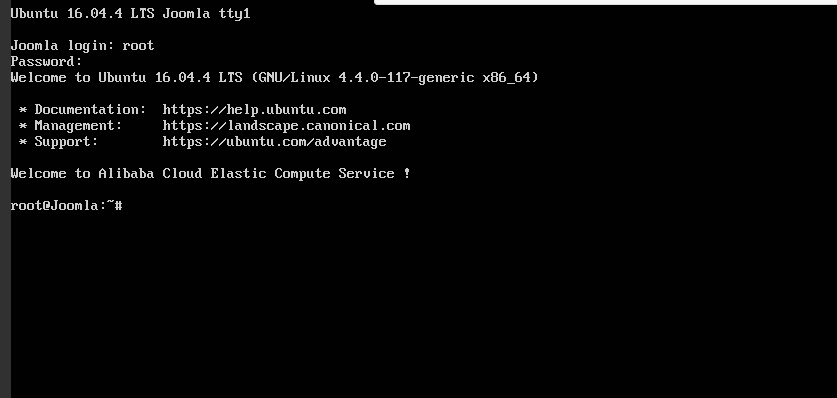
All the commands in the following sections should be typed in this terminal.
Step 2: Install Apache
To install Apache, update your server repository list by typing command below.
sudo apt-get update
Then install the Apache web server.
sudo apt-get install apache2
Step 3: Install MySQL
Joomla, like most other content management systems, requires MySQL for its backend. So we need to install MySQL and link it to PHP.
To do this, add the following command.
sudo apt-get install mysql-server php7.0-mysql
You’ll be asked to enter a MySQL password. Keep the password secure because you will need it later.
Complete the installation process of MySQL with the command below.
/usr/bin/mysql_secure_installation
You’ll be asked to enter the MySQL password you just created. Continue with the installation process by making the following selections.
Would you like to setup VALIDATE password plugin ? [Y/N] N
Change the root password ? [ Y/N ] N
Remove anonymous users ? [Y/N] Y
Disallow root login remotely ? [Y/N] Y
Remove test database and access to it ? [Y/N] Y
Reload privilege tables now ? [Y/N] Y
Step 4: Install PHP
Joomla! requires PHP to be installed. Execute the following command to install PHP 7.0 and other required PHP modules.
sudo apt-get install php7.0 libapache2-mod-php7.0 php7.0-mcrypt php7.0-xml php7.0-curl php7.0-json php7.0-cgi
Step 5: Confirm LAMP Installation
To confirm LAMP stack has been installed on your Ubuntu 16.04 server, follow the procedures below.
Open the web browser and navigate to your server’s IP address. You’ll see the Apache2 Ubuntu Default page.
Note: To check your server’s public IP address, check your ECS Instance dashboard. You’ll see both private and public IP addresses. Use the public IP address to access your website. If you don’t see the public IP address consider setting up an Elastic IP address.
In order to confirm the PHP installation on your server, remove the default page and replace it with the PHP code below. To do this use the commands below.
rm /var/www/html/index.html
Replace with a new file:
touch /var/www/html/index.php
nano /var/www/html/index.php
Enter a sample PHP code below:
<?php
phpinfo();
?>
To check your page, navigate to your web browser and enter the public IP address. You should see information about PHP installation if the LAMP stack is correctly installed on your server.
Now remove the index.php file using commands below:
rm /var/www//html/index.php
Step 6: Install and Configure Joomla! on ECS
We are almost done. In this step we will be installing Joomla!.
Before downloading and installing Joomla!, we need to open the Apache web server’s root directory.
cd /var/www/html
Then, download the Joomla! installation file.
wget [https://downloads.joomla.org/cms/joomla3/3-7.5-Stable-Full-Package.zip](https://downloads.joomla.org/cms/joomla3/3-7.5-Stable-Full-Package.zip)
Make sure the version you installed is the latest version.
To unzip the downloaded archive, install unzip.
sudo apt-get install unzip
Unzip the downloaded Joomla Zip file:
unzip Joomla_3-7.5-Stable-Full_Package.zip
If you can’t unzip the .tar.gz file, use the following command:
tar -xvzf Joomla_3-7.5-Stable-Full_Package.tar.gz
Next, activate the .htaccess file by renaming it.
mv htaccess.txt .htacess
Then set the appropriate file permissions:
chown -R www-data /var/www/html
chmod -R 755/var/www/html
Step 7: Create a MySQL Database and User for Joomla!
Joomla! makes use of relational databases to store and manage sites and user data. In this tutorial, we will use MySQL on our ECS instance. However, for production purposes, I recommend using Alibaba Cloud Apsara DB for increased security and reliability.
Since we have installed MySQL before, we just need to create a database and user for Joomla. To do this, log in to your MySQL account using the command below.
mysql -u root -p
You’ll be prompted to enter the MySQL password you created above. After successfully logging in, you’ll be taken to the MySQL shell.
Let’s now create a database for Joomla!. You can name it anything you like. In my command below, I have used “joomla”.
mysql > CREATE DATABASE joomla ;
Remember that every command in MySQL ends with a terminator semicolon (;). Create a new user and grant it permission to the database. You can replace “user” and “password” with the username and password of your choice.
mysql>GRANT ALL PRIVILEGES on joomla.* to ‘ user'@ ‘locahost' identified by ‘password';
Now, flush the privileges so that the current MySQL instance is aware of the recent privilege changes that we have made. Enter the command below.
mysql>FLUSH PRIVILEGES ;
Exit from MySQL shell with this command:
msql>exit;
Now you should be back to your server terminal.
Step 8: Complete the Installation Process through Web Interface
First, we need to restart the Apache Web server. Enter the following commands to do that:
systemct1 restart apache2
Open your web browser and navigate to your server’s public IP address. You’ll see the Joomla! web interface. Continue with the installation process.
Enter your MySQL username, password, and database in the Database Configuration section. In our case, this looks like:
Database Type : MySQL
Host Name : localhost
Username : user
Password : password
Database Name : joomla
Table Prefix : joomla_
Old Database Process : Remove .
Fill out the remaining required information until you finish the installation process. That’s it!
Final Thoughts
As mentioned previously, if you’re planning to deploy a Joomla website for production, I would recommend using Alibaba Cloud ApsaraDB for RDS. Alibaba Cloud ApsaraDB for RDS (Relational Database Service) is an on-demand database service that will free you up from the administrative task of managing a database. This leaves you with more time to focus on your core business.
Frequently Asked Questions about Deploying and Hosting a Joomla Website on Alibaba Cloud ECS
What is Alibaba Cloud ECS and why should I use it for my Joomla website?
Alibaba Cloud Elastic Compute Service (ECS) is a high-performance, stable, reliable, and scalable IaaS-level service provided by Alibaba Cloud. It provides virtual servers in the cloud and allows you to have complete control over your instances. You can use it to deploy and host your Joomla website because it offers a secure and cost-effective way to run your applications in the cloud. It also provides a variety of instance types to meet your diverse needs.
How can I deploy my Joomla website on Alibaba Cloud ECS?
Deploying your Joomla website on Alibaba Cloud ECS involves several steps. First, you need to create an ECS instance and configure the security group rules. Then, you need to connect to the instance and install a web server, PHP, and MySQL. After that, you can download and install Joomla. Finally, you need to configure your Joomla website and connect it to the database.
What are the benefits of hosting my Joomla website on Alibaba Cloud ECS?
Hosting your Joomla website on Alibaba Cloud ECS offers several benefits. It provides high performance, stability, and scalability. It also offers a secure environment for your website, protecting it from common web threats. Moreover, it allows you to manage your resources effectively and reduce your IT costs.
How can I secure my Joomla website on Alibaba Cloud ECS?
You can secure your Joomla website on Alibaba Cloud ECS by configuring the security group rules and using a firewall. You should also keep your Joomla, PHP, and MySQL versions up-to-date to protect your website from vulnerabilities. Additionally, you should use strong passwords and regularly backup your website.
Can I scale my Joomla website on Alibaba Cloud ECS?
Yes, you can scale your Joomla website on Alibaba Cloud ECS. It provides auto scaling, which allows you to automatically adjust your resources based on your website’s traffic. This ensures that your website can handle peak traffic periods without any performance issues.
What is the cost of hosting my Joomla website on Alibaba Cloud ECS?
The cost of hosting your Joomla website on Alibaba Cloud ECS depends on the instance type you choose and the region where your instance is located. You can check the pricing details on the Alibaba Cloud website.
How can I manage my Joomla website on Alibaba Cloud ECS?
You can manage your Joomla website on Alibaba Cloud ECS through the ECS console. It allows you to monitor your instance, manage your resources, and perform various operations such as starting, stopping, and restarting your instance.
Can I migrate my existing Joomla website to Alibaba Cloud ECS?
Yes, you can migrate your existing Joomla website to Alibaba Cloud ECS. You need to backup your website and database, create an ECS instance, install a web server, PHP, and MySQL, restore your website and database, and then update your DNS records.
What support does Alibaba Cloud offer for Joomla websites?
Alibaba Cloud offers comprehensive support for Joomla websites. It provides detailed documentation, tutorials, and a community forum where you can ask questions and share your experiences. It also offers 24/7 technical support to help you resolve any issues.
How reliable is Alibaba Cloud ECS for hosting Joomla websites?
Alibaba Cloud ECS is highly reliable for hosting Joomla websites. It provides a 99.975% availability guarantee and uses multiple redundancy mechanisms to ensure the stability and reliability of your website. It also offers data backup and disaster recovery solutions to protect your data.
 Martin Tumusiime
Martin Tumusiime is an Alibaba Cloud Tech Share Author.