Key Takeaways
- Understand the Interface: Familiarize yourself with Photoshop’s interface, including the main menu, options bar, and toolbox to navigate and utilize the software efficiently.
- Learn Key Terms: Acquaint yourself with common Photoshop terminology such as panels, document windows, and dialog boxes to follow tutorials and guides more effectively.
- Customize Your Workspace: Utilize Photoshop’s workspaces feature to arrange your panels and save your setup, enhancing workflow and efficiency.
- Document Setup: Know how to create new documents with desired dimensions, resolution, and color modes, which are crucial for different project requirements.
- Master Layers and Tools: Gain proficiency in using layers for complex edits and explore the wide array of tools for tasks like selection, cropping, and retouching.
- Practice Common Tasks: Engage in common Photoshop tasks such as masking, using the quick selection tool, and applying filters to build competence in image editing and enhancement.
Getting Started With Photoshop
It doesn’t matter if you are new to the world of graphic design, or you are a photographer and you want to enhance your photos, you will eventually encounter the need to use Adobe Photoshop. Remembering when I first started out, I recall how intimidated I was at all of the menus and features available. I wondered how I would ever begin to know how to work my way through Photoshop and create professional quality, eye-dazzling work. Years later, I use Photoshop on a daily basis, and my actions are more like reflexes and I can complete most tasks without a second thought. I won’t lie to you. You won’t be able to go from getting started, to pro overnight, but you can take comfort in knowing that everyone has to start somewhere.
Getting to Know Your Way Around Photoshop
It is good to have a general idea of where everything is, so that you can work your way around the Photoshop interface. To get started, I will list some terminology, and where you can find it in Photoshop.
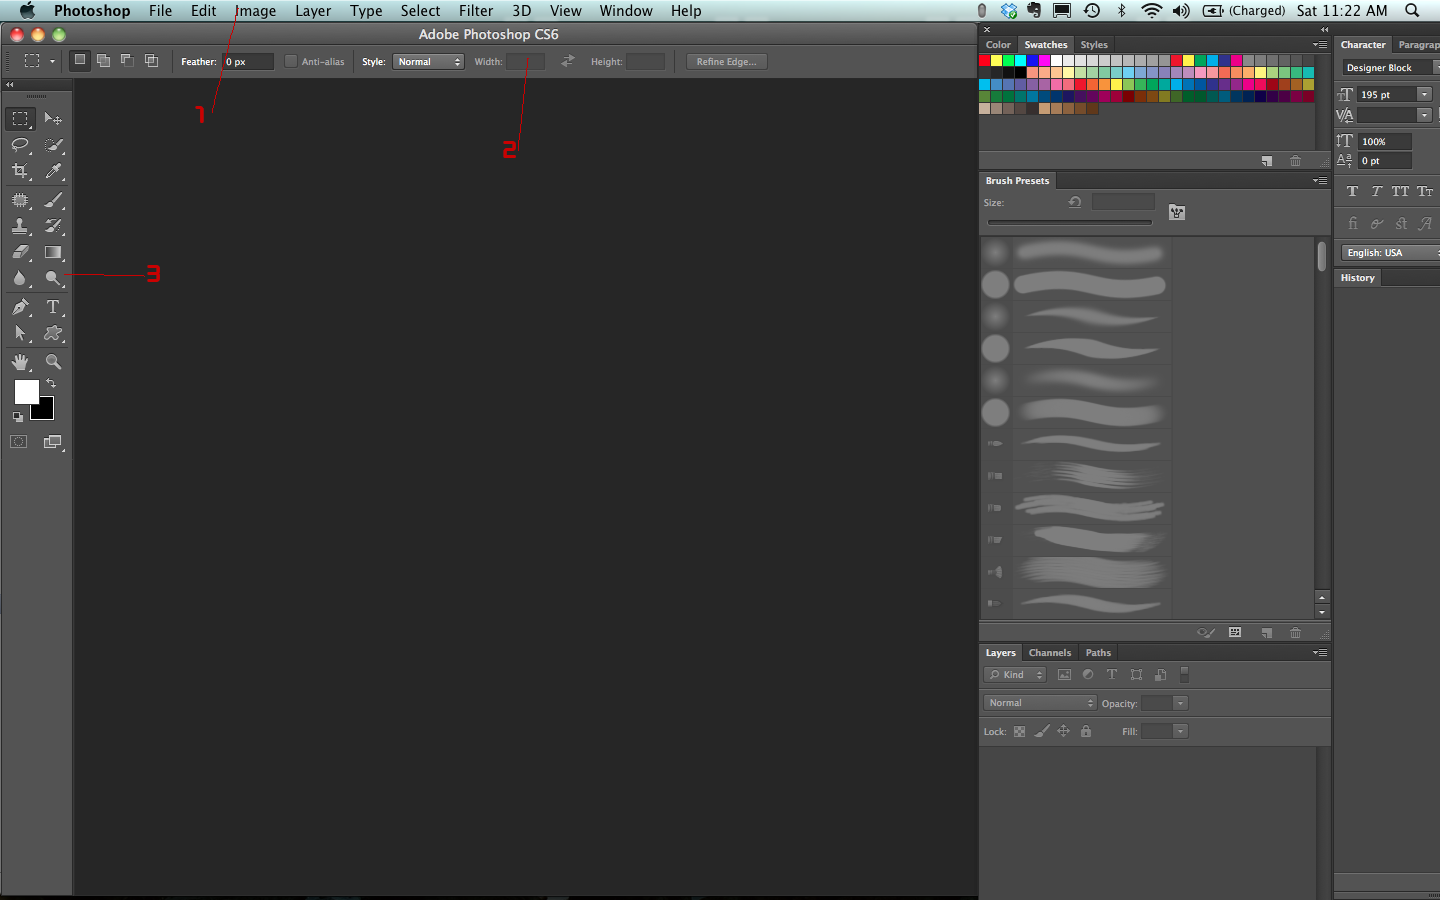
1. Main Menu
This is where your Options, Image Adjustments and Filters are. When you run filters in Photoshop, they will be found in this section under the Filters Menu.
2. Options Bar
This menu is most used when you have a tool selected. It allows you to adjust settings that are specified for the active tool.
2. Toolbox
By default, this sits on the left side of your screen and contains all of the different tools that are available in the program. If a tool contains a black triangle in the bottom-right corner, then there are other tools related to that one stored in a sub menu. All you have to do is click and hold your mouse over that tool to reveal the submenu.
Terms That You May Hear When Learning Photoshop
When learning Photoshop, you may be watching video tutorials, reading a book, or reading a blog tutorial online about how to do something in Photoshop. Most writers have an assumption that the reader has a general idea of the basic terminology involved with using Photoshop.
Panels
This refers to each window inside of Photoshop, which contains controls over different aspects of your document. Good examples would be the Color Panel, the Layers Panel, the Paths Panel, and anything else besides the toolbox that is open alongside your actual Photoshop document. What is great about Panels is that you can arrange them however you desire. You can dock any panel with another set of panels, so that you can consolidate your workspace. This is especially handy for people who are working on a laptop or a smaller monitor. All you have to do is click and drag the title tab of any panel over another panel. The bottom panel will outline in blue, letting you know that you can dock this panel with another set. Release your mouse, and now you will have multiple panels in one small window.
A good rule of thumb is to dock alike items. I tend to dock Swatches, Color, Styles and Kuler together. Then, I dock Layers, Channels, and Paths together. I also dock brushes and brush presets together, and I dock the Character and Paragraph panels together.
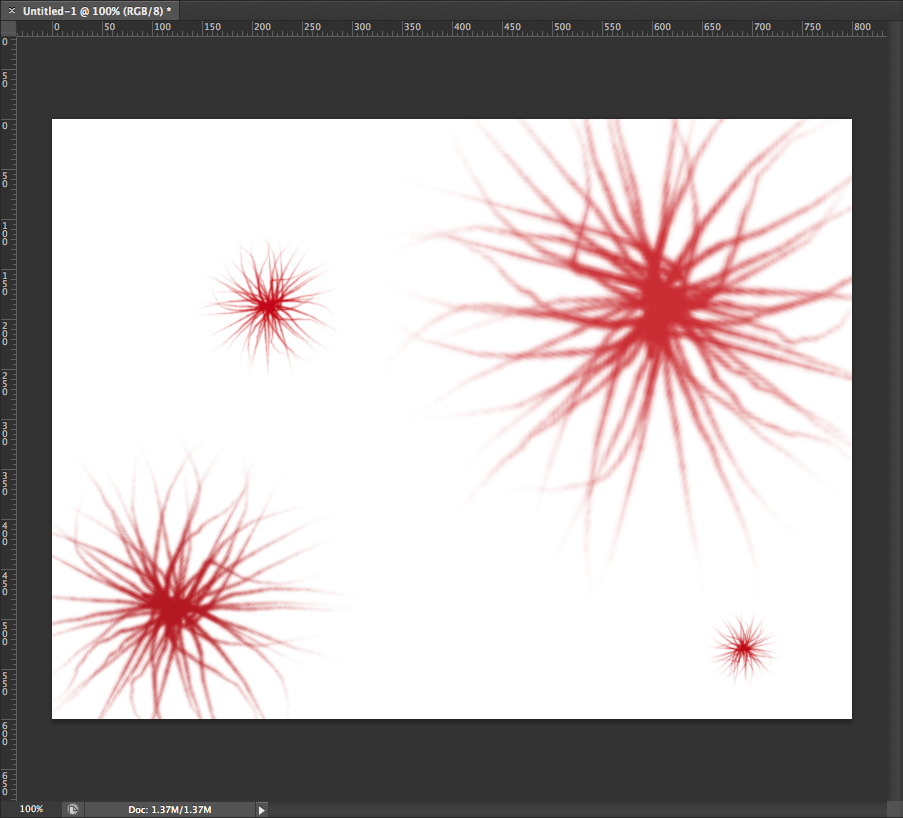
Document Window
This is the actual image or file that you are working on in Photoshop. This also refers to any other open document inside of Photoshop. You can have multiple images open in Photoshop at once.
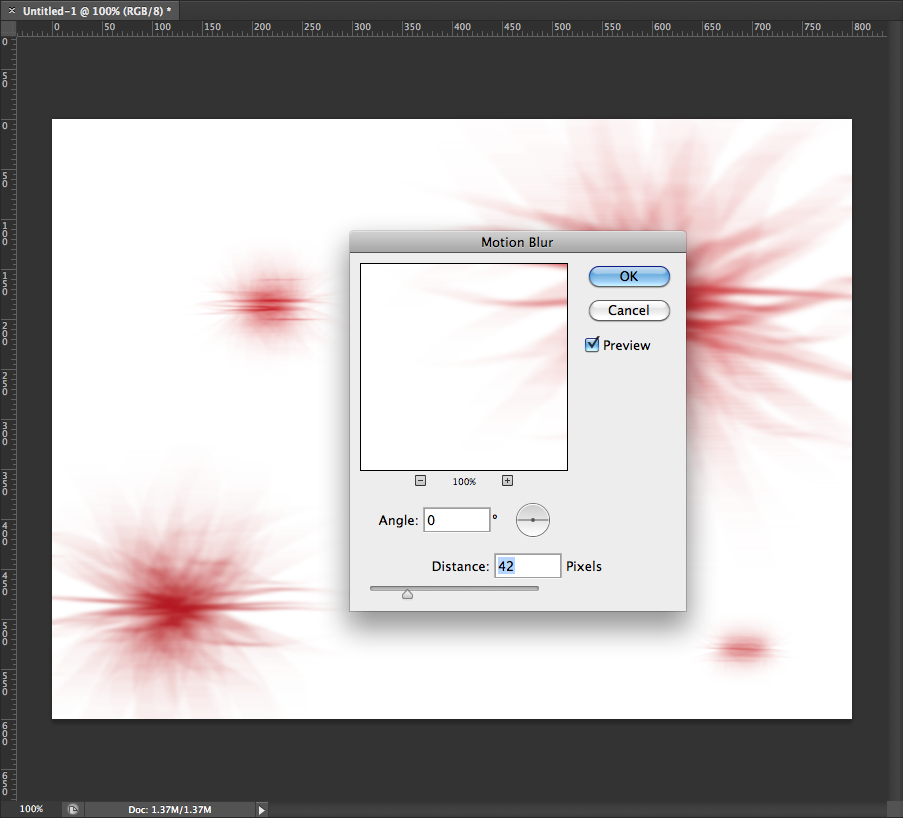
Dialog Box
This refers to a popup box that opens when you select choose to use a filter, or certain options in Photoshop. Dialog boxes usually contain options and settings for the filter or action that you just selected.
Get Comfortable With Your Surroundings
Adobe loves to make it easy to set things up how you like it. They have integrated a feature called workspaces. Workspaces allow you to set up your Photoshop panels how you like them. You can arrange your workspace exactly how you like it and save it for later as a preset.
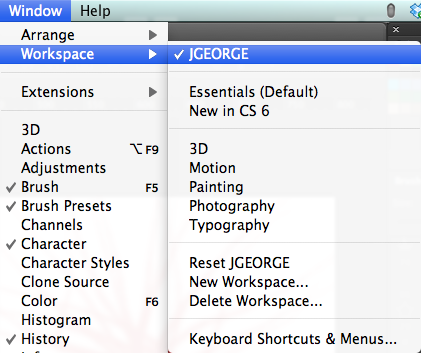
Photoshop already comes with workspace presets that are geared towards different professionals. The presets are Essentials, Design, Painting, Photography, 3D, Motion, and New in CS5. You can save your own presets easily. Simply arrange your panels and workspace exactly how you’d like it. You can close certain panels that you don’t use frequently, and if there are panels that you want to be active, but you don’t see them, you can make them visible quickly. Simply go to Window> and then select the panel that you want to make visible. Once you have everything how you like it, click the double arrow next to your list of workspaces, and select New Workspace.
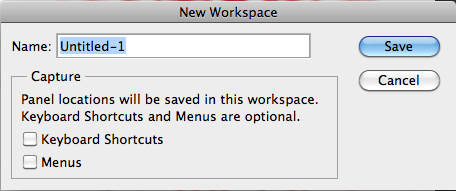
A dialog box will pop up, allow you to name your workspace so that you can activate it later. You will also have the option to remember your keyboard shortcuts and your menu setup as well. This enables you to have the ultimate flexibility you need, and you can switch workspaces with a simple click of a button. This speeds up your workflow, and saves you time, because you aren’t constantly opening and closing panels, moving them, rearranging them, etc.
New Documents
Simply go to File> New to open a blank document. A dialog box will come up with several options. You can choose a custom file size, resolution and the color mode for your document. If you are brand new to the world of Photoshop, then you will want to know what these are, and what they mean.
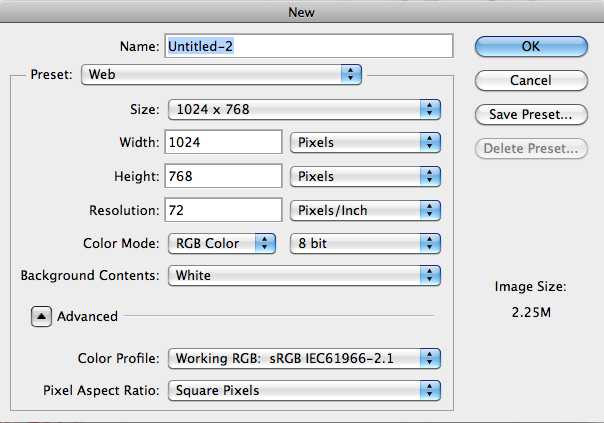
Width and Height
The width and height of your document are important. You can select whether you work in inches, pixels, centimeters, millimeters, points, picas or columns. A pixel is the smallest block of color information that makes up an image. You would most likely choose pixels if you are designing for the web, because dimensions are set in pixels. Inches will be useful in print design, because you are referring to the physical size of the document.
Centimeters, millimeters, points, and picas are also used for print, but aren’t as widely used anymore.
Resolution
The resolution of your document is as equally important as the size. Work that you do for the web is usually done in 72ppi or pixels per inch. This is the resolution in which most monitors display their images. If you are designing your work for print purposes, such as commercial photography, or anything that you want to print, such as photos, business cards, flyers, and brochures, then you will want to choose 300ppi. This is denser and gives a sharper image.
Color Mode
Your color mode is important, because just as in resolution, your color mode will depend on your intended outcome. The most commonly used color modes are RGB and CMYK. Lab Color, Bitmap and Grayscale are the other options for color modes. LAB mode is used for a lot of professional color correction, and you can do some things in this color mode that are harder to do in other modes. This is usually for more advanced users that understand Photoshop well already, because LAB color mode is a completely different animal.
RGB
RGB Color Mode is made up of 3 color channels- red, green and blue. RGB is mainly used for web design and for screen or monitor purposes. Monitor colors are made up of red, green and blue light in order to display images, so RGB mode is most suitable and true-to-life to work with. It is good to keep in mind that all monitors are different though. One monitor may display blue slightly different than the next monitor, and both of those could be different than the next in line.
CMYK
CMYK mode is used mainly for print. CMYK stands for Cyan, Magenta, Yellow and Black. These are the colors of ink that make up an image in most conventional printers. You will find it interesting that the different combinations of Cyan, Magenta, and Yellow will make red, green and blue. When designing in Photoshop, it is important to keep in mind that an image in CMYK mode won’t look exactly the same printed as they do on a monitor. Designers have been battling this issue for years. There are color calibration tools that high-end professionals use, but it is still a good idea to use something called a proof.
A proof is a printed sample of the image or design that you want to have printed. You compare this to your intended work on the monitor, and you make adjustments to your design based on the outcome of the proof. Your design may look perfect on your computer, but when it is printed, it is more yellow than it is supposed to be. Before the final print is approved, you would adjust your colors to compensate for the extra yellow, and you might even order a second proof.
Some printers charge for hard copy proofs of your work, which some might argue isn’t worth the extra expense. It really depends on your project, because you might order 10,000 copies, and if they are all ruined, then you have to absorb the costs, or you could spend the extra $10 and be on the safe side.
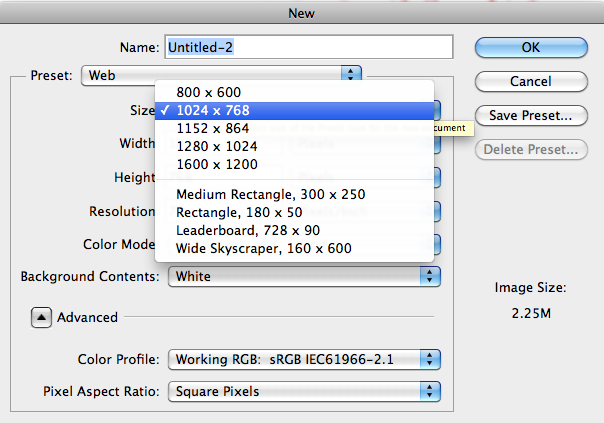
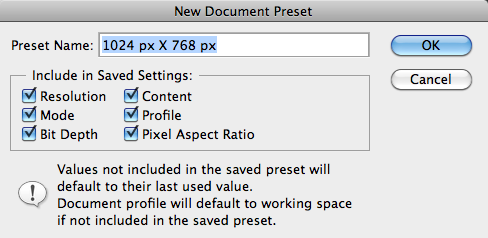
New document Presets
Other than resolution and color modes, Photoshop makes life easier, and incorporates document presets, so you don’t have to remember dimensions for all of your documents. A good example would be if you make a lot of mockups of tablet screens, and you didn’t want to have to remember the dimensions of an ipad screen, a Samsung Galaxy, an ipod touch, and a dozen other devices. You could dial in the dimensions once, and save them as a preset. Photoshop already incorporates some presets out of the box, such as paper sizes, and normal web site sizes.
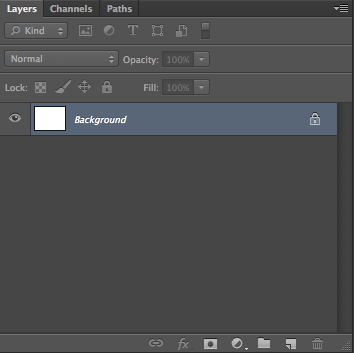
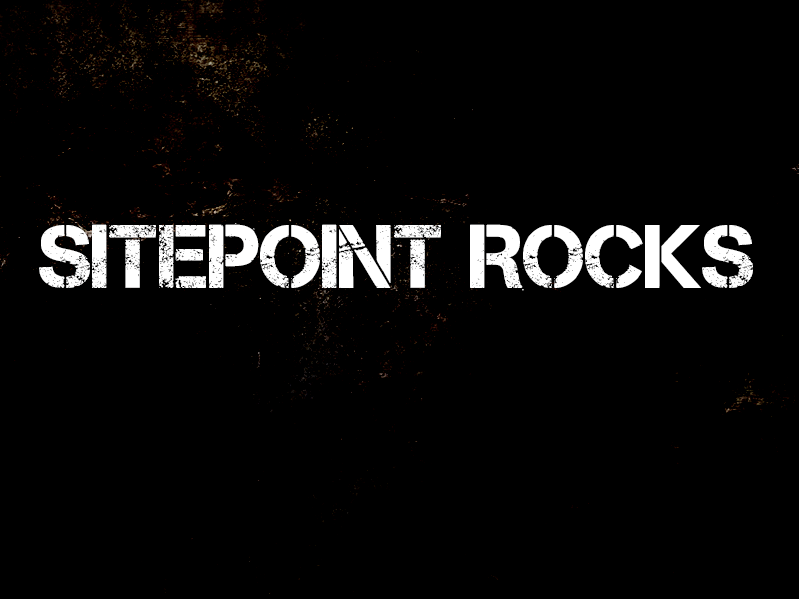
Layers
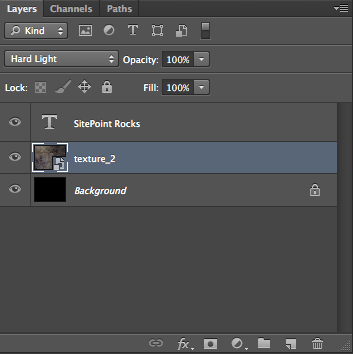
One of the most important aspects of Photoshop is the feature called Layers. Layers is where you can stack images on top of each other, blend images together, add color, take it away, merge layers together and much more. In the example below, the document is made up of 3 layers: the black background layer, the middle texture layer set to the blend mode of hard light and then the type layer on top. How layers stack will greatly determine the look of your work.
Shortcuts
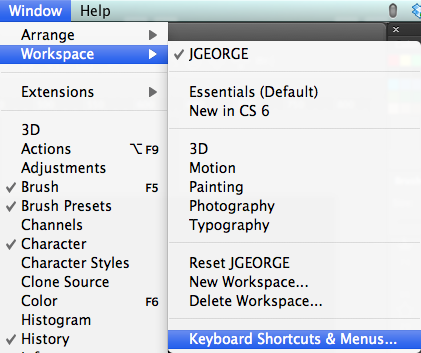
To make a new layer, hit Command/Ctrl +N to create a new layer. Personally, I use the Layers Panel, and there are keys that you can hit to save time and make life much easier. To create a new layer below the active layer, hold down the command/ctrl key when you click the new layer icon. You can create your own custom keyboard shortcuts by going to Window> Workspace> Keyboard SHortcuts & Menus.
Opacity
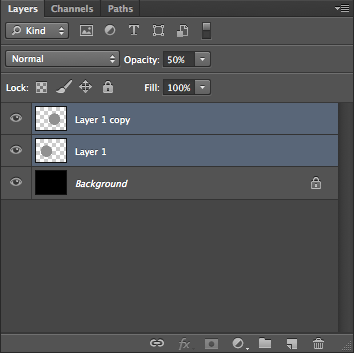
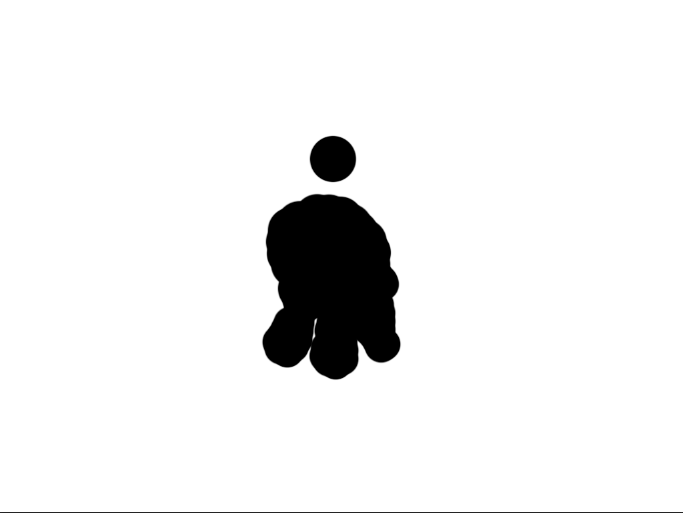
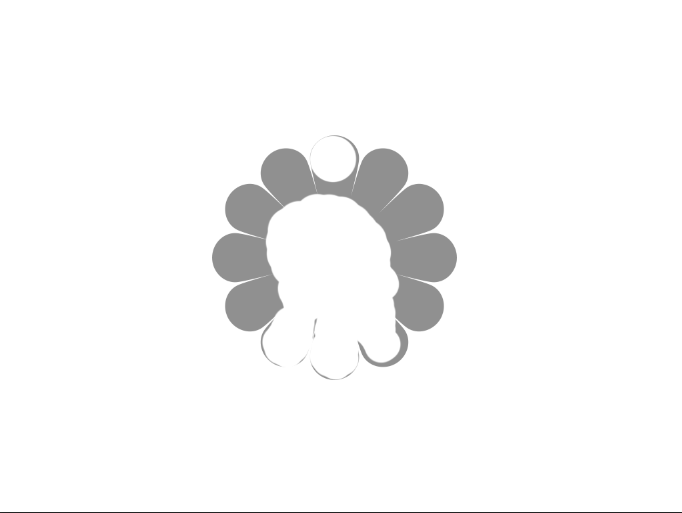
The opacity of a layer refers to how much you can see through it. 0% opacity means you can see right through it. 50% opacity means that it is 50% transparent. 100% opacity means that you can’t see through it at all. To lower a specific layer’s opacity, simply type the number of the opacity that you would like. For example, if you want 30% opacity for the selected layer, tap the 3 key. You can do this as much as you’d like. You can make a layer have double-digit opacity, by quickly tapping both numbers. For example, if you wanted a layer to have an opacity of 45%, you would quickly tap 4-5. In the example below, both circles are on their own layer and are set to 50% opacity.

To select multiple layers in order, hold shift and click the layers that you would like. If you want to select specific layers, hold down command/ctrl and click each layer. When multiple layers are selected you can move the contents of all of those layers at once. They are considered connected unless they are unselected.
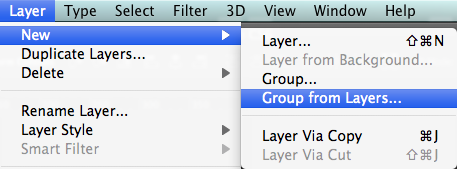
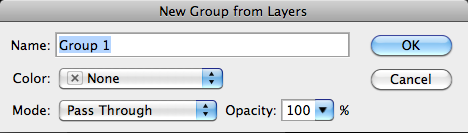
A great way to organize your layers is to group them together. With multiple layers selected, go to Layer> New> Group From Layers. You can name this group anything you want, and all of those layers will be in this folder. You can click the triangle next to the folder to expand its contents. You can move a whole group of layers at once by selecting the group layer with the folder icon. You can also link layers by clicking the link icon at the bottom of the Layers Panel. When layers are linked together, they will move together in unison.
You can stack layers upon layers on top of each other. Sometimes, when you are done processing multiple layers, it might help to consolidate them. This is called merging layers. You can do this by selecting multiple layers and hitting the command/ctrl + the E key.
To duplicate a layer, hit command/ctrl+ J.
Tools
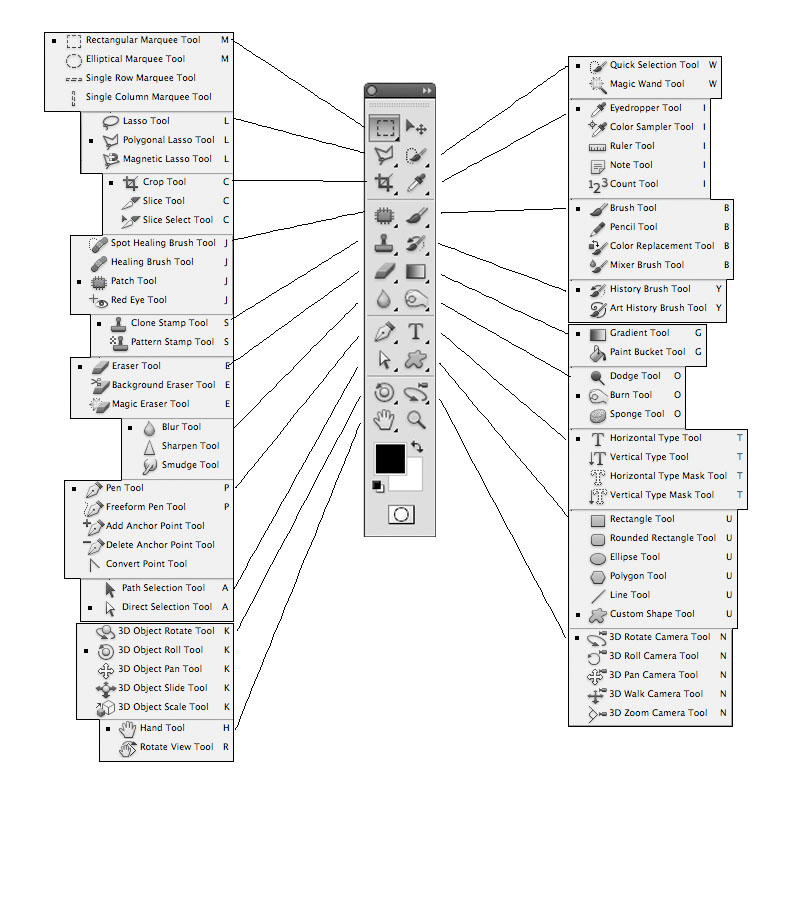
There are many tools at your disposal in Photoshop. I will cover them from left to right and from top to bottom. Below is a chart to follow along with.
1. The Marquee Tools
Rectangular – This makes a rectangular selection on your Photoshop document. With any of the selection tools, you can hold shift to add to your selection, and hold option/alt to subtract from the selection. You can also feather your section, which blurs the transition between the boundaries of your selection and the rest of the image.
Elliptical – This allows you to make a round selection, and the same rules for the rectangular marquee tool apply to the elliptical marquee tool.
Single Row – This tool makes a 1px horizontal selection that spans the total width of your document from left to right. This is great for created a 1px repeating pattern for your websites.
Single Column – This tool makes a 1px vertical selection that spans the total height of your document from left to right. This is great for created a 1px repeating pattern for your websites.
2. The Move Tool
The move tool does just that. You can select anything on the current layer and move it to a different position on the screen. If you have made a selection, you can move the selection and it will cut it away from the rest of the layer. You can also tell Photoshop to AutoSelect Layers or groups, but this can be annoying when you are trying to work.
3. The Lasso Tools
The Lasso Tool – This tool lets you make loose selections around anything on a layer. It has the same options as the marquee tools.
The Polygonal Lasso Tool – This tool allows you to make selections, but it does so in a strictly linear fashion. In other words, you can draw straight lines for your selections.
The Magnetic Lasso Tool – This is a handy selection tool that allows you to drag your mouse over the boundaries of an image, and it determines where the edges are, and anchor points are placed at regular intervals. This should give you a close and relatively controlled selection.
4. The Quick Selection Tool
The Quick selection tool makes a selection based on the boundaries of objects. As it is with the name, it makes quick work of making selections, and you can simply drag over the areas that you want to select.
Magic Wand Tool – The magic wand tool makes a selection based on where you click your mouse. As with the other selection tools, hold shift to add to the selection and hold option/alt to subtract from your selection. The contiguous option decides if you want to select only that spot, or if you want to select that color information over the entire image.
5. The Crop Tool
The crop tool allows you to crop an image to the proportions that you desire. You can input a set ratio, such as 3 x 5 in the ratio, or you can also determine a fixed size and resolution for your cropped image.
The Slice Tool – The Slice tool allows you to slice up your image or graphic for use on the web. It is basically like the Crop tool, but for use on the web. Once you have your graphics sliced up, you can export them all at once for the web.
The Slice Select Tool – This allows you to select a specific slice and edit its boundaries. This allows you to make proper adjustments before you export your slices.
6. The Eyedropper Tool
The eyedropper tool allows you to sample a color from any image, so that you can use it in your work. You can control the color area that it samples, so that it samples a pinpoint pixel, or it can sample a range of pixels. Also, you can sample the current layer or al layers.
The Color Sampler Tool – This allows you to sample up to 4 areas of color within your image, so that you can have information about those colors. Like the Eyedropper Tool, you can determine the range of pixels that it samples.
The Ruler Tool – The Ruler tool will tell you the distance between two points, but it can also help you straighten your photos.
The Note Tool – The Note Tool allows you to add notes to your Photoshop document. This is great for collaboration, and really helps to organize and streamline the workflow. You can export notes to a pdf version of your file, which is handy for those people that are involved in the project, but don’t have Photoshop.
The Count Tool – The Count Tool lets you place a visual marker on objects in an image as you are counting them, which it keeps track of. You can also have multiple count groups, which means that you can keep track of several types of objects within the same image.
7. The Spot Healing Brush
The spot healing brush is a great tool for removing artifacts and blemishes from images. It works with just a simple click of the mouse by sampling the surrounding areas and blending the anomaly away. If you set it to content aware, you can remove larger areas of unwanted material.
The Healing Brush Tool – The healing brush allows you to brush out blemishes and areas that aren’t desired in your images. You click the option/alt key to select certain
The Patch Tool – The patch tool is a great tool where you can make a selection that is similar to the lasso tool. Once the selection is made, you can click and drag it to the area that you wish to fill it with and when you release it, it patches it with the content that you have specified.
The Red Eye Tool – The Red Eye Tool is a quick and easy tool that allows you to click on portions of an image that have red eye and remove them instantly. If there are any red portions outside of the eye, it may cause adverse effects.
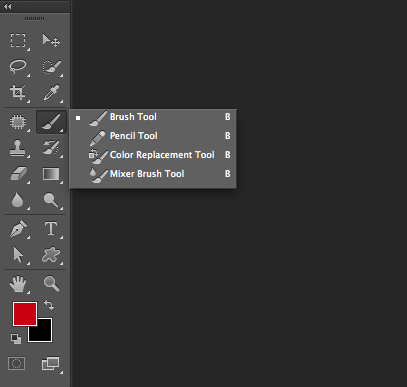
8. The Brush Tool
The Brush Tool is one of the most important tools that are in your arsenal. You will probably use the brush tool more than any other tool in Photoshop, especially if you are retouching images. You can change the size of the brush, how hard it is, its shape, texture, opacity, flow, how it acts when you use it, and more.
The Pencil Tool – The pencil tool allows you to draw on the Photoshop canvas as if you were using a real pencil.
The Mixer Brush Tool – The Mixer Brush is an amazing tool that allows you to simulate real media, such as paint, and blend colors with realistic effects. It is a natural way to paint inside of Photoshop, and with Photoshop CS5, there are many bristle brushes that are available to simulate the behavior of traditional paint brushes.
9. The Clone Stamp Tool
The Clone Stamp Tool is used to clone or copy image information from another area. Hold the option/alt key and click to sample an area of an image. Then, click the image to brush with the color and image information that you sampled.
The Pattern Stamp Tool – The pattern stamp tool gives you the ability to use a brush-type tool to paint a pattern or texture on your document.
10. The History Brush Tool
With this tool you can paint with an image state or a snapshot into a different layer. This lets you bring in details from another project state.
The Art History Brush Tool – This does the same as the History brush, but adds a stylized effect with different settings and parameters.
11. The Eraser Tool
The Eraser Tool removes pixel information from your document. It allows you to remove content that you do not need. You use brushes, which you can specify just like any other brush-related tool in Photoshop. You can adjust the opacity and the hardness of the brush.
The Background Eraser Tool – The Background Eraser Tool is a great tool for removing the background from an image. Simply click and drag the eraser along the boundaries of the image and its background and it will remove the background. This isn’t a perfect method of extraction, though and requires trial and error.
The Magic Eraser Tool – The magic eraser removes a section of the background of an image, and is based on the area that you click to remove. It does a good job, but sometimes it removes areas that aren’t necessary, requiring a lot of trial and error.
12. The Gradient Tool
The gradient tool allows you to create a blend between two or more colors. You can determine the angle of the blend, it’s opacity, how many colors are blended and the order of the steps within the gradient.
The Paint Bucket Tool – The paint bucket tool will fill an area with color, depending on the tolerance setting. It will fill contiguously, or you may set it to fill any area with that color range.
13. The Smudge Tool
The smudge tool works like a brush, but it smudges pixels and allows you to push them around. It allows you to blend and transition colors easily.
The Sharpen Tool – The sharpen tool gives you the ability to sharpen areas of an image by painting on them manually. This gives you a lot of control and pinpoint accuracy when sharpening images.
The Blur Tool – The blur tool lets you blur parts of an image, which can help with harsh transitions between images. Like the sharpen tool, it behaves like a brush and gives you pinpoint accuracy.
14. The Dodge Tool
The dodge tool lets you paint in highlights in the different tonal ranges of your images.
The Burn Tool – The burn tool allows you to paint in shadows and darken different tonal ranges in your images.
The Sponge Tool – The Sponge Tool allows you to add or take away saturation from your images. You can use it like a brush and paint in precise areas.
15. The Pen Tool
With the Pen Tool, you can draw paths for use in your artwork. Print designers use the pen tool to draw paths around objects to use them for projects. Many print design software such as Quark and InDesign allow you to use clipping paths embedded from Photoshop so that there are no background around your photos.
The Freeform Pen Tool – The freeform pen tool is a drawing tool that lets you draw a path by hand and it adds anchor points along the way. This is a natural way to draw a path by hand and would probably benefit best from a user with a drawing tablet.
The Add Anchor Point Tool – This tool lets you add anchor points to your paths by using this tool and clicking directly on the path itself.
The Delete Anchor Point Tool – This tool lets you delete anchor points from your paths that you don’t need. This keeps your paths clean and free from too many points.
The Convert Point Tool – This tool allows you to select a path and convert it from a straight path to a round one, or from a round path to a straight path.
16. The Text Tool (The Horizontal Type Tool)
This is the main tool for creating your type in Photoshop.
The Vertical Type Tool – The Vertical Type Tool lets you type vertically instead of the traditional horizontal method.
The Horizontal Type Mask Tool and The Vertical Type Mask Tool- These tools let you make a mask from a typeface, which can save you a step or two if you know that you want rasterized type right off the bat. If you want editable type made of a color or texture, you can simply use a clipping path using normal text and it will work the same, while still being editable.
17. The Path Selection Tool
The Path Selection Tool gives you the ability to select an entire path at one time. This lets you move the entire path instead of just one point.
The Direct Selection Tool – The Direct Selection Tool lets you select one or more anchor points within a path, so that you can move them or alter their arrangement.
18. The Shape Tools
These include the Rectangle, Rounded Rectangle, Ellipse, Polygon, The Line Tool and The Custom Shape Tools. They allow you to draw custom shapes based from paths or vector shape layers, giving you crisp lines.
19. 3D Tools
The 3D tools inside of Photoshop let you manipulate objects in 3D space.
20. Camera Tools
The camera tools allow you to alter the position of the camera view when working with 3D. The allow you to pan, or rotate around the scene.
21. The Hand Tool
The hand tool lets you move to any area of an image without accidentally dragging around a layer of an object on a layer. You can quickly switch to the hand tool any time just by holding the space bar.
The Rotate View Tool – The Rotate view tool is really handy because it allows you to rotate the entire canvas and leave it in any 360° rotated position. To bring it back to normal view, simply click the reset view button in the options bar.
22. The Zoom Tool
The Zoom Tool is used to zoom in and out of your document. It is mostly used when someone wants to zoom in on a specific section of an image. You can simply click and drag a selection of an image and it will zoom in on that area.
Common Tasks
Masking
To make a mask, you have a few different options available to you. Masks allow you to blend images, retouch images, blend effects, and composite images into one convincing photo.
Quick Mask
A quick mask is really simple to make. Simply hit the Q key to bring up quick mask mode, where you can use the brush tool to paint in the areas that you want to make as your selection. The areas will be shown in a transparent red color. When you are done, you can hit the Q key again, and you will see that your quick mask is an active selection. Simply click the Layer Mask icon in the Layers Panel to turn your selection into a mask for that layer.
A True Layer Mask
Click the Layer Mask icon in the Layers Panel to create a new layer mask. You will use the brush tool to paint in your mask. Black conceals the image, to show the layer below and white reveals the image to hide what is under it.
Selections
You can create selections in several ways. One way is to use the magic wand tool and click on an area of your image to make a selection. You can add to the selection by holding shift when you click on a new area, and by holding alt/option when you click on an area, you can subtract from the selection.
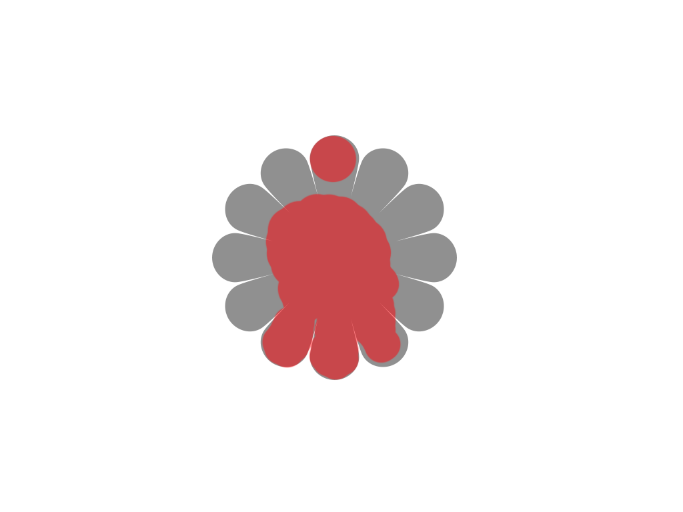
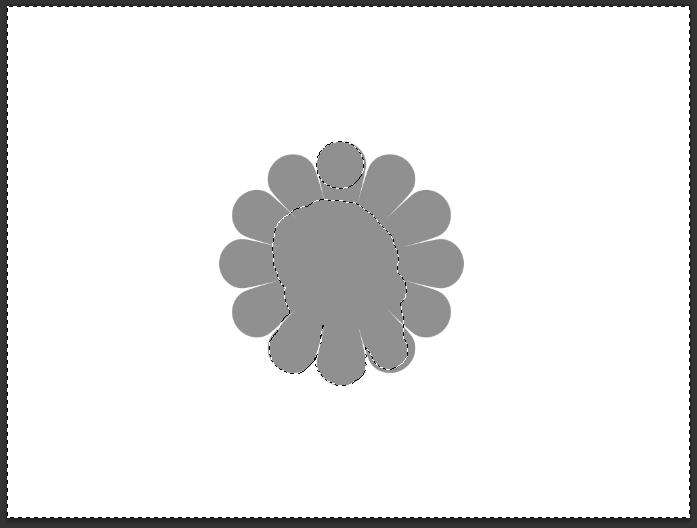
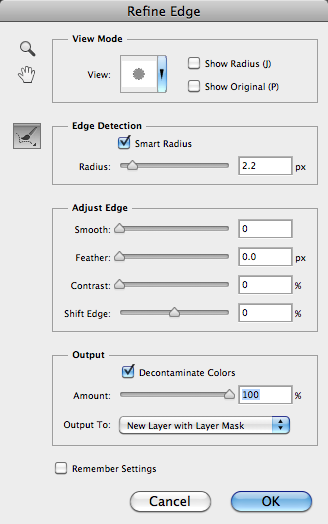
The quick selection tool is a great tool, because it quickly selected areas of your image when you click and drag over them. You can quickly select people and objects. Just as the magic wand tool, you can add to the selection by holding shift when you click on a new area, and by holding alt/option when you click on an area, you can subtract from the selection. You can use the marquee tools to make selections. The rectangular marquee tool creates a rectangular or square selection and the elliptical marquee tool creates an oval or circular selection. You can make selections manually with the Lasso Tool, the Polygonal Lasso Tool, and the Magnetic lasso tool. These tools will allow you to make a custom selection that you specify your. Once you make a selection with any of these tools, if you click Refine Mask in the options bar at the top of Photoshop, you can tweak your selection and one of the output options is New Layer with a Layer Mask. This gives you a highly refined mask that you can tweak for your own purposes.

Conclusion
Getting started for the first time with Photoshop can seem daunting, but learning the basics and learning your way around the program can make things quick and easy. As with anything, practice makes perfect, so with a little practice you should be used to the interface in no time. Knowing what Photoshop will and won’t do ( There isn’t much that Photoshop can’t do) will help you to edit your images and create digital artwork quickly and efficiently.
If you enjoyed reading this post, you’ll love Learnable; the place to learn fresh skills and techniques from the masters. Members get instant access to all of SitePoint’s ebooks and interactive online courses, like Foundations of Photoshop.
Frequently Asked Questions (FAQs) about Getting Started with Photoshop
What are the basic tools in Photoshop and how do I use them?
Photoshop offers a variety of tools to help you edit and enhance your images. Some of the basic tools include the Move Tool for moving layers, the Marquee Tool for making selections, the Lasso Tool for freehand selections, the Magic Wand Tool for selecting a color range, and the Crop Tool for cropping images. Each tool has its own properties and uses, which you can learn about in the tool options bar at the top of the Photoshop workspace.
How can I customize my Photoshop workspace?
Photoshop allows you to customize your workspace according to your needs. You can rearrange panels, modify menu items, and even create custom keyboard shortcuts. To customize your workspace, go to the Window menu, choose Workspace, and then select New Workspace. You can then name your workspace and choose which panels and menus you want to include.
How do I work with layers in Photoshop?
Layers are a fundamental aspect of Photoshop. They allow you to work on different parts of an image without affecting other parts. You can create a new layer by going to the Layer menu and selecting New. To select a layer, simply click on it in the Layers panel. You can also rearrange layers by dragging them up or down in the Layers panel.
How do I save my work in Photoshop?
To save your work in Photoshop, go to the File menu and select Save. You can choose to save your work as a Photoshop (.PSD) file, which will preserve your layers and allow you to continue editing later, or you can choose to save it as a JPEG, PNG, or other image format for sharing or printing.
How do I resize an image in Photoshop?
To resize an image in Photoshop, go to the Image menu, select Image Size, and then enter the desired width and height. You can also choose to maintain the aspect ratio to prevent the image from being distorted.
How do I remove a background in Photoshop?
There are several ways to remove a background in Photoshop, but one of the most common methods is to use the Quick Selection Tool or the Magic Wand Tool to select the background, and then press Delete to remove it.
How do I add text to an image in Photoshop?
To add text to an image in Photoshop, select the Text Tool from the Tools panel, click on the image where you want the text to appear, and then start typing. You can adjust the font, size, color, and other properties of the text in the options bar at the top of the workspace.
How do I apply filters in Photoshop?
Photoshop offers a wide range of filters that you can apply to your images. To apply a filter, go to the Filter menu, select the filter you want to use, and then adjust the settings as needed.
How do I undo an action in Photoshop?
To undo an action in Photoshop, you can press Ctrl+Z (or Command+Z on a Mac). You can also use the History panel to undo multiple actions or to revert to an earlier state of your image.
How do I learn more advanced techniques in Photoshop?
Once you’ve mastered the basics of Photoshop, there are many resources available to help you learn more advanced techniques. Adobe offers a variety of tutorials on their website, and there are also many online courses, books, and forums where you can learn from other Photoshop users.
James George is a professional web developer and graphic designer. James is an expert in design, and a professional web developer, with a special interest in WordPress. Founder of Design Crawl, James has been a professional designer since 2005.