Amongst the many templating systems out there, most work in pretty much the same way; variables are “injected” using some syntax or another, be it curly braces, percentage signs or whatever that library’s convention happens to be. They’ll usually have basic control structures, such as if...then and, of course, iteration.
FigDice, however, takes an altogether different approach. Inspired by PHPTAL – the subject of a future article – it gives the view layer the reponsibility of “pulling” in the data it requires, rather than relying on controllers to assemble and “push” it into the templates.

In this two-part series, I’m going to take a more detailed look at it, at how it works and how to use it.
Installation
You can get the code from the website, Github or, better still, Composer:
"figdice/figdice": "dev-master"
The library is also available as a .phar; you can download the latest version (direct link) or generate it yourself using figdice-make-phar.php, available in the Github repository.
Basic Usage
Let’s first look at FigDice at its most basic – creating and rendering a view.
To begin, create a new instance of the view:
$view = new \figdice\View();Obviously, you’ll need to ensure the library is available – using Composer provides a suitable autoloader.
Next, you need to load in the appropriate template, relative to the current path:
$view->loadFile( '../templates/home.html' );To render the template, call render():
$view->render(); // returns the HTML content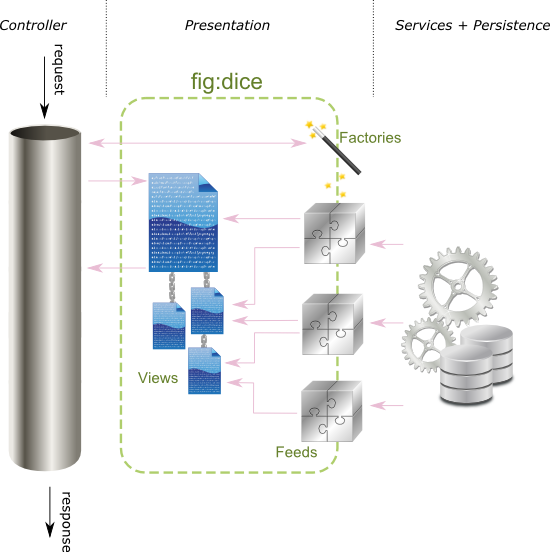
With that in mind, let’s start building some templates.
A Skeleton Application
I’ve created a simple application containing all the code from this article, which also better illustrates how it all fits together. It uses Silex, but you shouldn’t need a particularly thorough knowledge of it in order to understand what’s going on.
You’ll find it on Github, and you can see it in action here. Note that the demo includes functionality we’re going to add later in Part Two.
Creating a Layout
The first thing to point out is that FigDice is largely XML-based. As such, it relies on a few custom XML elements and crucially. requires that your HTML tags are properly closed.
Let’s start by creating a simple, two-columned page layout.
<!-- file: layout.html -->
<html>
	<head>
		<title fig:slot="docTitle" />

		<link rel="stylesheet" href="//netdna.bootstrapcdn.com/bootstrap/3.1.1/css/bootstrap.min.css" />
		<link rel="stylesheet" href="//netdna.bootstrapcdn.com/bootstrap/3.1.1/css/bootstrap-theme.min.css" />
	</head>
	<body>
		<div class="container">
			<header class="header">
			<fig:include file="menu.html" />
				<h3 class="text-muted">FigDice Example</h3>
			</header>

			<div class="row">

				<div class="col-sm-12 col-md-9 col-lg-9">

					<div class="content">
						<h1 fig:slot="pageTitle" />
						<div fig:slot="pageContent" />
					</div>

				</div>

				<div class="col-sm-12 col-md-3 col-lg-3">

					<fig:include file="tweets.html" />

				</div>

			</div>

			<footer id="footer">
				<fig:include file="footer.html" />
			</footer>

		</div>

	</body>
</html>
Let’s go over a few things.
<title fig:slot="docTitle" /> is used to generate the <title> tag, by defining a “slot” for the value to go into. We’ll look at how this data gets “plugged in” to a slot shortly.
Note how the <link> tags are closed. This is very important; because FigDice makes extensive use of XML, it must validate accordingly.
<fig:include file="menu.html" /> is self-explanatory – FigDice makes it easy to split your templates up into smaller template files. We’re doing likewise for the footer – footer.html – and for a Tweets block (tweets.html) which we’ll build shortly.
Here are the contents of menu.html:
<ul class="nav nav-pills pull-right">
	<li><a href="/">Home</a></li>
	<li><a href="/about">About</a></li>
</ul>
And footer.html:
<p>© 2014 Someone or Other</p>A Simple Homepage
Now let’s create a homepage for our sample application. In a new file named index.html:
<xml fig:mute="true"> <!-- Mute because this tag should not end up in the HTML document. But the FigDice template must have an XML root node. -->

		<!-- Load the page layout -->
		<fig:include file="layout.html" />

		<!-- Set the <title> tag -->
		<title fig:plug="docTitle">Sample application homepage</title>

		<!-- Set the <h1> tag -->
		<h1 fig:plug="pageTitle">Homepage</h1>

		<!-- "Plug in" the page content -->
		<div fig:plug="pageContent">Lorem ipsum...</div>
	</xml>
This time our template is pure XML, and introduces some more FigDice tags.
Note that the opening <xml> tag has an attribute called fig:mute, which is set to true. As the comments point out, this attribute tells FigDice not to include this element in the final HTML.
<fig:include file="layout.html" /> tells FigDice about the layout we created a moment ago. However, that doesn’t include the file in the same way a PHP include might; that’s where slots and plugs come in.
<div fig:plug="pageContent">Lorem ipsum...</div> indicates that we should “plug” the content into a “slot” called pageContent, which you may remember we created in layout.html.
Finally, let’s define a really simple route to display the page:
$app->get('/', function () use ($view) {

	$view->loadFile( '../templates/home.html' );

	return $view->render();
});
Working with Data
In the traditional MVC approach the controller retrieves, assembles and then “injects” data into the views. By implication this means that the controller must be aware of what data is required and which views are interested in it.
FigDice takes a different approach. Instead of relying on the controller to deal with the data, the views are responsible for “pulling in” the data they require.
To accomplish this, FigDice uses feeds. A feed is a class which extends figdice\Feed and which must contain a run() method to return the appropriate data.
To demonstrate this, let’s create a block which displays a user’s latest Tweets on every page.
If you look back to the layout, you’ll see we’ve already added the following line to include it:
<fig:include file="tweets.html" />Actually getting Tweets from the Twitter API is relatively straightforward, but outside the scope of this article – so let’s fake it. Here’s the feed:
<?php namespace Sitepoint\Feed;

	use figdice\Feed;

	class TwitterFeed extends Feed
	{

		public function run() {
			return array(
				array(
					'body' 			=> 'This is an example of a Tweet, though it isn\'t really a Tweet',
				),
				array(
					'body' 			=> 'This is another example of a Tweet, though it isn\'t really a Tweet either',
				),
				array(
					'body' 			=> 'Using REAL Tweets is left as an example, you see',
				),
			);
		}
	}
For simplicity, we’re only returning the body of the tweets.
Now let’s create the template which “pulls” data from the TwitterFeed class, and renders it using a simple unordered list:
// file: twitter.html
	<?xml version="1.0" encoding="utf-8"?>
	<fig:template xmlns:fig="http://figdice.org/">

		<fig:feed class="TwitterFeed" target="tweets" />

		<ul>
			<li fig:walk="tweets" fig:text="body" />
		</ul>

	</fig:template>
The <fig:feed> declaration indicates we should create an instance of TwitterFeed, and make its data available using the key tweets.
Then we’re creating a simple unordered list. Each iteration of <fig:walk> creates an <li> element as it “walks” through the data assigned to the tweets variable. The fig:text attribute indicates the <li> tag’s text content should be populated using the body of each Tweet.
Here’s the result:
<ul>
		<li>This is an example of a Tweet, though it isn't really a Tweet</li>
		<li>This is another example of a Tweet, though it isn't really a Tweet either</li>
		<li>Using REAL Tweets is left as an example, you see</li>
	</ul>
The Factory
We’re not quite there yet; in order to use feeds you’ll need a factory. A factory must implement \figdice\FeedFactory, which requires that it includes a create method responsible for instantiating a given feed class.
Here’s an example, which is pretty self-explanatory:
<?php namespace Sitepoint\Factory;

	use Sitepoint\Feed\TwitterFeed;

	class FeedFactory implements \figdice\FeedFactory
	{
		/**
		 * In this simple example, we did not declare additional
		 * arguments for our factory. You can experiment by yourself.
		 */
		public function __construct() {
		}

		/**
		 * In this simple example, we did not pass attributes to
		 * the fig:feed invokation.
		 * Had we specify XML attributes (in addition to class and target),
		 * they would be interpreted by the Expression engine, and passed
		 * as the $attribute argument, as key/value pairs.
		 * @see \figdice\FeedFactory::create()
		 */
		public function create($className, array $attributes) {

			if ($className == 'TwitterFeed') {
				return new TwitterFeed();
			}

			// Explicitly return null when our Factory cannot handle
			// the requested class, so that more Factories can chain
			// the lookup.
			return null;

		}
	}
By doing it this way rather than doing return new $classname, we don’t need to pollute our view code with namespace information.
Because we’re using dummy data stored in an array, this is all we need. However, in reality your factory will probably do some additional initialization, such as registering database connections or passing in some configuration parameters.
Finally in order to get this to work, you need to register it with your View:
$view->registerFeedFactory(new FeedFactory());If you browse to the application’s homepage, you should now see a list of Tweets.
Summary
Our dummy application now has a basic structure, and we’ve looked at pulling in data by implementing a simple Twitter stream, albeit one which uses dummy data.
In the next part, we’ll build upon our simple website by adding a blog, which allows us to look in more detail at data feeds in Figdice. We’ll also provide a language selector, examining Figdice’s localization feature.
 Lukas White
Lukas is a freelance web and mobile developer based in Manchester in the North of England. He's been developing in PHP since moving away from those early days in web development of using all manner of tools such as Java Server Pages, classic ASP and XML data islands, along with JavaScript - back when it really was JavaScript and Netscape ruled the roost. When he's not developing websites and mobile applications and complaining that this was all fields, Lukas likes to cook all manner of World foods.