This article was sponsored by Microsoft. Thank you for supporting the sponsors who make SitePoint possible.
For this series of articles, we’re going to use Microsoft’s modern IDE: Visual Studio Community 2015, along with an assortment of useful tools that will probably be familiar, including Bootstrap, MailChimp and Adobe Kuler.
Visual Studio is most often used as a development tool. It certainly fulfills that role. But what many people may not know is that it is also a design tool. It has full autocomplete support for front end languages such as CSS, AngularJS, jQuery and more.
After a long session of typing in code, you might look back and see your code formatting is off or could use a little cleaning up. Visual Studio can step in and format your code with clean, readable alignment, whether it is back-end or front-end code.
Combining Bootstrap, which is already downloaded and available in your (Starter Web) project, with Visual Studio’s IDE sets up a great environment for designing a beautiful, professional looking website.
Visual Studio 2015 Features
Visual Studio 2015 introduces some great new features to aide in our development. One of those is organization. No longer is there a large serial list of DLLs in our project References. All of those DLLs are now grouped. Expanding a group reveals the related DLLs and other associated references, such as NuGet packages. This keeps the References section very concise and keeps you from searching in different locations for various reference types.
There is also a new folder included with projects. It’s called wwwroot. This folder contains static files, separating them out from dynamic files. You might be wondering, “what’s the difference between these two types?” Static files are images, CSS, and Javascript, and frameworks like Bootstrap and jQuery. Dynamic files are mainly CS and CSHTML — files that are able to process C## code.
Visual Studio Community 2015 has also added some efficiencies in developer work flow. One being the ability to change code in a controller, for example, and refresh the browser without needing to compile the project again. Your changes will render in the browser once the page is refreshed. This saves developers a few seconds of time compared to recompiling and running the app all over again.
Downloading packages and frameworks is simplified with the introduction of Bower. In the root project folder is a file named bower.json. In this file, you can configure frameworks and versions of them you’d like included in the project. Below is a code snippet from the bower.json file:
{
"name": "WebApplication",
"private": true,
"dependencies": {
    "bootstrap": "3.0.0",
    "jquery": "1.10.2",
    "jquery-validation": "1.11.1",
    "jquery-validation-unobtrusive": "3.2.2",
    "hammer.js": "2.0.4",
    "bootstrap-touch-carousel": "0.8.0"
},
You can see jQuery is included and also the version being used. It’s a very easy and fast convention for managing frameworks.
We’ll discuss the above features in detail a little later in the article. To get started, let’s meet Andy.
The Developer/Designer
Andy is a freelance web designer. His new client wants a website designed for his guitar lessons courses.
Andy has discussed with his client what the site should look like. It will be a simple site with earthly tones, inspired by the wood in a guitar. The top part of the site will have a large image with text on top of it. The text will be the website name followed by a tagline.
The middle section will contain three columns, used to feature different content. For example, a summary of the latest blog post, a product preview, or a short piece of news.
The bottom part of the site will contain quotes from happy customers. The client wants to allow purchases of his courses from the site. He also wants an email signup form in the top-right section.
We’re going to follow along with Andy as he builds a client website. There’s a lot to cover so let’s get started.
Bootstrap
While Visual Studio will provide a great application structure using MVC, Bootstrap is great for speeding up the design process. It’s also fully responsive.
This first milestone site will look like this:
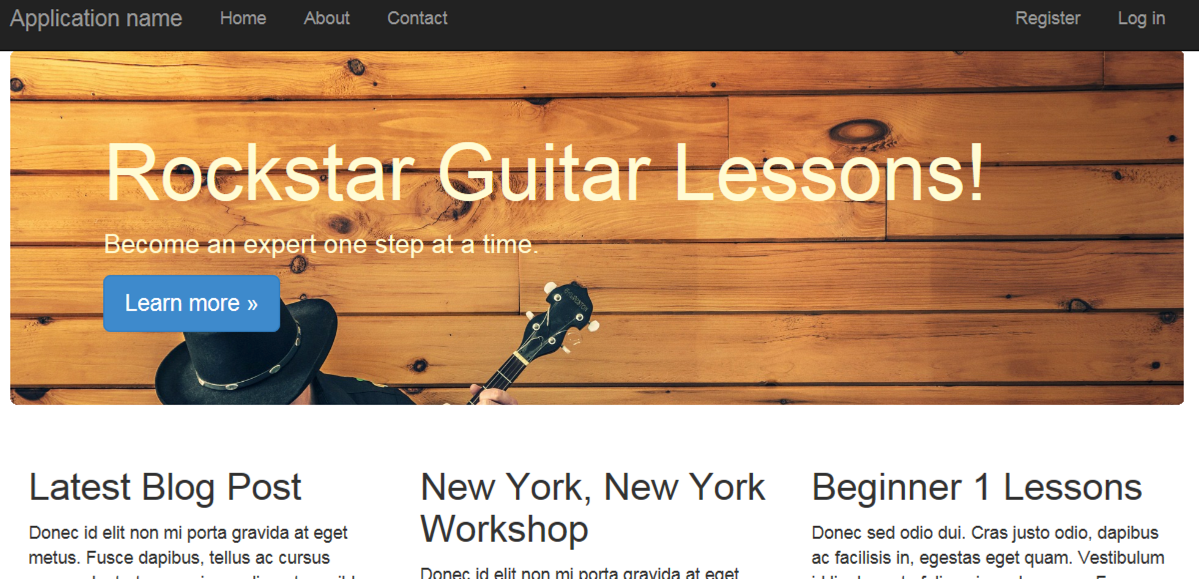
Let’s look at a few templates we’ll use in the website. Go to the main Bootstrap site and click Getting Started at the top. Scroll down past Basic template until you reach Examples.
The jumbotron looks like it will meet our requirements for the top part of the website.

It has a large grey area at the top that we can replace with our image. There is also text on top of the gray area. The three columns are there as well. Excellent!
Now we need to find something for the customer quotes. Looking at the template examples, it looks as though Carousel will do what we want.
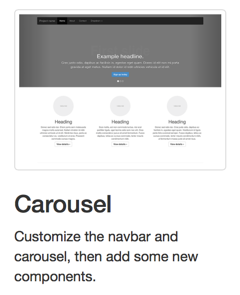
You can see it in the thumbnail but if you click it, it will display the full template. Scroll toward the bottom of this template. There are several rows with larger text that would work great for quotes.
Color Scheme
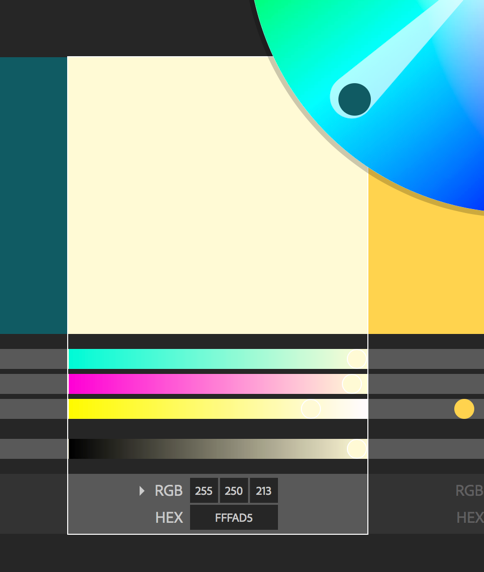
For a color scheme, we’re going to check out some popular schemes on Adobe Kuler. Head over to https://color.adobe.com and click Explore, then Most Popular. We’re looking for something with a good earth tone based scheme — HoneyPot looks like it will fit the bill.
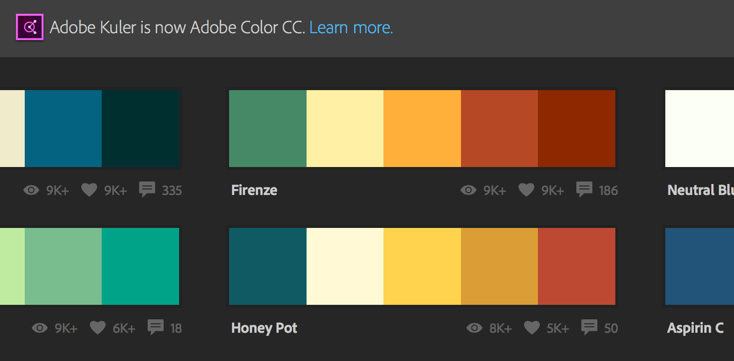
If you move your mouse over this scheme, a hint will appear. Click edit. This lets you view the details of the color scheme. Click the brighter yellow. This is the color we’ll use for our title font in the jumbotron.
Starting A New Project
Andy is going to take advantage of Visual Studio 2015. We’re going to follow along, so download Visual Studio 2015 here.
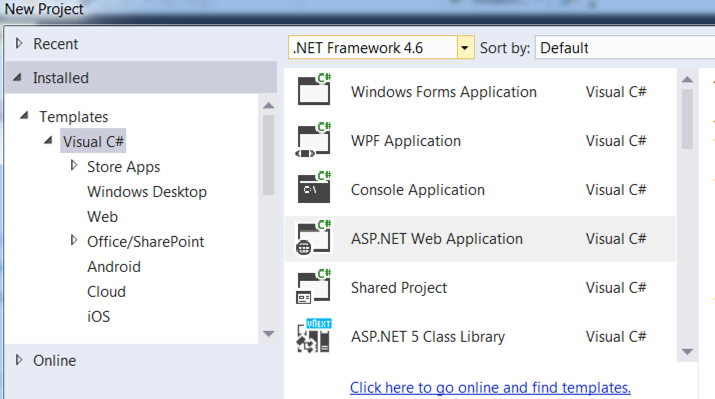
To begin, start a new project in Visual Studio and choose ASP.NET Web Application as shown below.
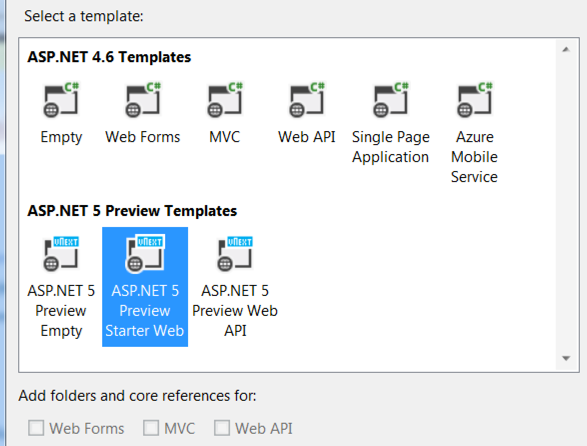
Next, choose ASP.NET Preview Start Web:
If you run the project, it should display a webpage that looks similar to the following:
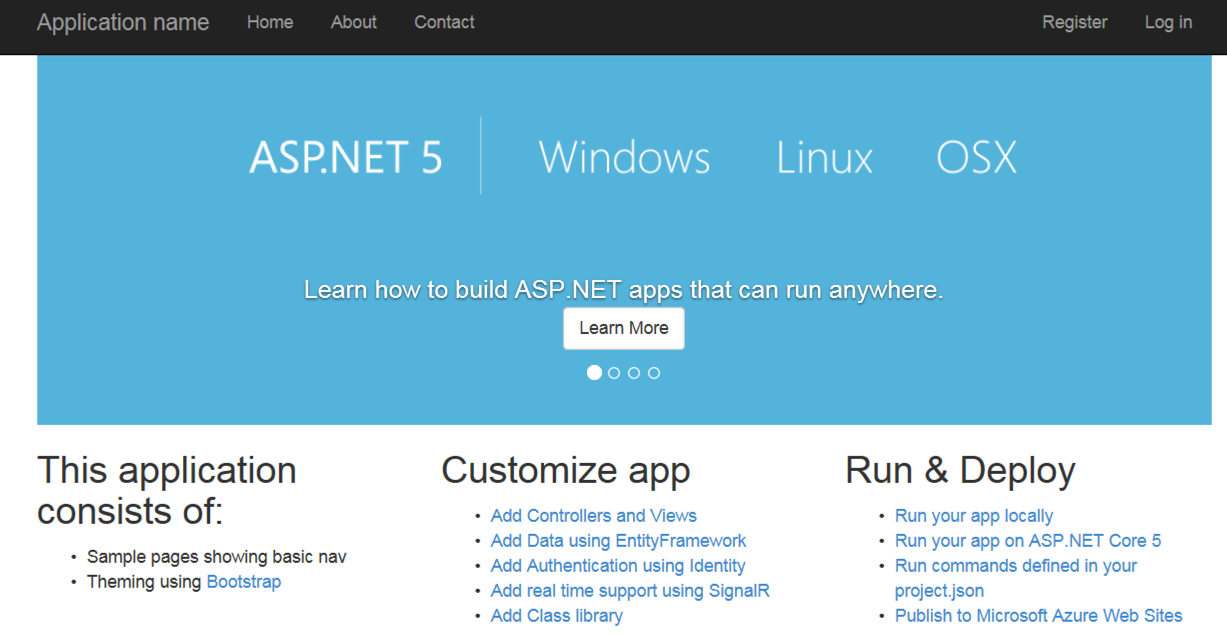
We’re going to modify the layout of this base site using parts from the Bootstrap templates described above.
Before we do, I’d like to point a few new features in Visual Studio 2015. Below is a screenshot of the application folder structure. Notice the wwwroot folder. This folder contains all of our static files. These include css, images, and js files.
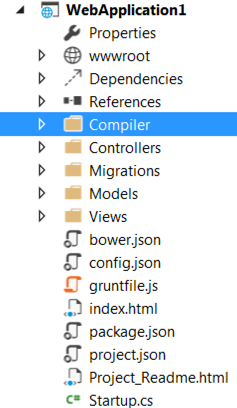
The reasoning behind the wwwroot folder is to further separate dynamic code from static code. C## (dynamic) code files are still in the Controllers, Models, and Views folders, as you’d expect them to be.
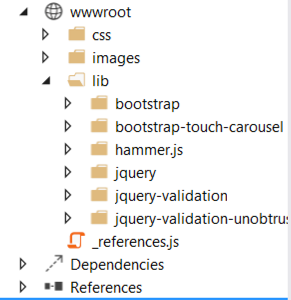
Below I’ve expanded the wwwroot folder to provide a better look at its internal structure and what’s inside of it.
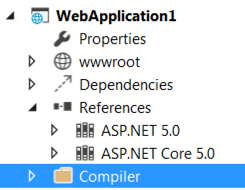
One other thing that has changed is how DLL and other references are now grouped. Rather than a large listing of references, we have a group, which can be expanded.
Notice below the DNX 4.5.1 and DNX Core 5.0 are the only references listed.
If I expanded the DNX Core 5.0 reference, I see a listing of Nuget packages and DLLs.
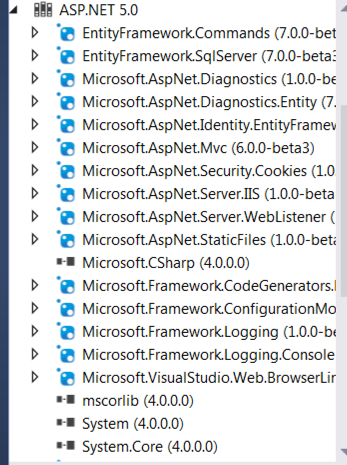
This is just a great way to not clog up the development environment with information you may not want to know until you need to.
Site Development
Our ASP.NET 5 Starter site includes Bootstrap. There is no need to download Bootstrap anymore. In previous versions of Visual Studio, we would need a Nuget package for Bootstrap or download it from the Bootstrap website and add it to our project.
To help manage client side frameworks, Visual Studio now includes Bower. If you look in the root of the project, you’ll see bower.json. In here, you’ll see references to Bootstrap with specific versions. Adding a new client-side framework will retrieve that version and bring it into the project.
To get started, we want to do is download the code examples from the bootstrap website. Go to getbootstrap.com and click Download Bootstrap. Under Source Code, click Download source. Unzip this file and go to docs > examples > jumbotron. Drag the jumbotron.css file into the wwwroot > css folder. You can also drag the index.html into the root of the project. It won’t display when the site starts, since this is an MVC site. But we’ll use it as a reference.
We’re going to start by modifying the main site layout. In the Solution Explorer, open Views > Shared > _Layout.cshtml. You’ll see the following CSS file references at the top of this file:
<link rel="stylesheet" href="~/lib/bootstrap/css/bootstrap.css" />
<link rel="stylesheet" href="~/css/site.css" />
<link rel="stylesheet" href="~/lib/bootstrap-touch-carousel/css/bootstrap-touch-carousel.css" />
Remove the bootstrap-touch-carousel.css line. Create a new line under the bootstrap.css line. Drag the jumbotron.css file and place it on this new line. It should now look like the following:
<link rel="stylesheet" href="~/lib/bootstrap/css/bootstrap.css" />
<link href="~/wwwroot/css/jumbotron.css" rel="stylesheet" />
<link rel="stylesheet" href="~/css/site.css" />
Open the Home folder inside the Views folder then open the Index.cshtml file. Remove everything in this file except the top part:
@{
    ViewBag.Title = "Home Page";
}
Open the index.html Bootstrap file that we dragged in earlier. Collapse the nav, div class=jumbotron and div class=container nodes so they are easier to see, as shown below:
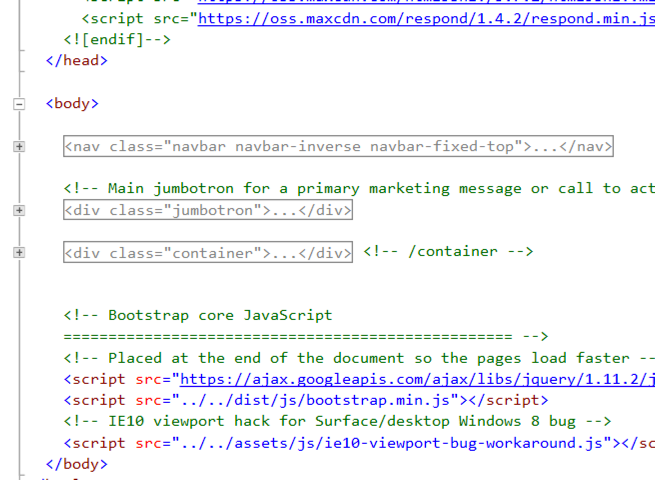
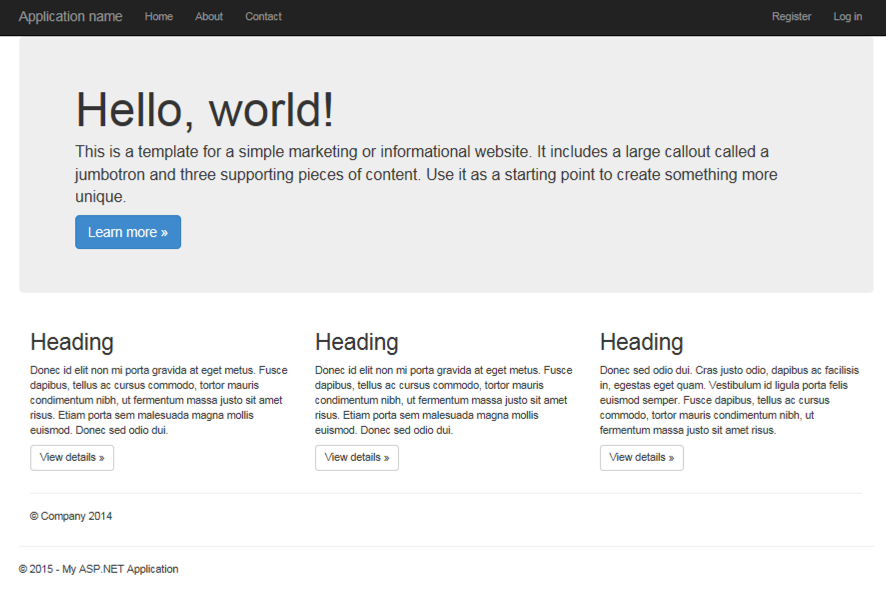
Copy the two divs and paste them into the Index.cshtml file. Now run the app. You should see the following:
You’ll notice we have two footers. This can be fixed by removing the following code at the bottom of Index.cshtml:
<hr>
<footer>
<p>© Company 2014</p>
</footer>In this same file, we can add some more meaningful headers to the three columns. Add the following headers in the H2 tags just under the three
lines:
Latest Blog Post
New York, New York Workshop
Beginner 1 Lessons
If you run the app, you should see the following:
Updating The Jumbotron
We can now update our jumbotron with an image. The jumbotron is the large gray box at the top of the webpage.
We’ll use this image as the jumbotron’s image. Download the large version and place it in wwwroot > images. Open wwwroot > css > site.css. Type in the following at the bottom of this file:
.jumbotron {
    background-image: url('../images/musician-349790_1920.jpg');
    background-size:cover;
    color:#fffad5;
}
You can actually drag in the image and Visual Studio will create the necessary background-image code.
The color fffad5 is from our Adobe Kuler color scheme.
We can now update the jumbotron text. Go back into Index.cshtml. Open the jumbotron node and replace:
<div class="container">
<h1>Hello, world!</h1>
<p>This is a template for a simple marketing or informational website. It includes a large callout called a jumbotron and three supporting pieces of content. Use it as a starting point to create something more unique.</p>
with the following:
<div class="container">
<h1 class="scriptfont">Rockstar Guitar Lessons!</h1>
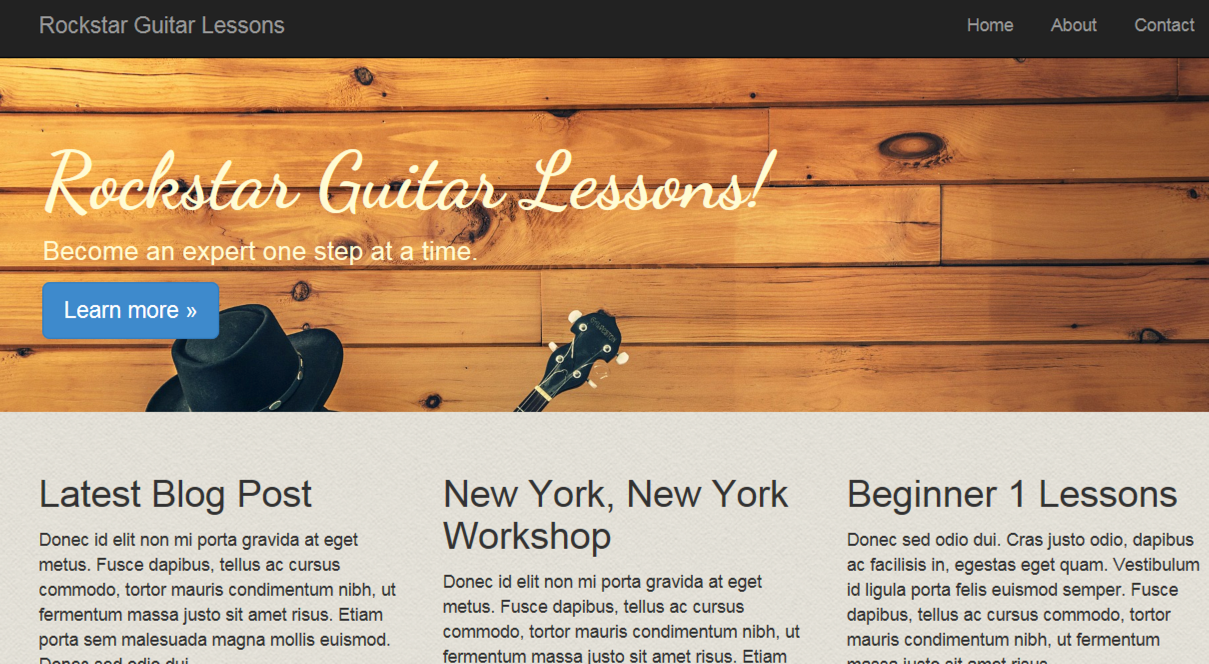
<p>Become an expert one step at a time.</p>Let’s run the app and see what we have so far. Your page should look like the following:
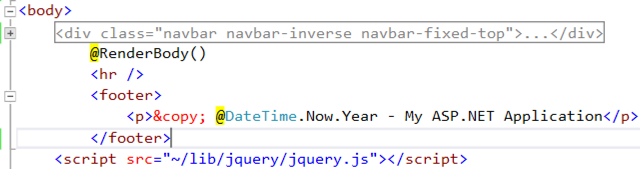
As you can see, we’re getting close. The jumbotron should extend all the way to edges. This gives our overall design a little more depth. To accomplish this, in Index.cshtml, remove the container body-content div surrounding @Renderbody().
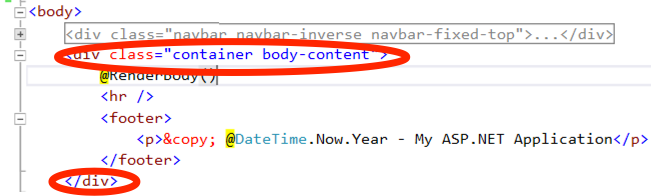
Now your code should look like the following:
Updating Fonts
Inside the jumbotron, we want a different front. Something more informal. We’re going to use a font called Dancing Script for this. Google Web Fonts is going to help us in getting the font.
Navigate here, in the top left, type in dancing, which should bring up Dancing Script. Click Add To Collection then click Use. Uncheck Normal and check Bold. Copy the script link at the bottom.
In _Layout.cshtml, paste the script link under the title tag. It should look like the following:
<title>@ViewBag.Title - My ASP.NET Application</title>
<link href='http://fonts.googleapis.com/css?family=Dancing+Script:700' rel='stylesheet' type='text/css'>
Now we’re going to add a new class to site.css. This will allow us to target the font to specific text. Add the following to site.css:
.scriptfont {
    font-family: 'Dancing Script', cursive;
}
In the jumbotron, add class="scriptfont" to the H1 tag so it looks like the following:
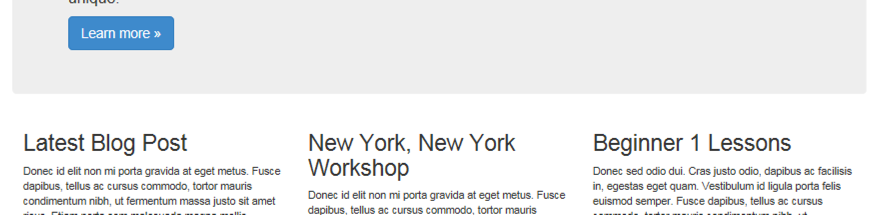
<h1 class="scriptfont">Rockstar Guitar Lessons!</h1>Run the app and check out the jumbotron title font. It should now be in script.
Finishing Touches
To provide a little polishing to this first phase of our design, we’re going to add a background and do a little adjusting to the footer, which is currently flush left.
We’ll use an image for the background and something to that matches our Earthy tones. Download it hereand type in “seamless paper texture”. Download this texture and add it to wwwroot > images.
Open site.css. Add a new line within the first body tag. Then drag the paper texture into it. It should look like the following:
body {
    padding-top: 50px;
    padding-bottom: 20px;
    background-image: url('../images/seamless_paper_texture.png');
}
While we’re here, add the following at the bottom of this file:
footer {
    margin-left:15px;
}
If you run the app now, the background should be visible and the footer off the edge.
Customer Quotes
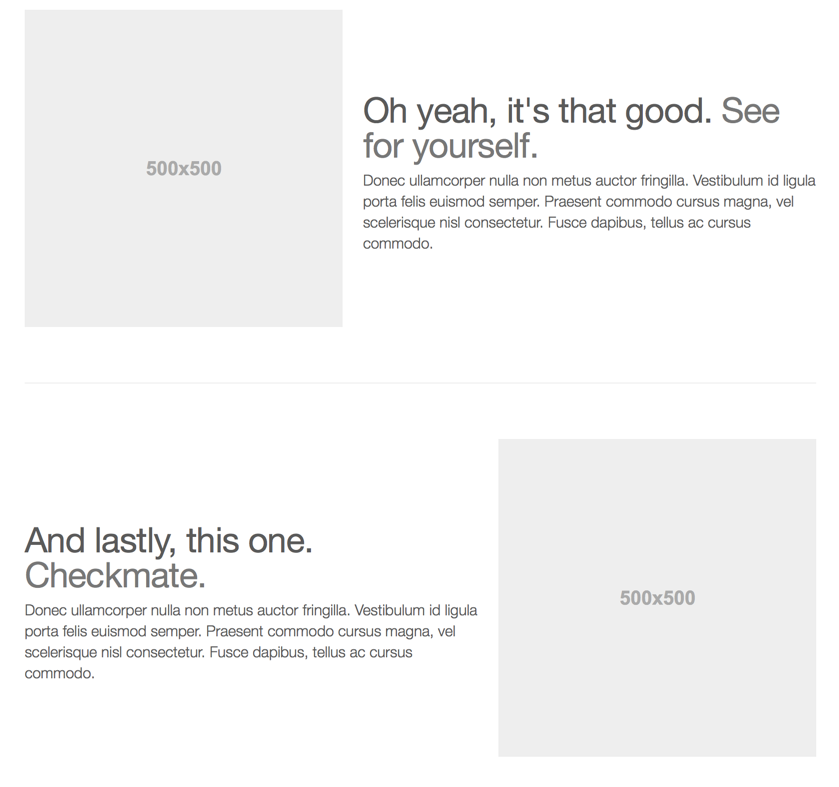
We can now format our quotes section. Code for the quotes can be found in the same Bootstrap examples folder. Open the Carousel folder then the index.html file.
Copy the featurette code starting at this comment
<!-- START THE FEATURETTES -->and ending with this comment
<!-- /END THE FEATURETTES -->Now paste this code into the index.cshtml file just below the three columns we added earlier. Your should look like the following:
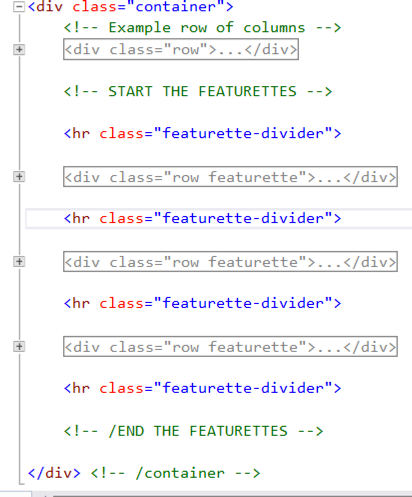
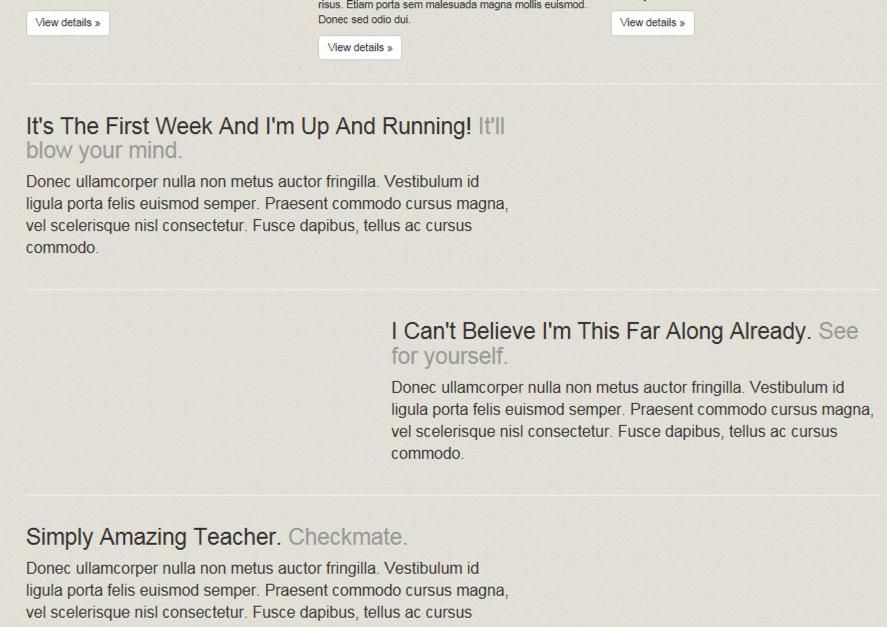
You can add some custom quotes by opening each featurette div and modifying the text between each of the following H2 tags:
<h2 class="featurette-heading">Your finished webpage should look similar to the following:
Summary
Andy now has a completed webpage for his client that will be the new guitar lessons customer facing site.
By using Visual Studio 2015 and Bootstrap, Andy was able to create a great looking website with little effort.
Next time, we’ll look at how to integrate MailChimp to give Andy’s client the ability to send email updates to the customers. We’ll add a couple of new pages, such as a thank you page for people signing up to the email list and a contact page.
 Brett Romero
Brett Romero is a software developer versed in .NET, PHP, Python, and iOS to name a few. He builds desktop, web and mobile applications. As well, he knows Illustrator and Photoshop backwards and forward. His design skills aren't too shabby either. Brett also founded Bitesize Business School, which helps entrepreneurs develop needed technical skills for running an online business while also teaching them invaluable business skills. His undergraduate major was mathematics but he finished with a degree in business administration then went on to study mathematics at the University of Washington. He also has an MBA from Arizona State University.