If you are developing a web project using Bootstrap, you may have the need to add a set of custom icons in the place of the default Glyphicons that come with the framework.
I’ve already covered the topic of building an icon using Illustrator and Icomoon, but what is the better way to integrate icons in a Bootstrap project?
Icomoon CSS vs Glyphicons CSS
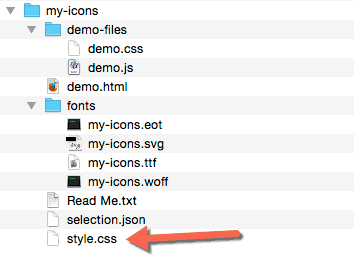
When we download a set of icons from Icomoon (for this demo I’ve created a project called my-icons), we get the font files, some demo files (that provide a useful reference to our glyphs), and a style.css file. This one contains all the CSS rules you need to use the font in your project.
Lets take a look at the CSS file. It contains a @font-face declaration, a rule to catch all icon classes (based on the first part of their names) and a list of all icon classes:
@font-face {
  font-family: 'my-icons';
  src:url('fonts/my-icons.eot?-dp1fqh');
  /* other properties */
}

[class^="myicon-"], [class*=" myicon-"] {
  /* some properties */
}

.myicon-alert:before {
  content: "\e600";
}

.myicon-arrow-down:before {
  content: "\61";
}

/* ... more icons */
Now, let’s see the glyphicons.less file from Bootstrap:
// Import the fonts
@font-face {
  font-family: 'Glyphicons Halflings';
  src: url('@{icon-font-path}@{icon-font-name}.eot');
  /* other properties */
}

// Catchall baseclass
.glyphicon {
  /* some properties */
}

// Individual icons
.glyphicon-asterisk {
  &:before {
    content: "\2a";
  }
}

.glyphicon-plus {
  &:before {
    content: "\2b";
  }
}

/* ... more icons */
They are very similar, but with some fundamental differences:
- First, Glyphicons is a Less file (there is a Sass file too) and the icon font path and name are assigned to two variables (
@{icon-font-path}and@{icon-font-name}). - Glyphicons uses a class as a “catchall” selector (
.glyphicon), while Icomoon uses an attribute selector. - Glyphicons uses the parent selector (&) for individual classes.
The last point can be really useful in some situations, because it can simplify the way you build your CSS files.
The ampersand refers to the parent of each rule, and when glyphicons.less is compiled, it produces exactly the same result as the Icomoon CSS:
.glyphicon-asterisk:before {
  content: "\2a";
}
So, what’s the difference?
Simply put, you can use each icon class as a mixin, therefore you can embed them in other rules without worrying about any changes to the original class.
Lets see a sample.
Using font mixins
In the screenshot below, you can see an alert block that uses an icon from the my-icons font created with Icomoon.

The icon is applied using a span element; this is the “classic” way to use an icon font, and it is the same way suggested for Bootstrap Glyphicons.
Therefore, to build our example we need to add a span.myicon-alert element inside a container (in this case a div):
<div class="alert">
  <span class="myicon-alert"></span>
  .alert
</div>
You can’t apply the myicon-alert directly to the div, because it would inherit the icon font. This is the reason we need the additional span element. But using mixins there’s another way to solve our problem.
First, let’s rearrange our icon font in the same way as Glyphicons and build the alert rules using mixins:
/* this replaces the [class^="myicon-"], [class*=" myicon-"] selectors */
.myicon {
  /* catchall properties */
}

.myicon-alert {
  &:before {
    content: "\e600";
  }
}

.alert {
  /* some properties */
  .myicon-alert();
  &:before {
    .myicon();
  }
}
.myicon-alert and .myicon (parentheses can be omitted) refer to the respective classes, and import all their properties inside the .alert rule.
This is the generated CSS:
.myicon {
  /* catchall properties */
}

.myicon-alert:before {
  content: "\e600";
}

.alert {
  /* some properties */
}

.alert:before {
  content: "\e600";
}

.alert:before {
  /* myicon catchall properties */
}
Now we can minimize the markup and obtain the same result as the previous sample without a span element:
<div class="alert">
  .alert
</div>
But the generated CSS is redundant: the catchall properties are repeated twice, there are two .alert:before rules, and so on.
We can do it more efficiently using the :extend pseudo-class:
.alert {
  /* some properties */

  &:before {
    &:extend(.myicon);
    &:extend(.myicon-alert:before);
  }
}
Which produces:
.myicon,
.alert:before {
   /* myicon catchall properties */
}

.myicon-alert:before,
.alert3:before {
  content: "\e600";
}

.alert {
  /* some properties */
}
Not bad, right?
Towards Bootstrap
The above example is just one of many benefits you can get by using Less (or Sass) for icon fonts. So let’s recap the tasks we have to do to rearrange our Icomoon CSS file in the Bootstrap way:
- Change the font path using the
@{icon-font-path}variable (that must be set in our Bootstrap projectvariables.lessfile). I don’t care about the@{icon-font-name}variable (there is also another one:@{icon-font-svg-id}), but you can handle that too if you need. - Change the catchall selectors (
[class^="myicon-"], [class*=" myicon-"]) in.myicon. - Change all individual icon classes using the
&selector. - Rename the file in
my-icons.less
You can do most of these changes manually, and the individual icon classes can be easily rearranged using a regular expression. Many tools can help you to perform this task, but I usually prefer Bare Bones BBEdit:
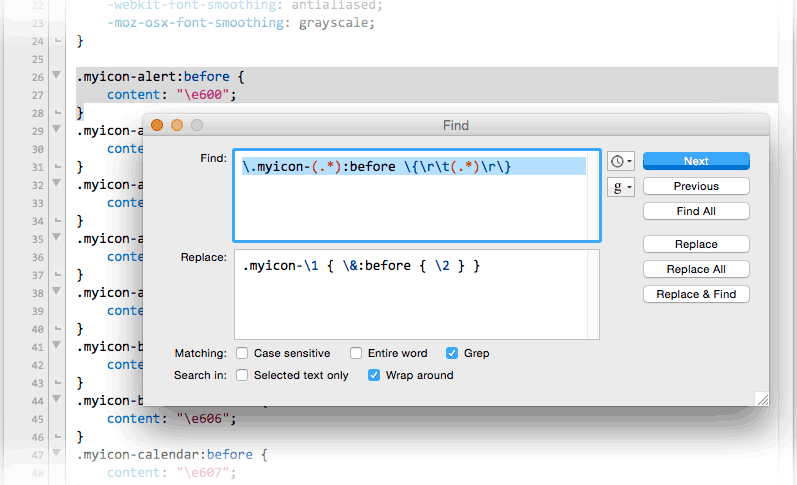
Its handy Search & Replace window, and the well documented support of Grep Patterns make BBEdit a very useful tool for this kind of work. BBEdit is a commercial code editor, but you can use its free “little brother” Text Wrangler to get the same results.
All changes take a few minutes, but you’ll probably need to repeat these tasks many times (especially when a project starts), and it would be useful if the tasks could be automated. Here is when a task runner like Gulp or Grunt, enters the game.
What is Gulp?
Gulp and Grunt are JavaScript task runners, in other words, a simple way to automate repetitive tasks. They use JavaScript and are perfect for a front-end developer since they don’t need to learn another language. Both of them only need Node.js to be installed on your computer, and this makes Grunt/Gulp scripts easy to share.
I’ve spent a bit of time to help me decide which one of them would be more suitable for this work. The difference is minimal, but I found Gulp to be a little easier, so I prefer it (maybe I’ll change my mind in the future).
Take a look at Craig’s article An Introduction to Gulp.js from last year, if you want an overview.
Installing Gulp
According to the official Gulp getting started guide, to install Gulp you have to perform a few simple steps.
Note: If you are already familiar with Gulp and have it installed, you can skip down to the next section.
First of all, you need to install the Node Package Manager for JavaScript (npm). npm comes with the Node.js installer, so you only need to download and run it.
Once npm is on your computer:
- Open the Terminal app (or the Command Prompt on Windows)
- Type
npm install --global gulp
On a Mac, you will probably get a lot of errors, since you need to be authenticated as administrator to run this kind of command:
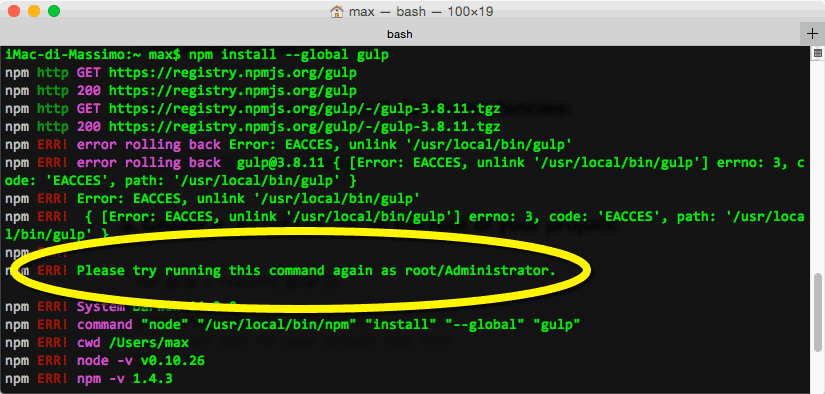
This can be easily solved using the sudo (= super user do) command that allows you to run commands as a top level administrator:
sudo npm install --global gulpYou will be asked for your administrator password, and then the installation will start.
At this point, Gulp will be installed globally on your computer, but you need to install it in your project folder too (on StackOverflow you can find a brief and clear explanation on this).
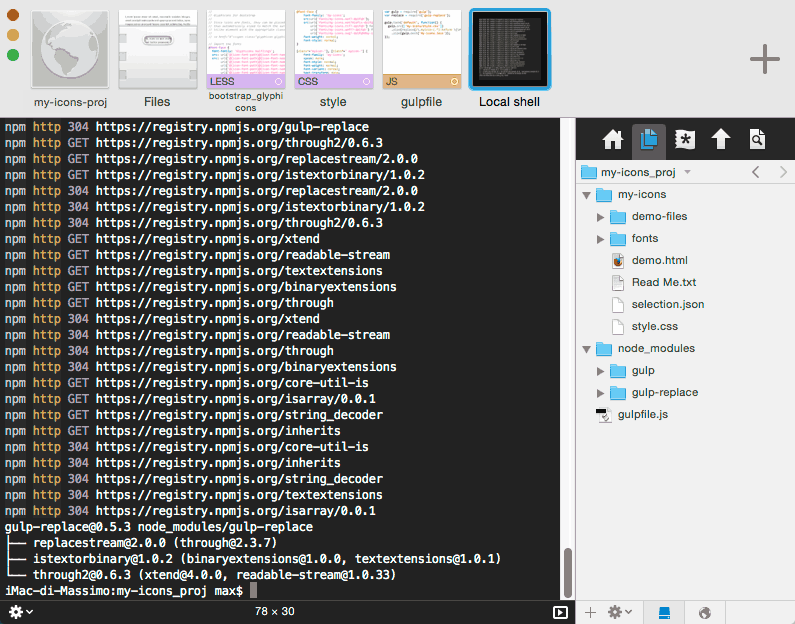
To install Gulp locally you have to locate your project folder in the Terminal using the cd (= change directory) command. You can perform this task by simply dragging your project folder into the Terminal / Command Prompt window (after you have typed cd followed by a space):

The full path of the folder will be automatically added to the terminal and you will only need to press the return key.
Once inside your project folder, type:
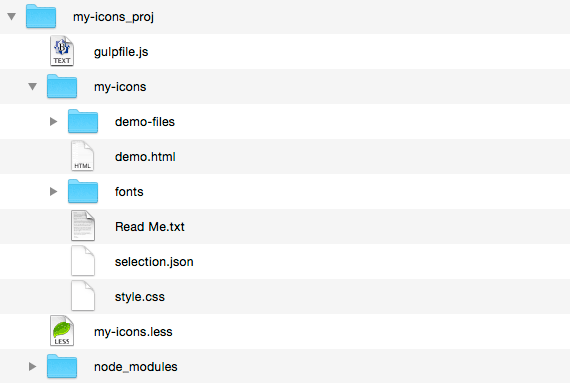
npm install --save-dev gulpYour Gulp installation is now completed and you will find a node_modules folder inside your project that contains the local Gulp files. Note that if you will need Gulp for other projects, you will have to repeat the local installation for each of them.
Tip: Using Coda Terminal
Although the Terminal app is perfect for our purposes, I find that Panic Coda, the application I normally use for development, is particularly suitable for this kind of work.
Coda has a built-in Terminal app that can open a local shell inside your project window. The Terminal opens directly in your project folder and you can switch to it without leaving Coda.
Install Gulp Modules
Besides installing Gulp, we need two modules (Gulp extensions) to perform our task.
They can be found at the npmjs online repository, and are Gulp Replace and Gulp Rename.
You have to install them locally in the same way you did for Gulp:
npm install --save-dev gulp-replace
npm install --save-dev gulp-rename
Note that the install command for each module can be found on its npmjs page:

Building the gulpfile.js
Now we can write our script. When Gulp is launched, it searches for a file named gulpfile.js, so you have to create it at the root of your project.
This is the content of it:
var gulp = require('gulp');
var replace = require('gulp-replace');
var rename = require("gulp-rename");

gulp.task('default', function() {
  gulp.src(['my-icons/style.css'])
    .pipe(replace(/\.myicon-(.*):before \{\n\t(.*)\n\}/g, '.myicon-$1 { \&:before { $2 } }'))
    .pipe(replace(/\[class\^="myicon-"\], \[class\*=" myicon-"\]/, '.myicon'))
    .pipe(replace(/url\('fonts\//g, "url('@{icon-font-path}/"))
    .pipe(rename("my-icons.less"))
    .pipe(gulp.dest('./'));
});
The first three lines load everything we need: Gulp and the two modules we have downloaded, then a task is instantiated: it first loads our source file (my-icons/style.css) and three replaces are performed. Note that we are using the vanilla JavaScript replace syntax and that the RegExp string is the same we’ve previously tested with BBEdit (or the tool you are using).
By default, Gulp generates a file with the same name of the source, therefore we need the Gulp Rename module to change it in my-icons.less. The last command tells Gulp the position of the generated file (in this case ./ indicates the same folder as gulpfile.js).
To perform all of the tasks, simply open the Terminal (or the Command Prompt) at your project root and type gulp.

This will create a my-icons.less file in your project folder root. The original file my-icons/style.css is left untouched, so that the my-icons/demo.html file (in your Icomoon folder) is still available to provide a useful reference to your font glyphs.
If you need to update your font, you only have to download the files from Icomoon and run your Gulp task again.
Conclusion
Although not mandatory, I found that rearranging the CSS icon file can really improve and speed up the development of a web project (not only if you are using Bootstrap). Gulp can help you in many ways, we have seen here a basic usage, but you can add more actions and speed up your work further.
Frequently Asked Questions (FAQs) about Customizing Bootstrap Icons Using Gulp
How can I install Gulp for customizing Bootstrap icons?
To install Gulp, you need to have Node.js and npm installed on your computer. Once you have these, you can install Gulp globally by running the command npm install --global gulp-cli in your terminal. After installing Gulp, you can create a new project directory and navigate into it. Then, you can initialize a new project with npm init. This will create a new package.json file in your project directory. Finally, you can install Gulp in your project devDependencies with npm install --save-dev gulp.
How can I use Gulp to customize Bootstrap icons?
After installing Gulp, you can create a gulpfile.js in your project root. This file is used to define tasks that automate your workflow. For customizing Bootstrap icons, you can use Gulp plugins like gulp-svgmin for minifying SVG files, gulp-cheerio for removing unnecessary code from SVG files, and gulp-replace for replacing attributes in SVG files. You can install these plugins with npm and require them at the top of your gulpfile.js. Then, you can define a task that uses these plugins to customize your Bootstrap icons.
What are the benefits of using Gulp for customizing Bootstrap icons?
Gulp automates your workflow and makes it easier to customize Bootstrap icons. It allows you to minify SVG files, remove unnecessary code, and replace attributes in a streamlined and efficient manner. This can save you a lot of time and effort, especially when working with a large number of icons. Moreover, Gulp tasks can be easily configured and reused, which enhances your productivity and consistency.
Can I use Gulp to customize other aspects of Bootstrap?
Yes, Gulp can be used to customize various aspects of Bootstrap, not just the icons. For instance, you can use Gulp to compile and minify your Bootstrap Sass files, concatenate and uglify your Bootstrap JavaScript files, and optimize your Bootstrap images. This makes Gulp a versatile tool for customizing and optimizing your Bootstrap projects.
How can I add customized Bootstrap icons to my website?
After customizing your Bootstrap icons with Gulp, you can add them to your website by including the SVG files in your HTML. You can do this by using the <img> tag with the src attribute set to the path of the SVG file. Alternatively, you can use the <object>, <embed>, or <iframe> tags to include the SVG files. Remember to add appropriate alt text for accessibility.
What should I do if I encounter errors while using Gulp?
If you encounter errors while using Gulp, you should first check the error message for clues about what went wrong. The error message often indicates which task or plugin caused the error, and what the error was. If the error message is not clear, you can try searching for the error online or asking for help on Gulp’s GitHub issues page or Stack Overflow.
Can I use Gulp with other icon libraries besides Bootstrap?
Yes, Gulp can be used with any icon library that provides SVG files. This includes popular libraries like Font Awesome, Ionicons, and Material Icons. You can use Gulp to customize these icons in the same way as Bootstrap icons.
How can I update Gulp and its plugins?
You can update Gulp and its plugins by running the command npm update in your project directory. This will update all the packages listed in your package.json file to the latest versions. If you want to update a specific package, you can use the command npm update <package-name>.
Can I use Gulp on different operating systems?
Yes, Gulp can be used on any operating system that supports Node.js, including Windows, macOS, and Linux. The installation and usage of Gulp are the same across all these operating systems.
How can I learn more about Gulp and its plugins?
You can learn more about Gulp and its plugins by visiting their official websites and reading their documentation. The documentation provides detailed information about how to install and use Gulp and its plugins, as well as examples and best practices. You can also find tutorials and articles about Gulp on websites like SitePoint, CSS-Tricks, and Smashing Magazine.
 Massimo Cassandro
Massimo is a web and graphic designer and front-end developer based in Roma, Italy.