- How do I set my text to display in a certain font?
- How do I remove underlines from my links?
- How do I remove the large gap between an h1 element and the following paragraph?
- How do I style the first item in a list differently from the others?
- How do I add a drop shadow to my text?
- How do I highlight text on the page?
- How do I change text to all capitals using CSS?
- How do I create a drop-caps effect?
- How do I change or remove the bullets on list items?
- How do I use an image for a list-item bullet?
How do I set my text to display in a certain font?
The browser will display text in the default font used for that browser and operating system. How do you change it to the one used in your design?
Solution
Specify the typeface that your text will adopt using the font-family property:
p {
  font-family: Verdana;
}
Discussion
As well as specific fonts, such as Verdana or Times, CSS allows the specification of some more-generic family names:
- serif
- sans-serif
- monospace
- cursive
- fantasy
When you specify fonts, it’s important to remember that users are unlikely to have the same fonts installed on their computer as you do. If you define a font that the user doesn’t have, your text will display according to their browsers’ default fonts, regardless of what you’d prefer.
To avoid this, you can simply specify generic font names and let users’ systems decide which font to apply.
For instance, if you want your document to appear in a sans-serif font such as Arial, you could use the following style rule:
p {
  font-family: sans-serif;
}
Now, you will probably want more control than this over the way your site displays—and you can. It’s possible to specify both font names and generic fonts in the same declaration block.
Take, for example, the following style rule for the p element:
p {
  font-family: Verdana, Geneva, Arial, Helvetica, sans-serif;
}
Here, we’ve specified that if Verdana is installed on the system, it should be used; otherwise, the browser is instructed to see if Geneva is installed; failing that, the computer will look for Arial, then Helvetica. If none of these fonts are available, the browser will then use that system’s default sans-serif font.
If a font-family name contains spaces, it should be enclosed in quotation marks, like so:
p {
  font-family: "Courier New", "Andale Mono", monospace;
}
The generic font-family names should always be without quotes and appear last in the list. The list of fonts is often termed a “font stack,” which is a good term to search for if you’re looking for information on fonts to use in this way.
Fonts that you can feel fairly confident using are:
Windows
Arial, Lucida, Impact, Times New Roman, Courier New, Tahoma, Comic Sans, Verdana, Georgia, Garamond
Mac
Helvetica, Futura, Bodoni, Times, Palatino, Courier, Gill Sans, Geneva, Baskerville, Andale Mono
This list reveals the reason why we chose the fonts we specified in our style rule. We begin by specifying our first preference, a common Windows font (Verdana), then list a similar Mac font (Geneva). Then we follow up with other fonts that would be usable if neither of these fonts were available.
How do I remove underlines from my links?
The widely accepted default indicator that text on a web page links to another document is that it is underlined and displays in a different color from the rest of the text. However, there may be instances in which you want to remove that underline.
Solution
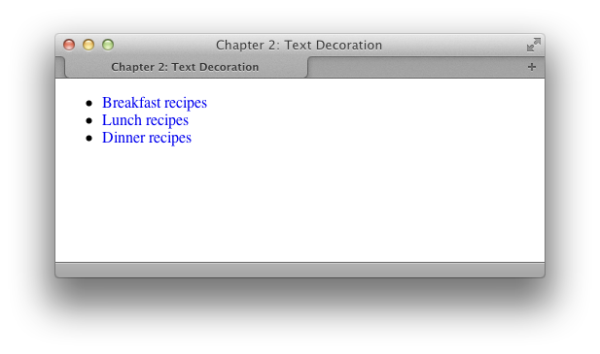
We use the text-decoration property to remove the underlines from link text. By default, the browser will set the text-decoration property of all elements to underline. To remove the underline, simply set the text-decoration property for the link to none:
text-decoration: none;The CSS used to create the effect shown in Figure 2.3 is as follows:
a:link, a:visited {
  text-decoration: none;
}
Discussion
In addition to underline and none, there are other values for text-decoration that you can try out:
- overline
- line-through
- blink
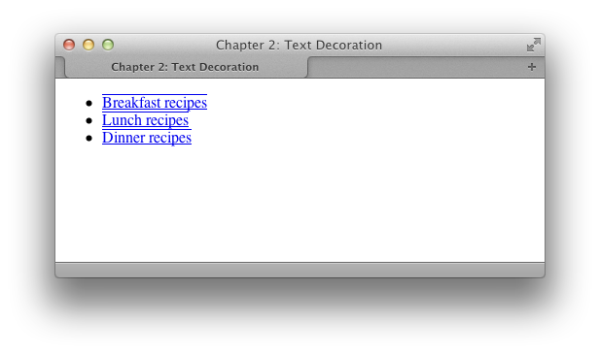
It is possible to combine these values. For instance, should you wish to have an underline and overline on a particular link—as illustrated in Figure 2.4 — you’d use this style rule:
a:link, a:visited {
  text-decoration: underline overline;
}
When is removing underlines a bad idea?
Underlining links is a standard convention followed by all web browsers, and, consequently, users expect to see links underlined. Removing the underline from links that appear within large areas of text can make it very difficult for people to realize that these words are, in fact, links, rather than just highlighted text. I’d advise against removing the underlines from links within text. There are other ways in which you can style links so that they look attractive, and removing the underline is rarely, if ever, necessary.
Links that are used as part of a menu, or appear in some other situation in which the text is quite obviously a link—for instance, where the text is styled with CSS to resemble a graphical button—are a different story. If you wish, you can remove the underline from these kinds of links, because it should be obvious from their context what they are.
How do I remove the large gap between an h1 element and the following paragraph?
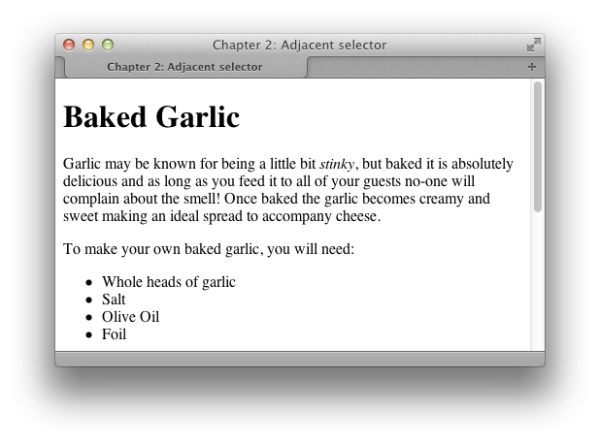
By default, browsers render a gap between all heading and paragraph elements. The gap is produced by default top and bottom margins that browsers apply to these elements. The margin on the heading shown in Figure 2.12 reflects the default value. This gap can be removed using CSS.
Solution
To remove all space between a heading and the paragraph that follows it, you must remove the bottom margin from the heading as well as the top margin from the paragraph. In modern browsers — including Internet Explorer 7 and above — we can do this through CSS using an adjacent selector. To achieve the same effect in older browsers, however, we need to revert to other techniques that are better supported.
Using an Adjacent Selector
An adjacent selector lets you target an element that follows another element, as long as both share the same parent. In fact, you can use adjacent selectors to specify an element that follows several other elements instead of just one. The element to which the style is applied is always the last element in the chain. If you’re confused, be assured that this concept will be clearer once we’ve seen it in action.
The following style rules remove the top margin from any paragraph that immediately follows a level-one heading. Note that the top margin is actually removed from the paragraph that follows the h1, rather than the level-one heading itself:
h1 {
  font: 1.6em Verdana, Geneva, Arial, Helvetica, sans-serif;
  margin-bottom: 0;
}

h1+p {
  margin-top: 0;
}
Figure 2.13 shows the display of the original page once this rule is applied.
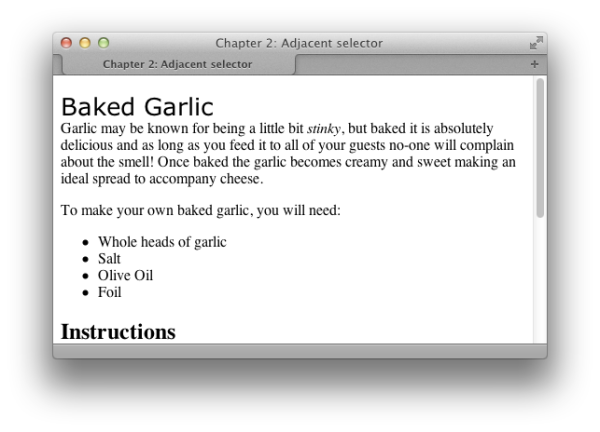
As you can see, the first paragraph that follows the h1 no longer has a top margin; all subsequent paragraphs, however, retain their top margins.
Discussion
The adjacent selector is supported in Internet Explorer 7 and above, and in all recent versions of other browsers.
How do I style the first item in a list differently from the others?
Frequently, designers find that they need to style the first of a set of items — be they list items or a number of paragraphs within a container — distinct from the rest of the set. One way to achieve this is to assign a class to the first item, and then style that class uniquely from other items; however, there’s a more elegant way to create this effect using the pseudo-class selector first-child.
Solution
Here’s a simple list of items marked up as an unordered list:
<ul>
  <li>Brie</li>
  <li>Cheddar</li>
  <li>Red Leicester</li>
  <li>Shropshire Blue</li>
</ul>
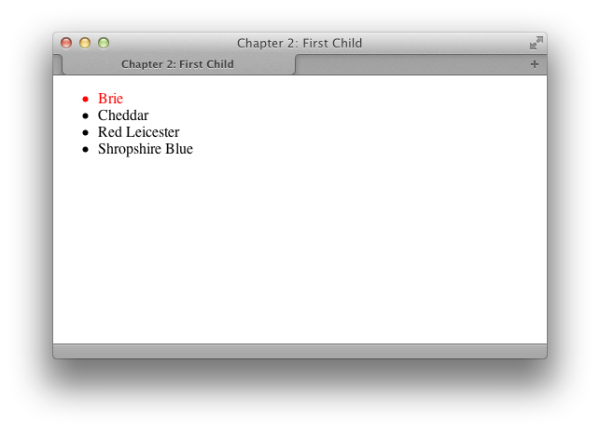
To change the color of the first item in the list without affecting its neighbors, we can use the first-child selector. This allows us to target the first element within the ul element, as shown in Figure 2.8:
li:first-child {
  color: red;
}
Discussion
The first-child pseudo-class selector is well supported in browsers as it has existed since the CSS2.1 specification. The only browser you’re likely to be concerned about without support is IE6.
How do I add a drop shadow to my text?
A drop shadow can be used to add a tiny shadow, whether to gently highlight some text, or allow a more dramatic shadow effect.
Solution
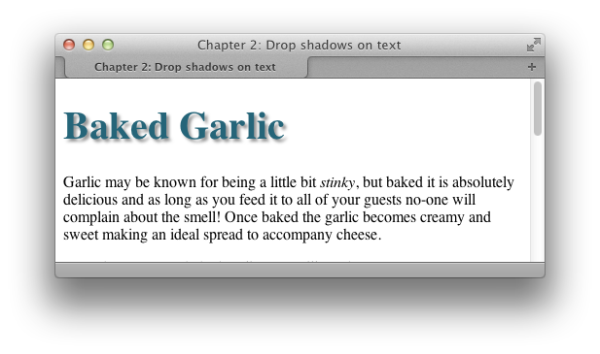
The text-shadow property lets you add shadows to text—from the subtle to the completely crazy:
<h1>Baked Garlic</h1>
<p>Garlic may be known for being a little bit <em>stinky</em>, but
  baked it is absolutely delicious and as long as you feed it to all
  of your guests no-one will complain about the smell! Once baked
  the garlic becomes creamy and sweet making an ideal spread to
  accompany cheese.</p>
h1 {
font-size: 250%;
color: #256579;
text-shadow: 3px 3px 3px #999;
}
Discussion
The syntax for the text-shadow property is straightforward:
text-shadow: 5px, 5px, 5px, #999;The first value is the horizontal distance from the text; the second is the vertical distance; the third is the blur radius or spread of the shadow; and the final value is the color. The easiest way to see how text-shadow works is to create a large heading so you can easily see your changes—and then play around with the values. You can also have a play around with text-shadow and many other CSS3 properties at the online CSS3 Generator.
Beyond a Shadow of Doubt
When adding shadows to text, make sure that your text is still legible. I find text-shadow most useful when adding effects to form buttons and big headings, but large quantities of body copy can be hard to read with a shadow applied. Sadly, the text-shadow property is unsupported in Internet Explorer (including version 9).
How do I highlight text on the page?
A common feature on many websites is to highlight an important term on a page, such as the search terms visitors have used to locate our web page through a search engine. It’s easy to highlight text using CSS.
Solution
If you wrap the text to be highlighted with span tags and add a class attribute, you can easily add a CSS rule for that class. For example, in the following paragraph, we’ve wrapped a phrase in span tags that apply the class hilite:
<p>Garlic may be known for being a little bit <span class="hilite">
  stinky</span>, but baked it is absolutely delicious and as long as
  you feed it to all of your guests no-one will complain about the
  smell! Once baked the garlic becomes creamy and sweet making an
  ideal spread to accompany cheese.</p>
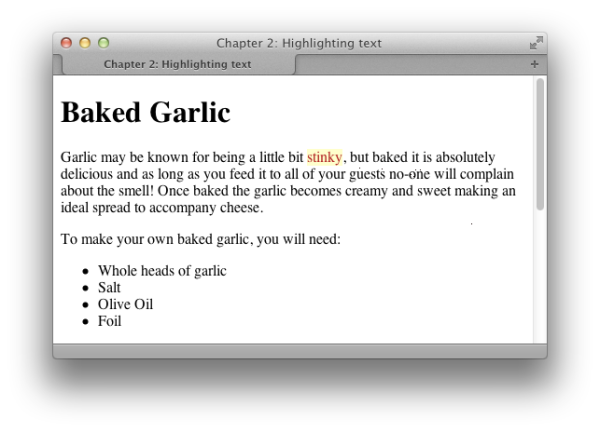
The style rule for the hilite class is shown below; the highlighted section will display as seen in Figure 2.14:
.hilite {
  background-color: #FFFFCC;
  color: #B22222;
}
When It’s All Done for Show
You should only highlight text in this way if the effect is purely presentational, and only relevant to those who can see the text in the browser. If the text needs to be highlighted in order to convey its meaning, consider using em (for emphasis) or strong instead, and then style the em or strong element. By using em or strong, you affect the meaning of the document. In such cases where highlighting is for looks only and no additional semantic elements are required, the technique explained here is the best one to use.
How do I change text to all capitals using CSS?
Solution
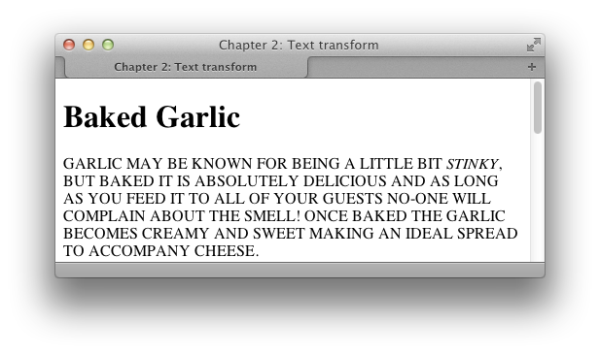
You can change text to all capitals, and perform other transformations, by using the text-transform property:
<p class="transform">Garlic may be known for ...</p>.transform {
text-transform: uppercase;
}Note the uppercase text in Figure 2.20.
Discussion
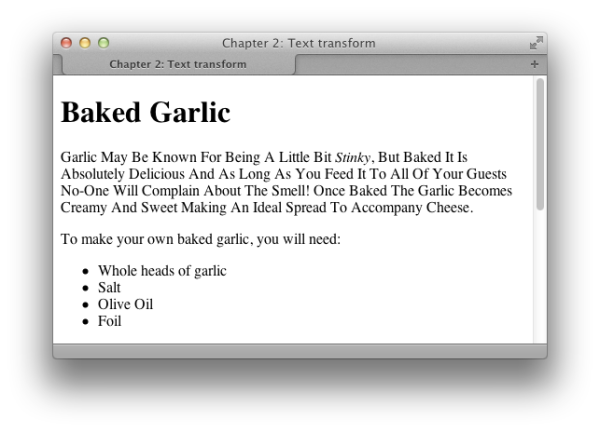
The text-transform property has other useful values. The value capitalize will capitalize the first letter of each word, as illustrated in Figure 2.21. This is very useful for transforming headings when text is being entered via a CMS. Users are unlikely to remember to capitalize everything correctly, but with CSS you can ensure that text will display neatly, regardless of what has been entered. You should be aware, however, that words such as “a” and “the” will also be capitalized.
.transform {
  text-transform: capitalize;
}
The other values that the text-transform property can take are:
- lowercase
- none
How do I create a drop-caps effect?
Making the first letter in a paragraph larger — a simple drop-capitals effect — is easily achieved with CSS.
Solution
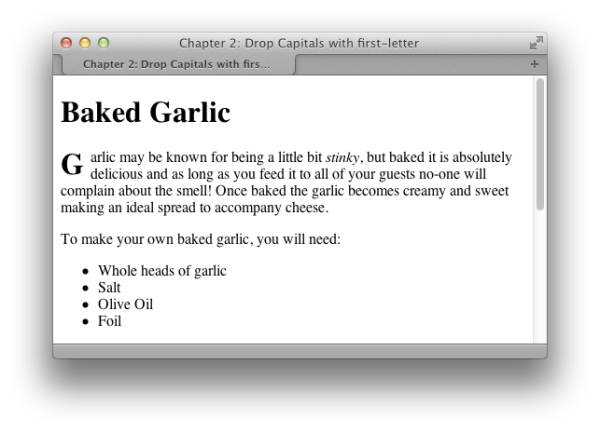
This can be achieved by using the first-letter pseudo-class selector:
<h1>Baked Garlic</h1>
<p>Garlic may be known for being a little bit <em>stinky</em>, but
  baked it is absolutely delicious and as long as you feed it to all
  of your guests no-one will complain about the smell! Once baked
  the garlic becomes creamy and sweet making an ideal spread to
  accompany cheese.</p>
h1 + p:first-letter {
font-size: 200%;
font-weight: bold;
float: left;
width: 1em;
line-height: 1;
}
Discussion
This is a basic example demonstrating the use of the pseudo-class selector first-letter. I’ve also used an adjacent selector to only target the paragraph that comes directly after an h1; without this, the first letter of every paragraph would have a drop cap. Because browsers interpret line-height differently, the results can be a little inconsistent, so you’ll need to experiment a little for a pleasing effect.
There is a useful article by James Edwards on the SitePoint website that discusses creating a drop-caps effect in some detail.
How do I change or remove the bullets on list items?
Solution
You can change the style of bullets displayed on an unordered list by altering the list-style-type property. First, here’s the markup for the list:
<ul>
  <li>Brie</li>
  <li>Cheddar</li>
  <li>Red Leicester</li>
  <li>Shropshire Blue</li>
</ul>
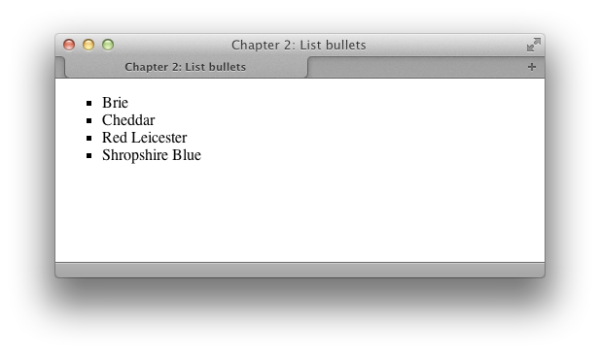
To display square bullets as in Figure 2.24, set the list-style-type property to square:
ul {
  list-style-type: square;
}
Discussion
Some of the other values that the list-style-type property can take are disc, circle, decimal-leading-zero, decimal, lower-roman, upper-roman, lower-alpha, upper-alpha, and none.
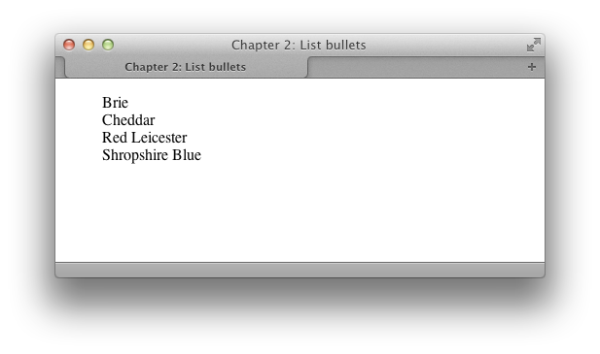
You’ll find that some of these values have no support in certain browsers; those browsers without support for a particular bullet type will display the default type instead. You can see the different types, and check the support your browser has for them, at the CSS Test Suite for list-style-type. Setting list-style-type to none will remove bullets from the display, although the list will still be indented as if the bullets were there, as Figure 2.25 shows:
ul {
  list-style-type: none;
}
How do I use an image for a list-item bullet?
Solution
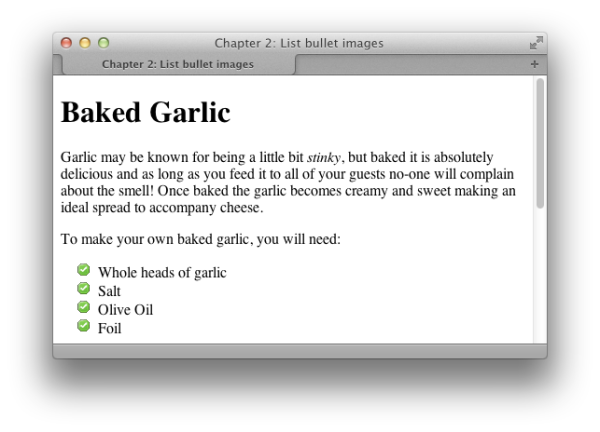
Create your image, then use the list-style-image property to set your bullets rather than list-style-image. This property accepts a URL, which can incorporate the path to your image file as a value:
ul {
  list-style-image: url(bullet.gif);
}
Figure 2.26 shows how this effect can be used to spruce up a list.
Setting Bullets on Individual List Items
The list-style-image property applies to the list item (li) elements in the list. But if you apply list-style-image to the list as a whole (the ul or ol element), each individual list item will inherit it. You do, however, have the option of setting the property on individual list items by assigning a class or id to each, giving individual items their own unique bullet images.
This is an excerpt from The CSS3 Anthology, 4th Edition, by Rachel Andrew
 Adam Roberts
Adam is SitePoint's head of newsletters, who mainly writes Versioning, a daily newsletter covering everything new and interesting in the world of web development. He has a beard and will talk to you about beer and Star Wars, if you let him.


