I had lost my phone. I left it on a couch in a shopping mall and returned back to find it gone. Someone had been gifted a new phone via the awful art of stealing. I sent JavaScript code remotely to my phone over the web that sent me the coordinates of the device any time I texted it. I tracked it to a Sizzler restaurant until they turned the phone off and it disappeared forever. I bought myself a new phone but saw new potential in a powerful app I’d barely used until that point called on{X}.
In this article I’ll be sharing a very different use of the app compared to the horror story of my lost phone. I’d like to show you how you can use your Android device to send remote instructions to a live web page. I’ll be using the example of remote controlling a HTML presentation but the concepts can be expanded to do any number of interesting things.
We’ll be using the following bits of tech:
If you don’t have an Android phone, don’t worry! You could theoretically use any other device that can make HTTP calls to work the same sort of Node/Socket.IO sorcery we’re about to unleash. This article assumes the reader has some knowledge of Node.js and JavaScript, however the source code is provided for your reference.
What is Socket.IO?
Before we get too far into this, I’ll explain what Socket.IO does, as it will appear in the next few code snippets. Socket.IO is a JavaScript library enabling real-time communication between servers and clients. It allows you to define events on both the server and client. For example io.sockets.emit('eventthathappened') creates a new event that the application can react to. To react to the event, simply set up an event handler like this – socket.on('eventthathappened', function(){}).
A chat program is a common example Socket.IO application. The server listens for incoming messages from any clients and displays them instantly on all clients running the chat app. We’ll be using it to instantly respond to signals from an Android device while the page is up.
Setting up the Server
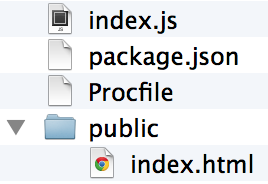
The directory structure of this demo is shown in the following figure. All of the server side code is stored in the main JavaScript file, index.js. The front end HTML, CSS, and JS are stored in the public folder.
The package.json file defines the dependencies and other meta information about the Node application. The contents of this file are shown below. Notice that the Express and Socket.IO modules are required in the dependencies.
{
  "name": "androidremotecontrol",
  "version": "0.0.1",
  "dependencies": {
    "express": "3.1.x",
    "socket.io": "latest"
  },
  "engines": {
    "node": "0.10.x",
    "npm": "1.2.x"
  }
}
Since this demo is intended to be hosted on Heroku, we’ll need a Procfile, whose content is shown below (pretty simple!).
web: node index.js
The Node Server
The Node server, stored in index.js is shown below.
var http = require('http'),
    express = require('express'),
    app = express(),
    server = require('http').createServer(app),
    io = require('socket.io').listen(server),
    port = process.env.PORT || 5000;

app.use(express.bodyParser());

app.get('/', function(request, response) {
  response.sendfile('public/index.html');
});

app.post('/nudging', function(request, response) {
  io.sockets.emit('nudge'+ request.body.nudged);
  response.json({success: true});
});

app.get(/^(.+)$/, function(req, res) {
  res.sendfile('public/' + req.params[0]);
});

server.listen(port, function() {
  console.log('Listening on ' + port);
});

io.configure(function() {
  io.set('transports', ['xhr-polling']);
  io.set('polling duration', 10);
});
The following lines from index.js are used to import Socket.IO and set the server’s port.
io = require("socket.io").listen(server),
port = process.env.PORT || 5000;
In order for Socket.IO to work on Heroku, I found I had to add these extra lines to configure xhr-polling rather than relying on WebSockets (you may not need these for your environment). These lines tell the server to wait for 10 seconds before answering with an empty response if it has no specific response to a GET or POST request.
io.configure(function () {
  io.set("transports", ["xhr-polling"]);
  io.set("polling duration", 10);
});
Controlling the Presentation Slides
This demo uses Deck.JS, but feel free to substitute any other HTML presentation template as long as it has a JS call to move between slides. For Deck.JS, simply download and unzip it to the public folder.
The most important route in the Node server is the POST request that allows us to interact with our presentation slides. This route is shown below.
app.post('/nudging', function(request, response) {
  io.sockets.emit('nudge'+ request.body.nudged);
  response.json({success: true});
});
The previous code calls io.sockets.emit('nudgeleft') or io.sockets.emit('nudgeright') depending on the JSON data that is sent with the request. A key point to make here is that the route responds with JSON. If you don’t do this, your requests will timeout as they will sit, waiting for a response from the server. At this point, you can run the server locally, or push it to Heroku for deployment.
Configuring Socket.IO
Additional JavaScript has been added to the presentation in public/js/magic.js as shown below:
(function() {
  var socket = io.connect(window.location.hostname);

  socket.on('nudgeleft', function() {
    $.deck('next');
  });

  socket.on('nudgeright', function() {
    $.deck('prev');
  });
}());
The first line connects to our Socket.IO server at window.location.hostname. For the purposes of this demo, we’ll keep it simple and have everything on one domain. The two event handlers listen for any request to nudge the slides left or right. If it notices these, then we run Deck.JS’s prev or next functions to move the slides.
The on{X} Secret Sauce
on{X} is an Android application that allows you to control your Android device and respond to events like incoming text messages, GPS location, battery life, and more via a JavaScript API. In this demo, we’ll be using it to send those server requests when nudges occur.
Getting Started with on{X}
- Download the app to your device: https://www.onx.ms/#!downloadAppPage.
- While that’s downloading, go to https://www.onx.ms on your desktop browser and log into on{X} using your Facebook account (don’t worry, this is just used to sync code between your device and on{X}).
- You’ll be taken to the dashboard of on{X}. You can go to recipes to explore exciting snippets of code already available if you’re interested, we’re going to delve straight into custom code for this tutorial though.
- Click the write code link on the top left corner of the page to bring up the code editor.
- Leave that window open, we’re about to add some code in there.
Coding on{X}
As mentioned above, on{X} has a JavaScript API which lets you call and detect a lot of events on your Android device. For this demo, we’re focusing mostly on the device.gestures.on method.
The first thing to do is go back to that window with the code editor open in on{X} and you’ll see “Rule name:”, rename that to something more friendly like “Nudge presentation control”. My on{X} code is shown below. Note that you will want to replace http://androidremotecontrol.herokuapp.com with your own server.
device.gestures.on('nudgeLeft', function() {
  device.notifications.createNotification('the phone was nudged left').show();
  device.ajax({
    url: 'http://androidremotecontrol.herokuapp.com/nudging',
    type: 'POST',
    dataType: 'json',
    data: '{"nudged":"left"}',
    headers: {'Content-Type':'application/json'}
  }, function onSuccess(body, textStatus, response) {
    console.info('successfully received http response!');
  }, function onError(textStatus, response) {
    var error = {};
    error.message = textStatus;
    error.statusCode = response.status;
    console.error('error: ',error);
  });
});

device.gestures.on('nudgeRight', function() {
  device.notifications.createNotification('the phone was nudged right').show();
  device.ajax({
    url: 'http://androidremotecontrol.herokuapp.com/nudging',
    type: 'POST',
    dataType: 'json',
    data: '{"nudged":"right"}',
    headers: {'Content-Type':'application/json'}
  }, function onSuccess(body, textStatus, response) {
    console.info('successfully received http response!');
  }, function onError(textStatus, response) {
    var error = {};
    error.message = textStatus;
    error.statusCode = response.status;
    console.error('error: ',error);
  });
});

device.gestures.startDetection(900000);

device.screen.on('on', function () {
  // Start gestures detection for 1 minute
  device.gestures.startDetection(900000);
});
The device.gestures.on component is used to setup event handlers. Any time on{X} detects a nudge left, the nudgeLeft handler is invoked. We have a line of code which basically displays a notification on your phone showing the phone was nudged left. You don’t need this but I use it for testing to be sure a nudge was detected. That line of code is shown below.
device.notifications.createNotification('the phone was nudged left').show();Next, we use on{X}’s device.ajax method to send JSON data to the server. Notice that the data type is explicitly defined as JSON. Without this the data doesn’t get sent properly.
Currently, the onSuccess callback function is just used to log that the HTTP response was successful. This maps to the response.json({success: true}) we set earlier in the Node server. You could add more to this success call to provide on{X} with more data if you felt so inclined. Similarly, the onError callback is used to log any errors that occur.
Next, we turn on detection for these gestures for 900,000 milliseconds. This will run when you first enable the code on your device. Chances are you’ll want this code to run for longer than 900,000 milliseconds. The way I’ve currently got it set up personally, is to turn this on each time the device’s screen comes on. So if you want to control your slides, just turn your screen on and you’ve got 900 seconds to go wild. From what I found while developing, you’ve got to provide a time limit with this function. If you find another way, please let me know in the comments. I’d love to update it.
Once you’ve updated the code to match your server address and it’s all ready to go, click “save and send to phone” for it to get sent over the web to your phone. From there, open up your URL with the presentation, turn your Android device’s screen on and try nudging left and right. If all went well, you’ll see your slides switching back and forth!
Viewing on{X} Logs
If you’d like to see log files for on{X}, you can open up the app on your Android phone, select the rule you’ve added and choose “view logs”. Alternatively you can see them on the on{X} site when you’re logged in by going to your rules page, selecting the rule and clicking the “logs” tab.
What About Security?
This method isn’t secure in any way. If anyone else works out the address of your presentation and what POST request you’re sending, they could easily switch your slides from anywhere around the world. For this and any other ideas you think up relating to Socket.IO and on{X}, just keep in mind that you’ll want to add a layer of security somewhere for anything too generic like this.
Conclusion
The idea behind this demo is to show that with JavaScript, Socket.IO, and a pretty nifty Android app, you can use your phone to affect web pages in any number of ways. Flicking presentation slides left and right is only the start. You could change what a web page displays based on your location, whether you’ve got an app running, if your battery is running out, etc. If you do create a little experiment with on{X} and Socket.IO, I’d love to hear about it. Go forth and code something up!
The Code
All the code for this demo is up and available on GitHub. My running version is also available on Heroku.
Frequently Asked Questions (FAQs) about Controlling Web Pages with JavaScript
What is the role of JavaScript in controlling web pages?
JavaScript plays a crucial role in controlling web pages. It is a programming language that allows you to implement complex features on web pages. When a web page is static, i.e., displaying static information, JavaScript can be used to make the page more interactive. It can respond to user actions, create dynamic content, control multimedia, animate images, and much more. JavaScript is run on the user’s computer, making the page load faster and reducing the load on the server.
How can I use JavaScript within a webpage?
JavaScript can be embedded directly into HTML using the <script> tag or linked externally using the src attribute within the <script> tag. The script can be placed in the head or body sections of your HTML document, but it’s generally recommended to place scripts at the bottom of the body section to prevent blocking the rendering of the page.
What are some examples of JavaScript controlling a webpage?
JavaScript can control a webpage in numerous ways. For instance, it can change the content and style of HTML elements, validate form data before it is submitted to a server, manipulate cookies, create pop-up windows, and much more. JavaScript can also be used to create complex applications like online games, interactive maps, and 2D/3D graphics.
How does JavaScript interact with HTML and CSS?
JavaScript interacts with HTML and CSS to create dynamic and interactive web pages. HTML is used for the structure of the web page, CSS for styling, and JavaScript for functionality. JavaScript can access and change all the elements and attributes in an HTML document. It can also change all the CSS styles in a web page.
Can I learn JavaScript without prior programming knowledge?
Yes, you can learn JavaScript without prior programming knowledge. However, it’s beneficial to have a basic understanding of HTML and CSS as they work together with JavaScript to create interactive web pages. There are many resources available online, including tutorials, videos, and interactive coding platforms, to help you learn JavaScript from scratch.
Is JavaScript only used for web development?
While JavaScript is primarily used for web development, its use is not limited to that. It can also be used for server-side programming using Node.js, for mobile app development using frameworks like React Native and Ionic, and for creating desktop applications with frameworks like Electron.
How secure is JavaScript?
JavaScript is secure, but like any other programming language, it can be exploited if not used correctly. It’s important to follow best practices for secure coding to prevent potential security issues. These include validating and sanitizing user input, avoiding the use of eval(), and regularly updating and checking your code for vulnerabilities.
Can JavaScript be used to create animations?
Yes, JavaScript can be used to create animations on a webpage. It can change the CSS properties of HTML elements over time, creating the effect of animation. JavaScript also provides the requestAnimationFrame method, which is specifically designed for creating smooth, browser-optimized animations.
What is the Document Object Model (DOM)?
The Document Object Model (DOM) is a programming interface for HTML and XML documents. It represents the structure of a document and allows programming languages like JavaScript to manipulate the content, structure, and style of the document.
How does JavaScript handle errors?
JavaScript handles errors using a combination of the try, catch, and finally statements. The try block contains the code that may potentially throw an error, the catch block handles the error, and the finally block contains code that is executed regardless of an error being thrown or not.
 Patrick Catanzariti
PatCat is the founder of Dev Diner, a site that explores developing for emerging tech such as virtual and augmented reality, the Internet of Things, artificial intelligence and wearables. He is a SitePoint contributing editor for emerging tech, an instructor at SitePoint Premium and O'Reilly, a Meta Pioneer and freelance developer who loves every opportunity to tinker with something new in a tech demo.