There’s a popular maxim that “a product is as good as its documentation”. This holds true as much for software as it does for physical products.
As a small, indie developer who doesn’t specialize in front-end design, I often hire a freelancer to build my product website—which, of course, usually includes a documentation section.
A documentation section can take quite a bit of time and money to build, even for a simple product, so it would be nice not to have to reinvent the wheel for every site. Fortunately, there is a way.
Introducing MkDocs
MkDocs is a free, static site generator geared towards building project documentation. It can be used to generate a stand-alone site, or just a documentation section of a larger site.
Because MkDocs produces static files, your documentation is light-weight and easy to host—using free services such as GitHub Pages and Read The Docs—or of course on your own server.
In this article, I’ll introduce MkDocs, showing you how to install it, build documentation with it and finally host the generated documentation on a web server.
To get a sense of the sort of documentation MkDocs produces, have a look at my ProfilePress WordPress plugin documentation, which is built with MkDocs using the Read the Docs theme.
MkDocs is written in Python. The documentation source files are written in Markdown, and configured with a single YAML configuration file.
To build documentation with MkDocs, you need to have it installed locally in your computer. So let’s next look at how to install it.
Installing Python and MkDocs
Static site generators like Jekyll (used mainly for blogging, and built on Ruby) and MkDocs do require some command-line chops, so be warned. However, to those not used to working with the command line, I encourage you to read on and give it a try, as it’s not as bad as it looks!
Installing Python and pip
To install MkDocs, you need to have Python and pip (a Python package manager) installed in your computer. They may already be installed on your computer. If you have Python 3.4 or later installed, you probably have pip installed. (See the Python installation guide for full instructions.)
To install Python on a Linux distribution such as Ubuntu, see this stackoverflow thread or do a Google search for your distribution.
For Windows, download your preferred version installer and run the file to install Python.
Alternatively, if you have the Chocolatey package manager installed in your machine, run choco install python.
To verify that your Python distribution has pip installed, run the pip --version command. Otherwise, run python get-pip.py or choco install pip via Chocolatey to get it installed.
Installing MkDocs
Now that Python and pip are installed, run pip install mkdocs to install MkDocs.
To confirm everything is fine, run mkdocs help to give mkdocs command a try.
If you are on Windows and the mkdocs command isn’t alive, be sure to add C:\path-to-python-folder\Scripts to Path environmental variable.
Building the Documentation
Now that you have Python and MkDocs set up, you can get on with your actual documentation.
Firstly, create a project for the documentation (let’s call it sp-doc) and navigate to the created folder:
$ mkdocs new sp-doc
$ cd sp-doc
The generated project folder will contain a docs folder—where the Markdown files for the documentation will be stored—and the configuration file mkdocs.yml.
Here is the directory structure:
|-- docs              # MD doc pages
    |-- index.md
|-- mkdocs.yml        # config file
Add the following bare-minimum configuration to mkdocs.yml file:
site_name: SitePoint Documentation
site_description: Description of the documentation
theme: readthedocs
pages:
- ['index.md', 'Index']
MkDocs ships with a number of themes—such as “MkDocs”, “Read the Docs” and “Bootstrap”. Say you intend to use the default theme. In that case, simply replace readthedocs with mkdocs in the code above.
The pages config is used to determine the set of pages that should be built for the documentation and the navigation menu.
Markdown files added to pages must be relative to the docs folder. For example, if you created a new folder called config inside the docs directory and added a setup.md file in it, here’s how you would add it to pages in the mkdocs.yml file configuration:
site_name: SitePoint Documentation
site_description: Description of the description
theme: readthedocs
pages:
- ['index.md', 'Index']
- ['start.md', 'Get Started']
- ['config/setup.md', 'Configuration', 'Setup']
- ['config/debug.md', 'Configuration', 'Debug']
This creates some new pages that appear automatically in our documentation menu. Firstly, there’s a start.md page, with the title “Get Started”.
We’ve also added a new section to the documentation menu called “Configuration”, under which there’s a link to new Setup and Debug pages.
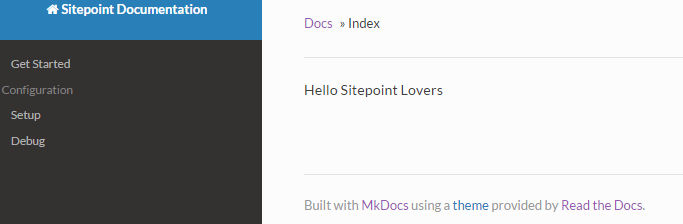
MkDocs includes a built-in web server, so you can preview your documentation locally as you work on it.
To start the web server, ensure you are in the directory where mkdocs.yml config file resides, and then run the mkdocs serve command.
Visit http://127.0.0.1:8000 in your browser to view the documentation:
If you’re satisfied with what you’ve created, run mkdocs build to generate the static files for the documentation which will be saved to site directory.
You can copy the static files and host them on a web server of your choosing to take the documentation live.
In the next section, we’ll learn how to deploy MkDocs to Read the Docs and GitHub Pages.
Deploying MkDocs
Firstly, create a GitHub (or Bitbucket) repository to store the files.
Run the following commands to deploy to GitHub where https://github.com/Collizo4sky/sitepoint_mkdocs is my own MkDocs repo:
$ git init

$ git remote add origin https://github.com/Collizo4sky/sitepoint_mkdocs.git

$ git add -A

$ git commit -a -m 'the genesis'

git push --set-upstream origin master
Let’s now deploy our documentation files to Read the Docs, a free documentation service.
Read the Docs
Firstly, create an account if you don’t have one and log in.
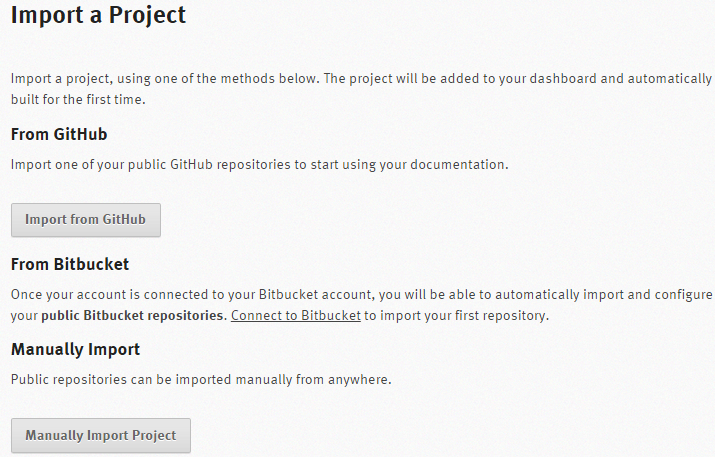
Click the Import a Project button or click the Add project menu item.
You can choose to connect your GitHub or Bitbucket account to Read the Docs to import your entire project. Instead, we’ll go with the manual importation, by clicking the Manually Import Project button.
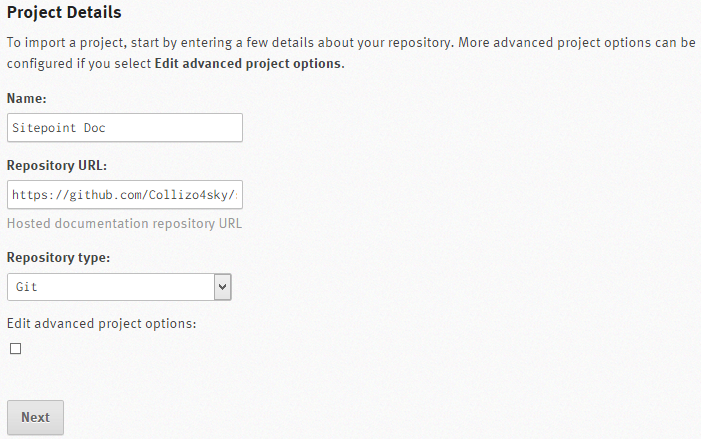
Fill the form as shown in the image below:
On successfully importing the docs from GitHub, you’ll be redirected to project page:

You can view our generated documentation at http://sitepoint-doc.readthedocs.org/en/latest/.
If you want the documentation on a subdomain, point a CNAME record in your DNS to the subdomain for your project.
For example, to make the documentation available on docs.sitepoint.com, create a CNAME record pointing to sitepoint-doc.readthedocs.org.
![]()
GitHub Pages
Now let’s look at how to host our documentation on GitHub Pages, another free hosting service.
Ensure you are on the working branch of the git repository—which is the master branch in our case.
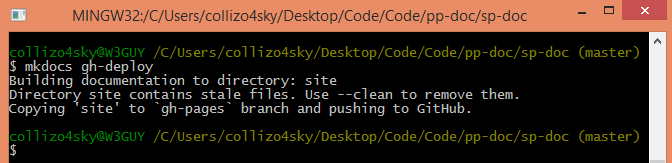
Run the command mkdocs gh-deploy --clean
Behind the scenes, this command will build your docs and commit them to the gh-pages branch and then push the branch to GitHub.
Here is a demo of our SitePoint docs on GitHub Pages.
Other Providers
Any hosting provider that can serve static files can be used to serve documentation generated by MkDocs. The following guidelines should provide some general assistance.
When you build your site using the mkdocs build command, all of the files are written to the directory assigned to the site_dir configuration option (defaults to “site”) in your mkdocs.yaml config file.
Simply copy the contents of that directory to the root directory of your hosting provider’s server and you are done. Or, if your docs will just be a subsection of your site, move the files to a designated subfolder.
Summary
In this tutorial, we learned how to build documentation with MkDocs, a Python static website generator, and also how to deploy and host the documentation for free on GitHub Pages and Read the Docs.
Have you used MkDocs before? If not, would you consider using it? How do you currently deal with serving documentation to your users? I’d love to hear your feedback or answer any questions you might have.
Frequently Asked Questions (FAQs) about Building Product Documentation with MkDocs
What are the prerequisites for using MkDocs?
To use MkDocs, you need to have Python installed on your system. MkDocs supports Python versions 2.7, 3.5, 3.6, 3.7, 3.8, and pypy. You can check your Python version by typing python –version in your command prompt. If Python is successfully installed, the version number will be displayed. If not, you need to install Python first. After Python is installed, you can install MkDocs using pip, the Python package installer. Type pip install mkdocs in your command prompt to install MkDocs.
How can I customize the look of my MkDocs site?
MkDocs uses themes to control the appearance of the site. The default theme is called “mkdocs”, but there are many other themes available. You can change the theme by editing the mkdocs.yml configuration file. Under the theme section, replace mkdocs with the name of your desired theme. Some themes also allow further customization by adding a custom CSS or JavaScript file.
How do I add a new page to my MkDocs site?
To add a new page, first create a new Markdown file in your docs directory. The name of the file will be used as the URL for the page. Then, add a new entry to the pages section of your mkdocs.yml configuration file. The format is – [‘Page Title’, ‘filename.md’]. The page title will be used as the link text in the navigation menu.
How do I deploy my MkDocs site?
MkDocs includes a built-in deployment command for GitHub Pages. Simply run mkdocs gh-deploy from your command prompt, and MkDocs will build your site and push it to the gh-pages branch of your GitHub repository. If you want to deploy to a different provider, you will need to build the site with mkdocs build and then manually upload the site files.
Can I use MkDocs with Read the Docs?
Yes, MkDocs is fully compatible with Read the Docs, a popular documentation hosting platform. To use MkDocs with Read the Docs, you need to create a .readthedocs.yml configuration file in the root of your repository and specify mkdocs as the documentation type.
How do I update MkDocs?
You can update MkDocs by running pip install –upgrade mkdocs in your command prompt. This will download and install the latest version of MkDocs.
Can I use MkDocs for private documentation?
Yes, you can use MkDocs for private documentation. However, if you’re using the built-in GitHub Pages deployment, your documentation will be publicly accessible. If you need to keep your documentation private, you can use a different hosting provider that supports password protection or access control.
How do I add a search function to my MkDocs site?
Most MkDocs themes include a built-in search function. If your theme doesn’t include search, or if you want to use a different search provider, you can add a search plugin to your mkdocs.yml configuration file.
Can I use MkDocs to generate a PDF of my documentation?
MkDocs is designed to generate HTML websites, not PDFs. However, there are third-party tools and services that can convert your MkDocs site into a PDF.
How do I add a navigation menu to my MkDocs site?
The navigation menu is automatically generated from the pages section of your mkdocs.yml configuration file. Each entry in the pages section becomes a link in the navigation menu. The order of the links matches the order of the entries in the pages section.
 Collins Agbonghama
Collins is a web developer and freelance writer. Creator of the popular ProfilePress and MailOptin WordPress plugins. When not wrangling with code, you can find him writing at his personal blog or on Twitter.