WordPress started life as a blog engine, web software for creating blogs. Over the years, it has evolved into a content management system (CMS), even though some developers might disagree on it being considered a CMS.
There’s a healthy disrespect for the WordPress default login and registration pages, because they live outside the website without conforming to the site design.
When it comes to creating a website for clients, you might want a more customized login page, so that it integrates nicely with the website design as a whole. There are also numerous plugins that extend WordPress where the registration and login pages are used by end users, not just site administrators.
A couple of developers have released several kinds of plugins for customizing the default login and registration forms in WordPress such as the Custom Login Page Customizer.
The gripe about the default account page is not primarily because it isn’t pretty, but because it doesn’t have a connection to the website look and feel.
A quick Google search on building custom registration and login pages for WordPress reveals tutorials geared towards advanced PHP/WordPress developers. This is ok if you’re experienced, but as someone that’s written a lot of developer tutorials, I know there’s also an audience that needs something a bit simpler.
In this tutorial, we’ll learn how to build custom WordPress login, registration and password reset pages with a plugin I’ve developed called ProfilePress, all without writing a single line of PHP code. Of course, if you’re a developer, you’re welcome to check out the code too.
The form design below is what will be used in this tutorial.
See the Pen SP ProfilePress Login for WordPress by Agbonghama Collins (@collizo4sky) on CodePen.
See the Pen SP ProfilePress Registration for WordPress by Agbonghama Collins (@collizo4sky) on CodePen.
See the Pen SP Password Reset by Agbonghama Collins (@collizo4sky) on CodePen.
If you want to jump ahead of the tutorial, you can view a demo of the login, registration and password reset pages.
Introducing ProfilePress
ProfilePress is a WordPress plugin that makes building user account (login, registration, password reset, and edit profile) forms and front-end profile stupidly simple without having to code any PHP validation, authentication and authorization system on the server-side. It’s something I saw a need for, so I created it. It’s been an interesting project to work on, something I’ll share more about in future articles.
For a typical example, it can turn a simple HTML login form into a functional WordPress login without writing any PHP.
ProfilePress isn’t a drag-and-drop kind of plugin, rather it utilizes shortcodes as its templating system for building account forms and front-end profiles.
Shortcodes are to ProfilePress what Handlebars and Twig are to JavaScript and PHP respectively. You might already be familiar with shortcodes if you’ve used plugins such as Gravity Forms, Contact Form 7 or NextGEN Gallery. They’re very easy to use.
Without further ado, let’s get started with building the login, registration and password reset WordPress forms.
Custom Login Page
First off, install and activate the Lite version of ProfilePress plugin available for free in WordPress plugin directory.
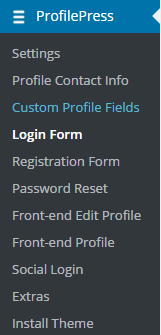
Click the Login Form menu as shown in the image below and then the Add New button to begin the process.
A form will be presented to you. Fill the fields as follows.
Enter a name for the login form in the Template Name field.
Copy the codepen login form code above to the Login Design TinyMCE editor and then replace the text, password and submit input fields with their respective shortcode equivalents.
Here is the final HTML code for the login form.
<div class="sp-pp">
  <div class="container">
    <h1>SitePoint</h1>
    <h2>Sign In</h2>
    <fieldset class="form-fieldset ui-input __first">
      [login-username id="username"]
      <label for="username">
        <span data-text="Username">Username</span>
      </label>
    </fieldset>

    <fieldset class="form-fieldset ui-input __second">
      [login-password id="password"]
      <label for="password">
        <span data-text="Password">Password</span>
      </label>
    </fieldset>

    <div class="form-footer">
       [login-submit class="btn" value="Log In"]
    </div>
  </div>
</div>
Note: no form tag <form ..></form> is allowed. They are automatically added by the plugin when rendering the forms.
Paste the login CSS into the CSS Stylesheet text area.
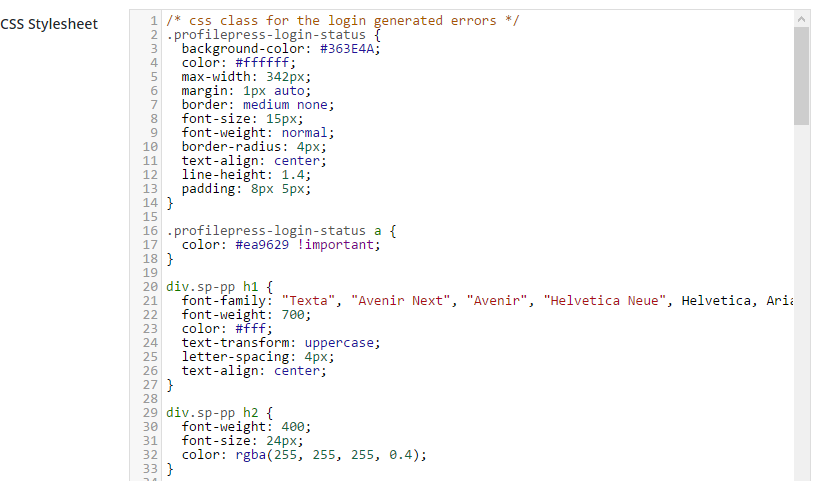
Note: Errors generated by ProfilePress login forms are wrapped in a div with class profilepress-login-status, thus the presence of the class in the login stylesheet.
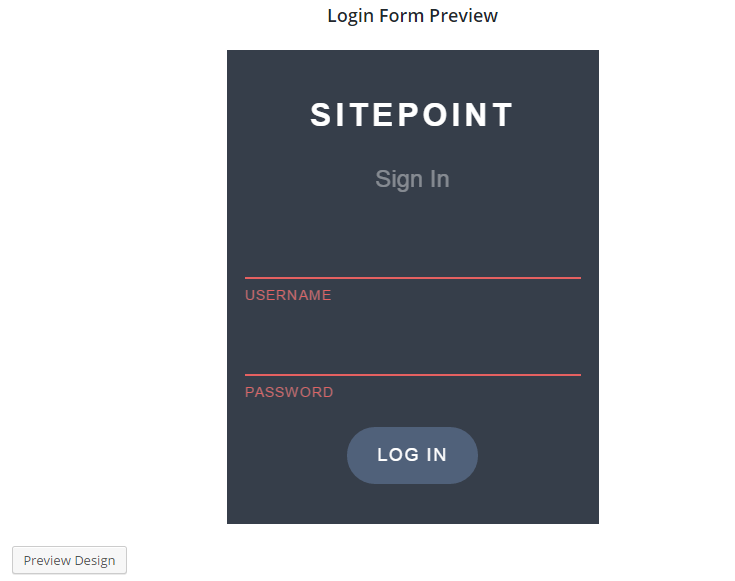
To see a preview of the login form, click the Preview Design button.
Finally, hit the Save Changes button to create the login form.
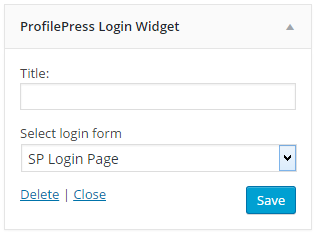
To make the login form available as a WordPress widget that can be dragged and dropped into a widgetized area / sidebar; check the Make this a Widget check box. After saving the changes, Go to the WordPress widget admin page, drag the ProfilePress Login Widget to a desired location and select the login form and save.
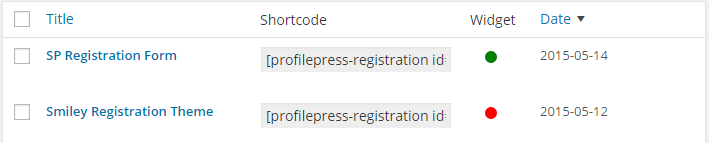
Navigate back to the login catalog, copy the generated login shortcode and paste it to the page you wish to make your custom login page.

Custom Registration Page
Building a custom registration form with ProfilePress follows pretty much the steps as a login form save for the form design and success message (text displayed on successful registration).
Click the Registration Form menu followed by the Add New button.
Copy the codepen registration form code above to Registration Design TinyMCE editor.
Replace the form components (username, password, email, first name, last name fields and submit button) with their respective ProfilePress shortcode equivalents.
The code for registration form will finally look like this:
<div class="sp-pp">
  <div class="container">
    <h1>SitePoint</h1>
    <h2>Create a new account</h2>
    <fieldset class="form-fieldset ui-input __first">
      [reg-username id="username"]
      <label for="username">
        <span data-text="Username">Username</span>
      </label>
    </fieldset>

    <fieldset class="form-fieldset ui-input __second">
      [reg-email id="email"]
      <label for="email">
        <span data-text="E-mail Address">E-mail Address</span>
      </label>
    </fieldset>

    <fieldset class="form-fieldset ui-input __third">
      [reg-password id="password"]
      <label for="password">
        <span data-text="Password">Password</span>
      </label>
    </fieldset>

    <fieldset class="form-fieldset ui-input __fourth">
      [reg-first-name id="first-name"]
      <label for="first-name">
        <span data-text="First Name">First Name</span>
      </label>
    </fieldset>

    <fieldset class="form-fieldset ui-input __fourth">
      [reg-last-name id="last-name"]
      <label for="last-name">
        <span data-text="Last Name">Last Name</span>
      </label>
    </fieldset>

    <div class="form-footer">
      [reg-submit class="btn" value="Create Account"]
    </div>
  </div>
</div>
Paste the registration CSS into the CSS Stylesheet text area.
Note: Errors generated by ProfilePress registration forms are wrapped in a div with class name profilepress-reg-status, hence the class in the style sheet.
Enter the code to display a customized message on successful user registration.
<div class="profilepress-reg-status">Registration Successful.</div>There is also the option to make a registration form available as a widget, I’ve found this can be very useful.

Navigate back to the registration catalog, copy the generated shortcode and paste it to the page you wish to make your custom registration page.
Custom Password Reset Page
Go to the password reset settings page by clicking the Password Reset menu.
Click the Add New button at the top of the page to begin the form building process.
Copy the CodePen password reset form code above to the Password Reset Design TinyMCE editor.
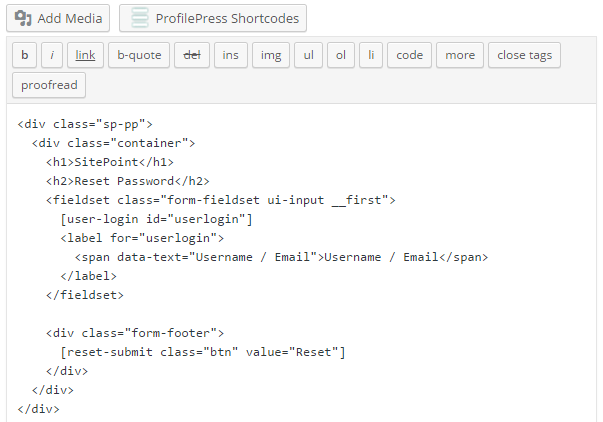
Replace the username/email field and the submit button with their shortcode equivalents.
The final code for the password reset form will look like this:
<div class="sp-pp">
  <div class="container">
    <h1>SitePoint</h1>
    <h2>Reset Password</h2>
    <fieldset class="form-fieldset ui-input __first">
      [user-login id="userlogin"]
      <label for="userlogin">
        <span data-text="Username / Email">Username / Email</span>
      </label>
    </fieldset>

    <div class="form-footer">
      [reset-submit class="btn" value="Reset"]
    </div>
  </div>
</div>
Enter the code below into Message on successful password reset text area in order to display a customized message after users successfully use the form to reset their password.
<div class="profilepress-reset-status">Check your e-mail for further instruction.</div>Save the changes and go back to the catalog.
Copy the generated shortcode and paste it to the page you wish to make your custom password page.
Redirecting the Default WordPress Account Pages to the Custom Alternatives
Finally, all we need to do now is redirect the default WordPress login, registration and password reset pages to their custom alternatives created with ProfilePress, so when users visit the following default URLs below, they will be redirected to the custom pages.
- http://example.com/wp-login.php
- http://example.com/wp-login.php?action=register
- http://example.com/wp-login.php?action=lostpassword
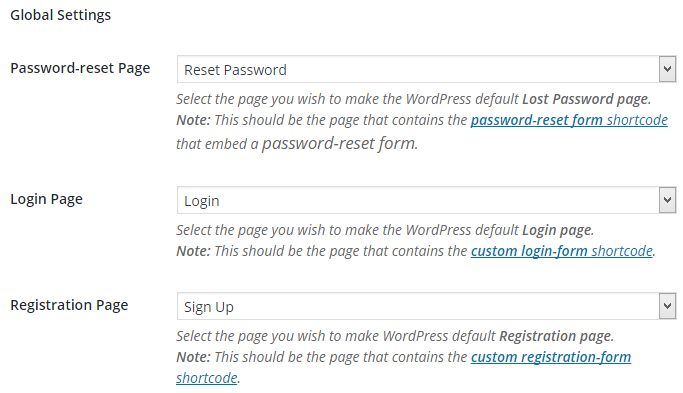
To achieve this, click the settings plugin menu.
In the Global Settings section, select and save the custom login, registration and password reset pages.
Summary
In this tutorial, we learned how to easily build a custom login, registration and password reset page in WordPress using a plugin I’ve written called ProfilePress available in the WordPress Plugin Directory. We also learned how to redirect the default WordPress account pages to the custom account pages.
If you have any questions, suggestions or contributions, please let me know in the comments.
Frequently Asked Questions on Building Custom Login and Registration Pages in WordPress
How Can I Customize the Look of My WordPress Login Page?
Customizing the look of your WordPress login page can be done by using a plugin or manually coding. Plugins like Theme My Login, Custom Login Page Customizer, and LoginPress provide easy-to-use interfaces for customization. If you prefer coding, you can create a custom login page by creating a new PHP file in your theme directory and using the wp_login_form function to display the login form. You can then style the form using CSS.
Can I Add Extra Fields to My Custom Registration Form?
Yes, you can add extra fields to your custom registration form. This can be done by using the ‘register_form’ action hook in WordPress. You can add a function to your functions.php file that adds the extra fields and then use the ‘registration_errors’ and ‘user_register’ hooks to validate and save the field data.
How Can I Redirect Users After Login or Registration?
You can redirect users after login or registration by using the ‘login_redirect’ filter hook. This hook allows you to specify a URL to redirect to. You can add a function to your functions.php file that returns the URL you want to redirect to.
Is It Possible to Create a Custom Login Page Without a Plugin?
Yes, it is possible to create a custom login page without a plugin. This can be done by creating a new PHP file in your theme directory and using the wp_login_form function to display the login form. You can then style the form using CSS.
How Can I Add a Remember Me Checkbox to My Custom Login Form?
The wp_login_form function includes a ‘remember’ parameter that you can set to true to include a Remember Me checkbox. If you’re using a plugin, check the plugin settings to see if there’s an option to include a Remember Me checkbox.
Can I Use a Shortcode to Display My Custom Login Form?
Yes, you can use a shortcode to display your custom login form. The wp_login_form function returns a string containing the form HTML, which you can use in a shortcode function. You can then use the shortcode in your posts or pages to display the form.
How Can I Change the Error Messages on My Custom Login Form?
You can change the error messages on your custom login form by using the ‘login_errors’ filter hook. This hook allows you to modify the error messages before they’re displayed.
Can I Add Social Login to My Custom Login Page?
Yes, you can add social login to your custom login page. There are several plugins available that provide social login functionality, such as Nextend Social Login and WP Social Login. If you prefer coding, you can use the HybridAuth library to add social login.
How Can I Protect My Custom Login Page Against Brute Force Attacks?
You can protect your custom login page against brute force attacks by using a plugin like Limit Login Attempts or Login LockDown. These plugins limit the number of login attempts from a single IP address.
Can I Add a CAPTCHA to My Custom Login Form?
Yes, you can add a CAPTCHA to your custom login form. There are several plugins available that provide CAPTCHA functionality, such as Really Simple CAPTCHA and Google Captcha (reCAPTCHA). If you prefer coding, you can use the Google reCAPTCHA API to add a CAPTCHA.
 Collins Agbonghama
Collins is a web developer and freelance writer. Creator of the popular ProfilePress and MailOptin WordPress plugins. When not wrangling with code, you can find him writing at his personal blog or on Twitter.