 This article was peer reviewed by Fred Heath. Thanks to all of SitePoint’s peer reviewers for making SitePoint content the best it can be!
Just another content management system? If that is the question running through your mind, wait until you get to the end of this post. I have been on the search for a Content Management System (CMS) built on Ruby on Rails but like WordPress. All the content management systems I have found are great in their different ways, but none matched this requirement until I found Camaleon CMS.
Welcome to Camaleon CMS
According to RailsCarma, “Camaleon CMS is an advanced and dynamic semantic personal publishing CMS based on Ruby on Rails. It allows you to manage your website from any place with internet connection. Modular, cost-effective and scalable website, Camaleon CMS is a feature-packed, established and remarkably well-coded powerful platform focused on aesthetics, web standards and usability.” It was built and is currently manainted by Owen Peredo Diaz.
Features:
- Multi Site.
- Multi Language: You can manage the contents of your site in several languages.
- Manage widgets to embed anywhere.
- Security: Multiple security measures are available to protect your site from various attacks.
- SEO & HTML5: Automatic sitemap generators, SEO Configuration, SEO for social media, and content customization for various devices.
- Easily customize the look of the site using themes.
Enough talk, let’s get busy!
Installation
Camaleon CMS requires ImageMagick to work. Installing it is pretty easy, open up your terminal and run the command below, depending on your operating system:
For Mac users (with Homebrew installed):
brew install imagemagick
For Ubuntu users:
sudo apt-get install imagemagick
Camaleon CMS requires Ruby on Rails 4.1+. To check the version of Rails running on your machine, open a terminal and enter the command:
rails -v
=> Rails 4.2.1
To install the latest Rails version, open up a terminal and enter:
gem install rails
That will install Rails and its dependencies. As of the time of this writing, the latest Rails version is 4.2.4. In this tutorial, we will learn how to build a blog using Camaleon CMS.
From your terminal create a new Rails project and navigate to its home directory:
rails new rubyblog
cd rubyblog
Open the Gemfile using your text editor and add the Camaleon CMS gem:
gem 'camaleon_cms'
Run bundle install:
bundle install
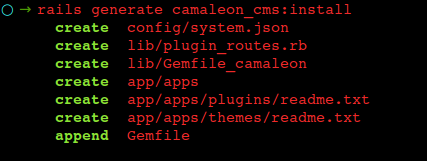
Thanfully, Camaleon comes with some handy generators. Let’s use them to install the CMS. From your terminal type:
rails generate camaleon_cms:install
This will copy some basic templates and plugins into your project. You can follow the path shown on your terminal to see what was created.
From the terminal output, you’ll notice that something was added into the Gemfile. The camaleon_cms gem has its own dependencies. Open the lib/Gemfile_camaleon file to view the gems. Go back to your Gemfile and you will see what was appended:
#################### Camaleon CMS include all gems for plugins and themes ####################
require './lib/plugin_routes'
instance_eval(PluginRoutes.draw_gems)
Install the gems and migrate the database:
bundle install
rake db:migrate
Start your server (rails s) and view the blog by going to http://localhost:3000 in a browser.
General Settings and Customization
You will be presented with a page for quick setup. Enter the name of your blog and choose a theme. Three themes are provided, select one and hit submit.

User Setup
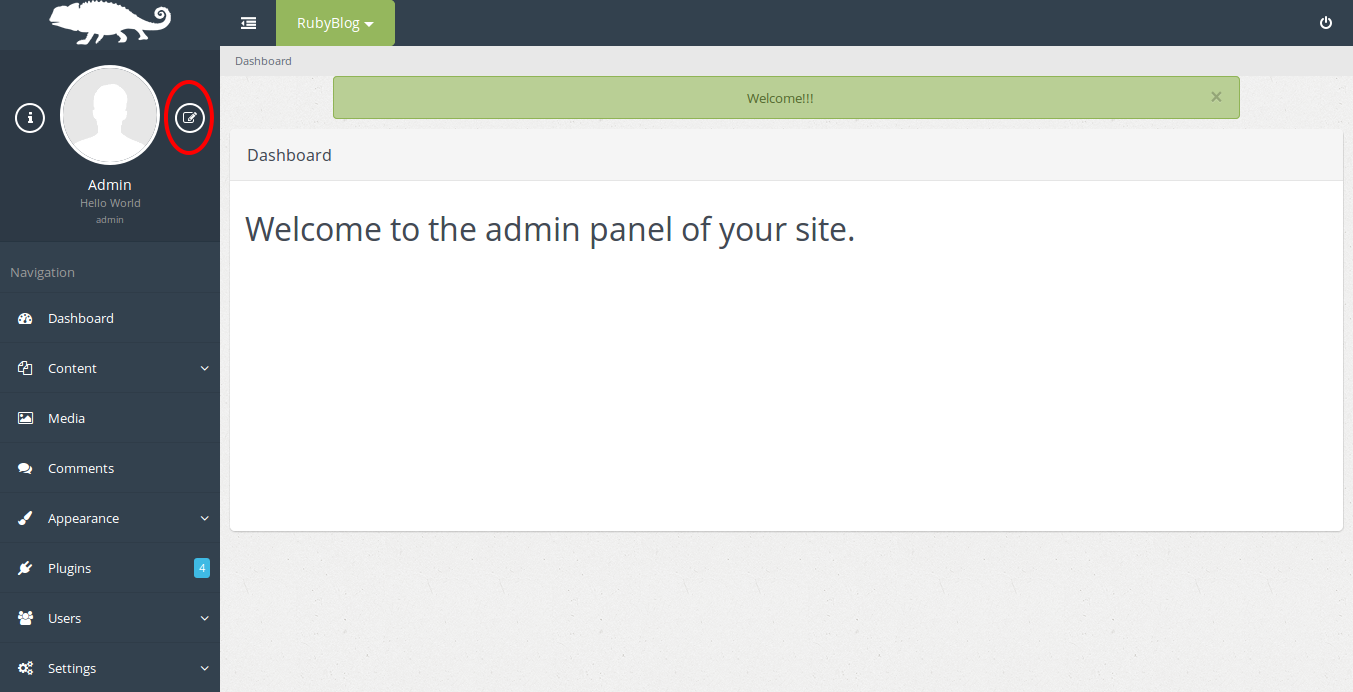
Camaleon CMS presents a default username and password (admin/admin) to login to the admin dashboard. We need to change this. Login to your dashboard. Click on the icon by the right hand side of the user image shown on the left side of your screen as indicated below.
Scroll down to the bottom of the page and select Change Password. Enter your old password which should be admin and a new password in the form displayed. Select Process and a dialog box should pop up showing that your password has been updated.
From this panel, you can edit the user profile as needed. When you are done, log out and login to see if the password successfully changed. You can log out by clicking the icon at the top right corner of your screen, then select Yes from the dialog box that pops up. If you changed the username from admin, enter the new one and your new password to login to your dashboard.
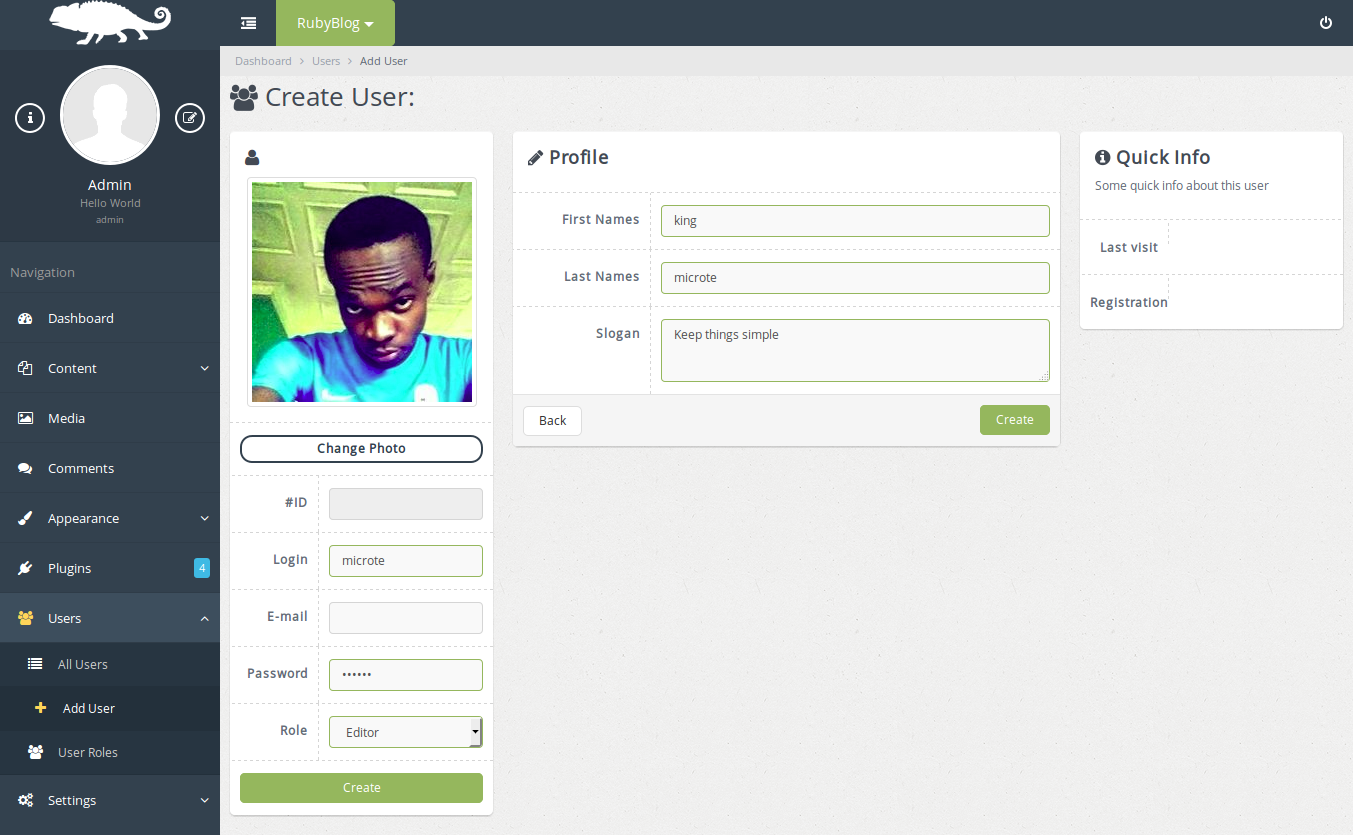
Camaleon CMS allows you to add more users with different roles, such as Administrator, Client, Contributor, and Editor. This is easy to do. Click on Users by the left hand side of your dashboard. From the dropdown select Add User. In the panel that is shown, you can create a user after setting up the profile as you please:
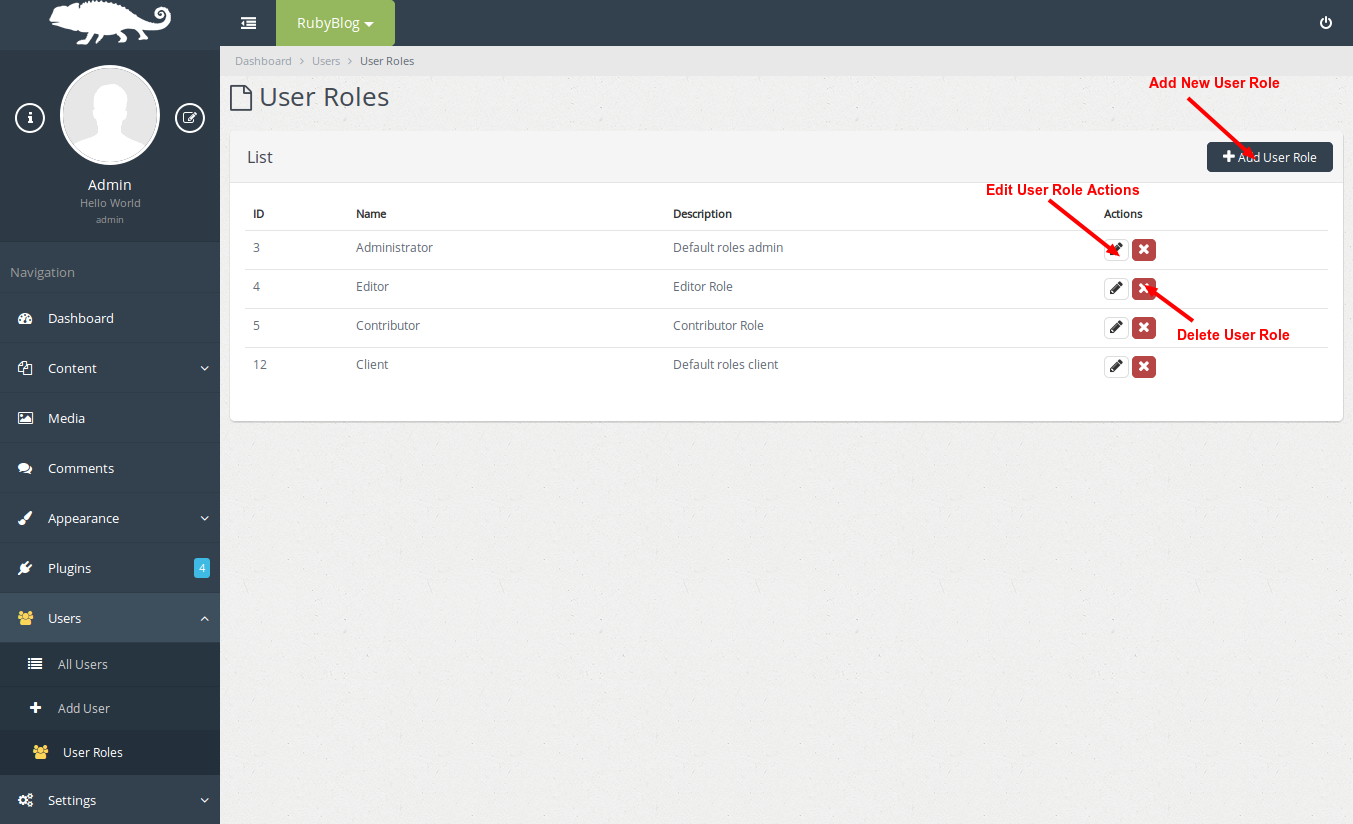
You can also control the actions a user can perform by editing the actions of the Roles. To do this click on User Roles under Users by the left side of your dashboard. It is also possible to add and delete User Roles.
Changing Site Language
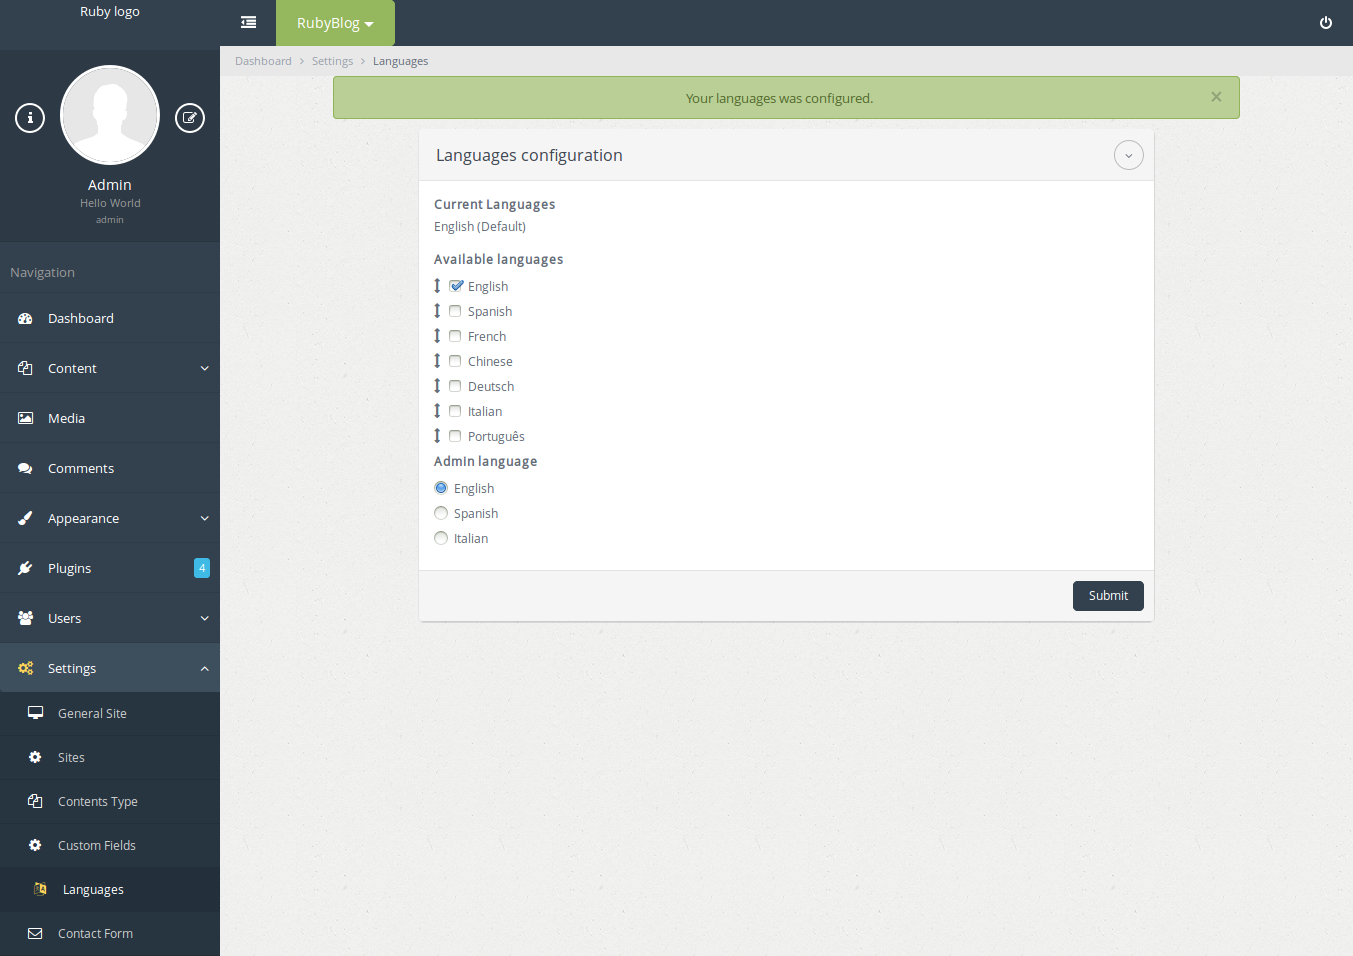
As mentioned above, one of the features of Camaleon CMS is the ability to manage site contents in various languages. Let us see how that is possible.
On the left side of your dashboard click on Settings, from the drop-down select Languages. On the next page, choose any language you want for your blog:
Publishing Content
Creating Posts
Posts are what you think of when you think of a blog. To create a post, on the left side of your dashboard select Content > Post > Add New.
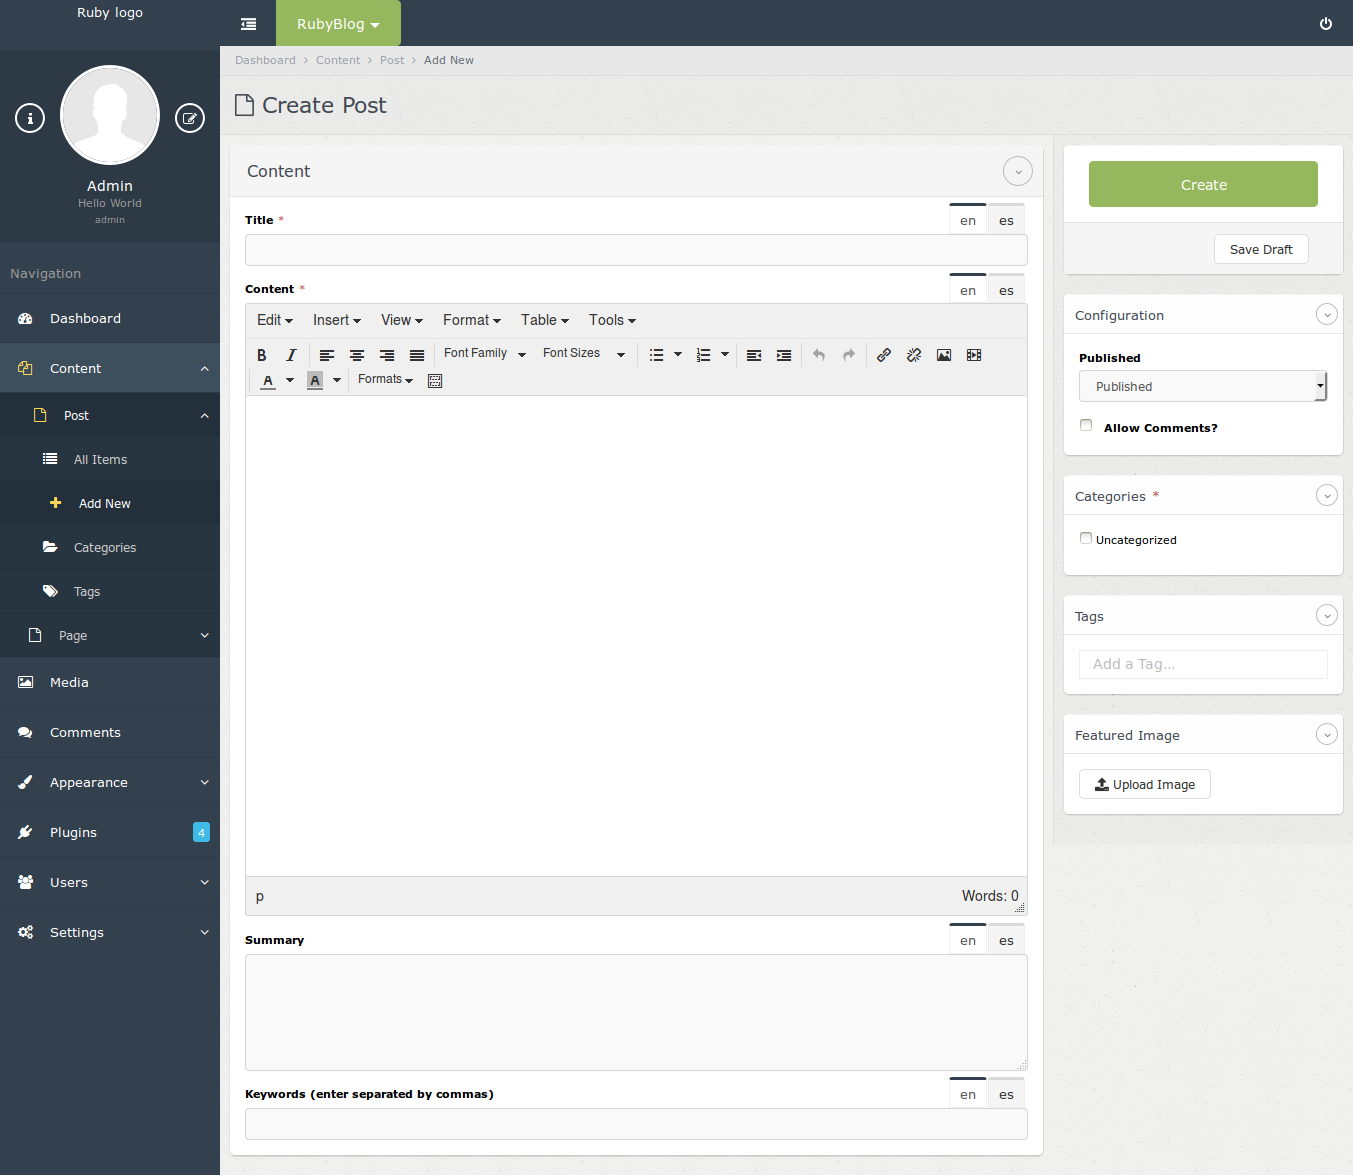
In the top field, insert a title. Write your post in the large area below the title. Use the formatting buttons to customize your post:

To add an image, place your cursor in the text where you’d like to put the image, and click Insert/edit image on the content toolbar as shown in the screenshot below:

In the dialog box that pops up, enter a link to the image in the Source field or click on the search icon by the side to upload the image.
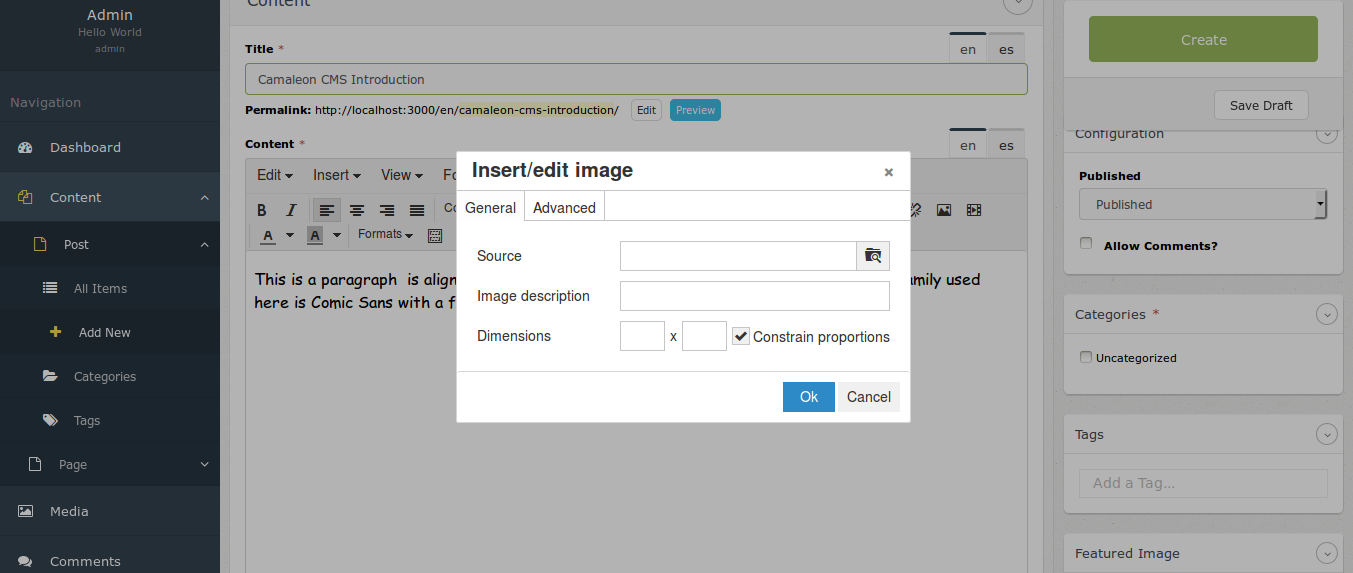
If you clicked the search icon the Media Manager opens up for you to import the image into your post.
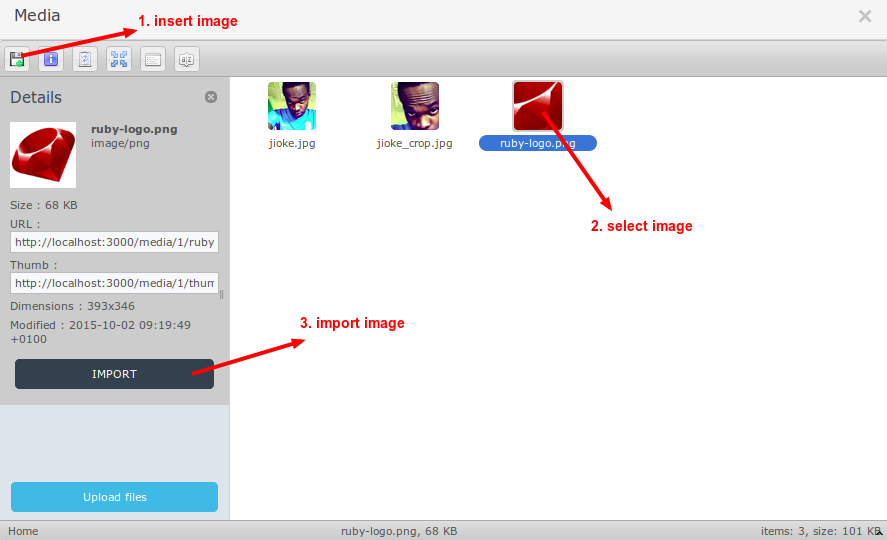
Click OK on the next box. You can always edit your image by clicking on Insert/edit image on your content toolbar.
To insert a Page Break, place your cursor on the place you want the break. On your content toolbar hover on Insert and select Page Break from the drop-down.
Creating New Page
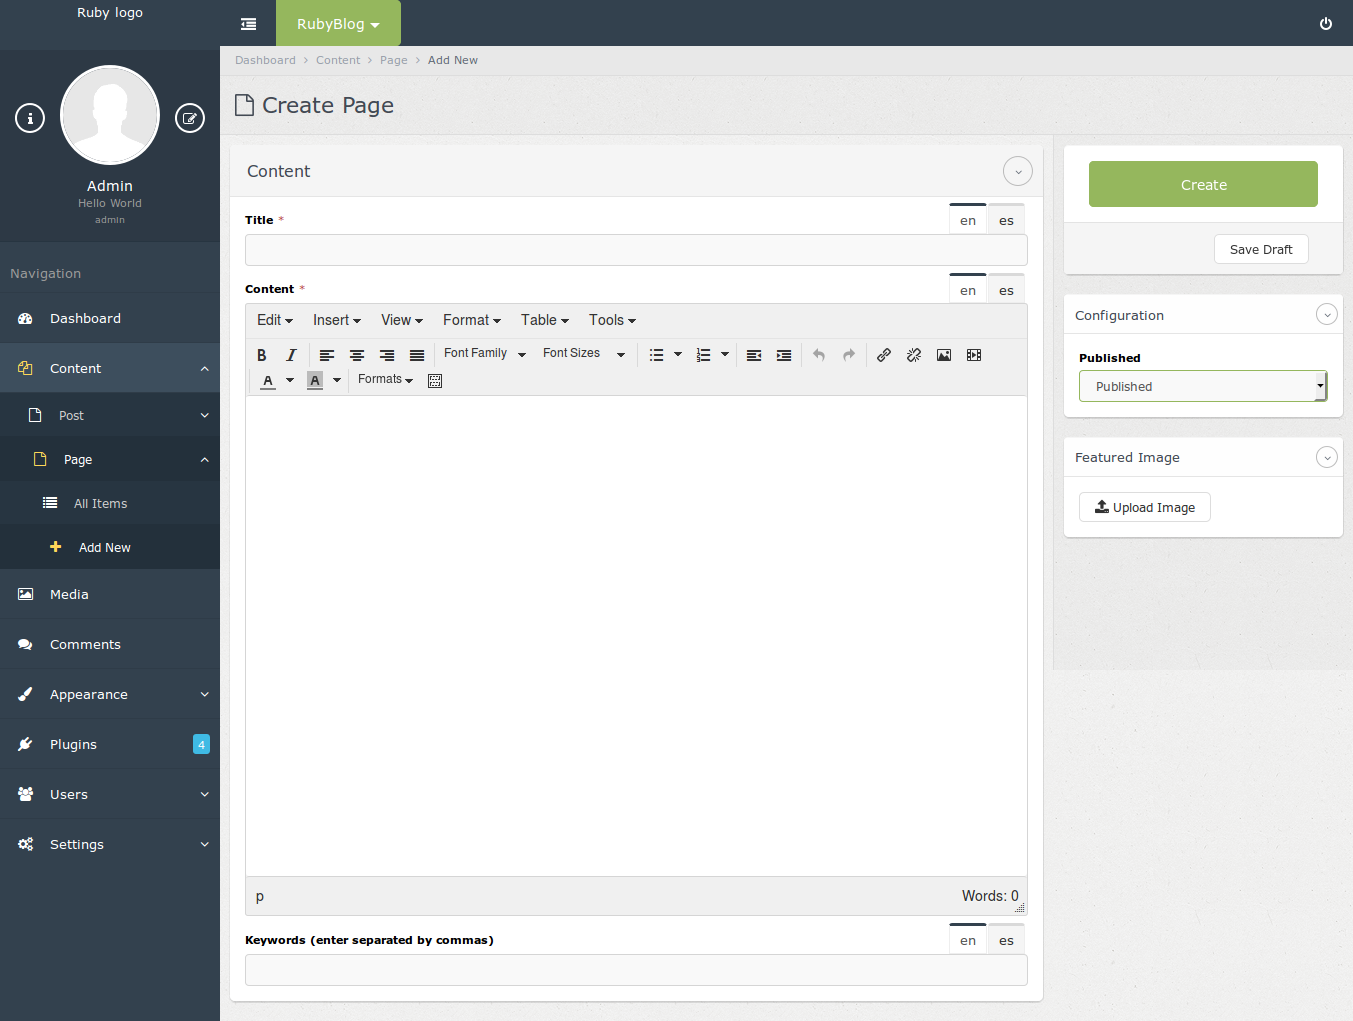
Camaleon CMS comes with built-in support for creating pages. From your dashboard, click on Pages by the left side of your screen. From the drop-down click on Add New. You will be presented with a page that looks similar to what WordPress gives when you want to add new page. Enter the details into the text field and click on Create Page. You can upload an image to your page by using the Featured Image option shown on the right side of the screen. The configuration option allows you to choose if you want your page to be published immediately or not.
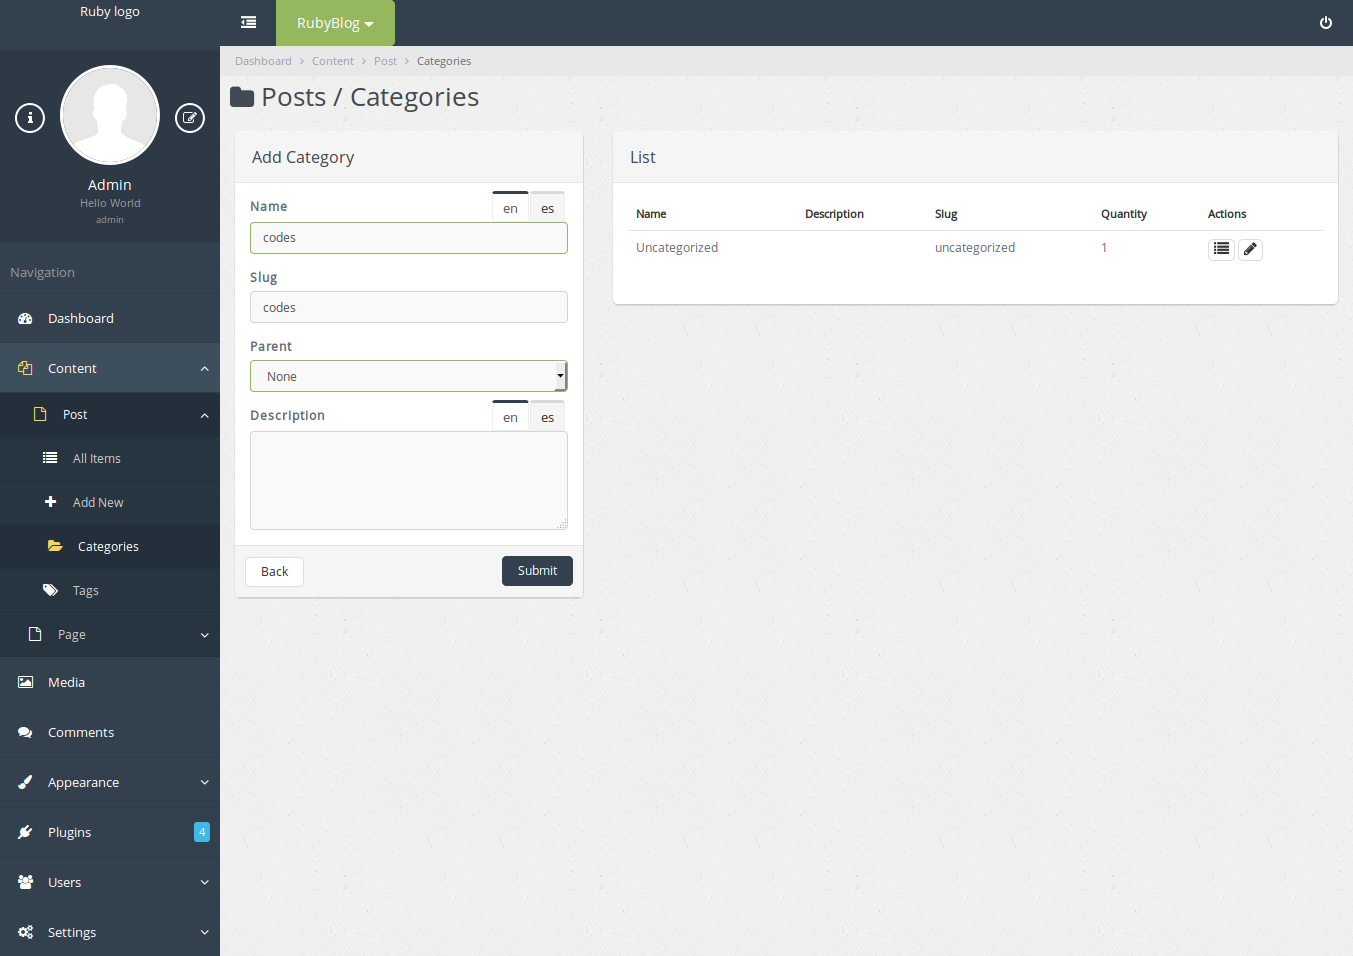
Creating Categories
Categories are a convenient way to organize your posts. They give a lot of flexibility to show the posts you want, the way you want them.
To create new categories, click on Content > Post > Categories. On the left side of the page, there is a tab that allows you to create categories. Fill in the category name, slug (will be used in the category URLs), description (this is optional) and click on the Submit button.
Assigning Posts to Categories
Once you have the category structure created, you can add posts to categories. Create a new post by clicking on Content > Post > Add New and simply select the category for the post.

Creating a Menu
Menus are a list of common links, usually displayed as the main navigation for your site.
To create a custom menu, click on Appearance, from the drop-down options click on Menus. By default a menu is created for you: Main Menu. To change the name of the Main Menu, enter your preferred name into the text box and click on Update Menu.
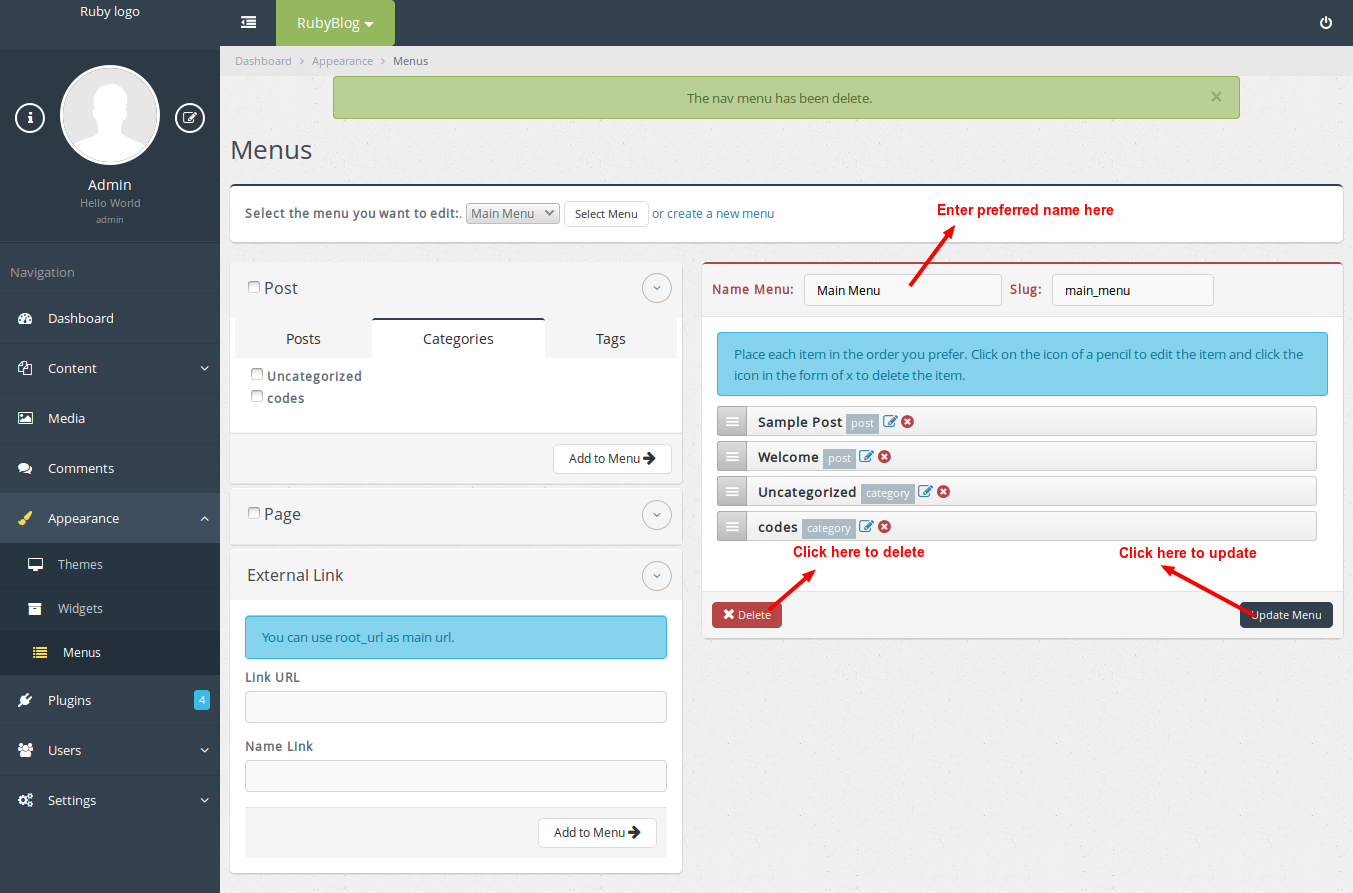
It is possible to add pages, posts, categories, tags, external links to your menu. First, you must have created and published the item. In the above image, notice the tabs for Posts, Categories, and Tabs. When you want to add one to the menu:
- Select the section (categories, pages, post, tags, external links) you want to add.
- Tick the box by the left side.
- Click on Add to Menu.
- Click on Update Menu.
Deploying to Heroku
Let us deploy our blog to Heroku. Add the following to your Gemfile:
Gemfile
group :production do
  gem 'pg', '~> 0.18.3'
  gem 'rails_12factor', '~> 0.0.3'
  gem 'puma', '~> 2.14.0'
end
Run bundle install.
Create a file in your config directory for Puma and paste the configuration below into it:
config/puma.rb
workers Integer(ENV['WEB_CONCURRENCY'] || 2)
threads_count = Integer(ENV['MAX_THREADS'] || 5)
threads threads_count, threads_count

preload_app!

rackup      DefaultRackup
port        ENV['PORT']     || 3000
environment ENV['RACK_ENV'] || 'development'

on_worker_boot do
  # Worker specific setup for Rails 4.1+
  # See: https://devcenter.heroku.com/articles/
  # deploying-rails-applications-with-the-puma-web-server#on-worker-boot
  ActiveRecord::Base.establish_connection
end
In order to publish to Heroku, we need our site to be under git source control. Initialize the repository and add the files:
git init
git add .
git commit -m "initial commit"
If you do not have an account on Heroku yet, go and create one. Then check to see if your system already has the Heroku command-line client installed:
heroku version
If not, you can get the Heroku toolbelt here. Once you have installed the toolbelt, login and add your SSH key:
heroku login
heroku keys:add
Next, use the heroku create command to create an app on Heroku:
heroku create
Deploy the application by pushing the master branch to Heroku:
git push heroku master
Finally run database migration:
heroku run db:migrate
A demo app is available at nerdnoob (your heroku app name will be different). The dashboard is available at nerdnoob dashboard. You can login using the following details:
username: admin
password: admin
Your app should be live now.
Conclusion
The world of Rails has been home to several CMS frameworks over time. Camaleon CMS is a solid addition, with its plugin framework and themes, it can do just about whatever you did. Today, I showed you how to setup a simple, but functional, blog using Camaleon CMS. Your feedback is welcome. Thanks for staying with me till the end :)
Frequently Asked Questions about Camaleon CMS
How does Camaleon CMS compare to other Ruby on Rails CMS platforms?
Camaleon CMS is a dynamic and advanced content management system built on Ruby on Rails. It stands out from other CMS platforms due to its flexibility and customization options. Unlike other platforms, Camaleon CMS allows you to create and manage multiple sites from a single installation. It also supports multiple themes, plugins, and widgets, giving you the freedom to customize your site to your liking.
Is Camaleon CMS suitable for beginners?
Yes, Camaleon CMS is suitable for beginners. It has a user-friendly interface that makes it easy to manage content. Additionally, it provides detailed documentation and a supportive community to help beginners get started.
How secure is Camaleon CMS?
Camaleon CMS is built on Ruby on Rails, a framework known for its robust security features. It includes built-in protection against common web attacks such as SQL injection and cross-site scripting. Additionally, Camaleon CMS regularly updates its software to address any potential security vulnerabilities.
Can I use Camaleon CMS for e-commerce?
Yes, Camaleon CMS supports e-commerce functionality. It has a built-in shopping cart feature and supports multiple payment gateways. You can also add product categories, manage inventory, and track orders with ease.
How does Camaleon CMS handle SEO?
Camaleon CMS has excellent SEO capabilities. It allows you to customize URLs, meta tags, and sitemaps to improve your site’s visibility on search engines. It also supports Google Analytics integration for tracking your site’s performance.
Can I migrate my existing site to Camaleon CMS?
Yes, Camaleon CMS supports site migration. You can import your existing content and settings to Camaleon CMS without losing any data. However, the process may require some technical knowledge.
Does Camaleon CMS support multilingual sites?
Yes, Camaleon CMS supports multilingual sites. It allows you to create and manage content in multiple languages, making it an excellent choice for businesses targeting a global audience.
What kind of support does Camaleon CMS offer?
Camaleon CMS offers comprehensive support through its documentation and community forums. You can also get professional support from the Camaleon CMS team for any technical issues or queries.
How customizable is Camaleon CMS?
Camaleon CMS is highly customizable. It supports multiple themes and plugins, allowing you to change the look and functionality of your site. You can also create custom fields and forms to collect specific information from your users.
Is Camaleon CMS free to use?
Yes, Camaleon CMS is an open-source platform and is free to use. However, some premium themes and plugins may require a purchase.
 Kingsley Silas
Kingsley Silas is a web developer from Nigeria. He has a hunger for acquiring new knowledge in every aspect he finds interesting.