After spending hours, maybe days, putting the finishing touches on an awesome new feature for your web application, you’re finally ready to see it in action. You add the new code to your JavaScript base, build the release candidate, and fire up your browser, expecting to be amazed. Then … Uh Oh… the new feature may be working fine, but some other critical part of your app – a part you didn’t touch while developing the new version – has gone horribly awry. Now you’re faced with the challenge of backtracking through days of work to try and figure out how you broke the existing code. Happy days are definitely not here again.
That very scenario has bitten me more than I’d like to admit. And if you’ve been coding awhile, you’ve probably seen it as well. Consider, though, what makes this scenario so painful. It isn’t really because our new code broke existing code; that’s inevitable in development. The real pain is that it took so long to notice the breakage. With so much development since we knew our application was working, there’s a vast amount of code in which the bug may be hiding. And, though it may seem a bit like hunting for a needle in a haystack, we have no choice but to dive it.
In this article we are truly going to banish this scenario from our JavaScript development. No more digging through hours, days, or weeks of code looking for a needle. The principle we’ll adopt is a simple one: find any bug as soon as we create it. That’s right; we’re going to set up a development environment and process that tells us immediately when we write code that introduces a bug. Furthermore, the extra effort we put into the process won’t go to waste once initial development is complete. The same test code that catches our development bugs will be completely reusable in an integration environment. We can easily incorporate the tests into our source code managements system, blocking bugs before they can even get into our code base.
In the four sections that follow, we’ll first look at the tools we need for a JavaScript testing environment. We’ll then consider a trivial application, one that’s simple enough to understand, yet has all the features and functionality that might exist in a real production web application. The final two sections demonstrate how we can use our environment to test the example app during development and, once initial development is complete, during integration.
Assembling a JavaScript Testing Environment
Our unit testing nirvana requires some development tools that may not be in your workbench (yet). The news, both good and bad, is that there are options aplenty. That’s good news because it gives us options, and that’s bad news because the pace of front end development today means that there are far too many options. To focus our evaluation, let’s be explicit about our top two goals. Everything else is secondary:
- Our environment must support frictionless, continuous testing during development.
- Tests created during development must be equally usable in integration.
Execution Environments
For JavaScript coding, there is no better development environment than the modern web browser. Whether your taste is Firebug or Webkit’s Developer Tools, the browser supports live DOM inspection and editing, full interactive debugging, and sophisticated performance analysis. Web browsers are great for development, and so our test tools and environment must integrate with in-browser development. Web browsers, however, are not so great for integration testing. Integration testing often takes places on servers somewhere in the cloud (or a least somewhere in the data center). Those systems don’t even have a graphical user interface, much less a modern web browser. For efficient integration testing, we need simple command line scripts and a JavaScript execution environment that supports them. For those requirements, the tool of choice is node.js. Although there are other command line JavaScript environments, none has the breadth and depth of support to match node.js. In the integration phase, our test tools must integrate with node.js.
Test Framework
Now that we’ve established that our test tools must support both web browser and node.js environments, we can narrow the choices enough to select a core test framework. Many JavaScript test frameworks exist, but most are heavily biased towards browser testing; getting them working with node.js is usually possible, but often requires inelegant hacks or tweaks. One framework that does not suffer from this problem is Mocha, which justifiably describes itself as:
Mocha is a feature-rich JavaScript test framework running on node and the browser, making asynchronous testing simple and fun.
Originally developed for node.js, Mocha has been extended to readily support web browsers as well. By using Mocha as our test framework, we can write tests that support both development and integration without modification.
Assertion Library
Unlike some JavaScript test frameworks, Mocha was designed for maximum flexibility. As a consequence, we’ll have to choose a few additional pieces to make it complete. In particular, we need a JavaScript assertion library. For that, we’ll rely on the Chai Assertion Library. Chai is somewhat unique in that it supports all of the common assertion styles – assert, expect, and should. Assertion styles determine how we write tests in our test code. Under the covers, they’re all equivalent; it’s easy to translate tests from one assertion style to the other. The main difference in assertion styles is their readability. The choice of assertion style depends mostly on which style you (or your team) find most readable, and which style produces the most understandable tests. To see the difference, consider developing a trivial test for the following code:
var sum = 2 + 2;A traditional, assert-style test could be written as:
assert.equal(sum, 4, "sum should equal 4");That test gets the job done, but unless you’ve grown accustomed to old-school unit testing, it’s probably a little challenging to read and interpret. An alternative assertion style uses expect:
expect(sum).to.equal(4);Most developers find expect-style assertions easier to read and understand than assert-style tests. The third alternative, should, makes test assertions even more like natural language:
sum.should.equal(4);The Chai library supports all three assertion styles. In this article we’ll stick with should.
Spies, Stubs, and Mocks
Most web apps, including the trivial example we’ll consider in this article, rely on third party libraries and services. In many cases, testing our code will require observing – or even controlling – those libraries and services. The Sinon.JS library provides a lot of tools for testing those interactions. Such tools fall into three general classes:
- Spy. Test code that observes calls to functions outside of the code under test. Spies do not interfere with the operation of those external functions; they merely record the invocation and return value.
- Stub. Test code that stands in for calls to functions outside of the code under test. The stub code doesn’t attempt to replicate the external function; it simply prevents unresolved errors when the code under test accesses the external function.
- Mock. Test code that mimics functions or services outside of the code under test. With mocks, test code can specify the return values from those functions or services so it can verify the code’s response.
Along with the Sinon.JS library itself, we can augment the standard Chai assertion library with Sinon.JS Assertions for Chai.
A Unit Test Development Environment
The final tool for our testing workbench is a development environment for unit testing. For our example we’ll use Test’em. Test’em is a collection of handy scripts to set up and run a continuous test environment. We could, if we chose to, write the scripts ourselves and manage the environment manually; however, Toby Ho (Test’em’s creator) has put together an awesome package that can save us the trouble.
The Example Application
To see our testing environment in action, let’s consider a simple application. Although pared to its bare essentials, this application includes all the functionality required for a real application. (Complete source code for the application is available on GitHub.)
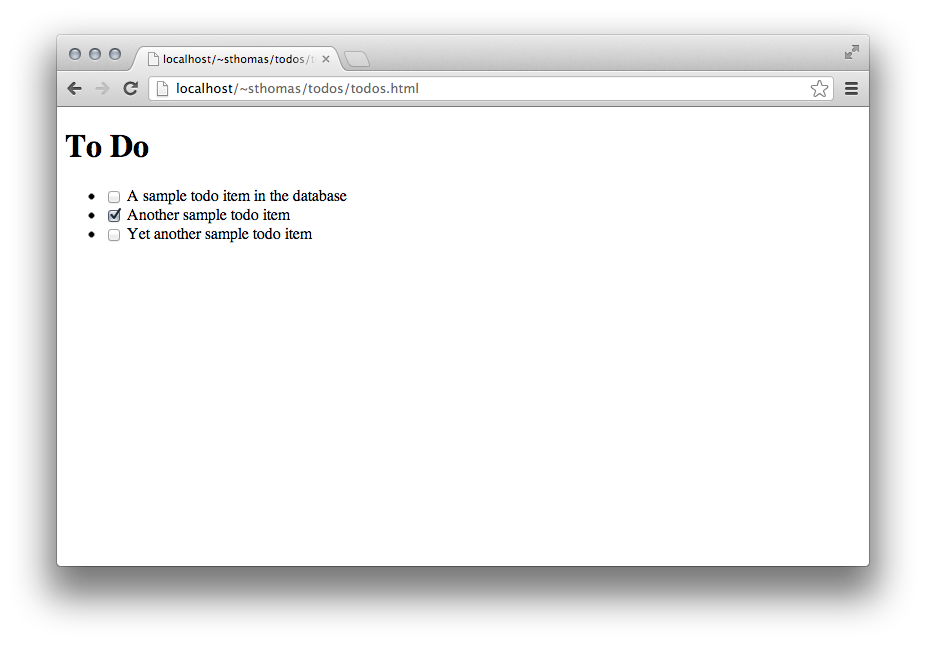
Users can see their list of todos, and they can click on a check box to toggle any todo’s status.
The Todos Database
Our application starts with a database table that holds the information for todos. Here’s the SQL that we could use to create that table.
CREATE TABLE `todos` (
  `id`       int(11)      NOT NULL AUTO_INCREMENT COMMENT 'Primary key for the table.',
  `title`    varchar(256) NOT NULL DEFAULT ''     COMMENT 'The text for the todo item.',
  `complete` bit(1)       NOT NULL DEFAULT b'0'   COMMENT 'Boolean indicating whether or not the item is complete.',
  PRIMARY KEY (`id`)
) ENGINE=InnoDB DEFAULT CHARSET=utf8 COMMENT='To Do items.'
And here’s how the table might look after we’ve put some test data in it.
| id | title | complete |
|---|---|---|
| 1 | A sample todo item in the database | 0 |
| 2 | Another sample todo item | 1 |
| 3 | Yet another sample todo item | 0 |
As the table shows, our todos only include a primary key (id), a title, and a status bit to indicate whether or not they are complete.
A REST API
Our web application needs access to this database, so we’ll provide a standard REST interface. The API follows Ruby conventions, but can be easily implemented by any server technology. In particular:
GET api/todosreturns a JSON-encoded array of all rows in the database.GET api/todos/NNNreturns the JSON representation of the todo withidequal toNNN.POST api/todosadds a new todo to the database using the JSON-encoded information in the request.PUT api/todos/NNNupdates the todo withidequal toNNNusing the JSON-encoded information in the request.DELETE api/todos/NNNdeletes the todo withidequal toNNNfrom the database.
If you’re not particularly fond of Ruby, the source code includes a complete PHP implementation of this API.
JavaScript Libraries
Our modest application is simple enough to implement in pure JavaScript without any libraries, but we have far bigger plans. We may be starting small, but eventually the app will feature amazing functionality and a delightful user interface. In preparation for that day, we’ll build on a framework that can support our ultimate killer app:
- jQuery for DOM manipulation, event handling, and server communications.
- Underscore.js to enhance the core language with many indespensible utilities.
- Backbone.js to define the structure of the application in terms of models and views.
An HTML Skeleton
Now that we know the components that will comprise our application, we can define the HTML skeleton that will support it. There’s nothing fancy about it (yet), just a minimal HTML5 document, some JavaScript files, and a small bit of code to get things started.
<!DOCTYPE html>
<html lang="en">
  <head>
    <meta charset="utf-8">
    <title></title>
  </head>
  <body>
    <h1>List of Todos</h1>

    <script src="lib/jquery-1.9.0.min.js"></script>
    <script src="lib/underscore-min.js"></script>
    <script src="lib/backbone-min.js"></script>
    <script src="src/app-todos.js"></script>
    <script>
      $(function () {
        var todos = new todoApp.Todos();
        todos.fetch();
        var list = new todoApp.TodosList({collection: todos});
        $("body").append(list.el);
      })
    </script>
  </body>
</html>
Testing During Development
Now that we’ve selected our tools and specified the application, it’s time to start development. Our first task is installing the tools.
Installing the Tools
Even though we’ll be developing in the browser, our test environment relies on node.js. The very first step, therefore, is installing node.js and the node package manager (npm). There are executable binaries for OS X, Windows, Linux, and SunOS on the node.js web site, as well as a source code for other operating systems. After running the installer, you can verify both node.js and npm from the command line.
bash-3.2$ node --version
v0.8.18
bash-3.2$ npm --version
1.2.2
bash-3.2$
Everything else we need is conveniently available as a node package. The node package manager can handle their installation, as well as any dependencies.
bash-3.2$ npm install jquery jsdom underscore backbone mocha chai sinon sinon-chai testem -g
Creating the Project Structure
The source code for this example includes a complete project structure with the following 15 files:
todos.html
testem.json

api/htaccess
api/todos.php

lib/backbone-min.js
lib/chai.js
lib/jquery-1.9.0.min.js
lib/sinon-1.5.2.js
lib/sinon-chai.js
lib/underscore-min.js

mysql/todos.sql

php-lib/dbconfig.inc.php

src/app-todos.js

test/app-todos-test.js
test/mocha.opts
Here is what each folder and file contains:
todos.html: The skeleton HTML file for our application, shown in full above.testem.json: The configuration file for Test’Em; we’ll look at this in detail shortly.api/: A folder for our REST API implementation.api/htaccess: Sample configuration for the Apache web server that supports our REST API.api/todos.php: PHP code to implement the REST API.
lib/: A folder for JavaScript libraries used by the app itself and the test framework.lib/backbone-min.js: Minified version of Backbone.js.lib/chai.js: Chai Assertion Library.lib/jquery-1.9.0.min.js: Minified version of jQuery.lib/sinon-1.5.2.js: Sinon.JS library.lib/sinon-chai.js: Sinon.JS Assertions for Chai.lib/underscore-min.js: Minified version of Underscore.js.
mysql/: A folder for MySQL code for the application.mysql/todos.sql: MySQL commands to create the application database.
php-lib/: A folder for PHP libraries and configuration for the application’s REST API.php-lib/dbconfig.inc.php: PHP database configuration for the REST API.
src/: A folder for our client-side application code.src/app-todos.js: Our application.
test/: A folder for test code.test/app-todos-test.js: Test code for our application.test/mocha.opts: Configuration options for mocha; we’ll look at this in the next section.
During development, we’re only interested in three of these files, testem.json, src/app-todos.js, and test/app-todos-test.js.
Configuring Test’Em
The last step before actual development is defining the Test’Em configuration. That configuration resides in the JSON-formatted testem.json, and it’s simple enough to create in any text editor. We simply specify that we’re using Mocha (Test’Em supports several frameworks), and we list the JavaScript files our application and our test code requires.
{
  "framework": "mocha",
  "src_files": [
    "lib/jquery-1.9.0.min.js",
    "lib/underscore-min.js",
    "lib/backbone-min.js",
    "src/*.js",
    "lib/chai.js",
    "lib/sinon-chai.js",
    "lib/sinon-1.5.2.js",
    "test/*.js"
  ]
}
Start Developing
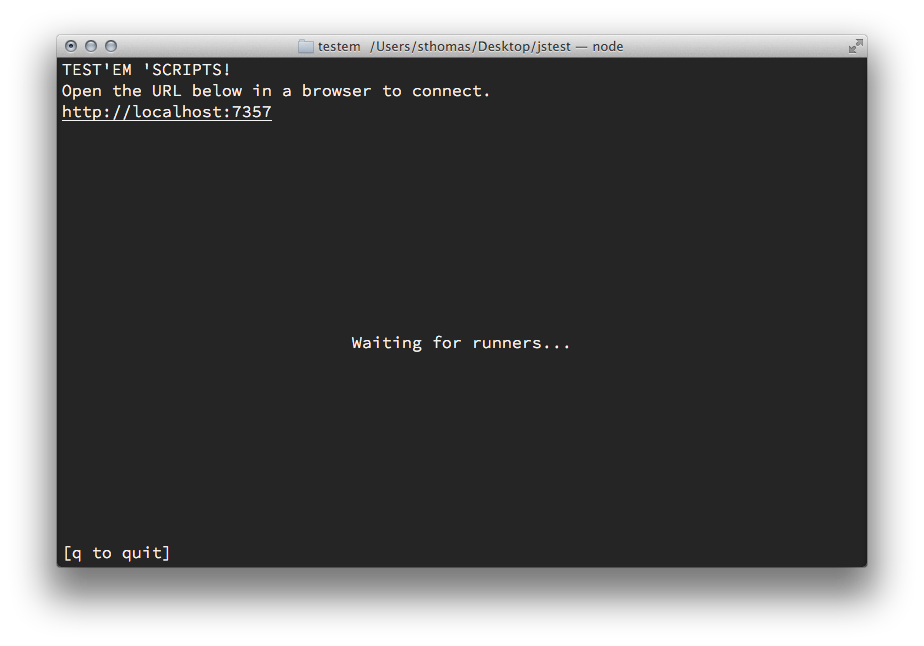
Finally, we’re ready to code. In a command shell, navigate to the root folder of our project and execute the command testem. The Test’Em scripts will run, clearing the terminal window and giving us a URL in the upper right. Copy and paste that URL into our browser of choice and we’re off.
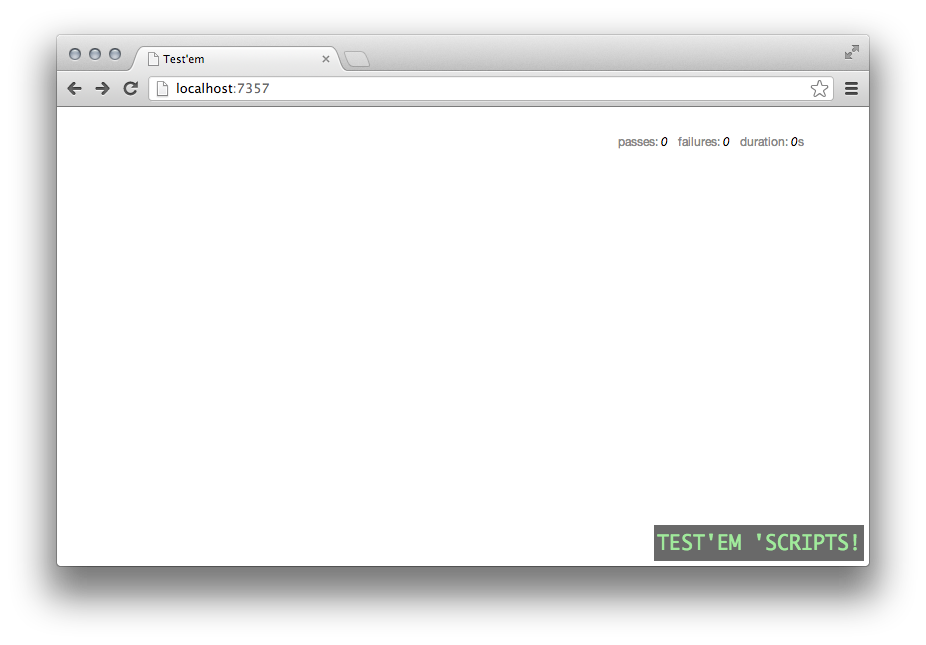
As soon as we launch the web browser, it will automatically execute any tests that we’ve defined. Since we’re just beginning development, we won’t have any code, nor any test cases. The browser will kindly point that out to us.
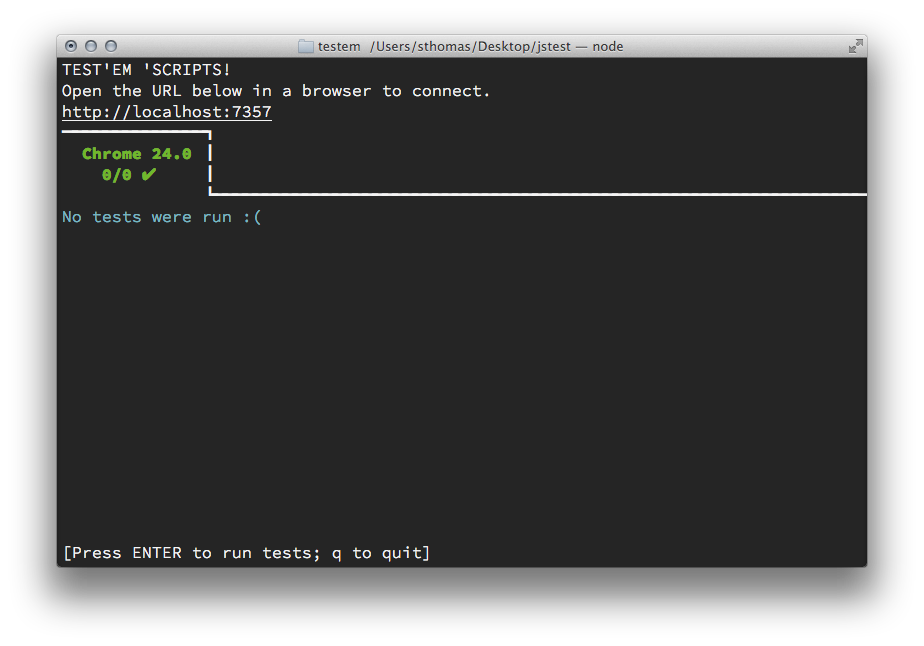
The terminal window from which we launched Test’Em will also give us the status.
A First Test Case
In the spirit of true Test-Driven Development, we’ll begin by writing our first test case in the test/app-todos-test.js file. Like any good web app, we want to minimize global name space pollution. To do that, we’ll rely on a single global variable, todoApp, to contain all of our code. Our first test case will make sure that the global name space variable exists.
var should = chai.should();

describe("Application", function() {
  it("creates a global variable for the name space", function () {
    should.exist(todoApp);
  })
})
As you can see, we need one preliminary statement to tell Mocha that we’re using Chai assertions. Then we can begin writing tests. By convention JavaScript tests are organized into blocks (which can be nested into sub-blocks, and so on). Each block begins with a describe() function call to identify what part of the code we’re testing. In this case we’re testing the overall application, so that’s the first parameter to describe().
Within a test block, we document each test case by what it tests. That’s the purpose of the it() function. The way to read any test case is to combine the describe() and it() strings into a single statement. Our first test case, therefore, is
Application creates a global variable for the name space
The test code itself is inside the it() block. Our test case is
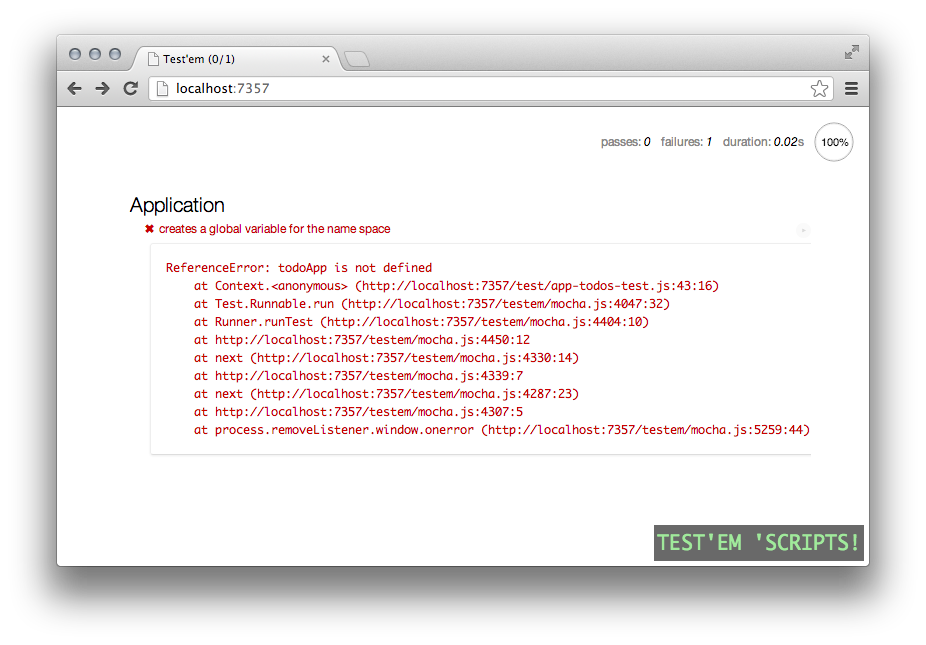
should.exist(todoApp);Now we have a complete test case. As soon as we save the file, Test`Em automatically takes over. It notices that one of our files has changed, so it immediately reruns the tests. Not surprisingly (since we haven’t written any code for the application yet), our first test fails.
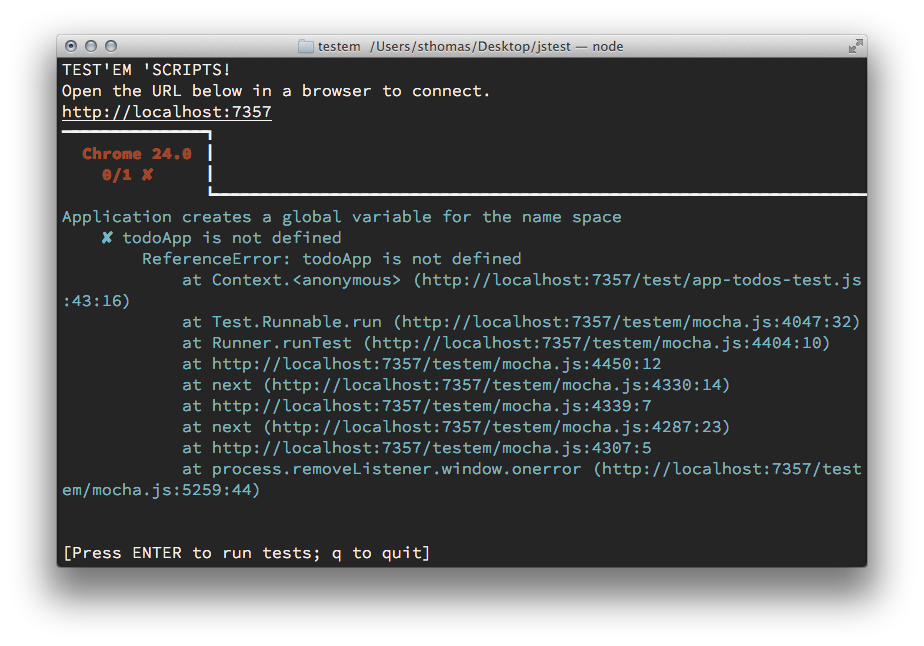
The terminal window updates automatically as well.
To make the test pass, we must create the global name space variable. We shift to the srcapp-todos.js file and add the necessary code.
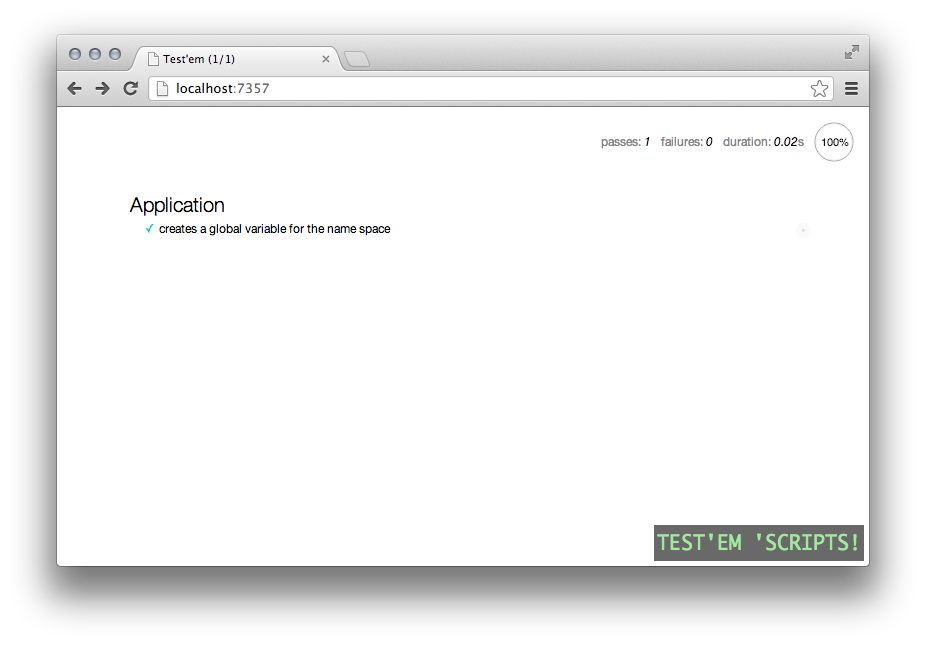
if (typeof todoApp === "undefined") todoApp = {};As soon as we save the file, Test`Em once again springs into action. We immediately get updated results for our test cases.
Step back for a moment and consider what’s happening! Every time we make a change, either to the test code or to our application, Test`Em immediately re-runs our entire test suite. All we have to do is keep Test’Em’s browser or terminal window visible in a corner of our screen, and we can see the health of our code in real time, as we’re developing. We’ll know as soon as we introduce a bug, even if the bug manifests itself in a part of the code different from where we’re working. No more digging back through hours, days, or weeks of new code to figure out when we introduced a bug.
Testing the Model
With our development environment now fully established, we can begin developing the application. Since our app shows a list of todos, it might be good to create a model for those todos. The model will need to keep track of both the title of the todo and it’s status. Let’s add a unit test that verifies we can create an todo with reasonable defaults.
describe("Todo Model", function(){
  describe("Initialization", function() {
    beforeEach(function() {
      this.todo = new todoApp.Todo();
    })
    it("should default the status to 'pending'",function() {
      this.todo.get('complete').should.be.false;
    })
    it("should default the title to an empty string",function() {
      this.todo.get('title').should.equal("");
    })
  })
})
There are several aspects of these tests worth noting.
- We can nest test blocks within each other. One test block will contain all the unit tests for the todo model, and a sub-block of those tests focuses on initialization.
- Within a test block, we can define functionality to execute before every test. That’s the purpose of the
beforeEach()block. In the example above, we’re creating a new instance of a Todo before every test. - The Mocha framework automatically makes sure that the JavaScript context (i.e. the value of
this) is consistent for all our test cases. That’s why we can definethis.todoin one function (thebeforeEach()parameter) and safely reference it in other functions (such as theit()parameters). Without Mocha working behind the scenes to provide this consistency, JavaScript would define different contexts for each function.
Of course, since we haven’t written the model code yet, all our tests will fail. (And we’ll know that immediately.) But once we’ve added the code for our model, the tests pass and we’re on our way.
todoApp.Todo = Backbone.Model.extend({
  defaults: {
    title: "",
    complete:  false
  }
})
Using Stubs for Third Party Functionality
Now that we have a simple model for todos, we can start to define its behavior. One thing our model should do is update the database whenever any of its properties change. In a unit test environment, however, we won’t have an actual database to check. On the other hand, we’re not actually writing any code to do the database update. Rather, we’re relying on Backbone to handle that interaction. That suggests a unit test strategy for this test case. All we need to know is that Backbone models use the save() method to update whatever backing store is persisting the model. In our case that backing store is the database. Here is the unit test code we can use:
describe("Persistence", function() {
  beforeEach(function() {
    this.todo = new todoApp.Todo();
    this.save_stub = sinon.stub(this.todo, "save");
  })
  afterEach(function() {
    this.save_stub.restore();
  })
  it("should update server when title is changed", function() {
    this.todo.set("title", "New Summary");
    this.save_stub.should.have.been.calledOnce;
  })
  it("should update server when status is changed", function() {
    this.todo.set('complete',true);
    this.save_stub.should.have.been.calledOnce;
  })
})
We’ve included some additional code before each test, and we’ve added a section of code to execute after each test. That extra code manages a sinon stub, a function that effectively nullifies another function in the code. In our case the stub nullifies the save() method of this.todo. With the stub in place, calls to the method won’t actually go to the Backnone library. Instead, sinon intercepts those calls and simply returns immediately. This behavior is important. If we tried to execute the actual Backbone save() method in a unit test environment, the call would fail because there would not be a database or server API available.
With the stub in place, our test cases can use it to verify the model’s behavior. In the first test case, we immediately set the todo’s title to a new value. Since that changes the title property, we want our model to update its backing store. To check that we simply verify that the stub was called. To get our model to pass these tests, we can look for change events and respond appropriately.
todoApp.Todo = Backbone.Model.extend({
  defaults: {
    title: "",
    complete:  false
  },
  initialize: function() {
    this.on("change", function(){ this.save(); });
  }
})
Testing the View
Of course, our app won’t do anyone any good if it doesn’t actually display the todos to users, and that requires creating some HTML. We’ll use Backbone views for that functionality. In our trivial app, we simply wish to render each todo as a list item. Here are the test cases that will get us started.
describe("Todo List Item View", function() {
  beforeEach(function(){
    this.todo = new todoApp.Todo({title: "Summary"});
    this.item = new todoApp.TodoListItem({model: this.todo});
  })
  it("render() should return the view object", function() {
    this.item.render().should.equal(this.item);
  });
  it("should render as a list item", function() {
    this.item.render().el.nodeName.should.equal("LI");
  })
})
We begin our tests of the view with two test cases. First we ensure that the view’s render() method returns the view itself. That’s a common and very convenient convention in Backbone because it allows method chaining. Our second test case verifies that the HTML element the render creates is a list item (<li>). The code necessary to pass these tests is a straightforward Backbone view.
todoApp.TodoListItem = Backbone.View.extend({
  tagName: "li",
  render: function() {
    return this;
  }
})
Next, we can develop the detailed content of that list item view. As an example, we want the full list item to look something like the following.
<li>
  <label>
    <input type='checkbox'/>
    Summary
  </label>
</li>
For our test cases, we can take advantage of jQuery to extract individual elements from the view’s main element.
describe("Todo List Item View", function() {
  beforeEach(function(){
    this.todo = new todoApp.Todo({title: "Summary"});
    this.item = new todoApp.TodoListItem({model: this.todo});
  })
  describe("Template", function() {
    beforeEach(function(){
      this.item.render();
    })
    it("should contain the todo title as text", function() {
      this.item.$el.text().should.have.string("Summary");
    })
    it("should include a label for the status", function() {
      this.item.$el.find("label").should.have.length(1);
    })
    it("should include an <input> checkbox", function() {
      this.item.$el.find("label>input[type='checkbox']").should.have.length(1);
    })
    it("should be clear by default (for 'pending' todos)", function() {
      this.item.$el.find("label>input[type='checkbox']").is(":checked").should.be.false;
    })
    it("should be set for 'complete' todos", function() {
      this.save_stub = sinon.stub(this.todo, "save");
      this.todo.set("complete", true);
      this.item.render();
      this.item.$el.find("label>input[type='checkbox']").is(":checked").should.be.true;
      this.save_stub.restore();
    })
  })
})
Notice that in the last test case we’ve stubbed the model’s save() method. Since we’re changing a property from its default value, our model will dutifully try to persist that change to its backing store. In a unit test environment, however, we won’t have a database or a server API. The stub takes the place of the missing components and allows the tests to proceed without error. To get these tests to pass, we’ll have to add some additional code to our view.
todoApp.TodoListItem = Backbone.View.extend({
  tagName: "li",
  template: _.template(
    "<label>"
    +   "<input type='checkbox' <% if(complete) print('checked') %>/>"
    +   " <%= title %> "
    + "</label>"),
  render: function() {
    this.$el.html(this.template(this.model.attributes));
    return this;
  }
})
Testing Model/View Interactions
Now that we’ve verified that our view implementation creates the right HTML markup, we can test its interaction with our model. In particular, we want to make sure that users can toggle a todo’s status by clicking on the checkbox. Our test environment doesn’t require an actual human user, so we’ll use jQuery to generate the click event. To do that, however, we’ll have to add content to a real live DOM. That content is known as a test fixture. Here is the unit test code.
describe("Todo List Item View", function() {
  beforeEach(function(){
    this.todo = new todoApp.Todo({title: "Summary"});
    this.item = new todoApp.TodoListItem({model: this.todo});
    this.save_stub = sinon.stub(this.todo, "save");
  })
  afterEach(function() {
    this.save_stub.restore();
  })
  describe("Model Interaction", function() {
    it("should update model when checkbox clicked", function() {
      $("<div>").attr("id","fixture").css("display","none").appendTo("body");
      this.item.render();
      $("#fixture").append(this.item.$el);
      this.item.$el.find("input").click();
      this.todo.get('complete').should.be.true;
      $("#fixture").remove();
    })
  })
})
Notice that we’re once again stubbing the todo’s save() method. Otherwise, Backbone will try to update a non-existent backing store when we change the todo status with our simulated click.
For the test case itself, we begin by creating a <div> element with an id of fixture and we add that element to our live document. The live document, in this case, is the web page displaying the results of our tests. Although we remove the element immediately after verifying the test case, we also set its display property to none so it won’t interfere with Mocha’s display of the test results. The code that implements this functionality includes a small addition to the todo model. The addition is a new toggleStatus() method.
todoApp.Todo = Backbone.Model.extend({
  defaults: {
    title: "",
    complete:  false
  },
  initialize: function() {
    this.on("change", function(){ this.save(); });
  },
  toggleStatus: function() {
    this.set("complete",!this.get("complete""));
  }
})
In the view, we want to catch click events on the <input> element and call this method for the model.
todoApp.TodoListItem = Backbone.View.extend({
  tagName: "li",
  template: _.template(
    "<label>"
    +   "<input type='checkbox' <% if(complete) print('checked') %>/>"
    +   " <%= title %> "
    + "</label>"),
  events: {
    "click input": "statusChanged"
  },
  render: function() {
    this.$el.html(this.template(this.model.attributes));
    return this;
  },
  statusChanged: function() {
    this.model.toggleStatus();
  }
})
Testing the Collection
At this point our application is nearly complete. The only remaining functionality is collecting all the todos together. Naturally, we’ll use a Backbone collection. We’re actually not going to do anything special with our collection, so we don’t really need any unit tests.
todoApp.Todos = Backbone.Collection.extend({
  model: todoApp.Todo,
  url:   "api/todos"
})
We can, however, verify that our implementation of the collection’s view is appropriate. We want that view rendered as an unordered list (<ul>). The test cases don’t require any functionality that we haven’t seen before.
describe("Todos List View", function() {
  beforeEach(function(){
    this.todos = new todoApp.Todos([
      {title: "Todo 1"},
      {title: "Todo 2"}
    ]);
    this.list = new todoApp.TodosList({collection: this.todos});
  })
  it("render() should return the view object", function() {
    this.list.render().should.equal(this.list);
  });
  it("should render as an unordered list", function() {
    this.list.render().el.nodeName.should.equal("UL");
  })
  it("should include list items for all models in collection", function() {
    this.list.render();
    this.list.$el.find("li").should.have.length(2);
  })
})
The view implementation is also straightforward. It tracks any additions to the collection and updates the view. For the initial render() it simply adds all the models in the collection one at a time.
todoApp.TodosList = Backbone.View.extend({
  tagName: "ul",
  initialize: function() {
    this.collection.on("add", this.addOne, this);
  },
  render: function() {
    this.addAll();
    return this;
  },
  addAll: function() {
    this.collection.each(this.addOne, this);
  },
  addOne: function(todo) {
    var item = new todoApp.TodoListItem({model: todo});
    this.$el.append(item.render().el);
  }
})
Bonus Tests: Verifying the API
Because our REST API perfectly matches the API that Backbone expects, we didn’t need any custom code to manage the API interaction. As a result, we don’t need any unit test cases. In the real world, you might not be quite as lucky. If your API doesn’t conform to Backbone conventions, you may need to override or extend some of the Backbone code to deal with the non-standard API. That extra code will need unit tests as well. Fortunately, it’s relatively easy to test API interactions, even in a unit test environment.
The easiest way to test API interactions relies on the fake server functionality of Sinon.JS. Unfortunately, that functionality is only available (currently) in Sinon’s browser implementation. It is explicitly excluded from the node.js implementation. There are some hacks to get it running in node.js, but those hacks are quite brittle and rely on internal implementation details. It would be best to avoid them if possible. Fortunately, we can get by without Sinon’s fake server.
The secret is knowing that Backbone relies on jQuery’s $.ajax() function to implement REST APIs. We can intercept the API interactions by stubbing that function. When we stub the function, we’ll want to substitute our own response. The yieldsTo() method of the stub gives us exactly that opportunity. It tells sinon what additional action it should take when the stub is called. Here’s a complete test case to verify that our collection correctly initializes itself using the REST API.
describe("Collection's Interaction with REST API", function() {
  it("should load using the API", function() {
    this.ajax_stub = sinon.stub($, "ajax").yieldsTo("success", [
      { id: 1, title: "Mock Summary 1", complete: false },
      { id: 2, title: "Mock Summary 2", complete: true  }
    ]);
    this.todos = new todoApp.Todos();
    this.todos.fetch();
    this.todos.should.have.length(2);
    this.todos.at(0).get('title').should.equal("Mock Summary 1");
    this.todos.at(1).get('title').should.equal("Mock Summary 2");
    this.ajax_stub.restore();
  })
})
Finished!
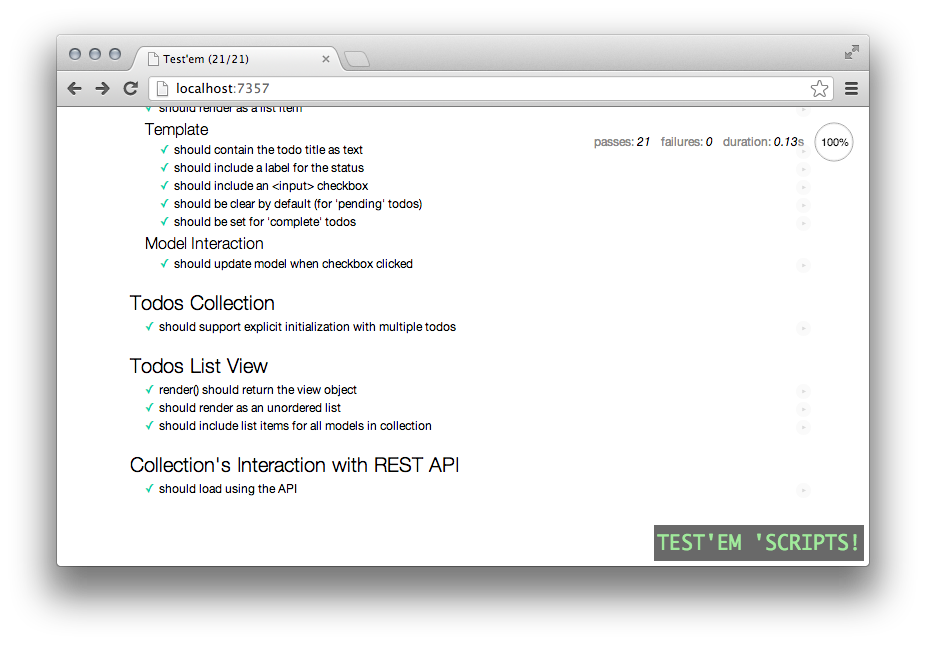
As you can see from the screen shot that follows, we’ve now written code that passes all the unit test cases. For the time being at least, development is complete.
Testing During Integration
Now that client-side development of our app is complete (and we have the tests to prove it), we can safely tuck our JavaScript into a source code management system. It can then be integrated into the build process for the entire application. As part of that process, we want to execute all the test cases we’ve developed. That will ensure that the code that makes up the final deployment passes all the tests that we’ve defined. It will also protect against “minor tweaks” to the code that inadvertently introduce new bugs.
During the build process, we’ll likely want to execute our tests from the command line rather than in a web browser. We don’t need the details of individual test cases, just an assurance that they all pass. Node.js makes it easy enough to accommodate this requirement. We only need to make a few small additions to our source code and unit test code files.
Our code needs these modifications because node.js handles global variables differently than web browsers. In a web browser, JavaScript variables are, by default, global in scope. Node.js, on the other hand, confines variables to their local module by default. In that environment, our code won’t be able to find the third-party libraries it needs (jQuery, Underscore, and Backbone. If we add the following statements at the beginning, though, node.js will resolve references to these libraries appropriately. We’ve constructed these statements so that they do no harm in the web browser, so we can leave them in the code permanently.
var jQuery   = jQuery   || require("jquery");
var _        = _        || require("underscore");
var Backbone = Backbone || require("backbone");
Backbone.$   = jQuery;
We also need to adjust our test code. The test scripts need access to their own libraries (jQuery, Chai, Sinon.JS, and sinon-chai). In addition, we need to add a little extra to simulate a web browser’s Document Object Model (DOM). Recall that our tests for click handling required us to temporarily add a “fixture” <div> to the web page. Node.js, of course, doesn’t normally have a web page. The jsdom node package, however, lets us emulate one. The code below creates a minimal, simulated web page for our tests.
if (typeof exports !== 'undefined' && this.exports !== exports) {
  global.jQuery = require("jquery");
  global.$ = jQuery;
  global.chai = require("chai");
  global.sinon = require("sinon");
  chai.use(require("sinon-chai"));
  global.jsdom = require("jsdom").jsdom;
  var doc = jsdom("<html><body></body></html>");
  global.window = doc.createWindow();
}
The conditional that wraps these statements tests to see if we’re running in the node.js environment instead of a web browser. In a browser, the extra statements aren’t necessary, so we can safely skip them.
With those changes, we can execute the full test suite from the command line. Simply navigate to the project’s root folder and execute the command mocha. The result looks quite familiar.
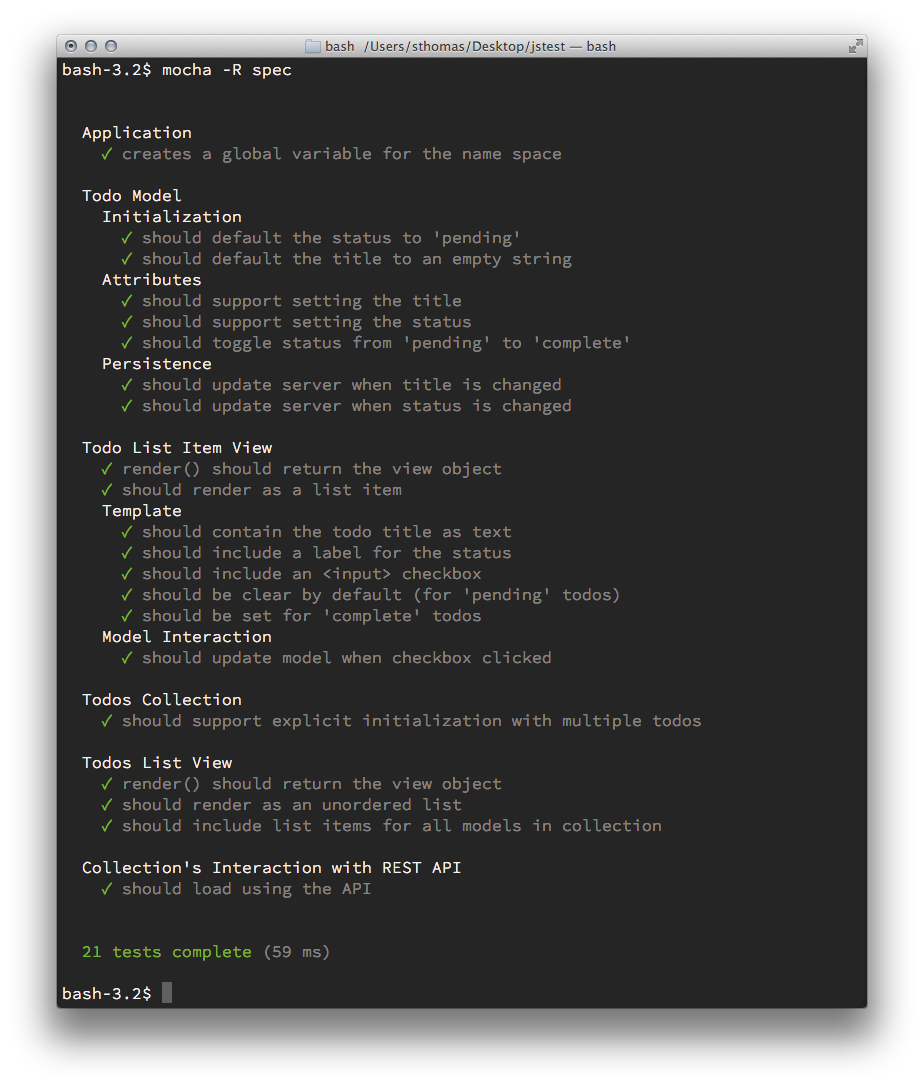
Of course, mocha returns an exit level to indicate whether or not all of the tests passed. That lets us automate the tests as part of a continuous integration process, or simply as a local pre-commit script to preserve our own sanity.
Conclusion
At this point we have accomplished our goals. We have a unit test environment that runs in the background during development and immediately notifies us when any test fails. The tests execute in a web browser, giving us full access to the browser’s development tools while we’re coding. The same tests also run equally well from a command line script, so we can automate their execution during the build or integration process.
Resources
Here are the main unit test resources used in the article.
- Command line JavaScript execution environment: node.js
- JavaScript unit testing framework: Mocha
- Test Development Environment: Test’em
- JavaScript assertion library: Chai Assertion Library
- Spies, stubs, and mocks: Sinon.JS
- Additional assertions: Sinon.JS Assertions for Chai
Frequently Asked Questions (FAQs) on Unit Testing Backbone.js Applications
What is the Importance of Unit Testing in Backbone.js Applications?
Unit testing is a crucial aspect of software development, especially in Backbone.js applications. It involves testing individual components of the software to ensure they function as expected. This helps in identifying and fixing bugs early in the development process, thus saving time and resources. Moreover, unit testing facilitates code refactoring, as developers can make changes to the code and quickly verify if the changes have broken existing functionality. It also improves the design of the code, as writing tests often leads to better modularization and high cohesion of code.
How Does Unit Testing in Backbone.js Compare to Other JavaScript Frameworks?
Backbone.js, like other JavaScript frameworks, supports unit testing to ensure the quality of the application. However, Backbone.js stands out due to its flexibility and simplicity. It doesn’t dictate how your application should be structured, giving developers the freedom to design their applications as they see fit. This flexibility extends to unit testing, allowing developers to choose their preferred testing tools and methodologies. Moreover, Backbone.js has a smaller footprint compared to other frameworks, making it faster and more efficient for unit testing.
What Tools Can I Use for Unit Testing in Backbone.js?
There are several tools available for unit testing in Backbone.js. Some of the popular ones include Mocha, Jasmine, and Jest. Mocha is a feature-rich JavaScript test framework that provides developers with a simple way to test their applications. Jasmine is a behavior-driven development framework for testing JavaScript code. It does not rely on browsers, DOM, or any JavaScript framework, making it ideal for testing Backbone.js applications. Jest, on the other hand, is a comprehensive testing solution with a focus on simplicity and support for large web applications.
How Do I Write Unit Tests for Backbone.js Applications?
Writing unit tests for Backbone.js applications involves creating test cases for each component of the application. This includes models, views, and collections. Each test case should cover a specific functionality of the component and should be independent of other test cases. You can use testing frameworks like Mocha or Jasmine to write your tests. These frameworks provide functions to define test cases, set up and tear down test environments, and make assertions.
How Do I Run Unit Tests in Backbone.js?
Running unit tests in Backbone.js depends on the testing framework you are using. For instance, if you are using Mocha, you can run your tests using the Mocha command-line tool. If you are using Jasmine, you can run your tests using the Jasmine command-line tool. These tools provide options to run individual test cases, entire test suites, or all tests in your application. They also provide detailed reports on the results of the tests, including the number of tests passed, failed, and skipped.
Can I Automate Unit Testing in Backbone.js?
Yes, you can automate unit testing in Backbone.js. Automation involves setting up a continuous integration (CI) system that automatically runs your tests whenever changes are made to the code. This ensures that any bugs introduced by the changes are caught immediately. There are several CI tools available, such as Jenkins, Travis CI, and CircleCI, that support JavaScript and can be used to automate unit testing in Backbone.js.
What Are Some Best Practices for Unit Testing in Backbone.js?
Some best practices for unit testing in Backbone.js include writing small, focused tests that cover a single functionality, keeping tests independent of each other, and testing all possible edge cases. It’s also important to write tests before writing the actual code, a practice known as test-driven development (TDD). This ensures that your code is testable and helps you design better software.
How Can I Debug Failed Unit Tests in Backbone.js?
Debugging failed unit tests in Backbone.js involves analyzing the test report to identify the cause of the failure. Most testing frameworks provide detailed error messages that can help you pinpoint the problem. You can also use debugging tools like Chrome DevTools or Node.js debugger to step through your code and inspect variables and function calls.
Can I Use Mocks and Stubs in Unit Testing Backbone.js?
Yes, you can use mocks and stubs in unit testing Backbone.js. Mocks and stubs are fake objects that simulate the behavior of real objects. They are used to isolate the component being tested from the rest of the system. This makes tests more reliable and easier to write. There are several libraries available, such as Sinon.js, that provide functions to create and manage mocks and stubs.
How Can I Improve the Performance of Unit Tests in Backbone.js?
Improving the performance of unit tests in Backbone.js involves optimizing your tests and your testing environment. This includes writing efficient tests that execute quickly, running tests in parallel, and using a fast testing framework. You can also use profiling tools to identify slow tests and bottlenecks in your testing process.
 Stephen Thomas
Stephen Thomas is a front end architect for a Fortune 50 company, where he is responsible for all aspects of client-side web technology.