In my previous tutorial, we saw how to get started creating a mobile app using the Mootor framework. We implemented user sign in functionality using the Mootor framework and Firebase.
In this tutorial, we’ll implement sign up functionality with Firebase as a back end.
We’ll modify the sign in implementation since firebase released a new version and the standalone FirebaseSimpleLogin client that we used in the first tutorial has been deprecated and added to the Firebase core.
Source code from this tutorial is available on GitHub.
Getting started
To get started, clone the previous tutorial from GitHub.
git clone https://github.com/sitepoint-examples/MootorFrameworkApp_Part1Once the source code has been cloned, navigate to the project directory and install the required dependencies:
cd MootorFrameworkApp_Part1
npm install
Next, start the server
npm startOpen http://localhost:8000/examples/BucketApp/ in your browser and the application should be running.
Include the Firebase script
Navigate to examples/BucketApp/index.html and replace both the existing firebase scripts with the newer version:
<script src="https://cdn.firebase.com/js/client/2.0.5/firebase.js"></script>Modifying Sign In implementation
Since FirebaseSimpleLogin has been deprecated, we won’t need to create the FirebaseSimpleLogin instance. Open examples/BucketApp/views/index/index.js and remove the references to the auth object, resulting in the code below:
(function($) {

        "use strict";

        m.app.view("index").on("ready", function() {

            // create the firebase object
            var firebaseRef = new Firebase('https://burning-fire-1723.firebaseio.com');


            // form on submit event
            $("#myForm").on("submit", function() {
                var email = $('#txtEmail').val();
                var password = $('#txtPass').val();

                firebaseRef.authWithPassword({
                  "email": email,
                  "password": password
              }, function(error, authData) {
                  if (error) {
                    console.log("Login Failed!", error);
                } else {
                    console.log("Authenticated successfully ", authData);
                    window.location.href = "#userhome";
                }
            });
                return false;
            });
        });

    }(window.$));
Instead, with the Firebase instance, firebaseRef, we can authenticate email addresses and passwords using the authWithPassword method.
As seen above, calling authWithPassword returns authData if there are no problems and an error if there are. If there are no errors then we redirect the user to the home page.
Save all changes, restart the server, open http://localhost:8000/examples/BucketApp/ in your browser and try to sign in using the email address sam@sam.com and password sam.
Using the new firebase version, we also need to modify the firebase logout implementation. Open examples/BucketApp/views/userhome/userhome.js and remove the auth object as it won’t be needed any more. Using firebaseRef we’ll call the unauth method which will logout the current user session. The results in the code below:
(function($) {

    "use strict";

    m.app.view("userhome").on("ready", function() {

        // create the firebase object
        var firebaseRef = new Firebase('https://burning-fire-1723.firebaseio.com');

        $("#btnLogout").click(function() {
            firebaseRef.unauth();
            window.location.href = "";
        });
    });

}(window.$));
Creating a Sign Up page
Before creating the sign up page, we’ll modify the sign in page to include a link to the sign up page. Open BucketApp/views/index/index.html and add the following header HTML code.
<header>
    <h1>
        Simple Mootor App
    </h1>

    <nav>
        <a target="_blank" href="#signup">
    <span class="m-icon-add-circle"></span>
</a>

    </nav>
</header>
Save the changes and restart the server. Open http://localhost:8000/examples/BucketApp/ in your browser and you should have a plus icon in the top right corner of the app.

Now let’s create the sign up page. Open examples/BucketApp/views and create a folder called signup. Inside the signup folder create a signup.html, signup.js and signup.css. Add the following html code to signup.html :
<header>
    <h1>
        User Registration
    </h1>
</header>
<form id="myForm" class="m-form m-padding">
    <fieldset class="m-form-top-labels">

        <div class="m-field">
            <input id="txtEmailId" type="text" class="m-text" placeholder="Email Id" />
        </div>

        <div class="m-field">
            <input id="txtPassword" type="password" class="m-text" placeholder="Password" />
        </div>

    </fieldset>

    <button id="btnSignUp" type="button" class="m-button m-button-success m-button-block">Sign Up</button>

</form>
Next, we’ll set the route for the added signup view. Open examples/BucketApp/index.js and add the route for the signup page:
app.route("^#signup", app.view("signup"));
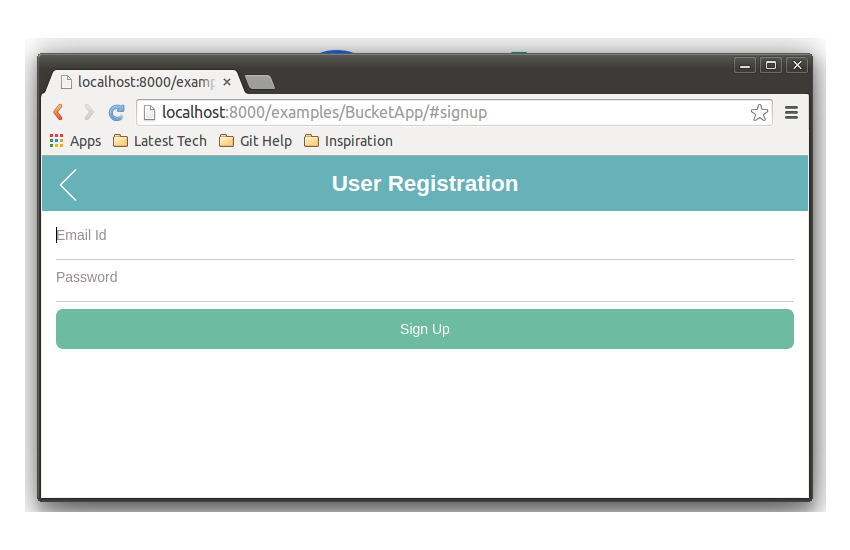
Save all changes and restart the server. Open the app and from the sign in screen, click on the plus icon to navigate to the sign up screen. Here is how the sign up screen should look:
Implementing SignUp functionality
When the sign up views loads, we’ll attach the Sign Up button click event . Open examples/BucketApp/views/signup/signup.js and declare the onready state function block as shown:
(function($) {

    "use strict";

    m.app.view("signup").on("ready", function() {

       // we'll attach the button click here !!

    });

}(window.$));
Now add the sign up button click event call inside the ready function.
(function($) {

    "use strict";

    m.app.view("signup").on("ready", function() {


        // on click
        $("#btnSignUp").on("click", function() {

           // Sign Up logic will be here

        });
    });

}(window.$));
Firebase provides an API method called createUser which we’ll use to sign up our user.
So, first create a Firebase object using the firebase url:
var firebaseRef = new Firebase('https://burning-fire-1723.firebaseio.com');Once the sign up button is clicked, we’ll read the email address and password from the form and call the Firebase createUser API method to create a new user.
$("#btnSignUp").on("click", function() {
    var email = $('#txtEmailId').val();
    var password = $('#txtPassword').val();
    var ref = new Firebase("https://burning-fire-1723.firebaseio.com");

    ref.createUser({
        email: email,
        password: password
    }, function(error) {
        if (error) {
            switch (error.code) {
                case "EMAIL_TAKEN":
                    console.log("The email is already in use.");
                    break;
                case "INVALID_EMAIL":
                    console.log("The email is not a valid email.");
                    break;
                default:
                    console.log("Error creating user:", error);
            }
        } else {
            console.log("User account created successfully!");
        }
    });
});
As you can see, once the createUser call is executed successfully, a success message can be seen in the browser console.
Save all changes, restart the server, open http://localhost:8000/examples/BucketApp/#signup in your browser and register a new user. On successful sign up, you’ll see the success message in the browser console.
Let’s add a redirect to the sign in page on successful user registration. Add the following code after the sucess console message to redirect to the sign in page.
window.location.href = "";
Save changes and restart the server. Open the sign up page and try to register using a new email address and password. On successful user registration, you’ll be redirected to the sign in page.
Conclusion
In this tutorial, we used the newer firebase version to re-implement sign up functionality in a web app that used the Mootor framework. We also modified the sign in functionality as per the new firebase APIs.
Detailed info about the framework can be found in the official docs. Do let me know your thoughts in the comments below!!
 Jay Raj
Jay is a Software Engineer and Writer. He blogs occasionally at Code Handbook and Tech Illumination.