Earlier this year I wrote an article on Pebble Watch Development with JavaScript. This covered starting Pebble app development from a JavaScript developer’s point of view and I snuck in some C coding at the end as a bonus. I built a wonderful app called “Find Me Starbucks” which combined the Foursquare API and Pebble location API to display the address of the nearest Starbucks underneath the time on my watchface. I then expanded that app in my article on Advanced Pebble Watch Configuration to “Find Me Anything”, adding a configuration screen so the user can choose what keyword to search for.
The next logical step once you’ve got a working and tested app is getting that app into the Pebble Appstore. Whether it’s a JavaScript enabled app or not, the process for getting a basic single app into the Appstore is the same.
Prepare your assets
Take screenshots of your app
Open your terminal application and navigate to the folder you’d like to save your screenshots to.
Run the following command:
pebble screenshot --phone IP_ADDRESS_OF_YOUR_PHONE. It’s similar to running thepebble build --phone IP_ADDRESS_OF_YOUR_PHONEcommand you run when creating your app. Your command line should run like so: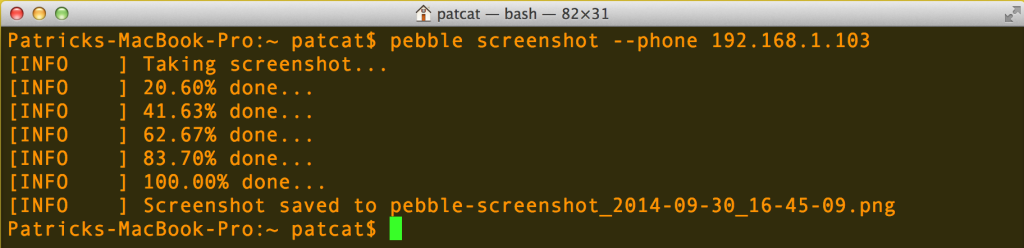
Then, in the folder you ran this command from, you’ll get a screenshot of what was visible on your Pebble:
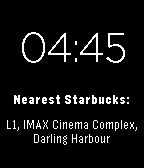
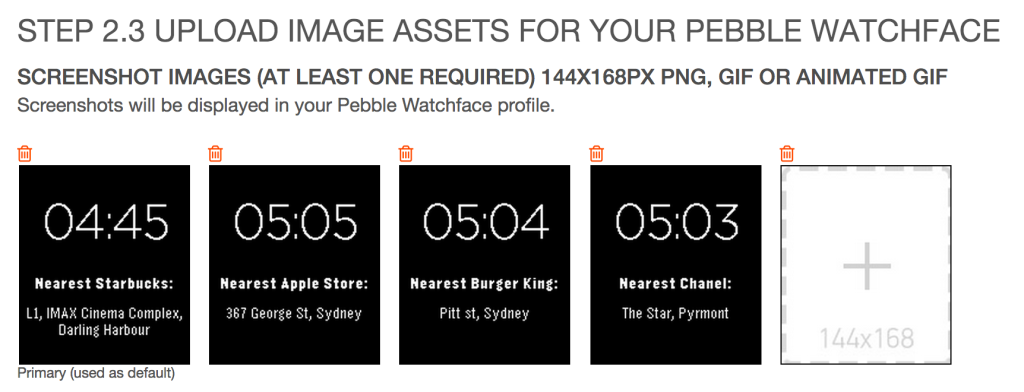
You can have up to five screenshots for your app, so prepare a few.
You could make an animated gif for the main image of your app, that’ll animate on the app store screens to show more of your app while people are searching.
Create a marketing banner
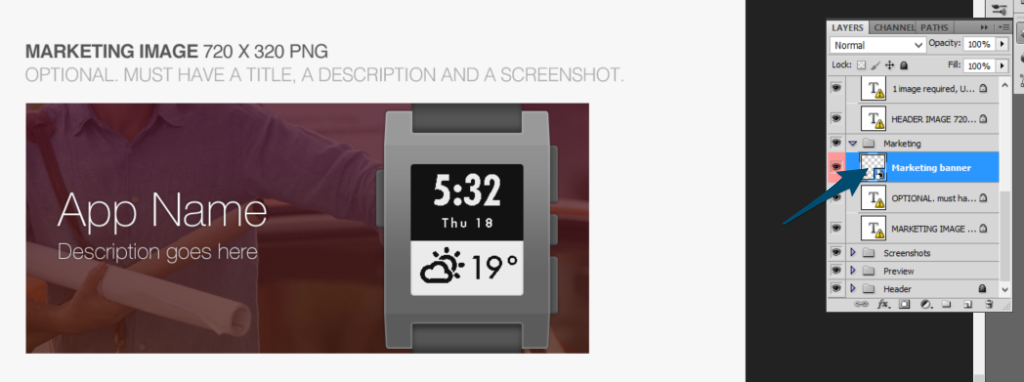
All professional and attractive Pebble apps should have a marketing banner. These are easy to produce as long as you have a tool such as Photoshop that can open the marketing materials pack provided by Pebble.
Download the “Pebble appstore Marketing Materials Kit” from this page. This is a photoshop file which contains assets and the ability to see live previews of what your content will look like in the store!
Extract and open up the psd file.
Scroll to the marketing banner and find it in your Photoshop layers. It should be under Marketing -> Marketing banner.
Double click the thumbnail of that layer to edit the contents (note: my Photoshop screenshots are in Windows, yet my other screenshots are on Mac, this is because I sadly don’t own a Mac version of Photoshop and run it in a VM!):
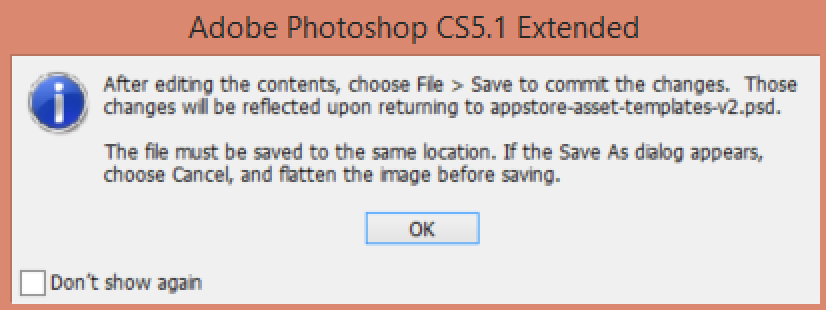
Click OK on that popup. It’s reminding you to click File -> Save if you want any of your changes here to remain.
You’ll now see the marketing banner and its available layers:
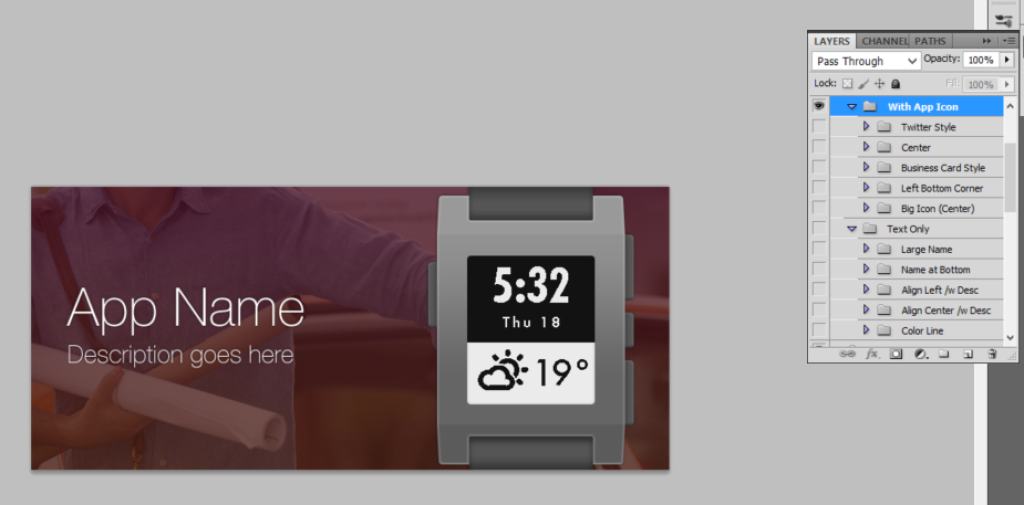
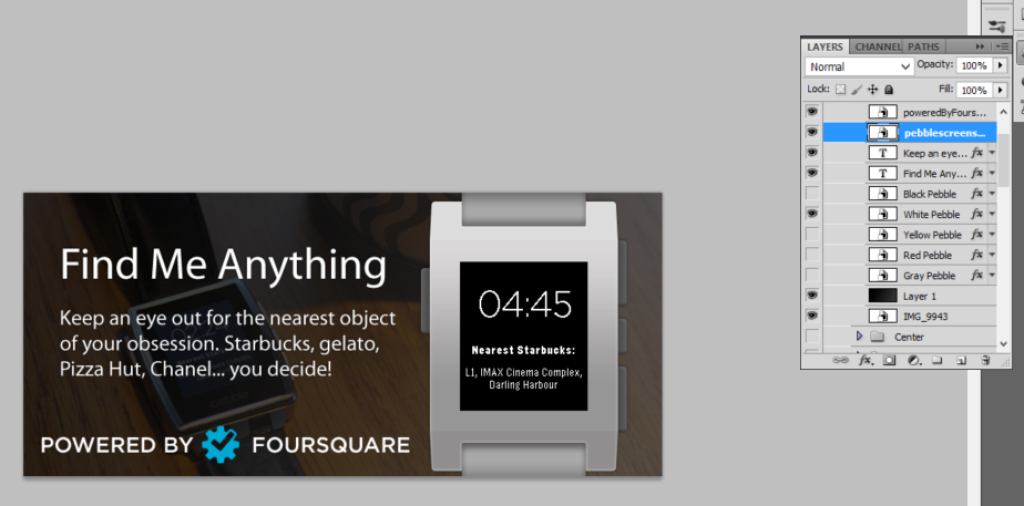
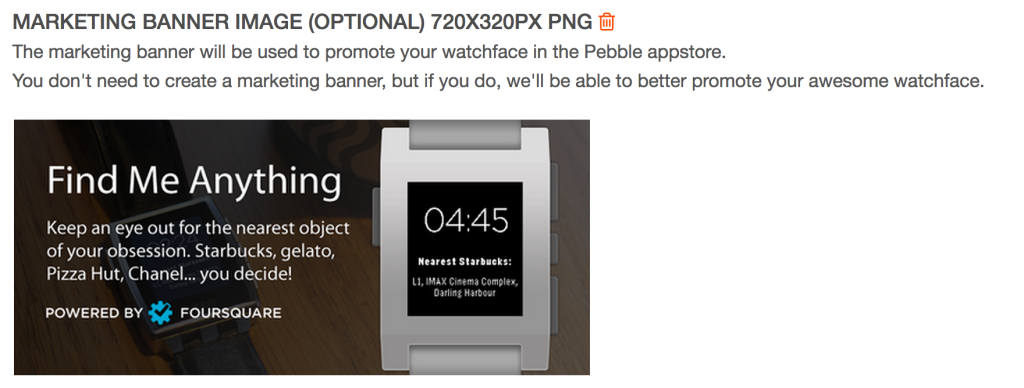
Edit the image, ensuring that you’ve got your app title, description and a screenshot of your app on the Pebble visible. You can adjust the font of your text, add new elements (e.g. I’ve added a “Powered by Foursquare”), use a more appropriate background image and so forth. The font used in Pebble’s sample is Helvetica Neue which, if you’re on Windows, isn’t freely available, so you might be forced to use a different font. My end result looks like this:
Go to File -> Save and save your creation.
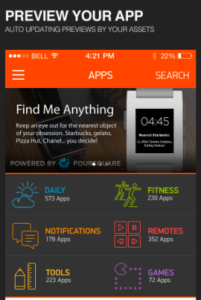
You can then switch back to the main psd (don’t close your marketing banner just yet, keep it open) and see your banner in action.
I found the “Powered by Foursquare” part was covered by the dots, so I adjusted, re-saved and switched back and forth a few times until I was happy with the result.
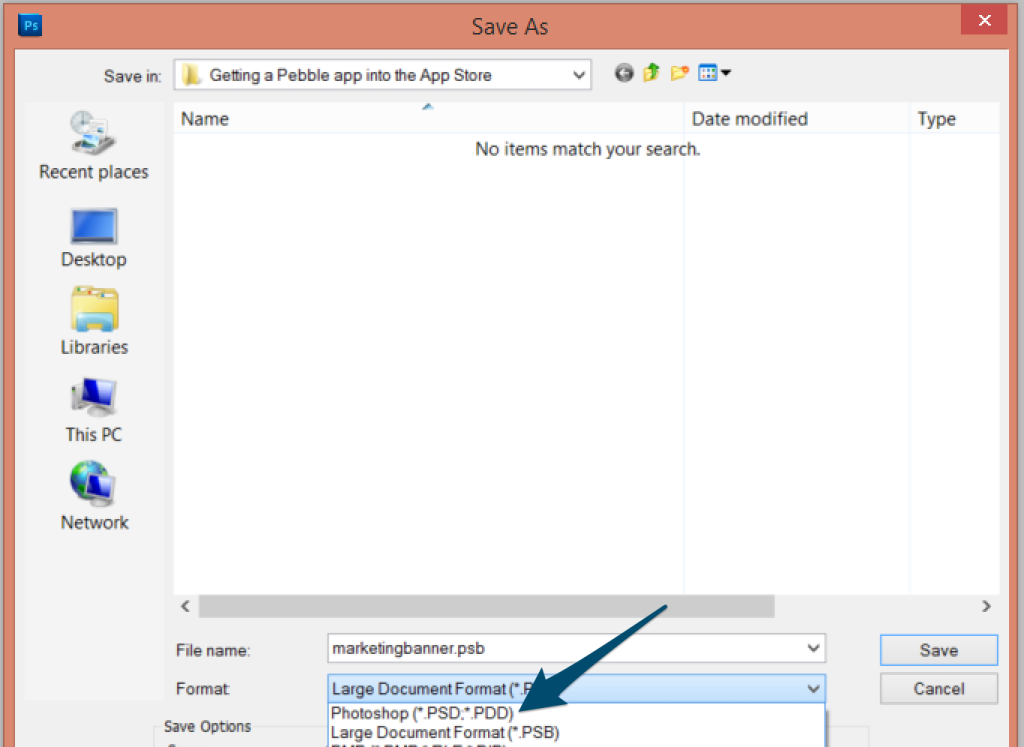
Once you’re happy with yours, I’d recommend saving a copy separate from this template for your own safe keeping. Switch to the marketing banner and go to File -> Save As and save your file somewhere else as a psd. The default filetype is a psb file, so make sure you change it to a PSD.
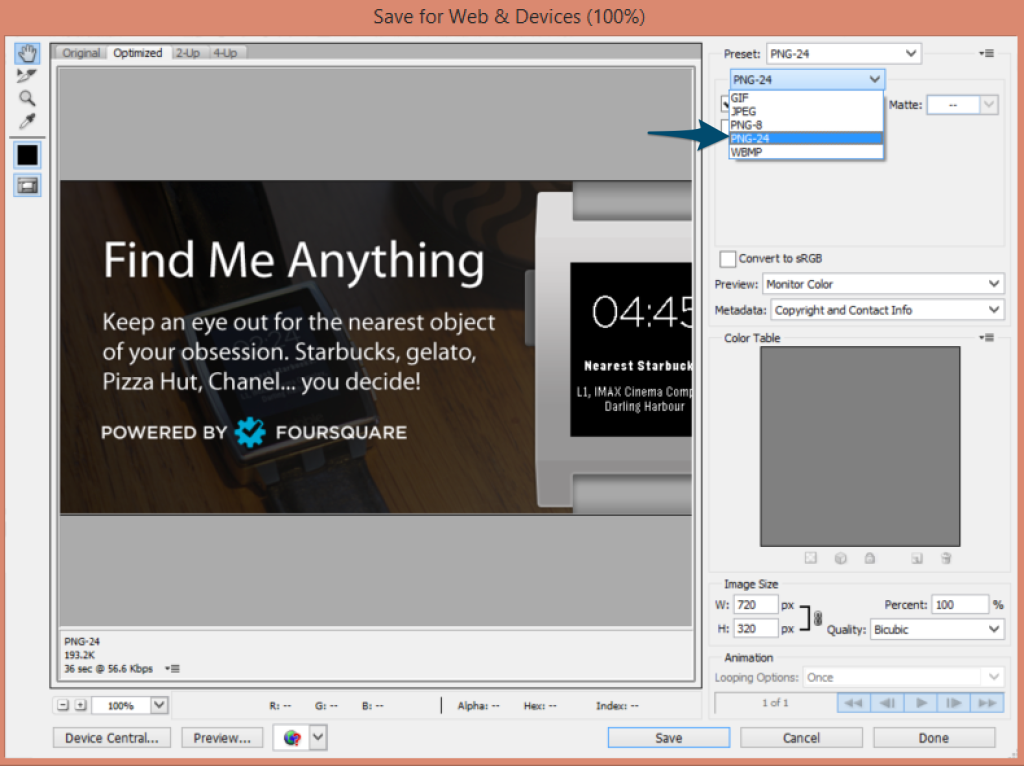
Next we’ll export the file as a PNG to include in our form. Go to File -> Save for web and devices, choose PNG–24. It should be 720×320 pixels. Save it somewhere you can find it.
For Pebble apps (not watchfaces)
If you’re adding a Pebble app, rather than a watchface, then you’ll also need two PNG image icons which are used to represent your app in the app store, they are both in the “Pebble appstore Marketing Materials Kit” template:
- One 144 x 144 PNG
- One 48 x 48 PNG
With all this sorted, we’re ready to upload.
Publish your app through the Pebble Developer Portal
Head to https://dev-portal.getpebble.com
Click “Publish a Pebble App”:

Get an account (or log in if you’ve already got one).
When you’ve logged in, you should see a screen with details on each app type and three buttons at the bottom like so:

I’d assume by this point, you’ve already got an app made. So you likely already know whether it is a watchface, watchapp or companion app. In summary:
- Watchface – Shows the time and is the app visible on a user’s Pebble most of the day. My “Find Me Starbucks” and “Find Me Anything” apps mentioned above are watchfaces.
- Watchapp – This is an app a user needs to open up from the Pebble watch menu and use. It could do anything, display pictures of My Little Pony, stats for the ten most recent gorilla sightings, order a pizza with no anchovies. Anything they’re likely to prefer tucked away for particular occasions rather than always available and displayed with the time.
- Companion app – If you’ve made a companion app, you’d know it. It’s a native iOS or Android app that accompanies a Pebble app to provide more functionality. With the Pebblekit JavaScript framework, these aren’t needed for providing a way for users to choose settings, so only have a companion app if you really need it. It’s a pain to install multiple items just for a single watchface/watchapp.
I’ll be uploading the “Find Me Anything” watchface from my Advanced Pebble Watch Configuration article, so I’m choosing “Create a Watchface”.
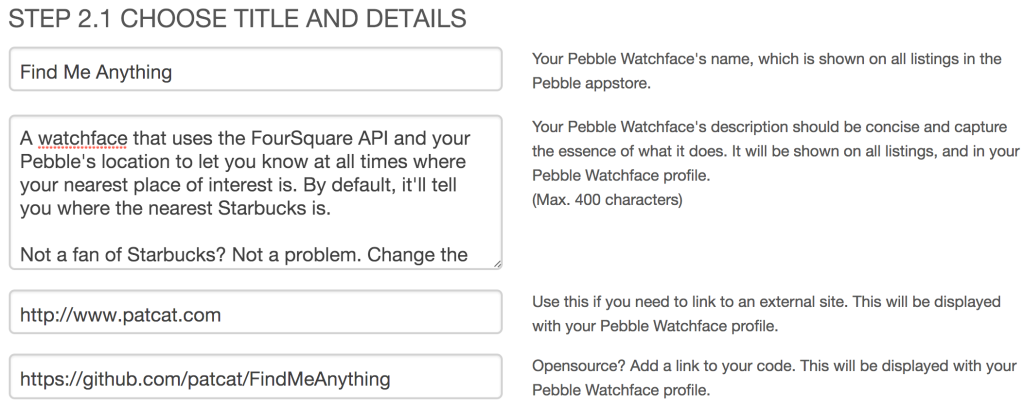
Add your app name, description, URL and a link to your code (if you’re willing to share it):
Upload your Pebble app screenshot (or multiple, if you’ve made a few):
Upload your marketing banner:
- Click “Create”
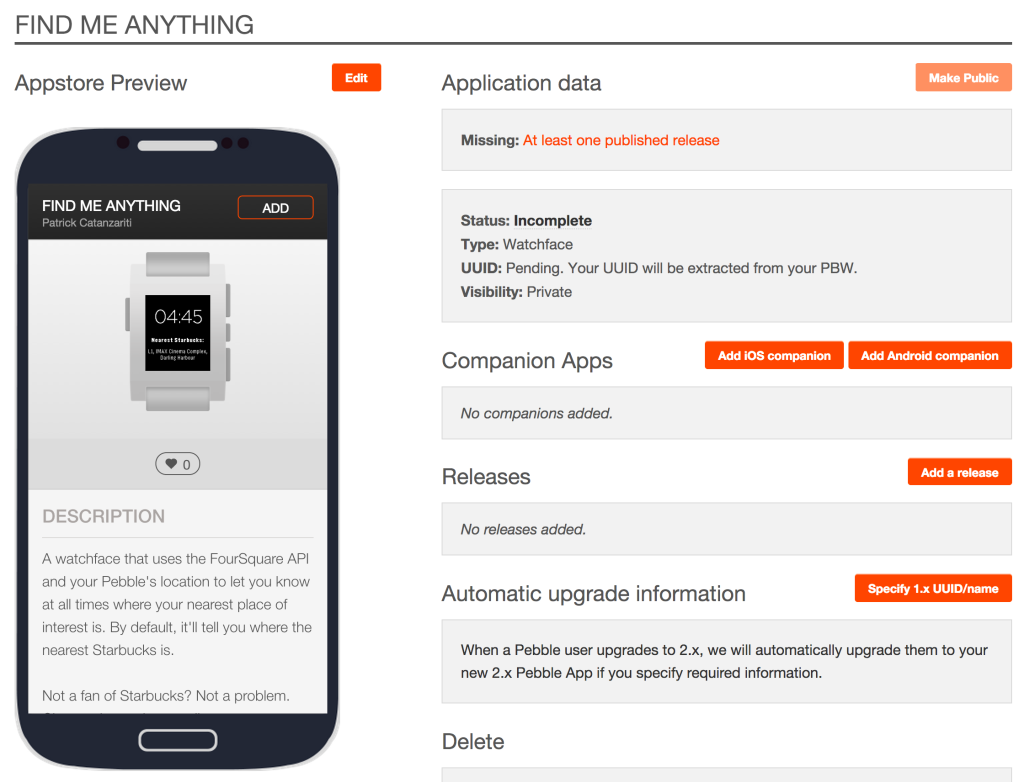
- From this point, your app exists under your account but doesn’t have any app releases. You can see a preview of your appstore entry:
- Your app is contained within a PBW file. To find it, go to the folder with your app inside and find the “build” folder.
- Inside this build folder, will be a PBW file with your app’s name as the filename. For example, mine is
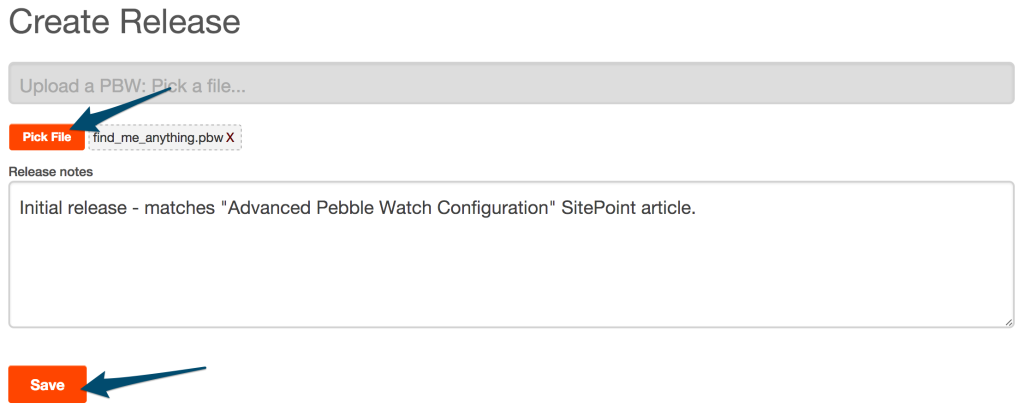
find_me_anything.pbw. - To upload your app, click the “Add a release” button:
- At the next screen, click “Pick File” and upload your PBW file, type in any release notes and then click “Save”:
- If you have any validation errors, you’ll need to fix those before resubmitting. My submission failed because the version numbering convention had changed. Pebble now require only major.minor rather than major.minor.bugfix in
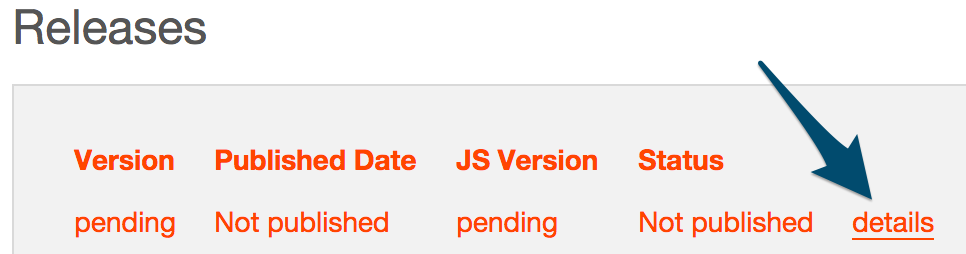
appinfo.json: - You can remove failed releases if you wish. To do so, go to the releases section of your app info and click the “details” link next to the release you want to remove:
- Underneath “Owner Actions”, choose “Delete” and then “OK”:
- You might be able to click “Edit” to resubmit a release, however the method I use is to either delete the failed release, or leave it there, go back to the main app info screen and click “Add a release” again.
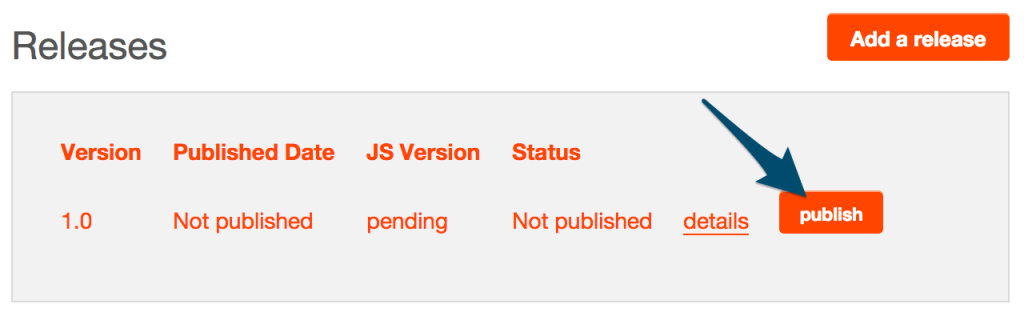
- If the submission is okay, go to the release and next to the “details” link, you’ll see a “publish” button. Click that:
- Click the “Make Public” button to change the visibility to public:
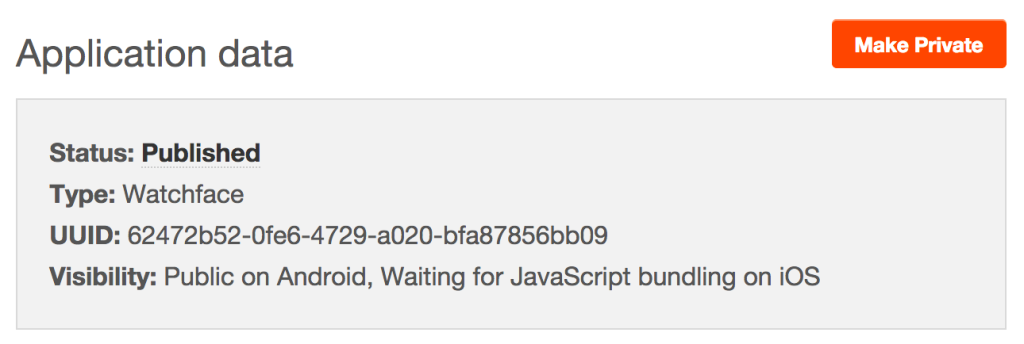
- You will be shown the status of your app under the application data (where it previously said “Private”). In this case, my app is now public on Android but it’s still working on getting it onto iOS (I’ll explain the iOS timeframe stuff in a section below):
- If all goes well, it’ll publish onto the appstore and you’ll get links that you can share. The Public Web Link is the one you can share on the web and the Deep Link is the one you can link to within Android and iOS applications to go straight into the Pebble Appstore.
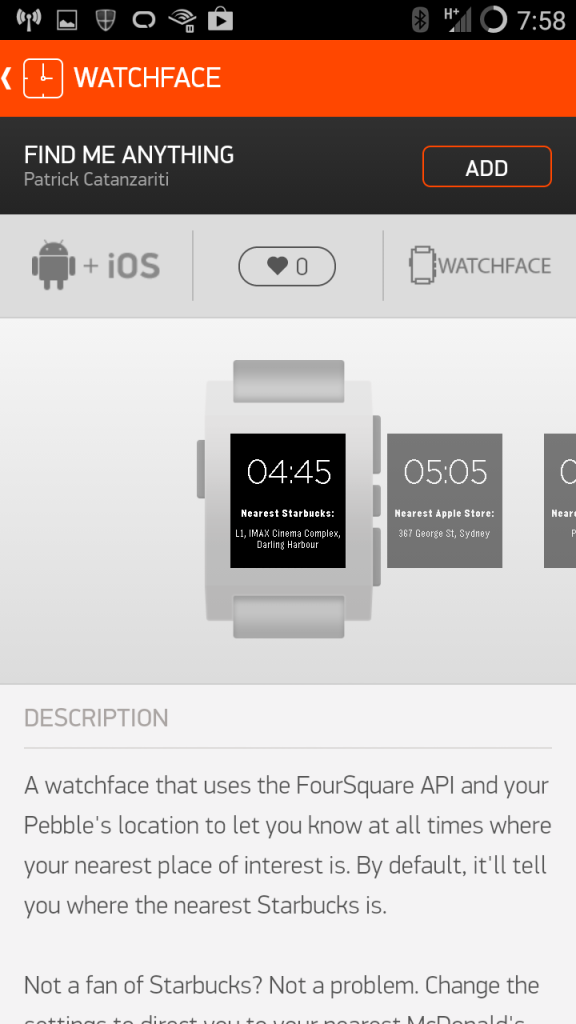
Head to the Appstore, search for your app and feel the exhilaration of seeing your very own app!
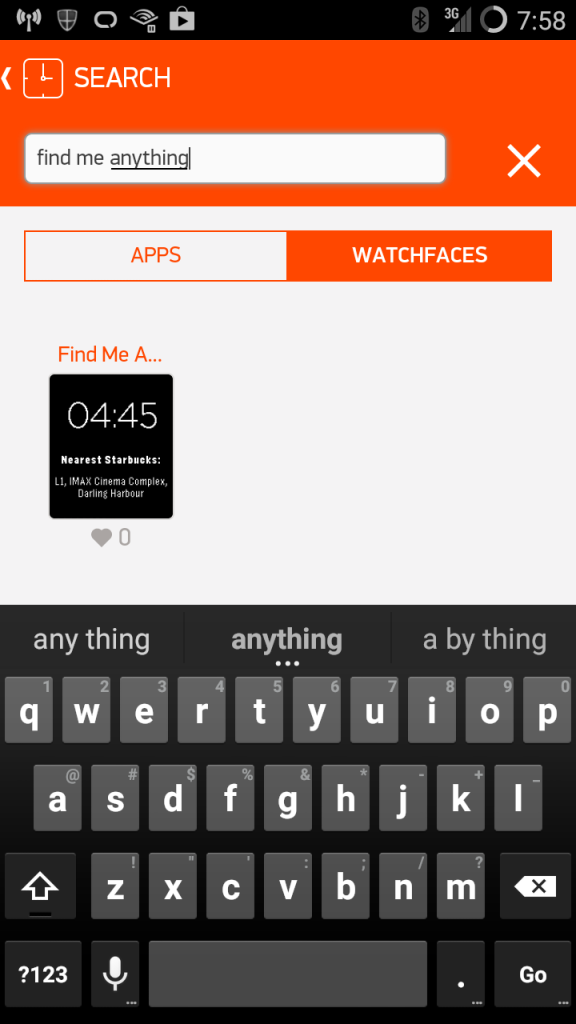
Click and check all details are as expected, then install.
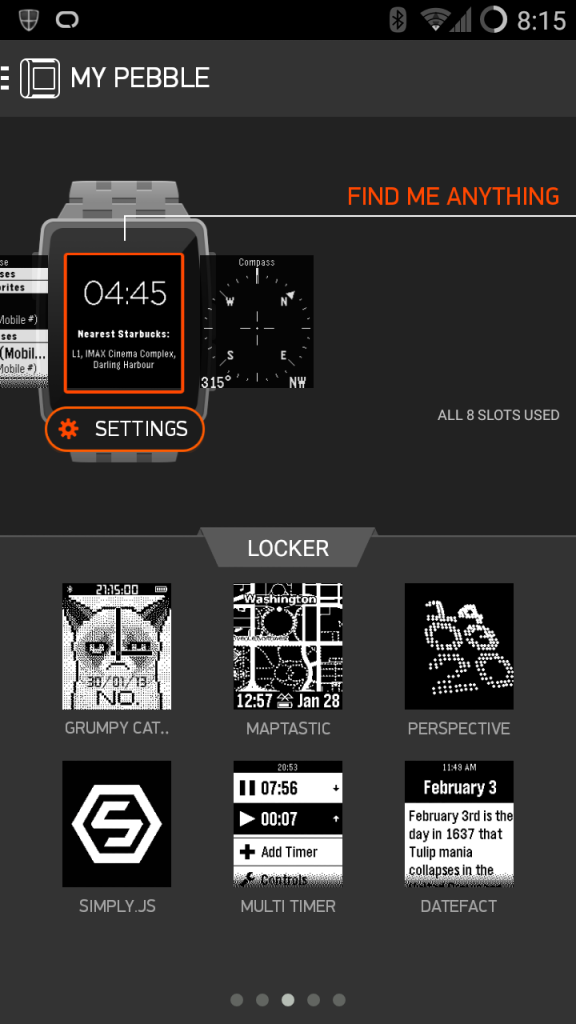
- When I installed the app, it replaced my test version automatically which was great:
- We’re all done! If you’ve followed along with your own app, congratulations, you’ve got an app on the appstore.


But… iOS is still waiting for this bundle thing?
Sadly Pebble needs to bundle each JavaScript file inside the Pebble iOS application before iOS users can install newly submitted JS enabled apps. They send updates to Apple about once every ten days, Pebble explains here:
When you submit a new app that uses JavaScript to the Pebble appstore, this app will not be available immediately to iOS users. Instead of the “ADD” button, they will see a “COMING SOON” button. Approximately once every 10 days, we grab the latest release of all published JavaScript apps and include them in a new release of our iOS app. This new release is then sent to Apple. When this new release is approved by Apple, iOS users will automatically upgrade to this version and will then have access to your app.
Resources
- Publishing to the Pebble appstore – Pebble’s official docs on publishing to the appstore
- Tips for Appstore Success – Tips from Pebble on achieving a successful app launch
- Pebble Designer Guide – Includes the “Pebble appstore Marketing Materials Kit” with templates for the marketing header and icons
- Bundling JavaScript for Pebble Apps – Info on the JS bundling issues with iOS
Frequently Asked Questions (FAQs) about Submitting a Pebble App to the App Store
How can I submit my Pebble app to the App Store?
To submit your Pebble app to the App Store, you first need to ensure that your app meets all the guidelines set by Apple. Once you have done that, you can submit your app for review through the App Store Connect portal. You will need to provide detailed information about your app, including its features, functionality, and any in-app purchases. Once submitted, your app will undergo a review process before it is approved for listing on the App Store.
What are the guidelines for submitting a Pebble app to the App Store?
Apple has a set of guidelines that all apps must adhere to in order to be listed on the App Store. These guidelines cover a range of areas, including user privacy, data security, content, design, and functionality. For instance, your app must not contain any offensive or inappropriate content, it must respect user privacy, and it must function as advertised. It’s important to thoroughly review these guidelines before submitting your app to avoid any potential issues during the review process.
How long does the review process take for a Pebble app?
The review process for a Pebble app can vary depending on a number of factors, including the complexity of the app and the volume of apps being reviewed at the time. However, in general, you can expect the review process to take anywhere from a few days to a couple of weeks. If your app is rejected for any reason, you will receive feedback on what needs to be fixed before you can resubmit it.
Can I update my Pebble app once it’s been submitted to the App Store?
Yes, you can update your Pebble app after it’s been submitted and approved for listing on the App Store. To do this, you will need to submit a new version of your app through the App Store Connect portal. This new version will also need to go through the review process before it can be made available to users.
What happens if my Pebble app is rejected by the App Store?
If your Pebble app is rejected by the App Store, you will receive feedback detailing the reasons for the rejection. You can then make the necessary changes and resubmit your app for review. It’s important to carefully review the feedback and make sure you fully address all the issues raised before resubmitting your app.
How can I improve the chances of my Pebble app being accepted by the App Store?
To improve the chances of your Pebble app being accepted by the App Store, make sure your app adheres to all of Apple’s guidelines, is free of bugs, and offers a good user experience. It’s also a good idea to thoroughly test your app before submitting it to ensure it functions as expected.
Can I charge for my Pebble app on the App Store?
Yes, you can choose to charge for your Pebble app on the App Store. When you submit your app, you can set the price you want to charge. Keep in mind that Apple takes a percentage of all sales made through the App Store.
How can I promote my Pebble app once it’s listed on the App Store?
There are many ways to promote your Pebble app once it’s listed on the App Store. You can use social media, email marketing, and other digital marketing strategies to reach your target audience. You can also use App Store Optimization (ASO) techniques to improve your app’s visibility in the App Store.
What kind of support will I need to provide for my Pebble app?
As an app developer, you will need to provide ongoing support for your Pebble app. This includes fixing any bugs that arise, updating the app to ensure it remains compatible with the latest versions of iOS, and responding to user feedback and reviews.
Can I submit a Pebble app to the Google Play Store?
Yes, you can also submit your Pebble app to the Google Play Store. The process is similar to submitting an app to the Apple App Store, but there are some differences in the guidelines and review process. It’s important to familiarize yourself with these differences before submitting your app to the Google Play Store.
 Patrick Catanzariti
PatCat is the founder of Dev Diner, a site that explores developing for emerging tech such as virtual and augmented reality, the Internet of Things, artificial intelligence and wearables. He is a SitePoint contributing editor for emerging tech, an instructor at SitePoint Premium and O'Reilly, a Meta Pioneer and freelance developer who loves every opportunity to tinker with something new in a tech demo.