This article was sponsored by Adobe. Thank you for supporting the sponsors who make SitePoint possible.
Finding the right stock image can be such a tiresome task; I despise it. I can easily tally up 20 to 30 images and remain indecisive for days, but even when I’ve made a decision I still need to clear it with the client, who might have other ideas.
Back to square one, and also to that awkward folder on my desktop where I have to store all of my other tiny low-quality samples – and that’s even if a stock website offers samples.
Before hearing about Adobe Stock I would save the image to a folder on my hard drive, locate the image using File → Place and import it into the Photoshop document. If it wasn’t suitable after all, I’d have to repeat those steps all over again.
![]()
Now, thanks to Adobe Stock, I can work much more speedily by storing all of my stock images in the Creative Cloud. This means I can access my stock images in Photoshop CC, Illustrator CC, InDesign CC, Premiere Pro CC and even After Effects CC. In Photoshop, you can simply drag the images from the Library Panel (which is always in-sync with Creative Cloud) directly to the artboard, there’s no need to manage stock images on your local machine. The library interface is fairly straightforward and the thumbnails are large enough to make multiple iterations a breeze.
In this article we’re going to show off the strengths of Adobe Stock by finding the perfect image for a given design project.
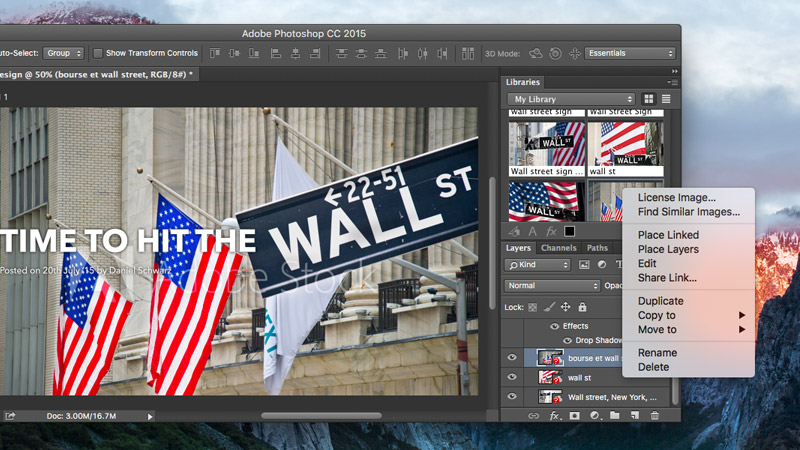
The concept in this case is an article called Time to Hit the Wall Street where the title reads “time to hit the” and the background image has the Wall Street sign in it.
Obviously, there are quite a few images of the Wall Street sign (Adobe Stock has over 40 million curated images in total), but we need a very specific example that allows the article title to run into our background image, because we’re clever like that!
Getting Started
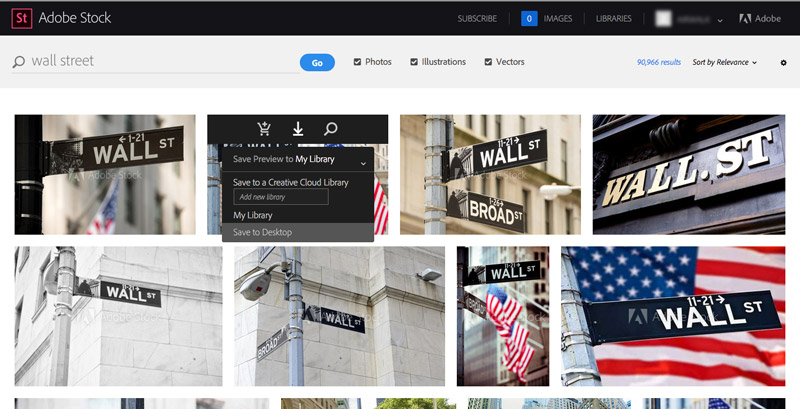
Assuming you have the Photoshop CC 2015 update and the Library Panel is open, click on the “St” icon and Adobe Stock will automatically open in the browser. Log in with your Adobe ID and then search “Wall Street”.
Managing Previews in the Creative Cloud
When you hover over a search result you’ll be offered three options. In order, these are: Buy License, Save Preview and Find Similar Images. We only want to sample some images for now, so let’s select a few Wall Street images that might be suitable. You’ll have the option to save to My Library or create an entirely new library specifically for our Wall Street stock – there’s that easier-to-manage stuff I was talking about.
Accessing the Previews in Photoshop CC 2015
Now, flick back to Photoshop and take a look in your library – those images that we chose are now visible there, but before we can use them for our project, we first need an artboard.
Go to File → New and select the “Web Most Common” artboard.

Our stock image will be used as a background for a full-screen article title, but before we can decide what image works best, we need to design our header content.
For the sake of keeping this simple, I’ll only include the article title, date and author, and I’ve decided that the title will be aligned to the left but centered vertically. After dragging a sample image from the Library Panel and scaling it, this is what I have.
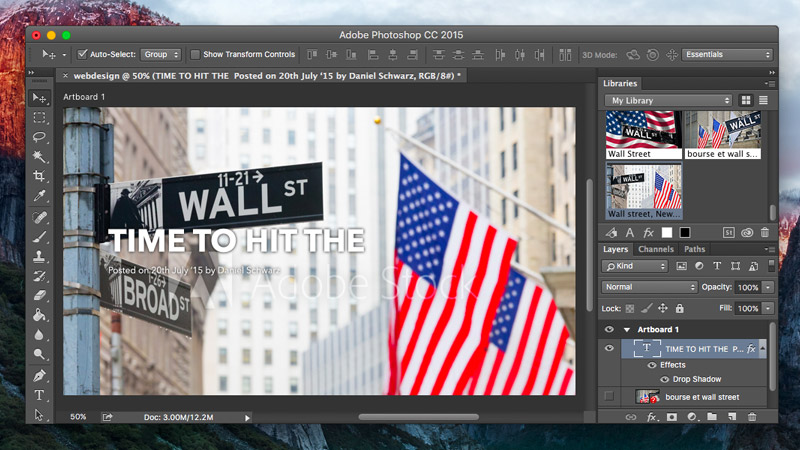
It reads, “Wall St, Time To Hit The”. Not quite what we had in mind. Lets hide this layer and try another stock image.
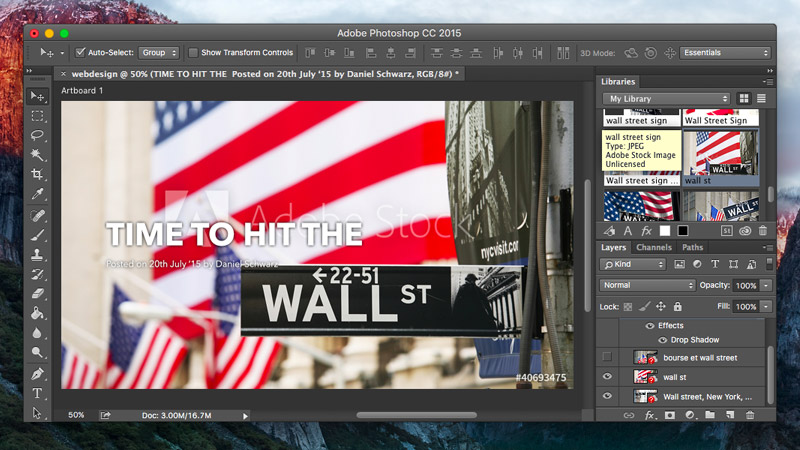
I think this one is better, but “Wall St” doesn’t follow on horizontally (it appears underneath) and I still have five more stock images to try. It’s quick and easy to re-try, and I haven’t licensed anything yet, so I’ve nothing to lose.
Licensing Images
Of the five remaining candidate stock images, I decided to choose the one below. It has the right amount of lighting and composition, and reads fluently from left to right, as I had hoped for. I’m ready to buy.
In the Library panel, Right-click and choose “License Image…”. You’ll be given various options for purchasing the image, or alternatively you can choose an add-on subscription for your Creative Cloud account – you can include a 10-image or 750-image subscription to be billed either monthly or annually.
After licensing the chosen stock image, your PSD will automatically update with a higher-quality, non-watermarked version without the need to repeat any of the editing I did when I was working on the comp.
Conclusion
Sourcing suitable stock images is a mammoth task in itself, and you could end up wasting not only your valuable time, but also money on resources that ultimately aren’t suitable after all.
Adobe Stock allows us to rapidly choose, try out and license many images in quick succession without forcing us to spend money until we’re ready, and Adobe’s desktop apps (Photoshop, Illustrator, InDesign, et cetera) lets us do that mostly in-app.
 Daniel Schwarz
Previously, design blog editor at Toptal and SitePoint. Now Daniel advocates for better UX design alongside industry leaders such as Adobe, InVision, Marvel, Wix, Net Magazine, LogRocket, CSS-Tricks, and more.


