As WordPress developers, we often encounter projects that need to include previously attained data, whether that be from simple text files, CSV files, or even an old database. Data migration is something any back end developer will encounter. A few months back, we had a project that needed nearly 1,000 posts to be generated from a plethora of CSV files. Now, usually this wouldn’t be that hard but this data also needed to be under its own post type and that custom post type had a few custom fields, including a media attachment for an MP3 file.
I won’t bore you with the code for creating custom post types and custom fields, because there’s already a ton of articles floating around the web on that subject. I’ll just mention that I am using Custom Post Type UI and Advanced Custom Fields for each respective task. As the title suggests, what we’re going to be covering here is programmatically taking data from a bunch of CSV files (some containing multiple posts), and then turning that data into WordPress posts for a custom post type. We’ll even go over attaching a simple text file to each post.
In order to get all the data we need from the CSV files, we’ll be making use of a few nifty PHP functions, such as: glob(), which ‘globs’ a directory and returns an array of filenames within it; fopen(), which opens up a file so that we can read its contents and finally, fgetcsv(), which parses a CSV file into a nice associative array housing all our data.
In reality, most of the data we’ll be using for this article would probably be inside of a single CSV, as opposed to how we’re going to be doing it today where the data is scattered throughout multiple files. This is done so that the techniques used here can be implemented using other types of data, such as JSON, Yaml, or even plain text files. The idea for this whole article came from the severe lack of tutorials and articles concerning this subject, especially when you’re using custom post types and custom fields.
Getting to Know Our Data
If you want to follow along, you can grab the needed CSV files (and all of the code used in this article, too) from this repo. Alrighty, first things first, let’s take a look at the CSV data we’re going to be dealing with (please note the ‘File’ column is there to show you that I am spreading all of this data across multiple CSV files).
| File | Title | Content | Attachment |
|---|---|---|---|
| dummy.csv | some title | some content for the post | attachment1.txt |
| dummy2.csv | some title 2 | some content for post 2 | attachment2.txt |
| dummy3.csv | some title for post 3 | some content for the third post | attachment3.txt |
| dummy3.csv | some title 4 | some content for post 4 | attachment4.txt |
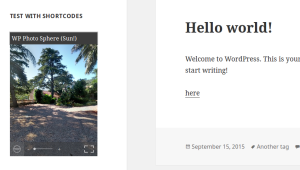
Pretty simple, huh? Next, we’ll take a look at the custom post type we’ll be using. I created it using Custom Post Type UI, so you can use the same settings if you’re using the plugin, or do it yourself with WordPress’ many functions. Here’s a quick screenshot of the options we’ll be using (I am highlighting slugs and other fields that we’ll be using throughout this article, so keep that in mind):

Lastly, let’s take a look at the custom field we’ll be using. It’s created with the lovely Advanced Custom Fields. Here’s another quick screenshot of the settings we’ll be using.
Please note, the ID for your custom field will likely be different from the one used in this article, so be sure to update your $sitepoint array with the correct ID. This can either be the actual hash key for the field, or simply the name of the field. I’m just going to stick to the name, for the sake of clarity.

A Couple of Prerequisites
It’s worth mentioning that the code used in this article requires at least PHP 5.3. We’ll be making use of anonymous functions, as well as fgetcsv(), both of which require 5.3, so before you go off and use this on an old rickety production server (please, don’t do that), you might want to upgrade.
Another thing to mention is that I’m not going to get into PHP’s max_execution_time, which can cause some issues when inserting a large amount of posts in one go. The setting varies so much from server to server that it’s not feasible to discuss it in this article. If you’d like to learn more, there’s a ton of information on Stack Overflow, as well as on the official PHP docs on how to go about increasing your max execution time.
The Nitty-gritty
To start this off, let’s create a simple button that executes our script within the back-end of our site. This will ensure that our code is only executed by us, the administrator. To do that, we’ll just make use of WordPress’ admin_notices hook. Basically, all it’s going to be doing is creating a $_POST variable that we’ll use to determine whether or not we should insert the posts into the database.
/**
 * Show 'insert posts' button on backend
 */
add_action( "admin_notices", function() {
    echo "<div class='updated'>";
    echo "<p>";
    echo "To insert the posts into the database, click the button to the right.";
    echo "<a class='button button-primary' style='margin:0.25em 1em' href='{$_SERVER["REQUEST_URI"]}&insert_sitepoint_posts'>Insert Posts</a>";
    echo "</p>";
    echo "</div>";
});
I mentioned earlier that we would be using anonymous functions (I’ll refer to them as closures, for simplicity) throughout this article, and the reason for this is that it’s not really worth polluting the global namespace with a bunch of functions that are essentially throw-away functions. Closures are great, and if you aren’t familiar with them, I’d highly suggest reading up on them. If you come from a JavaScript or Ruby background, you’ll feel right at home.
If you want to put all of this code into your functions.php file, that’s fine, though it’s also fine if you want to create a separate page template, a hidden page, or whatever. In the end, it really doesn’t matter. To start out, let’s use another WordPress hook, admin_init. We’ll also include the $wpdb global, so that we can do a custom database query later on.
/**
 * Create and insert posts from CSV files
 */
add_action( "admin_init", function() {
	global $wpdb;

	// ... code will go here
});
Alright, so what next? Let’s start out by checking whether or not our $_POST variable is present, and if it isn’t, we can exit the function. No use in wasting memory on nothing. To check whether our variable is present, we’ll use the $_GET variable. If you’re not familiar with these types of variables, you can read up on them here. In addition to the above check, we’ll also define our $sitepoint array that I mentioned earlier. It will contain your custom post type and custom field ID’s.
It’s worth noting, that anytime I use // ... within the code of this article, that is a continuation of the last code block we covered. Most of the code in this article is within the closure for the admin_init action we just created above. At end of the article, I’ll supply you with the full code, so don’t worry if you get a little lost.
// ...

global $wpdb;

// I'd recommend replacing this with your own code to make sure
//  the post creation _only_ happens when you want it to.
if ( ! isset( $_GET["insert_sitepoint_posts"] ) ) {
	return;
}

// Change these to whatever you set
$sitepoint = array(
	"custom-field" => "sitepoint_post_attachment",
	"custom-post-type" => "sitepoint_posts"
);

// ...
Next, let’s create a closure that will fetch our CSV data and create a nice associative array of all of the data. Now, it would be good to note that depending on what type of data you’re using (whether that be CSV, JSON, Yaml, etc.), this closure will vary. So, I would suggest that you adjust this to fit your data. I’ve commented the code below so that you can better follow what is actually going on.
A few additional notes:
* The $array[] = "value" syntax is short for array_push, which pushes the assigned value onto the end of the array.
* I’m storing my CSV data within my theme, inside of a data/ directory. You can store it wherever you want, but just remember to adjust the glob() path to whatever you choose.
// ...

// Get the data from all those CSVs!
$posts = function() {
	$data = array();
	$errors = array();

	// Get array of CSV files
	$files = glob( __DIR__ . "/data/*.csv" );

	foreach ( $files as $file ) {

		// Attempt to change permissions if not readable
		if ( ! is_readable( $file ) ) {
			chmod( $file, 0744 );
		}

		// Check if file is writable, then open it in 'read only' mode
		if ( is_readable( $file ) && $_file = fopen( $file, "r" ) ) {

			// To sum this part up, all it really does is go row by
			//  row, column by column, saving all the data
			$post = array();

			// Get first row in CSV, which is of course the headers
	    	$header = fgetcsv( $_file );

	        while ( $row = fgetcsv( $_file ) ) {

	            foreach ( $header as $i => $key ) {
                    $post[$key] = $row[$i];
                }

                $data[] = $post;
	        }

			fclose( $_file );

		} else {
			$errors[] = "File '$file' could not be opened. Check the file's permissions to make sure it's readable by your server.";
		}
	}

	if ( ! empty( $errors ) ) {
		// ... do stuff with the errors
	}

	return $data;
};

// ...
If you’re more of a visual person (I know I am), the data that is returned when that closure is executed will be something along the lines of this (and as you can tell above, there’s already a simple template for some error handling, just in case you want to do something a little crazy):
$data = array(
    0 => array(
        "title" => "some title",
        "content" => "some content for the post",
        "attachment" => "attachment1.txt"
    ),
    1 => array(
        "title" => "some title 2",
        "content" => "some content for post 2",
        "attachment" => "attachment2.txt"
    ),
    // ...
);
It might not seem like a lot, but it’s enough to get the job done. Next, we need a function that can check whether or not our post is already in the database. Nothing is worse than executing a script that inserts hundreds of posts, only to realize it inserted everything twice. This nifty little closure will query the database, and make sure that doesn’t happen. In this closure, we’re going to be using the use() function that allows us to access variables outside of the scope of the closure.
// ...

// Simple check to see if the current post exists within the
//  database. This isn't very efficient, but it works.
$post_exists = function( $title ) use ( $wpdb, $sitepoint ) {

	// Get an array of all posts within our custom post type
	$posts = $wpdb->get_col( "SELECT post_title FROM {$wpdb->posts} WHERE post_type = '{$sitepoint["custom-post-type"]}'" );

	// Check if the passed title exists in array
	return in_array( $title, $posts );
};

// ...
You’re probably wondering when we’re actually going to insert all of this data as actual posts, huh? Well, as you can tell, a lot of work has to be put into making sure that all of this data is organized cleanly, and that we have the functions set up to do the checks we need. To get this going, we’ll execute our $post() closure, so that we can loop over the data that gets returned. Next, we’ll execute our $post_exists() closure to see if the current post title exists.
So, within the code below, there’s a lot of arrays and data being passed around. I went ahead and commented the code so that you can better understand everything. Basically, we’re inserting the post into the database with wp_insert_post, and saving the returned post ID for use later on. Then, we grab the uploads directory and create the needed attachment meta data by creating the path to the uploaded file (which is in uploads/sitepoint-attachments); and then finally grabbing the file’s name and extension, which we’ll use to insert the attachment into our newly created post.
// ..
foreach ( $posts() as $post ) {
// If the post exists, skip this post and go to the next one
if ( $post_exists( $post["title"] ) ) {
continue;
}
// Insert the post into the database
$post["id"] = wp_insert_post( array(
"post_title" => $post["title"],
"post_content" => $post["content"],
"post_type" => $sitepoint["custom-post-type"],
"post_status" => "publish"
));
// Get uploads dir
$uploads_dir = wp_upload_dir();
// Set attachment meta
$attachment = array();
$attachment["path"] = "{$uploads_dir["baseurl"]}/sitepoint-attachments/{$post["attachment"]}";
$attachment["file"] = wp_check_filetype( $attachment["path"] );
$attachment["name"] = basename( $attachment["path"], ".{$attachment["file"]["ext"]}" );
// Replace post attachment data
$post["attachment"] = $attachment;
// Insert attachment into media library
$post["attachment"]["id"] = wp_insert_attachment( array(
"guid" => $post["attachment"]["path"],
"post_mime_type" => $post["attachment"]["file"]["type"],
"post_title" => $post["attachment"]["name"],
"post_content" => "",
"post_status" => "inherit"
));
// Update post's custom field with attachment
update_field( $sitepoint["custom-field"], $post["attachment"]["id"], $post["id"] );
}
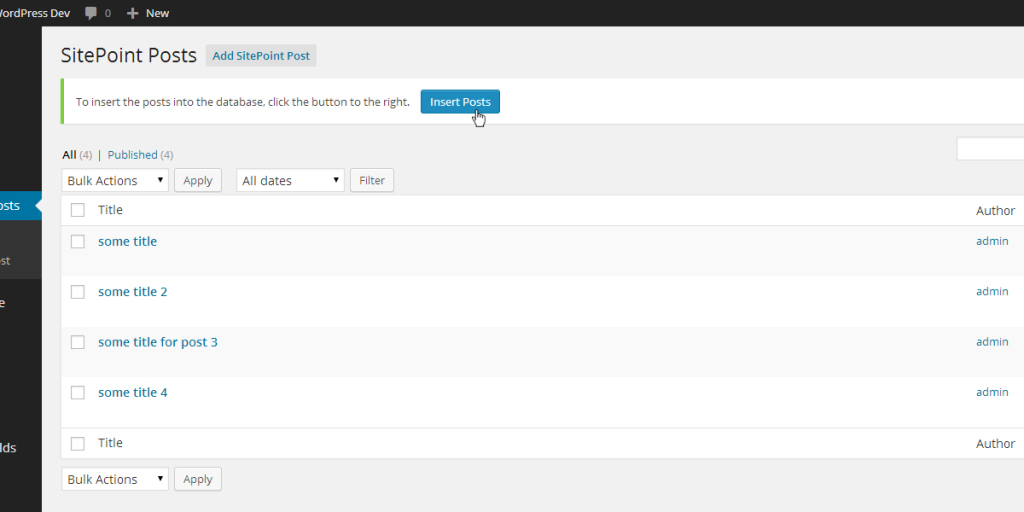
// ..So, what’s next? To put it as simply as I can: we push the button. All of our hard work is about to pay off (hopefully!). When we push the button, our code should check for the post variable, then it’ll run through our script and insert our posts. Nice and easy. Here’s a screenshot for all of us visual people:
And that’s it! Like I promised earlier, here’s the all of the code used within this article:
/**
 * Show 'insert posts' button on backend
 */
add_action( "admin_notices", function() {
    echo "<div class='updated'>";
    echo "<p>";
    echo "To insert the posts into the database, click the button to the right.";
    echo "<a class='button button-primary' style='margin:0.25em 1em' href='{$_SERVER["REQUEST_URI"]}&insert_sitepoint_posts'>Insert Posts</a>";
    echo "</p>";
    echo "</div>";
});

/**
 * Create and insert posts from CSV files
 */
add_action( "admin_init", function() {
	global $wpdb;

	// I'd recommend replacing this with your own code to make sure
	//  the post creation _only_ happens when you want it to.
	if ( ! isset( $_GET["insert_sitepoint_posts"] ) ) {
		return;
	}

	// Change these to whatever you set
	$sitepoint = array(
		"custom-field" => "sitepoint_post_attachment",
		"custom-post-type" => "sitepoint_posts"
	);

	// Get the data from all those CSVs!
	$posts = function() {
		$data = array();
		$errors = array();

		// Get array of CSV files
		$files = glob( __DIR__ . "/data/*.csv" );

		foreach ( $files as $file ) {

			// Attempt to change permissions if not readable
			if ( ! is_readable( $file ) ) {
				chmod( $file, 0744 );
			}

			// Check if file is writable, then open it in 'read only' mode
			if ( is_readable( $file ) && $_file = fopen( $file, "r" ) ) {

				// To sum this part up, all it really does is go row by
				//  row, column by column, saving all the data
				$post = array();

				// Get first row in CSV, which is of course the headers
		    	$header = fgetcsv( $_file );

		        while ( $row = fgetcsv( $_file ) ) {

		            foreach ( $header as $i => $key ) {
	                    $post[$key] = $row[$i];
	                }

	                $data[] = $post;
		        }

				fclose( $_file );

			} else {
				$errors[] = "File '$file' could not be opened. Check the file's permissions to make sure it's readable by your server.";
			}
		}

		if ( ! empty( $errors ) ) {
			// ... do stuff with the errors
		}

		return $data;
	};

	// Simple check to see if the current post exists within the
	//  database. This isn't very efficient, but it works.
	$post_exists = function( $title ) use ( $wpdb, $sitepoint ) {

		// Get an array of all posts within our custom post type
		$posts = $wpdb->get_col( "SELECT post_title FROM {$wpdb->posts} WHERE post_type = '{$sitepoint["custom-post-type"]}'" );

		// Check if the passed title exists in array
		return in_array( $title, $posts );
	};

	foreach ( $posts() as $post ) {

		// If the post exists, skip this post and go to the next one
		if ( $post_exists( $post["title"] ) ) {
			continue;
		}

		// Insert the post into the database
		$post["id"] = wp_insert_post( array(
			"post_title" => $post["title"],
			"post_content" => $post["content"],
			"post_type" => $sitepoint["custom-post-type"],
			"post_status" => "publish"
		));

		// Get uploads dir
		$uploads_dir = wp_upload_dir();

		// Set attachment meta
		$attachment = array();
		$attachment["path"] = "{$uploads_dir["baseurl"]}/sitepoint-attachments/{$post["attachment"]}";
		$attachment["file"] = wp_check_filetype( $attachment["path"] );
		$attachment["name"] = basename( $attachment["path"], ".{$attachment["file"]["ext"]}" );

		// Replace post attachment data
		$post["attachment"] = $attachment;

		// Insert attachment into media library
		$post["attachment"]["id"] = wp_insert_attachment( array(
			"guid" => $post["attachment"]["path"],
			"post_mime_type" => $post["attachment"]["file"]["type"],
			"post_title" => $post["attachment"]["name"],
			"post_content" => "",
			"post_status" => "inherit"
		));

		// Update post's custom field with attachment
		update_field( $sitepoint["custom-field"], $post["attachment"]["id"], $post["id"] );

	}

});
Conclusion
Programmatically inserting WordPress posts from CSV data isn’t as hard as we initially think. Hopefully, this can act as a resource for a lot of people when they need to migrate data that uses both custom post types and custom fields. Like I stated in the beginning of the article, a lot of the code, such as our backend button using $_POST variables, shouldn’t be used in a production site. The code used in this article should be used as a starting point, rather than a plug-and-play solution.
I hope you enjoyed the article. If you have any questions or comments, feel free to leave them below and I’ll try my best to answer them and troubleshoot any issues that you run into. Happy coding!
Frequently Asked Questions (FAQs) about Programmatically Creating WordPress Posts from CSV Data
What is the significance of creating WordPress posts from CSV data?
Creating WordPress posts from CSV data is a powerful feature that allows you to import a large amount of data into your WordPress site in a structured and efficient manner. This is particularly useful if you are migrating content from another platform or if you have a large amount of data that needs to be uploaded in bulk. It saves time and effort as you don’t have to manually create each post. It also ensures data consistency and accuracy as it eliminates the risk of human error.
Can I import images along with the posts using CSV files?
Yes, you can import images along with the posts using CSV files. You need to include the URL of the image in the CSV file. When you import the CSV file, the image will be fetched from the specified URL and attached to the corresponding post. This feature is particularly useful when you are importing posts that include media content.
How can I ensure the data in my CSV file is correctly formatted for import?
To ensure the data in your CSV file is correctly formatted for import, you should follow the standard CSV format. Each row in the file should represent a post, and each column should represent a field of the post. The first row should include the field names, such as “post_title”, “post_content”, “post_status”, etc. The subsequent rows should include the data for each post. Make sure to use a comma to separate each field, and enclose any text data in quotes.
What happens if there are errors during the import process?
If there are errors during the import process, the import function will return a WP_Error object that includes information about the error. You can use this information to troubleshoot the issue. Common issues include incorrect CSV format, missing required fields, and invalid data. Make sure to check your CSV file carefully before importing to minimize the risk of errors.
Can I update existing posts using CSV import?
Yes, you can update existing posts using CSV import. You need to include the ID of the post in the CSV file. When you import the CSV file, if a post with the same ID already exists, the existing post will be updated with the new data. This feature is particularly useful when you need to update a large amount of posts in bulk.
Can I import custom post types using CSV files?
Yes, you can import custom post types using CSV files. You need to include the post type in the CSV file. When you import the CSV file, the posts will be created with the specified post type. This feature is particularly useful when you are working with custom post types and need to import a large amount of data.
Can I schedule the import of CSV files?
While the core WordPress functionality does not support scheduling the import of CSV files, there are plugins available that provide this feature. These plugins allow you to set a schedule for the import process, which can be particularly useful if you need to regularly import data from CSV files.
Can I import CSV files from a remote location?
Yes, you can import CSV files from a remote location. You need to provide the URL of the CSV file. When you import the CSV file, the data will be fetched from the specified URL. This feature is particularly useful when the CSV file is hosted on a remote server or a cloud storage service.
Can I export WordPress posts to a CSV file?
Yes, you can export WordPress posts to a CSV file. This feature allows you to create a backup of your posts or to migrate your content to another platform. The exported CSV file will include all the data of the posts, including the title, content, status, and more.
Can I import CSV files in other languages?
Yes, you can import CSV files in other languages. WordPress supports multilingual content, so you can import posts in any language. However, you need to make sure your CSV file is encoded in UTF-8 to ensure the special characters in other languages are correctly displayed.
 Ezekiel Gabrielse
Ezekiel 'Zeke' Gabrielse is a full-stack developer and designer currently based in North Texas. He loves open source, adventure and a good, challenging project to work on. Check him out on GitHub, Twitter and his personal blog.