 In this tutorial I will show you the setup and use of a email-preview gem called Letter-Opener by Ryan Bates. In case you are serious about using Rails and you do not know Ryan’s excellent Railscasts, go watch them.
The gem we are using here makes it really easy to preview your application emails the minute they are sent in development mode.
In this tutorial I will show you the setup and use of a email-preview gem called Letter-Opener by Ryan Bates. In case you are serious about using Rails and you do not know Ryan’s excellent Railscasts, go watch them.
The gem we are using here makes it really easy to preview your application emails the minute they are sent in development mode.
Tutorial Details
- Program: Ruby on Rails, TextMate
- Gem: letter_opener
- Versions: Ruby 1.8.7+, Rails 3.0.10+
- Difficulty: easy
- Estimated completion time: 1 hour
Introduction
Let’s say you have an Rails application that sends out notifiction emails to a group of users. Action Mailer, which has been completly overhauled with Rails 3, will take care of sending the mails, provided you have configured your application right. But while you’re developing, you might not want to open your mailbox and wait for the delivery of your mails every time you make a change. This is especially true when your are sending out HTML emails and have lots of minor changes. What you need is the possibility to preview your emails quick and easy. That’s where Letter-Opener comes in. This tutorial walks you through setting up a Rails application quickly, writing the notification-mailer for sending your emails, and shows you how to use Letter Opener to preview them.Step 1 Setting Up a new Rails application quickly.
Just go to the console and setup a new Rails application:rails new postbox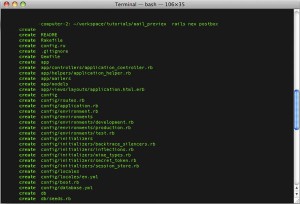
“Throughout the tutorial we’ll be using RVM, the ruby version manager, to create a special gemset to not pollute any other projects.”
Step 2 Install Your Gems
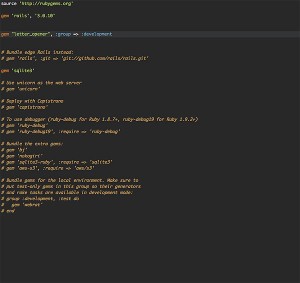
After you’ve created the app, just go into thepostbox/ directory and open your Gemfile in your favorite editor. We’re using TextMate here.
Add the letter_opener gem to your Gemfile like this
gem "letter_opener", :group => :development:group => :development as you only want to use this gem in your development environment.
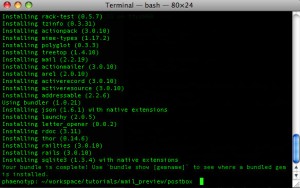
“Grouping your gems is highly recommended, so you do not get them mixed up throughout your environments.”After you’ve done that, run the
bundle install command to install the gems. It looks something like this:
Step 3 Setting Up the Delivery Method
After installing the gem, we need to configure it so that Rails knows to use Letter Opener in our development environment. Again, that’s pretty easy. Just one line in theconfig/environments/development.rb file.
Open it up in the editor and write:
config.action_mailer.delivery_method = :letter_opener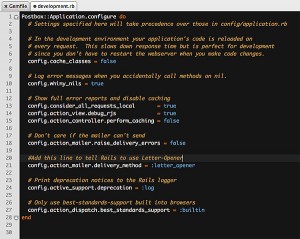 Now everything is set up and we can start writing the code for our notification emails.
Step 4 Writing the Notification Mailer
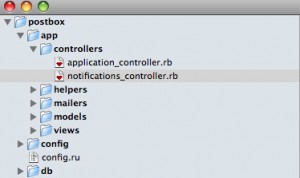
At the console, type the following command:rails generate mailer NotificationMailer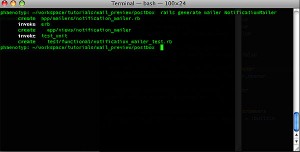 Let’s step through the files one by one and see what Rails baked for us.
1 app/mailers/notification_mailer.rb
2 app/views/notification_mailer
3 test/functional/notification_mailer_test.rb
Let’s step through the files one by one and see what Rails baked for us.
1 app/mailers/notification_mailer.rb
2 app/views/notification_mailer
3 test/functional/notification_mailer_test.rb
notification_mailer.rb
First file that’s been created is the notification mailer. It will take control of the details like addresses and content of the emails. Let’s have a closer look. You’ll find the default parameter for the sender’s address.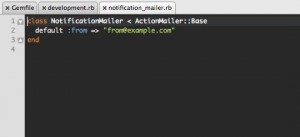
“Note that mailers always reside in the mailers directory .”
First of all, change the default parameters for our application.
default (:from => "info@postbox.tut", :to=>"somelist@postbox.tut")def notification_mailer(notification)
@notification = notification
@url = "http://postbox.tut/"
mail(:subject => "New Notification")
end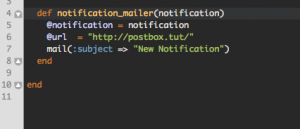
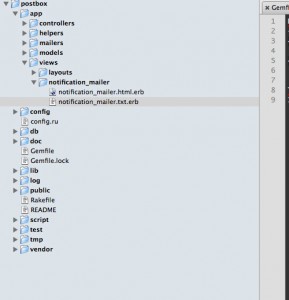
Views
Next, let’s go to the correspondingviews/ folder, where our email templates reside. There are no templates yet, so we’re going to set them up.
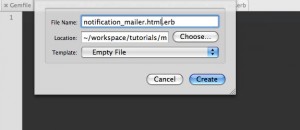 Note that we are going to set up an HTML and a TEXT version of our emails. That way we can send multi-part-emails automatically without further effort.
“ActionMailer will automatically send out multi-part emails, HTML and TEXT versions, if you create both files in the corresponding folder.”Ok, now that we have created the templates, let’s write some code. We want our users to have nice notifications in their inboxes. Start with writing some HTML for this version of the email. The code goes like this:
<meta http-equiv="Content-Type" content="text/html; charset=UTF-8" /></pre>
<h1>Notification email.</h1>
<h2><%= @notification.headline %></h2>
<pre>
<%= @notification.content %>

This email was sent out to you, because you are subscribed to the postbox-mailing-list.
If you want to unscribscribe, please use this url: <%= @url %>.@notification hash we will fill in the headline and the content of the mail. The link, which can be clicked to unsubscribe the newsletter is set by the @url variable.
Please note, that the @url is set only for demo-purposes as we will not implement the functionality of unsubscribing throughout this tutorial. Let’s complete this part by writing our text-version of the email.
Notification email.
-------------------
<%= @notification.headline %>

<code><%= @notification.content %>

This email was sent out to you, because you are subscribed to the steamengine-mailing-list.
If you want to unscribscribe, please use this url: <%= @url %>.notification_mailer) and the name of your views (notification_mailer.html.erb) are the same. Otherwise, no email will be sent
Now we are all done…almost. How do we get the hedline and content into the email? We need a notifications model in our apllication, but first let’s take a short excursion on testing.
notification_email_test.rb
Testing and TDD (test-driven-development) are some of the best things that Rails allows you to do. They help in so many situations, whether you have a large distributed team or code on your own. Let’s spend at some time on testing your mailer. We’ll be creating a unit test for our postbox apllication that will reside in thetest/unit/ folder and will go by the name notification_email_test.rb.
You might have noticed, that we’re not using the functional test, that was created by the generator. Instead, we make up a unit test. This is because we do some basic testing here. I’ll leave it up to you to expand your testing with a functional test.
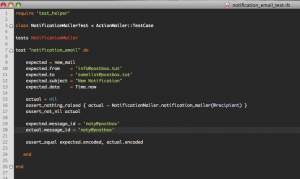
require 'test_helper'
class NotificationMailerTest < ActionMailer::TestCase

  tests NotificationMailer

  test "notification_email" do

    expected = new_mail
    expected.from    = 'info@postbox.tut'
    expected.to      = 'somelist@postbox.tut'
    expected.subject = "New Notification"
    expected.date    = Time.now

    actual = nil
    assert_nothing_raised { actual = NotificationMailer.notification_mailer(@recipient) }
    assert_not_nil actual

    expected.message_id = '<123@456>'
    actual.message_id = '<123@456>'

    assert_equal expected.encoded, actual.encoded

   end

endActionMailer::Testcase. We’re defining a test here called notification_email, where we create a new email message and give it the necessary parameters.
Next we will create the actual email by using our NotifcationMailer. With assertions, we will check that the email was created properly. We’ll test if anything was raised while creating the email and check that is was really created through the method and is not nil.
By assigning the same message_id to both of the emails, otherwise our next assertion will fail. The last step is to compare both emails with each other. Ok, so we now have three assertions in our code. Let’s check the test_helper.
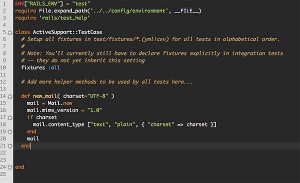
def new_mail( charset="UTF-8" )
  mail = Mail.new
  mail.mime_version = "1.0"
  if charset
    mail.content_type ["text", "plain", { "charset" => charset }]
  end
  mail
endnew_mail that sets up a mail everytime we need it. The method accepts a parameter to set the charset of the email, in case you want to change it. If not, it will always fall back to the default.
We could have done it in the test itself, but it’s these kinds of methods you should put into the test_helper, so you can easily change them on a global level. Now it is time to run the test, using rake.
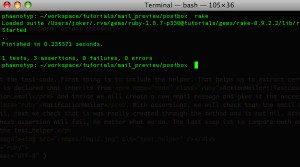 Ok, obviously we’ve done everything right because the output of our test is
1 tests, 3 assertions, 0 failures, 0 errors“Testing is one of Rails most important features. Use it extensively while you write your code. That’ll help you to save a lot of time while your code is growing and the complexity of the application is rising!”
Step 5 The Notification Model and Controller
Now that we have everything in place to send out the email (including tests!), we’ll setup a nice little interface to write the actual notification and use the mailer to send them. For the sake of this tutorial, we will use Rails scaffolding. Remember, we had headline and content in our views, so we will implement them here.rails generate scaffold Notification headline:string content:text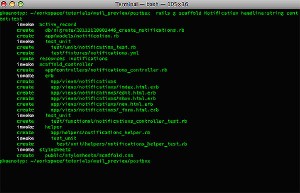 Let’s start up the server:
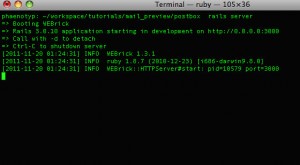
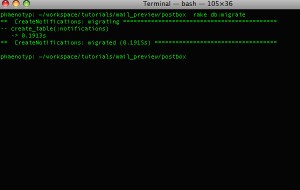
rails serverrake db:migrate This will set up the table for us.
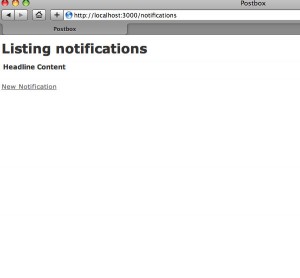
 Next, fire up the browser and point to http://localhost:3000/notifications. It should look something like this:
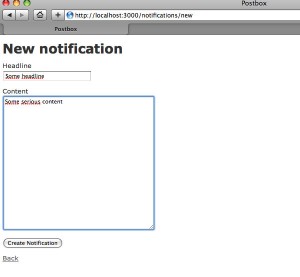
 Now we navigate to the new notifications page and create a new one by filling out the form.
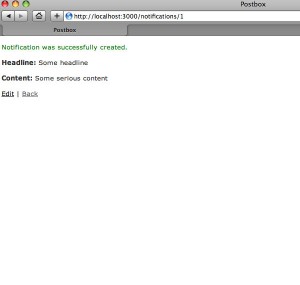
 Success will look something like this. Of course, you should write tests to be sure that everything works fine. I leave it up to you. ;-)
 One last thing before we can send the email and see the magic of letter_opener. Hopefully, you still remember that we wanted to find out how to use this gem. We now need to send the email, so we head over to the controller and modify the code.
 In the
 create method we will add one line of code that tells ActionMailer to send out our notification if it was saved succesfully.
def create
  @notification = Notification.new(params[:notification])
  respond_to do |format|
    if @notification.save
      **NotificationMailer.notification_mailer(@notification).deliver**
      format.html { redirect_to(@notification, :notice => 'Notification was successfully created.') }
      format.xml  { render :xml => @notification, :status => :created, :location => @notification }
    else
      format.html { render :action => "new" }
      format.xml  { render :xml => @notification.errors, :status => :unprocessable_entity }
    end
  end
end
After that, create another notification through the web interface. If we’ve done everything right, another tab in our browser should show up and we can preview the email we just created! Voila!
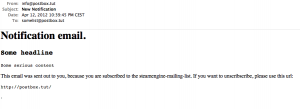 As you can see, you have a great way to preview emails from your application. Now you can go and modify them. As extra credit, try to find out where on your disk the previews are stored. I’m giving you a hint, look in the
 tmp/ directory or in the address bar of your browser.
I hope you enjoyed learning about letter_opener. The rails app I used for this article can be found here.
Frequently Asked Questions about Rails Mail Preview with Letter Opener
How do I install the Letter Opener gem in my Rails application?
To install the Letter Opener gem, you need to add it to your Gemfile. Open your Gemfile and add the following line: gem 'letter_opener', :group => :development. After adding the gem, run bundle install to install it. This gem should only be used in the development environment, hence it is added to the development group.
How do I configure Letter Opener in my Rails application?
After installing the gem, you need to configure your application to use Letter Opener for sending emails in the development environment. Open your config/environments/development.rb file and add the following line: config.action_mailer.delivery_method = :letter_opener. This will set Letter Opener as the delivery method for emails.
How do I preview emails with Letter Opener?
Once you have configured Letter Opener, any email sent from your application will automatically open in a new tab in your default browser. You can view the email content, subject, recipients, and any attachments. This allows you to preview and test your emails during development.
Can I use Letter Opener in the production environment?
It is not recommended to use Letter Opener in the production environment. Letter Opener is a development tool designed to preview emails in the browser instead of sending them. In the production environment, you should configure your application to send emails using a real SMTP server.
How do I customize the location where Letter Opener saves emails?
By default, Letter Opener saves emails in the tmp/letter_opener directory. You can customize this by setting the config.letter_opener.location option in your config/environments/development.rb file. For example, to save emails in the public/emails directory, add the following line: config.letter_opener.location = Rails.root.join('public', 'emails').
Can I use Letter Opener with ActionMailer::Preview?
Yes, you can use Letter Opener with ActionMailer::Preview. This allows you to preview emails in your browser without sending them. To do this, set the delivery method to Letter Opener in your preview class: ActionMailer::Base.delivery_method = :letter_opener.
How do I handle attachments with Letter Opener?
Letter Opener automatically handles attachments. When you preview an email with attachments, you will see links to download the attachments. The attachments are saved in the same directory as the email.
Can I use Letter Opener with Rails 6?
Yes, Letter Opener is compatible with Rails 6. You can install and configure it in the same way as in earlier versions of Rails.
How do I troubleshoot issues with Letter Opener?
If you encounter issues with Letter Opener, check the following: Ensure that the gem is installed and configured correctly. Check the console for any error messages. Ensure that your default browser is set to automatically open new tabs. If you still have issues, consider seeking help from the Rails community or the gem’s GitHub page.
Can I use Letter Opener with other programming languages or frameworks?
Letter Opener is designed to work with Ruby on Rails. If you are using another programming language or framework, you may need to find a similar tool or library that is compatible with your chosen technology.
 Jochen Hartz
Jochen studied literature and get stuck on the web in 1996. He worked as a freelance-developer with PHP, HTML, CSS and JS in his toolbox. In 2007 he discovered the beauty of Ruby on Rails and is writing less code ever since. When not working, he likes playing (beach-)volleyball and reading.