This article was peer reviewed by Marc Towler. Thanks to all of SitePoint’s peer reviewers for making SitePoint content the best it can be!
Lists and Grid are one the fundamental building blocks of any mobile application.
In this article I’m going to introduce the design of the SilicaListView and SilicaGridView, the Silica implementation of these common components. We will see some examples on how to display types of data, handle clicks and more, keeping the code as simple as possible.
The MVD design
Sailfish OS UIs are based on QML, a declarative language provided by the QT Framework. To give the developer or designer control over different aspects of an application, QT uses the Model-View-Delegate design pattern to modularize the visualization of data.

The model holds the data and its structure, and the View is a container that displays the data. In our case the view will be a list or a grid. Finally the delegate dictates how the single piece of data will appear in the view.
The SilicaListView
Let’s start with a simple example:
import QtQuick 2.0
import Sailfish.Silica 1.0

Page {
    id: page

    SilicaListView {
        width: parent.width;
        height: parent.height
        model: ListModel {
        ListElement { name: "Paul"; telephone: "342342341" }
        ListElement { name: "Laura"; telephone: "343241" }
        ListElement { name: "Luca"; telephone: "6454341" }
        ListElement { name: "Daniel"; telephone: "23431231" }
        ListElement { name: "Seb"; telephone: "666342342341" }
        ListElement { name: "Carl"; telephone: "55342342341" }
        }

        delegate: Item {
            width: parent.width
            height: Theme.itemSizeMedium
            Label {
                text: name
                font.pixelSize: Theme.fontSizeMedium
                anchors {
                            left: parent.left
                            right: parent.right
                            margins: Theme.paddingLarge

                        }
            }
        }
    }

}
Apart from the page components (look at this article for an introduction to Silica Components), we declared a SilicaListView with an hard coded model. The list will appear like this:
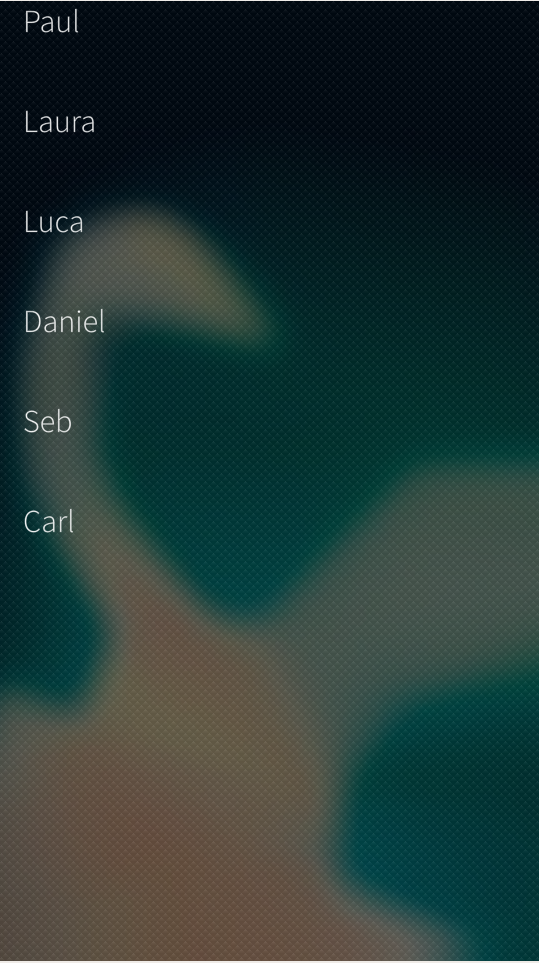
Each ListElement is an object with two properties – a name and a phone number.
The delegate is just an Item (the basic QML component) with its ‘width’ property set to fill the ListView width and the ‘height’ set using the Theme object, the actual size is calculated at runtime, adapting it to the display in use.
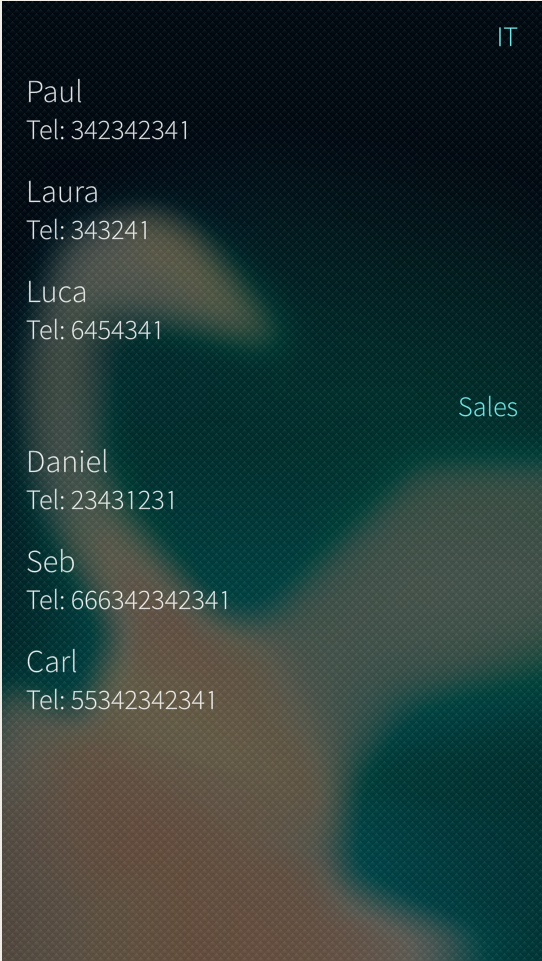
The delegate contains a Label displaying the contact name. To show the phone number I can add another Label to the delegate:
Item {
            width: parent.width
            height: Theme.itemSizeMedium
            anchors {
                        left: parent.left
                        right: parent.right
                        margins: Theme.paddingLarge

                    }

            Label {
                id: cName
                text: name
                font.pixelSize: Theme.fontSizeMedium
                anchors {
                            left: parent.left
                            right: parent.right
                        }
            }

            Label {
                text: "Tel: " + telephone
                font.pixelSize: Theme.fontSizeSmall
                anchors {
                            left: parent.left + Theme.paddingSmall
                            right: parent.right
                            top: cName.bottom
                        }
            }
Model and Delegate can be defined inline but as models get bigger, it’s better to move it in another QML file.
For example, you can create a ContactsModel.qml file with this content:
import QtQuick 2.0

ListModel {
        ListElement { name: "Paul"; telephone: "342342341"; team: "IT" }
        ListElement { name: "Laura"; telephone: "343241"; team: "IT"}
        ListElement { name: "Luca"; telephone: "6454341"; team: "IT" }
        ListElement { name: "Daniel"; telephone: "23431231"; team: "Sales" }
        ListElement { name: "Seb"; telephone: "666342342341"; team: "Sales" }
        ListElement { name: "Carl"; telephone: "55342342341"; team: "Sales" }
        }
And use it as a list model:
model: ContactsModel {}I added the team property to use in the next example.
A List sometimes needs to be divided into sections. Do this using the section property to define the model key used as grouping element and the delegate to use as a section header.
Define the section property in the SilicaListView:
    section {
        property: "team"
        criteria: ViewSection.FullString
        delegate: SectionHeader {
                text: section
            }
        }
Now it’s time to handle the click events and react to them.
            MouseArea {
                anchors.fill: parent
                onClicked: {
                    var name = list.model.get(index).name
                    console.log(name);
                }
We defined a MouseArea element filling our delegate. This way we can catch and handle the click event and get the clicked element using the list model get and index property.
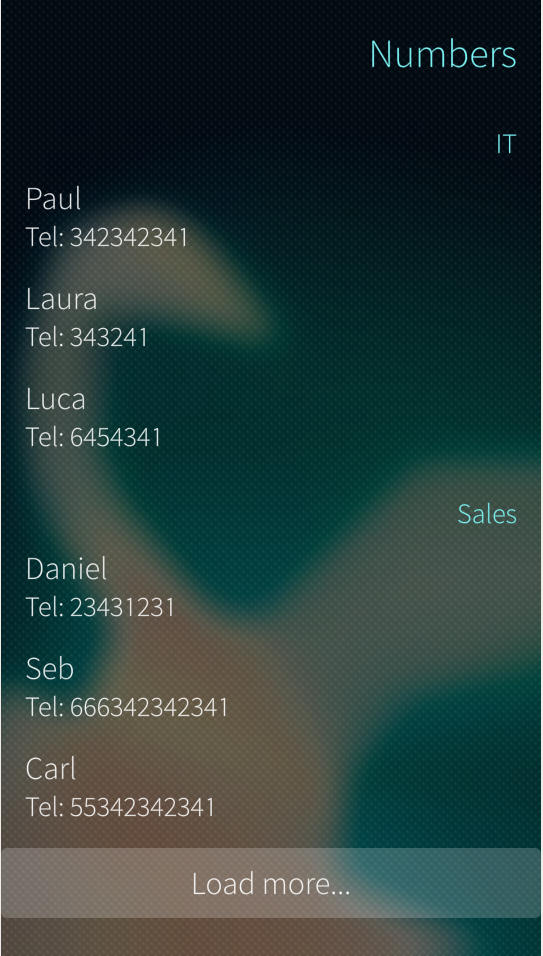
Every list can have a header and footer attached to the respective list property. These are useful as you shouldn’t include a SilicaListView or GridView in another Scrollable element. If you need content before or after the list/grid then use these properties.
   SilicaListView {
        id:list
        width: parent.width;
        height: parent.height
        model: ContactModel {}
        header: MyHeader {}
        footer: Button {
            width: parent.width
            anchors.margins: Theme.paddingSmall
            text: "Load more..."
              onClicked: console.log("clicked!")
          }

        section {
            property: "team"
            criteria: ViewSection.FullString
            delegate: SectionHeader {
                    text: section
                }
            }

        delegate: Item {
            width: parent.width
            height: Theme.itemSizeMedium
            anchors {
                        left: parent.left
                        right: parent.right
                        margins: Theme.paddingLarge

                    }

            Label {
                id: cName
                text: name
                font.pixelSize: Theme.fontSizeMedium
                anchors {
                            left: parent.left
                            right: parent.right
                        }
            }

            Label {
                text: "Tel: " + telephone
                font.pixelSize: Theme.fontSizeSmall
                anchors {
                            left: parent.left
                            right: parent.right
                            top: cName.bottom
                        }
            }

            MouseArea {
                anchors.fill: parent
                onClicked: {
                    var name = list.model.get(index).name
                    console.log(name);
                }
            }
        }
    }
We can choose to declare objects inline or in a separate file. As an example I created a file called MyHeader.qml with this content and declared the footer inline:
import QtQuick 2.0
import Sailfish.Silica 1.0

PageHeader {
        title: "Numbers"
}
Models
To simplify a developer’s life QML define a set of ready to use models, such as SqliteModel, XmlListModel and SparqlModel. You can defined your own models using the C++ QT API.
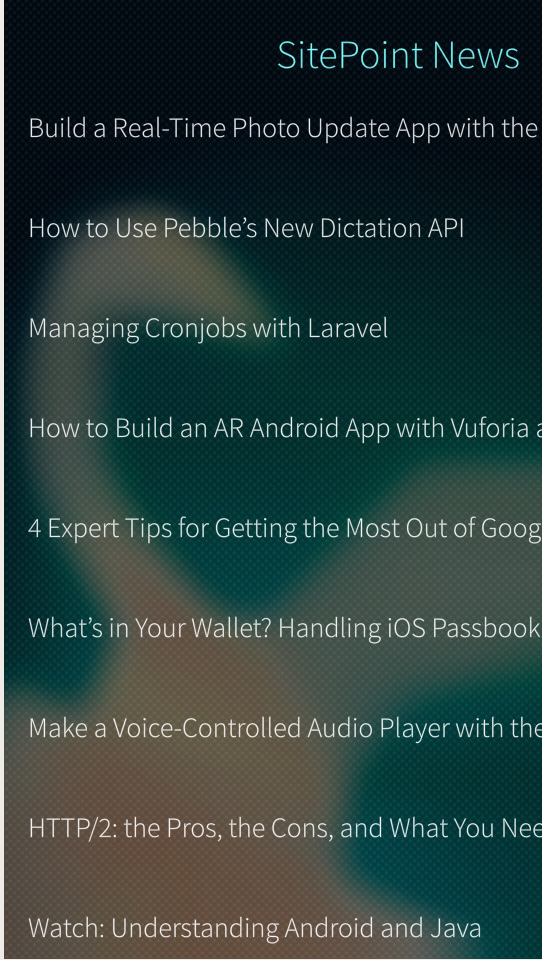
As an example, we can display the latest Sitepoint news using the site’s RSS feed. Let’s define our model using the predefined XmlListModel:
XmlListModel {
     id: feedModel
     source: "https://www.sitepoint.com/feed/"
     query: "/rss/channel/item"
     XmlRole { name: "title"; query: "title/string()" }
     XmlRole { name: "link"; query: "link/string()" }
     XmlRole { name: "description"; query: "description/string()" }
     XmlRole { name: "pubDate"; query: "pubDate/string()" }
}
Here we define the source of the feed and the query property that set the scope for the model. Only <item> children will be used, and the three XmlRoles act as a property inside the ListElement.
Now we can make our list view using this model, the complete example looks like this:
import QtQuick 2.0
import Sailfish.Silica 1.0
import QtQuick.XmlListModel 2.0
Page {
    id: page


    SilicaListView {
        id:list
        width: parent.width;
        height: parent.height
        model: XmlListModel {
            id: feedModel
            source: "https://www.sitepoint.com/feed/"
            query: "/rss/channel/item"
            XmlRole { name: "title"; query: "title/string()" }
            XmlRole { name: "link"; query: "link/string()" }
            XmlRole { name: "description"; query: "description/string()" }
            XmlRole { name: "pubDate"; query: "pubDate/string()" }
       }

        header: MyHeader {}
        footer: Button {
            width: parent.width
            anchors.margins: Theme.paddingSmall
            text: "Load more..."
              onClicked: console.log("clicked!")
          }

        delegate: Item {
            width: parent.width
            height: Theme.itemSizeMedium
            anchors {
                        left: parent.left
                        right: parent.right
                        margins: Theme.paddingLarge

                    }

            Label {
                id: cName
                text: title
                font.pixelSize: Theme.fontSizeSmall
                anchors {
                            left: parent.left
                            right: parent.right
                        }
            }

            MouseArea {
                anchors.fill: parent
                onClicked: {
                    var name = list.model.get(index).name
                    console.log(title);
                }
            }
        }
    }

}
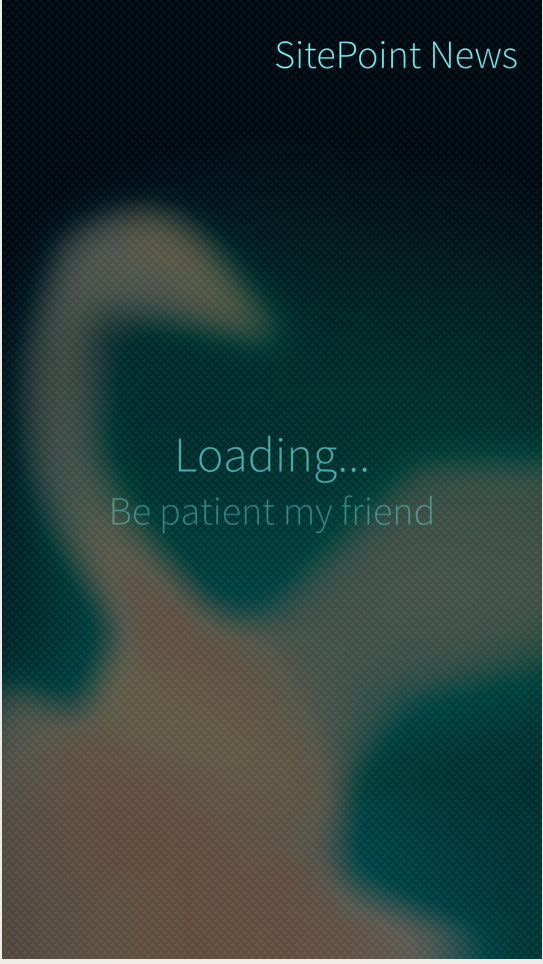
We need to address situations where we have no items to display, for example when the feed is still loading.
We can use the ViewPlaceholder element to handle this, binding its visibility to the count property of the list view:
ViewPlaceholder {
enabled: list.count == 0
text: "Loading..."
hintText: "Be patient my friend"
}
Models in Js
If you need to generate a just in time
model, you can use javascript. We obtain and display a list of numbers from 1 to 100 like this:
import QtQuick 2.0
import Sailfish.Silica 1.0


Page {
    id: page

    SilicaListView {
        id:list
        width: parent.width;
        height: parent.height
        model: ListModel {
           id: myJSModel

        }
        header: MyHeader {}
        footer: Button {
            width: parent.width
            anchors.margins: Theme.paddingSmall
            text: "Load more..."
              onClicked: console.log("clicked!")
          }
        delegate: Item {

            width: parent.width
            height: Theme.itemSizeMedium
            Label {
                text: value
                font.pixelSize: Theme.fontSizeMedium
                anchors {
                            left: parent.left
                            right: parent.right
                            margins: Theme.paddingLarge

                        }
            }

            MouseArea {
                anchors.fill: parent
                onClicked: {
                    var value = list.model.get(index).value
                    console.log(value);
                }
            }
        }

        Component.onCompleted: {
            for(var i=0;i<=100;i++) {
                var myElement = { "value" : i }
                myJSModel.append(element)
            }
        }
    }

}
The myElement could be an arbitrary javascript object and we can add as many properties as needed and use them in our delegate.
We defined the JavaScript model in the Component.onCompleted event. By doing this our code is called when the associated components are ready and displayed.
Gridviews
The GridView acts in a similar way to the list view, sharing most of the properties.
import QtQuick 2.0
import Sailfish.Silica 1.0


Page {
    id: page

    SilicaGridView {
        id:list
        width: parent.width;
        height: parent.height

        cellWidth: width / 2
        cellHeight: width / 2

        model: ListModel {
           id: myJSModel

        }
        header: MyHeader {}
        delegate: Item {
            width: list.cellWidth
            height: list.cellHeight


            Label {
                text: value
                font.pixelSize: Theme.fontSizeMedium
                anchors {
                            left: parent.left
                            right: parent.right
                            margins: Theme.paddingLarge

                        }
            }

            MouseArea {
                anchors.fill: parent
                onClicked: {
                    var value = list.model.get(index).value
                    console.log(value);
                }
            }
        }

        Component.onCompleted: {
            for(var i=0;i<=100;i++) {
                var element = { "value" : i }
                myJSModel.append(element)
            }
        }
    }

}
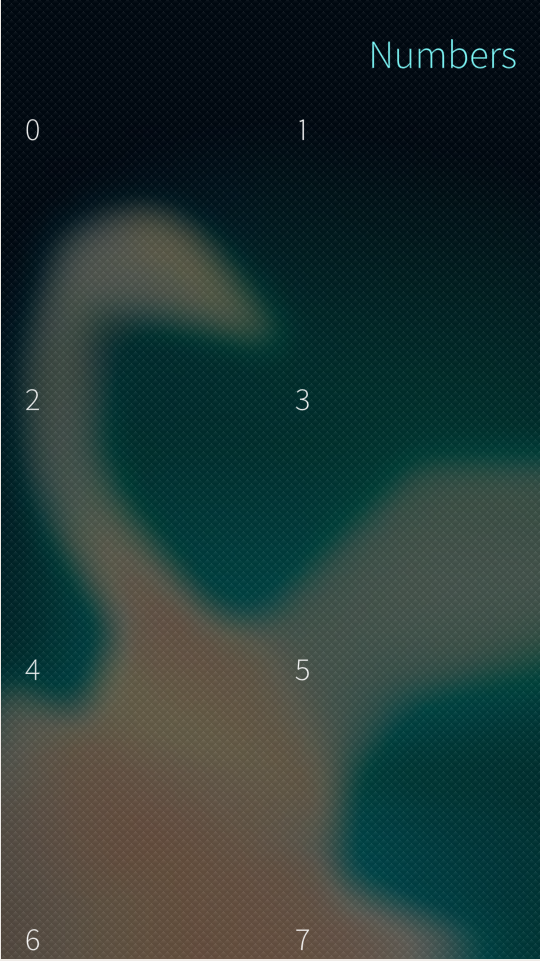
We have to define two more properties that the list view, cellWidth and cellHeight that are self explanatory.
Conclusion
Lists and grids are popular but not always easy to implement.
Sailfish, thanks to QML, has one of the cleanest and most convenient APIs regarding these two crucial components, allowing a developer to achieve a usable UI without much effort.
I’d love to hear your thoughts and comments and if you’ve tried any Sailfish development yet.
Frequently Asked Questions (FAQs) about Lists and Grids for Displaying Data in Sailfish OS
How can I create a list in Sailfish OS?
Creating a list in Sailfish OS involves using the SilicaListView element. This element is designed to display a list of data items in a vertically scrolling view. Each item in the list is represented by a delegate. The delegate is a template defining each item’s visual appearance. You can customize the delegate to suit your needs. The model property of SilicaListView is used to provide data to the list. The model can be a ListModel, an integer, or any other type of model recognized by QML.
How can I create a grid in Sailfish OS?
To create a grid in Sailfish OS, you can use the SilicaGridView element. This element is designed to display a grid of data items. Similar to SilicaListView, each item in the grid is represented by a delegate, and the model property is used to provide data to the grid. The delegate can be customized to define the visual appearance of each item in the grid.
How can I customize the appearance of list items in Sailfish OS?
The appearance of list items in Sailfish OS can be customized using the delegate property of SilicaListView. The delegate is a template that defines the visual appearance of each item in the list. You can use various elements such as Label, BackgroundItem, and Icon to customize the delegate.
How can I customize the appearance of grid items in Sailfish OS?
The appearance of grid items in Sailfish OS can be customized using the delegate property of SilicaGridView. The delegate is a template that defines the visual appearance of each item in the grid. You can use various elements such as Label, BackgroundItem, and Icon to customize the delegate.
How can I handle user interaction with list items in Sailfish OS?
User interaction with list items in Sailfish OS can be handled using the onItemClicked and onItemLongPressed signals of SilicaListView. These signals are emitted when an item is clicked or long-pressed, respectively. You can define handlers for these signals to perform actions when the user interacts with list items.
How can I handle user interaction with grid items in Sailfish OS?
User interaction with grid items in Sailfish OS can be handled using the onItemClicked and onItemLongPressed signals of SilicaGridView. These signals are emitted when an item is clicked or long-pressed, respectively. You can define handlers for these signals to perform actions when the user interacts with grid items.
How can I add headers and sections to a list in Sailfish OS?
Headers and sections can be added to a list in Sailfish OS using the header and section properties of SilicaListView. The header is a delegate that defines the visual appearance of the list’s header. The section property is used to divide the list into sections. Each section has a header that can be customized using the section.delegate property.
How can I add headers and sections to a grid in Sailfish OS?
Headers and sections can be added to a grid in Sailfish OS using the header and section properties of SilicaGridView. The header is a delegate that defines the visual appearance of the grid’s header. The section property is used to divide the grid into sections. Each section has a header that can be customized using the section.delegate property.
How can I update the data in a list or grid in Sailfish OS?
The data in a list or grid in Sailfish OS can be updated by modifying the model. The model is a property of SilicaListView and SilicaGridView that provides data to the list or grid. You can add, remove, or change items in the model to update the data in the list or grid.
How can I scroll to a specific item in a list or grid in Sailfish OS?
To scroll to a specific item in a list or grid in Sailfish OS, you can use the positionViewAtIndex method of SilicaListView and SilicaGridView. This method scrolls the view so that the item at the specified index is visible.
 Michele Tameni
An unconventional software engineer, interested in research and development of innovative apps, experimenting on emerging technology and interaction methods. A contributor to some open source projects, some for work, mostly for passion. When not at a keyboard Michele is usually travelling around the world, taking photographs or writing about adventures.